Printable Version of Topic
Click here to view this topic in its original format
6G Celicas Forums _ My Project _ jordisonjr's photography/progress thread
Posted by: jordisonjr Jun 5, 2010 - 1:16 AM
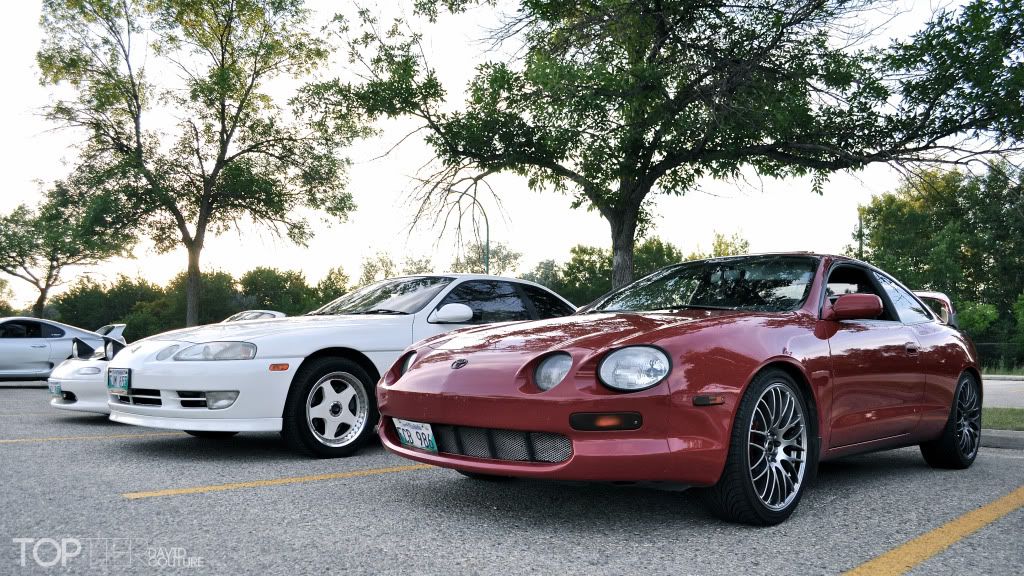
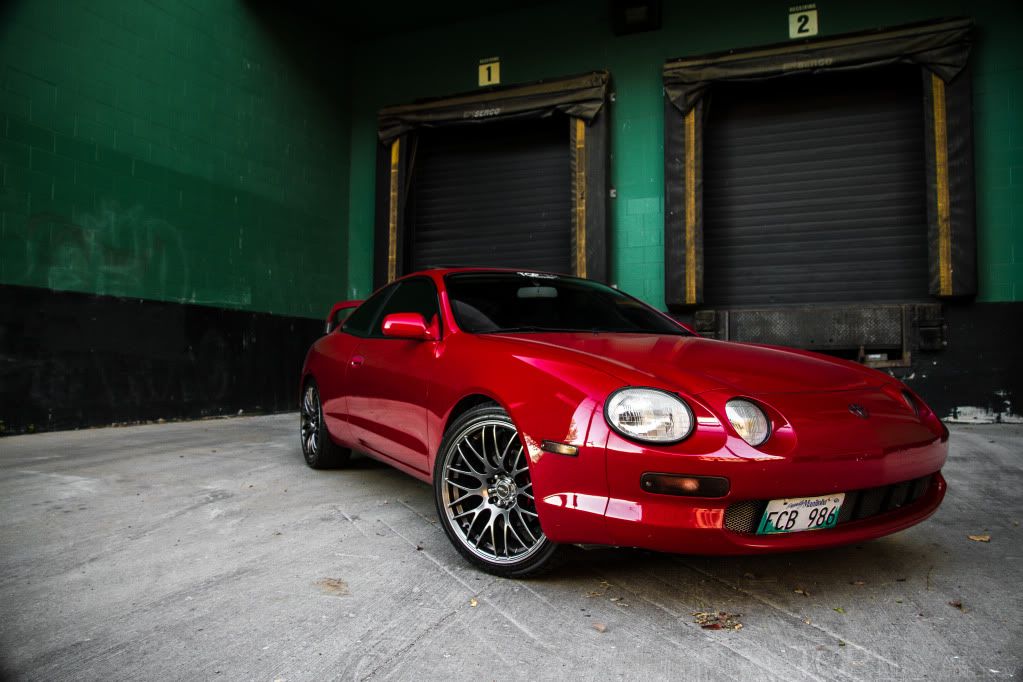
I just wanted to keep track of my mods and all that, thought maybe some people would be inerested in following along. It was a bone stock red 1995 Celica hatchback GTS and this is the most recent pics I have of her. Tint was probably the first thing I added, 15% all around. I love it, just dark enough during the day, and I can still see at night.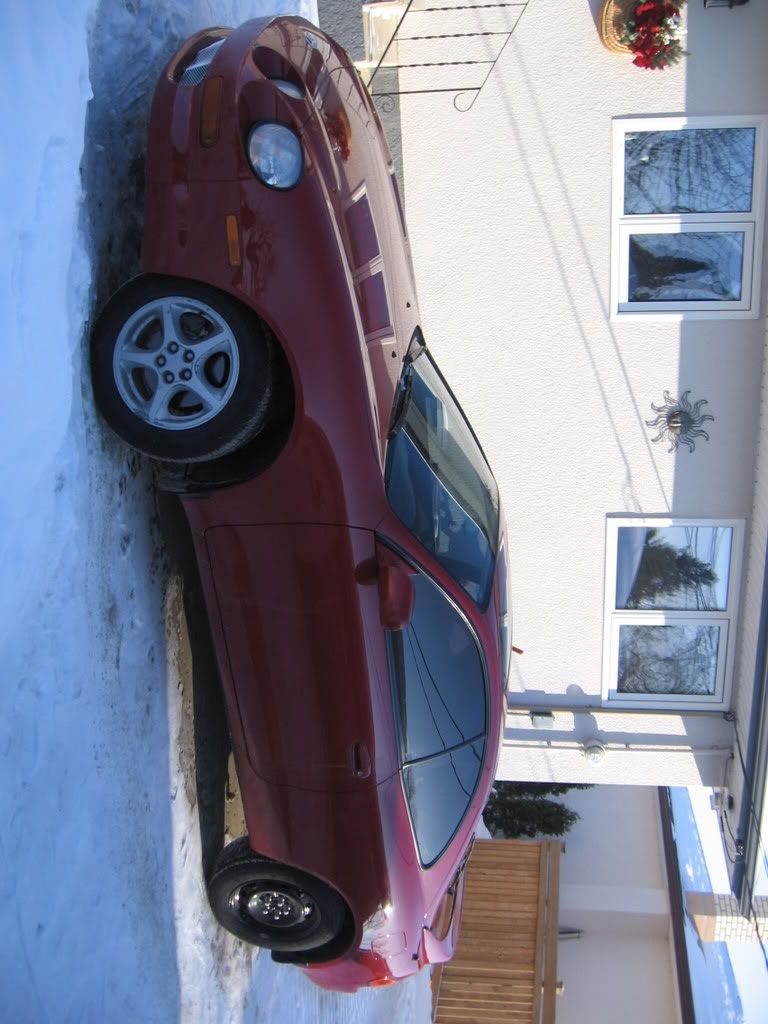
First Thing I did was added a sound system.
- 3 10" MTX subwoofers
-1000w Clarion Amp
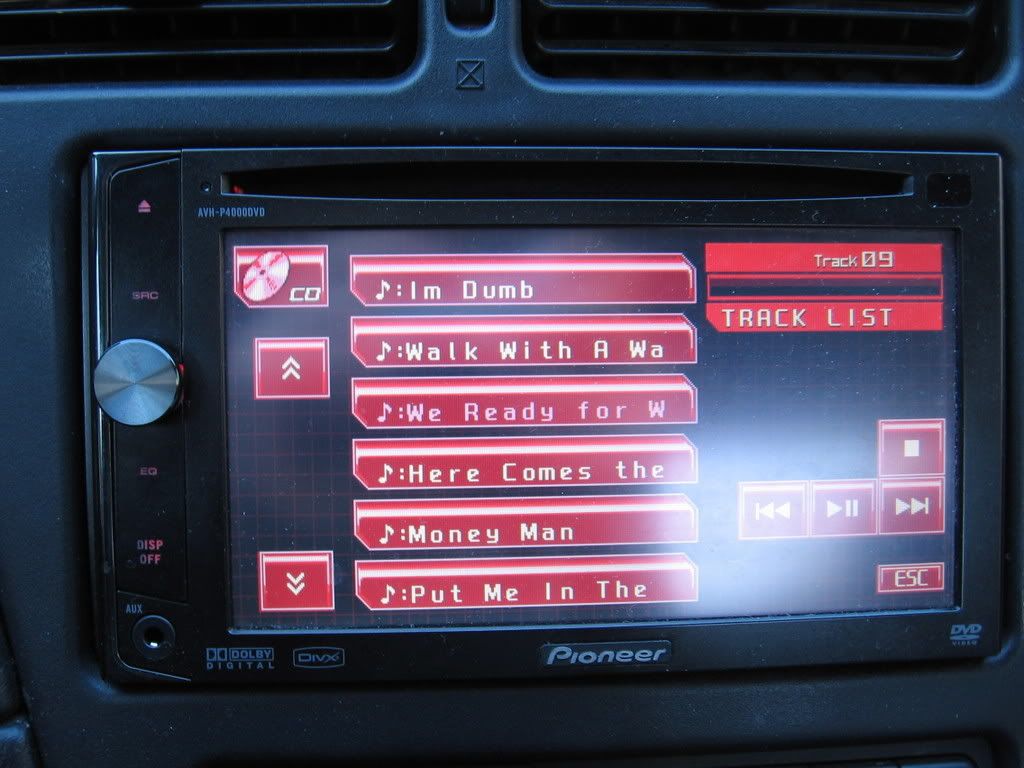
-Pioneer AVH-P4000DVD Double Din

Next I added a canister style muffler. Not sure the brand, but it was cheap, and sounds pretty good. It may get changed eventually, but for now it will do.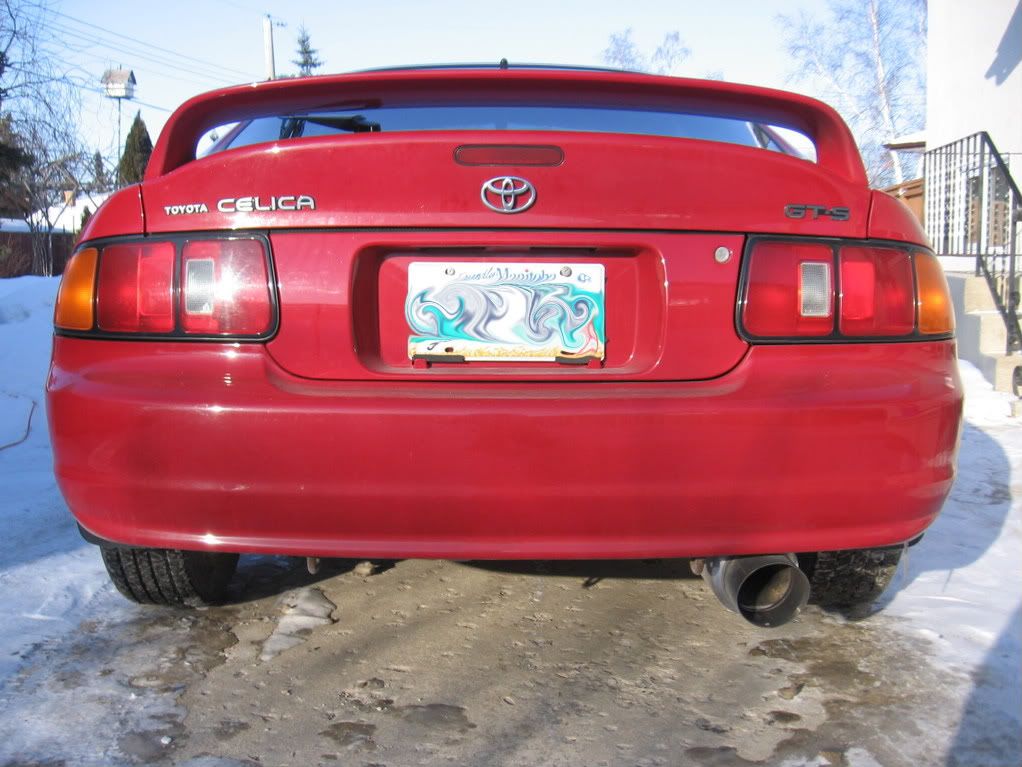
I Really liked the look of HID Headlights, so I picked up some 8000k HID's from Futurvision, I local company in my city and I haven' had any problems.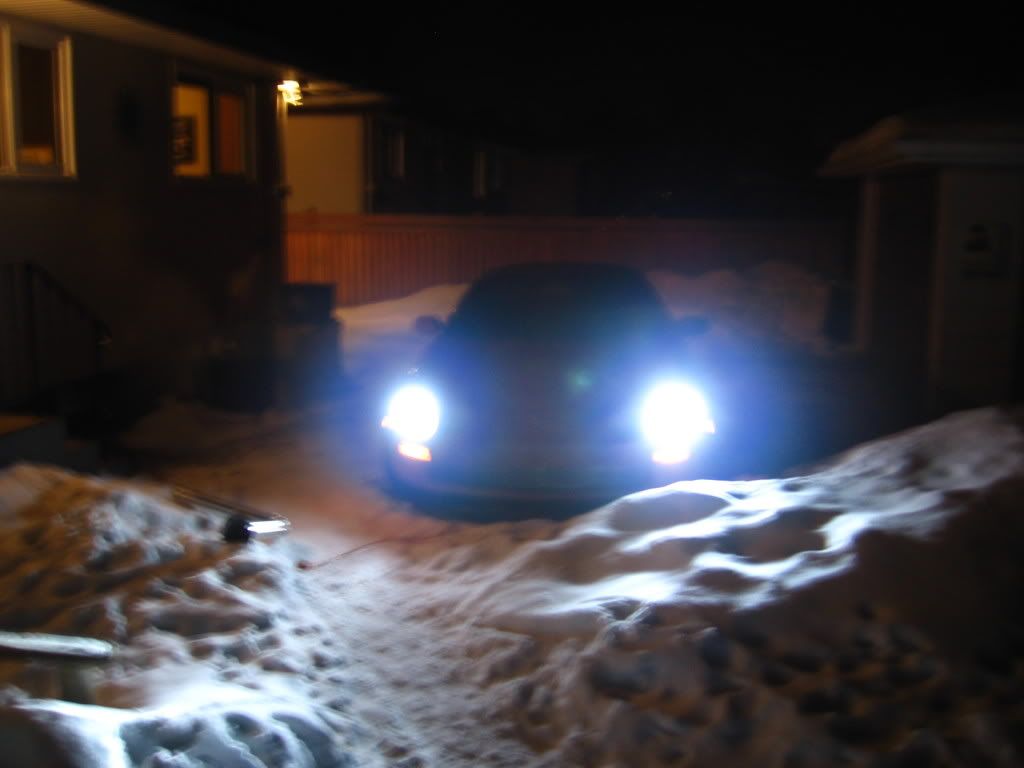
Added a Short ram Intake that I ordered off ebay, and I love the sound of it. I've had so many people ask me if my car is boosted because it sucks so loud. Even A mechanic I took it to asked if it was. Maybe I should start looking for a new one... haha.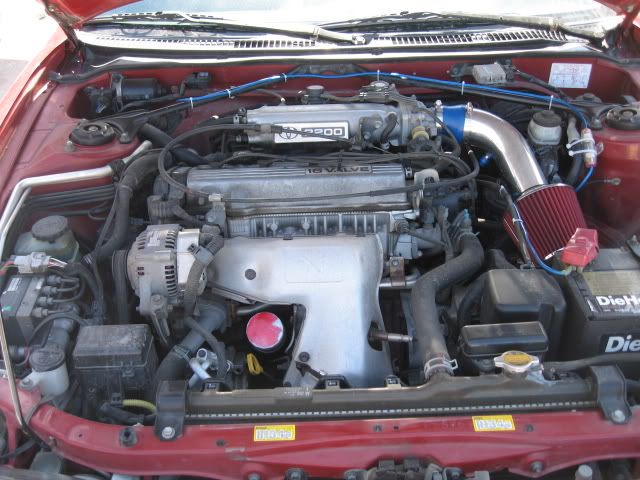
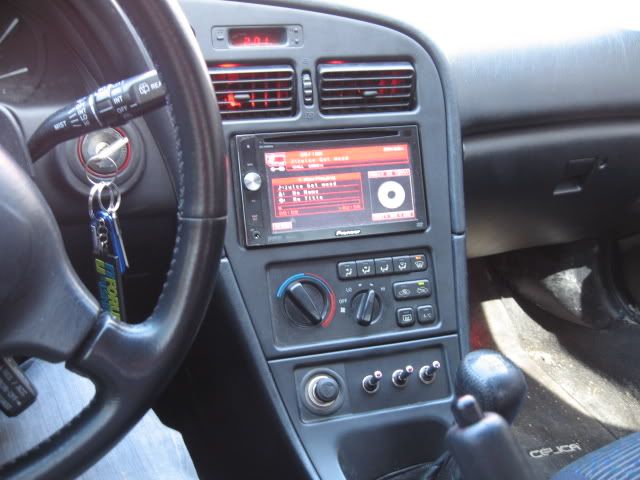
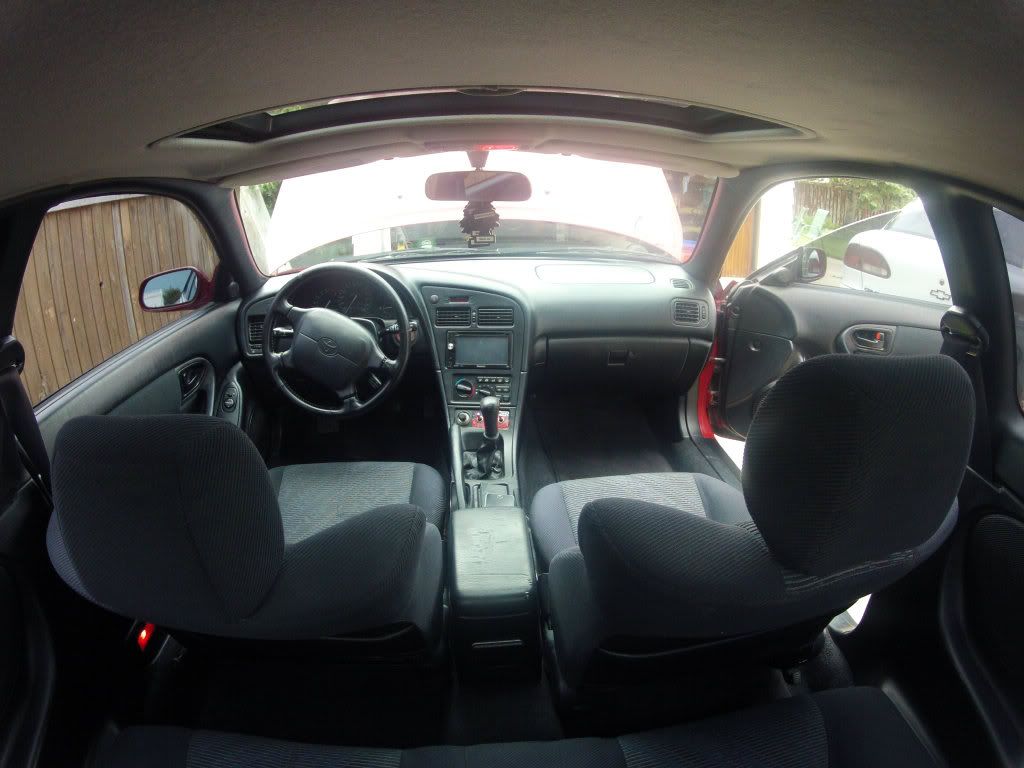
I wanted to focus on the interior next. Now it may not be everyones thing, but I wired up some LEDs uner neith the dash and inside the air vents. My dad and I made a custom Mount for the switches out of plexiglass. I removed the pocket, as I really had no use for it and Mounted he switches there. I foudn some of this wierd sheet of a giant sticker that was black called "Mack Tack" and it just happened to match the exact texture of the stereo trim so I used that To cover it.
Now some pics:
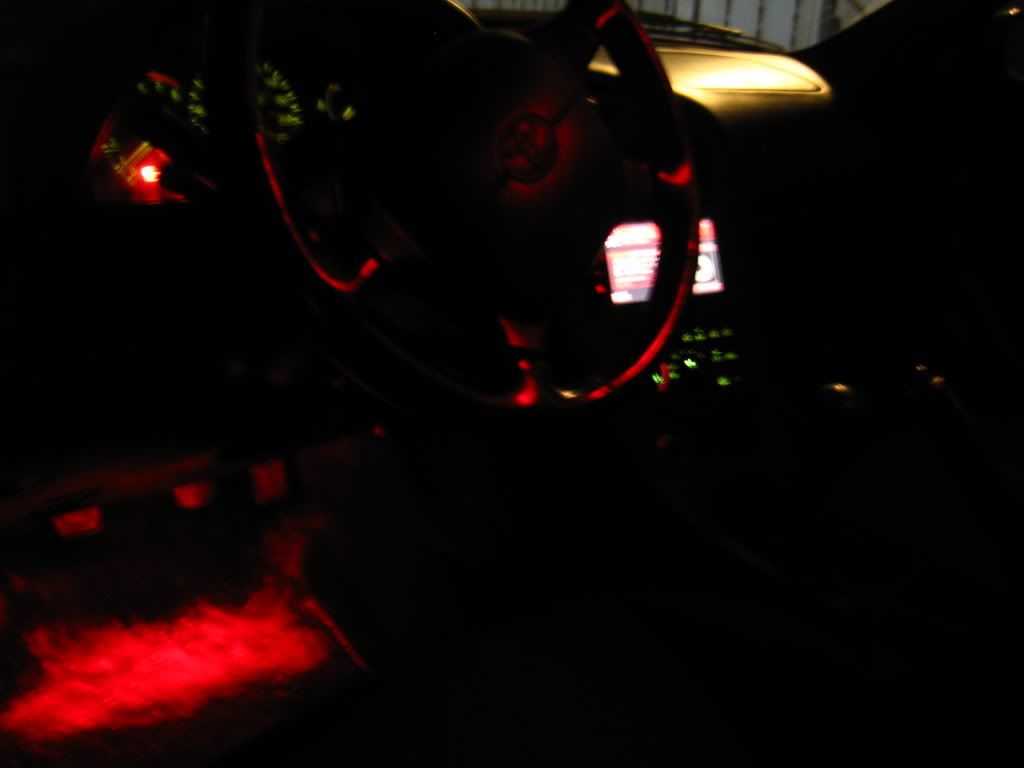
You can't see it that good, but I think it looks really awesome. Shortly after his i changed the dash lights to red too, but I don't have a picture.
My Celica had the dreaded water in the highbeam, I tried drilling it out before I really did any research, Didn't work out tooo great but it got the job done temporarily. Luckily I got a wicked deal on some headlights locally of Kloudkicka. This picture means a lot to me cause its probably the first real work I've ever done on a car, and I did it all by myself.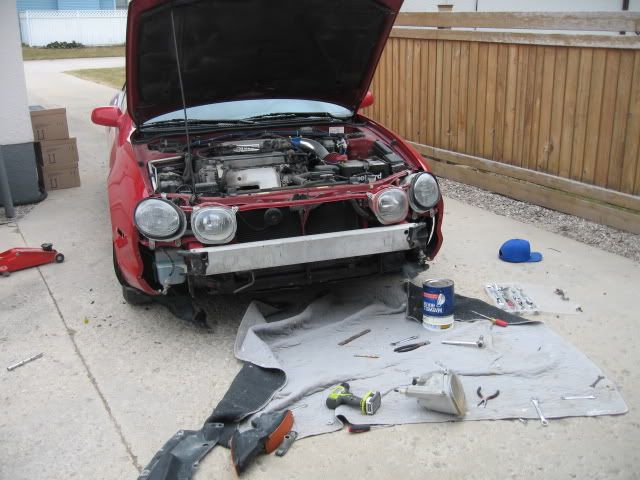
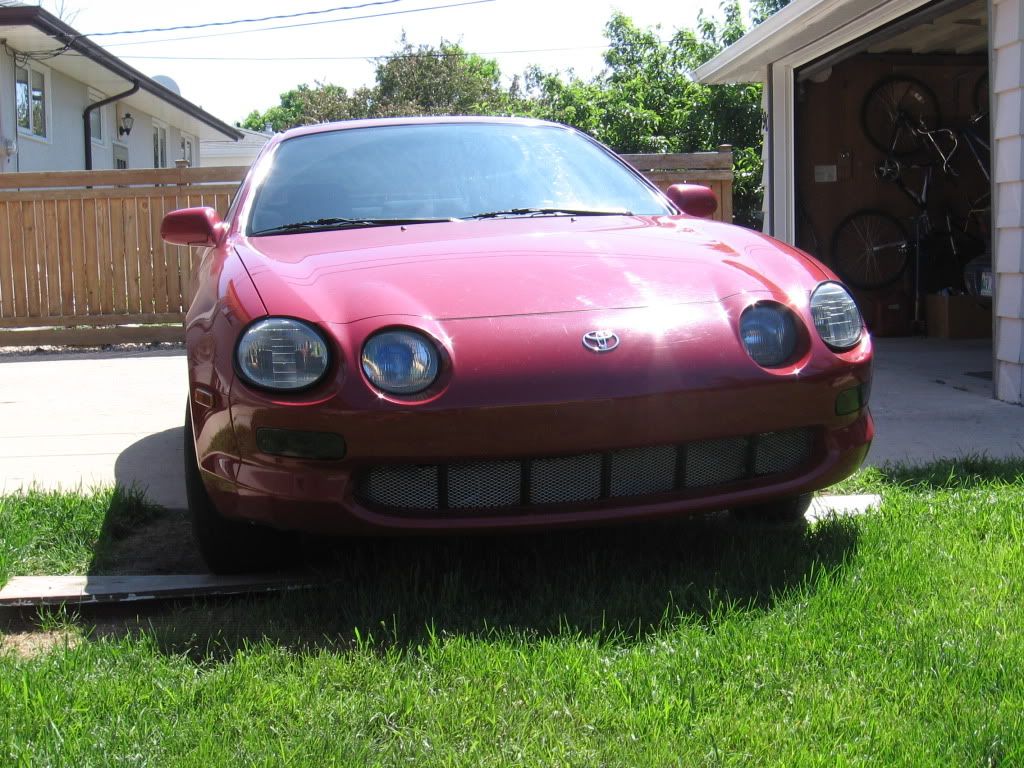
I stared looking at 6GC all the time and that's when I really caught the modding Bug. Unfortunately I couldn't really afford the direction I wanted the car to go, So I had to go the cheap route. I had I good idea of what rims I wanted, but couldn't afford it, so I went ahead and painted the stock rims for the time being just for a little change. ALso added an aluminum grill to get rid of the big open space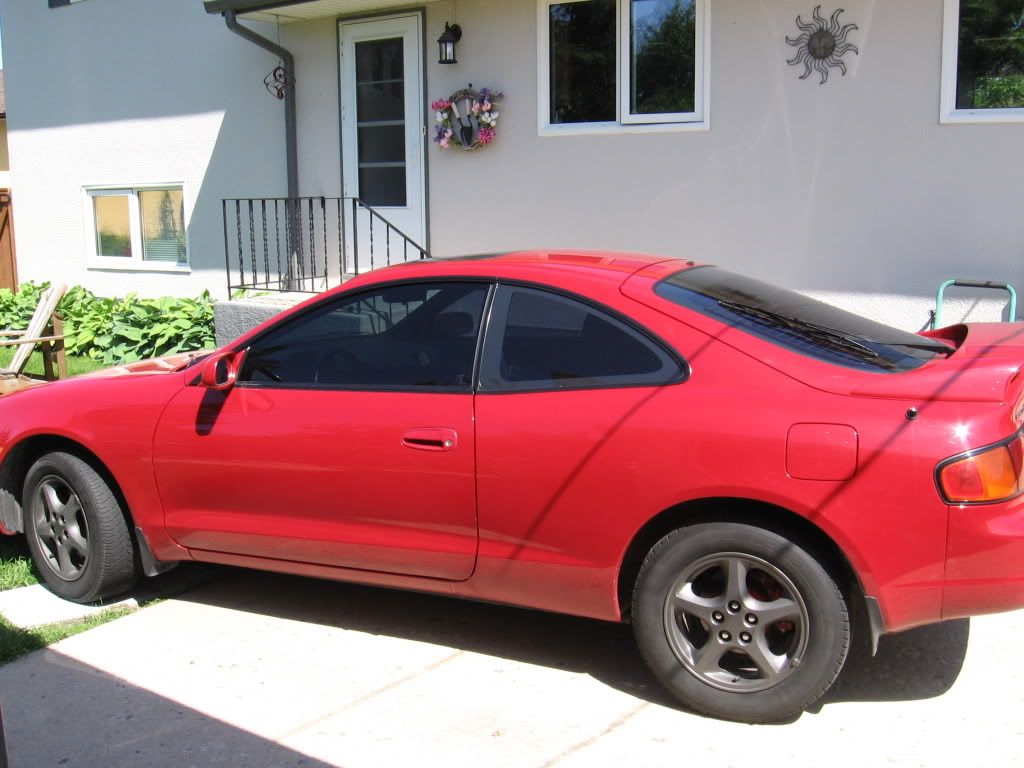
Ordered some Riser Blocks from vincent, and painted them to match the wheels, because I knew matching the red body would be fairly difficult to do, so this is how it will sit for now.
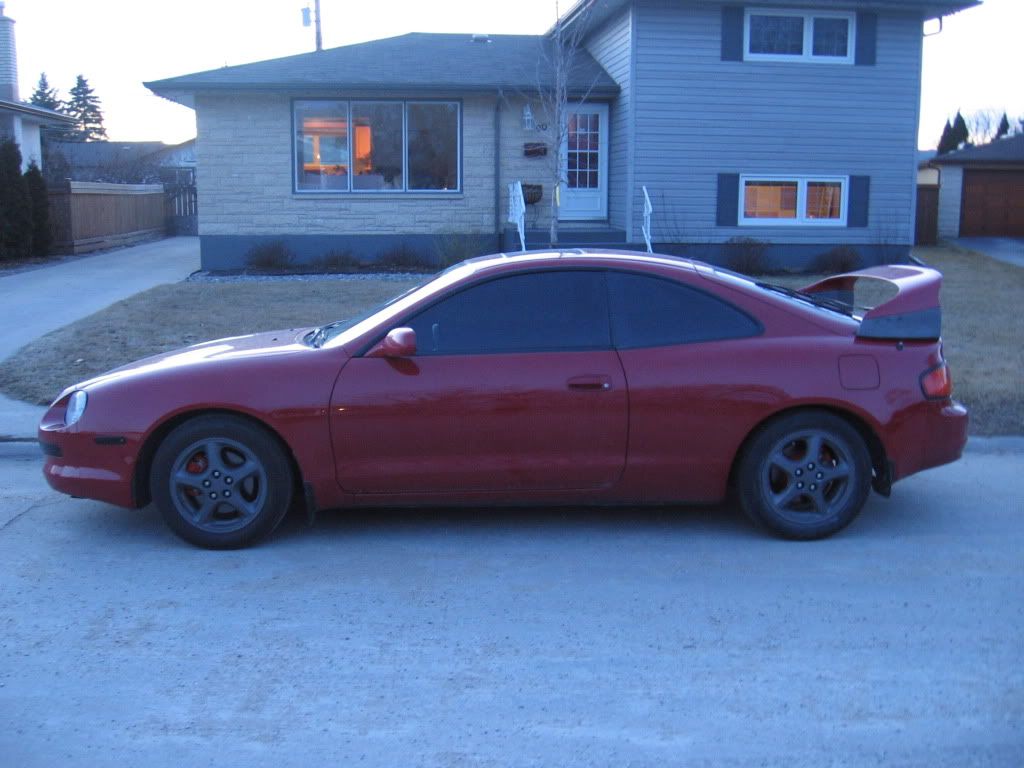
After plenty of saving up and a TON, and i mean a TON of research, I bought some Tien S-Tech's and I couldn't wait for them to arrive. The roads in my city are complete crap, so spring choice was a big choice, because I knew I wanted to get 18's and possibly add skirts and some TRD front and rear splitters.
I did the reading and decided s techs would be the best because It gave a drop, but didn't slam the car, and would reduce the wheel gap, but would still be a good daily driver and was also affordable.
Here's a before and after picture.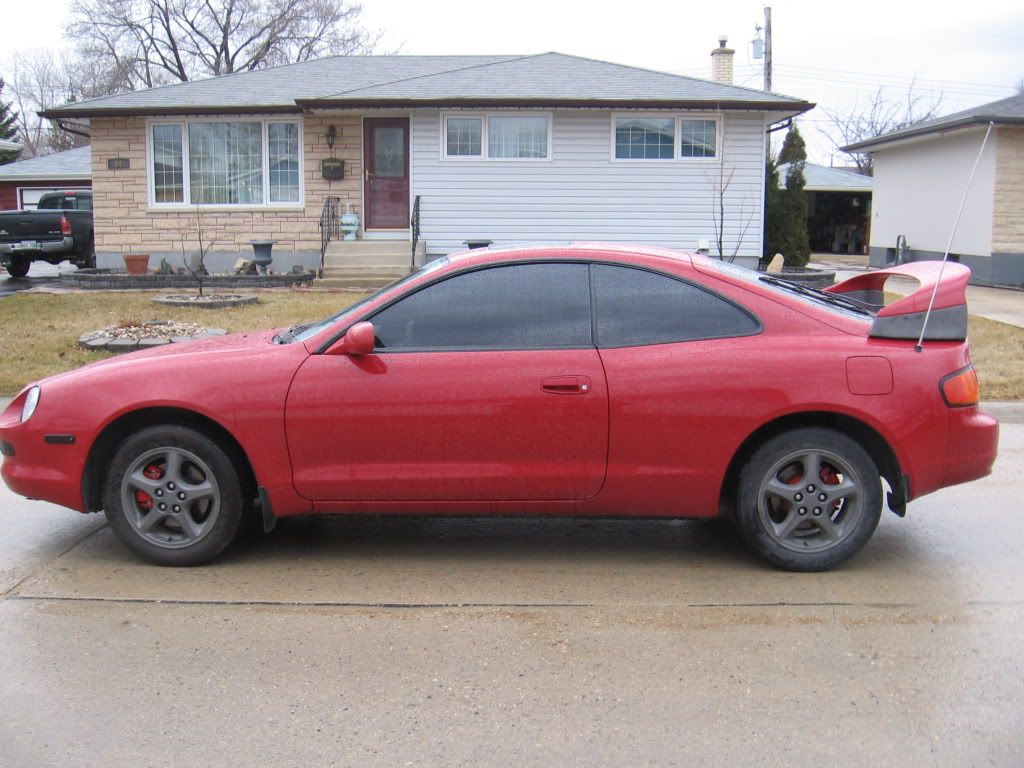
This took me about 7 hours, by myself. I really didn't know exactly what I was doing so I took my time. I managed to get almost all of the nuts and bolts off wih ease. Except on the last strut. The nut was stripped and the bolt had to be cut off. The endlink nut was also stripped so I replaced those, and my celica sat for a few days while the parts came in to the stealership haha. Finally got it on the road and couldn't be happier.
My car doesn't bottom out, and the ride was very close to stock.
Thats basically how the car sits right now, and Im really happy with it, except the modding bug has not left, but money kinda holds me back.
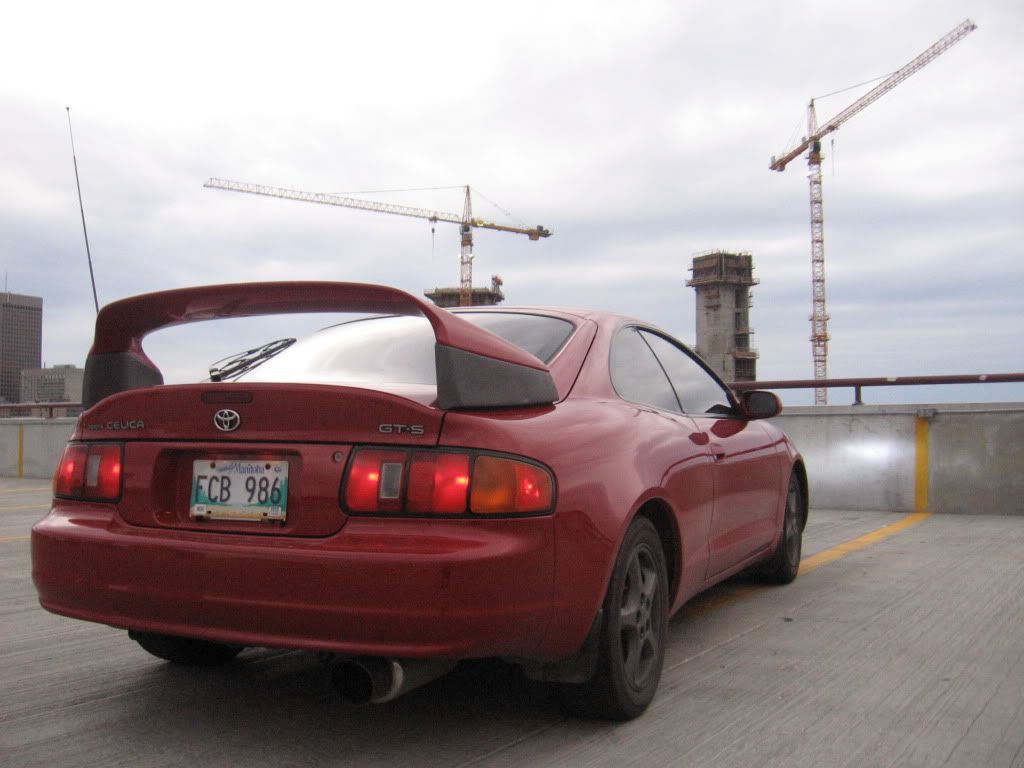
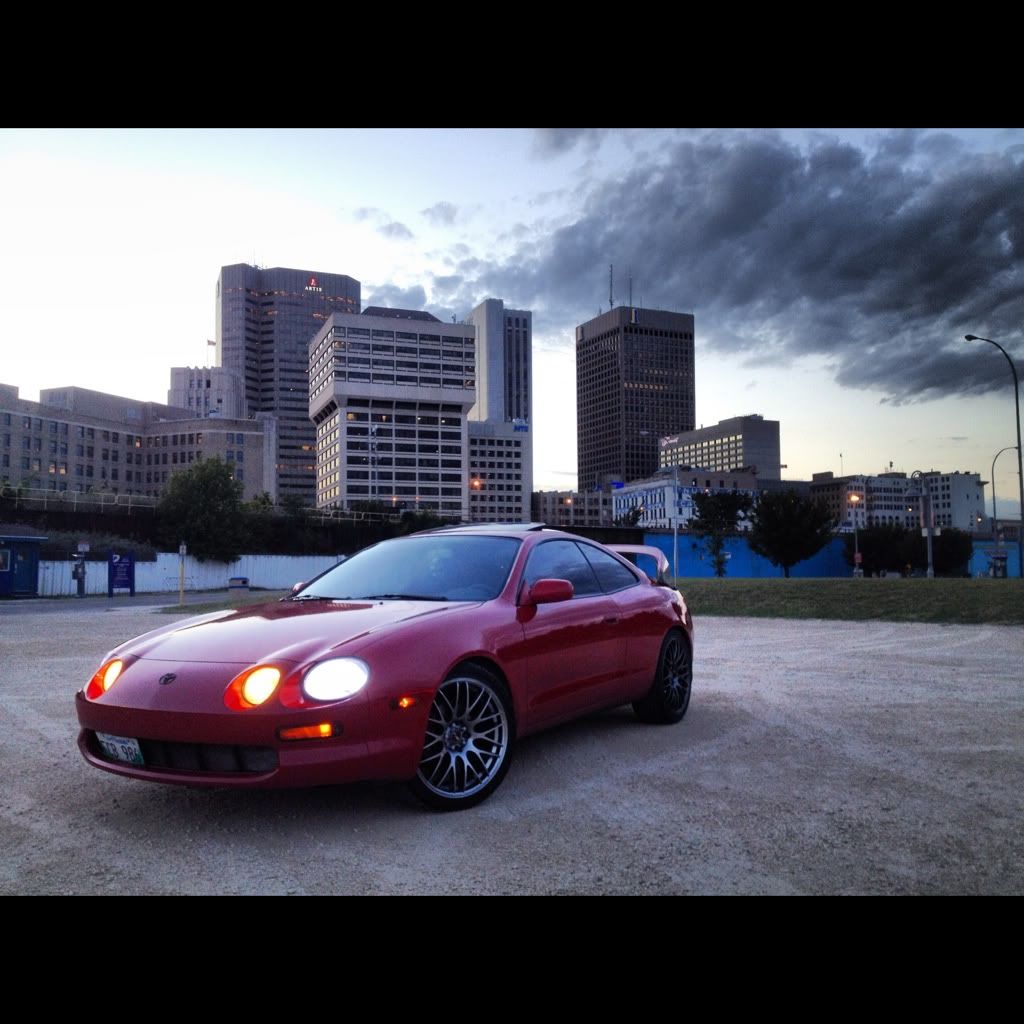
Little photoshoot I did with my moms point and shoot, they turned out not bad.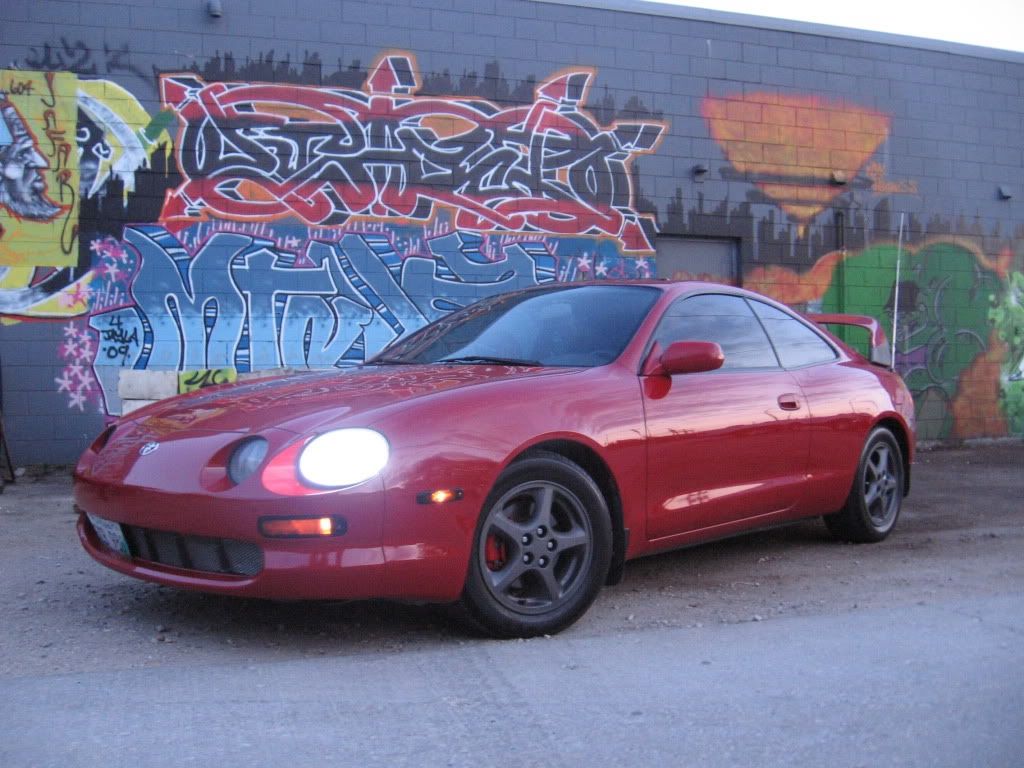


That's It for now, Any ideas, suggestions, comments, or whatever are welcome. I plan to update this thread as I go along. But you can expect an update REEAALLL Soon.
Thanks for looking, Colin.
Posted by: Johnnyny Jun 5, 2010 - 2:43 AM
looks good what are your future plans turbo swap ?
Posted by: jordisonjr Jun 5, 2010 - 11:45 AM
Not too sure at this point, I may turbo it eventually, I don't really have the knowledge for a swap, bu we'll see what happens. I was planning on importing a g four this summer, but some things came up and it's gunna have to wait till next summer.
But for now I think Im just going to get he exterior looking how I want it, just a nice clean looking car.
Posted by: jordisonjr Jun 5, 2010 - 1:18 PM
Sneak peak, Wheels are in. Proper photo shoot is a must, and I'll probably have pics up this weekend, but for now: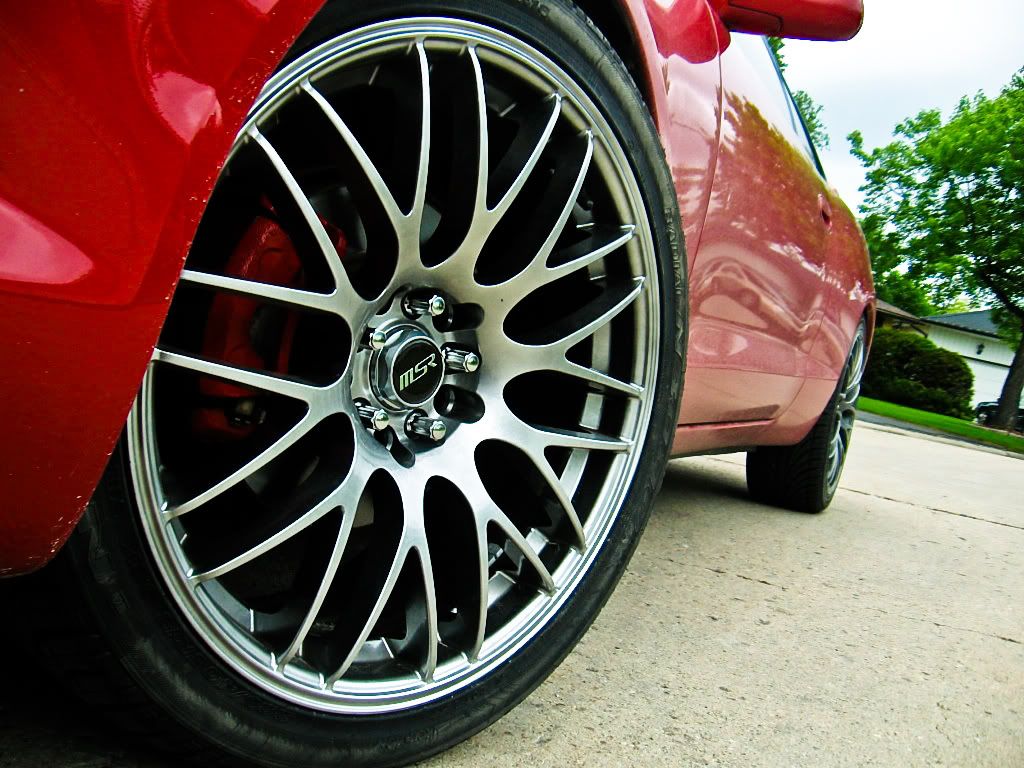
Posted by: kloudkicka Jun 6, 2010 - 5:50 PM
niice, looks like the very first set of rims that i had on my car, good choice

Posted by: Goonter Jun 7, 2010 - 1:31 AM
looks good man. Wish i can lower mine but i like riding stock. Met up with Azian_Advanced a few days ago and he's down for a meet. We should def have one when my buddy's GT-FOUR arrives
Posted by: jordisonjr Jun 7, 2010 - 4:27 PM
Kloudkicka: Thanks man, We should get a meet going some time, there's at least like 4 or 5 us in the city with 6th Gen's.
Goonter: That's sick, I'm totally down man. Its nice with the Tien s tech springs, it gives it a good look to the car, but not too low, and the ride is very close to stock. Only problem is my tires rub a tiny but in the back, when I go over the ****ty bumps in winnipeg haha.
Posted by: jordisonjr Jun 7, 2010 - 7:31 PM
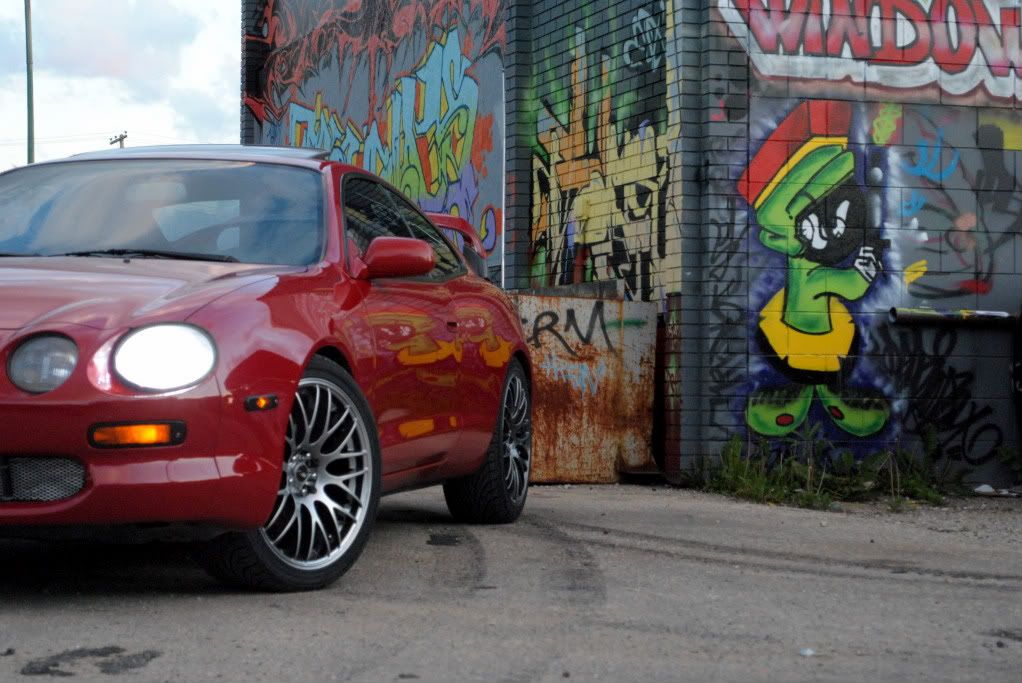
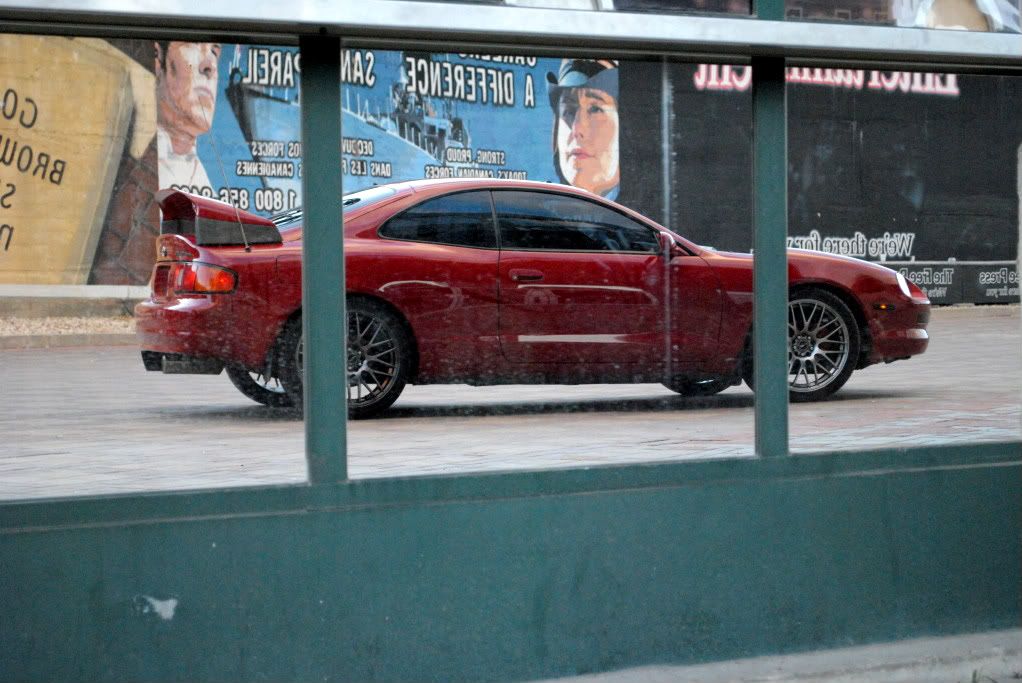
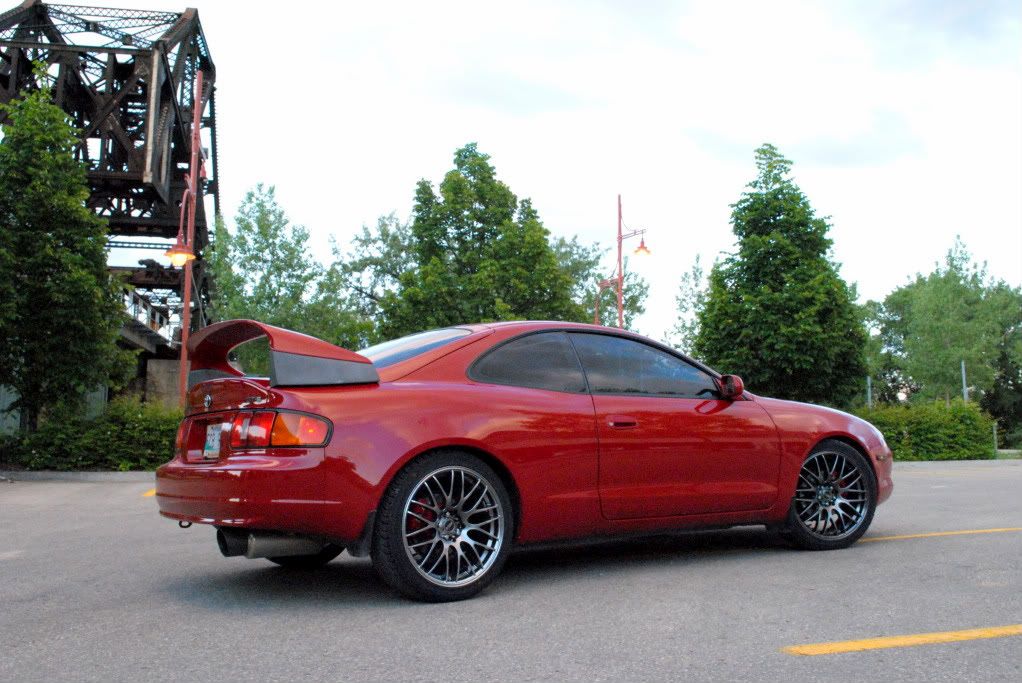
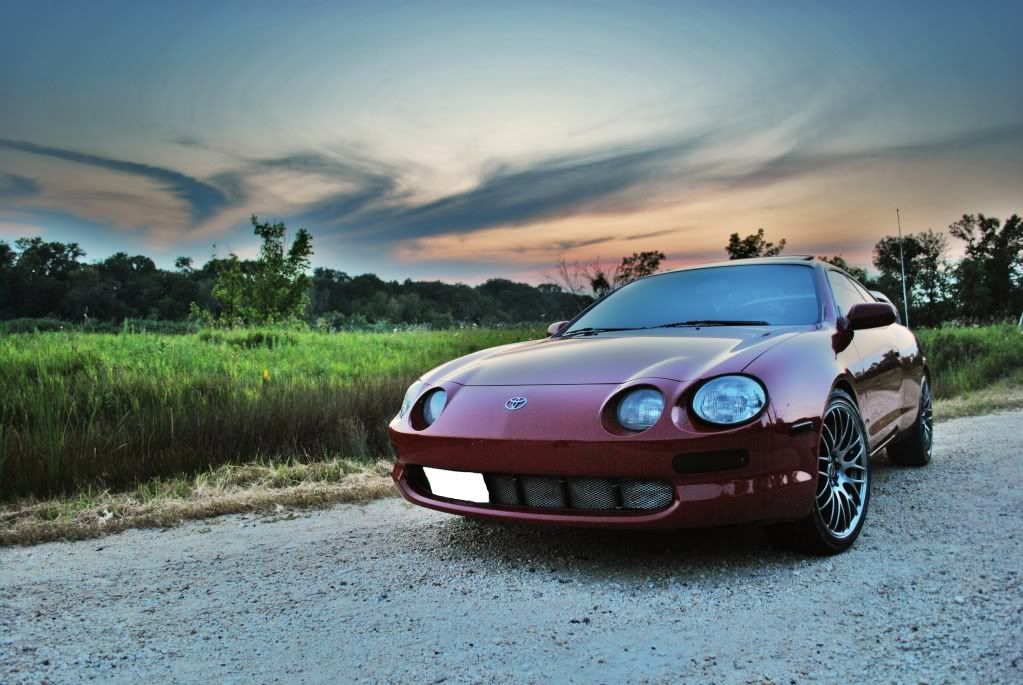
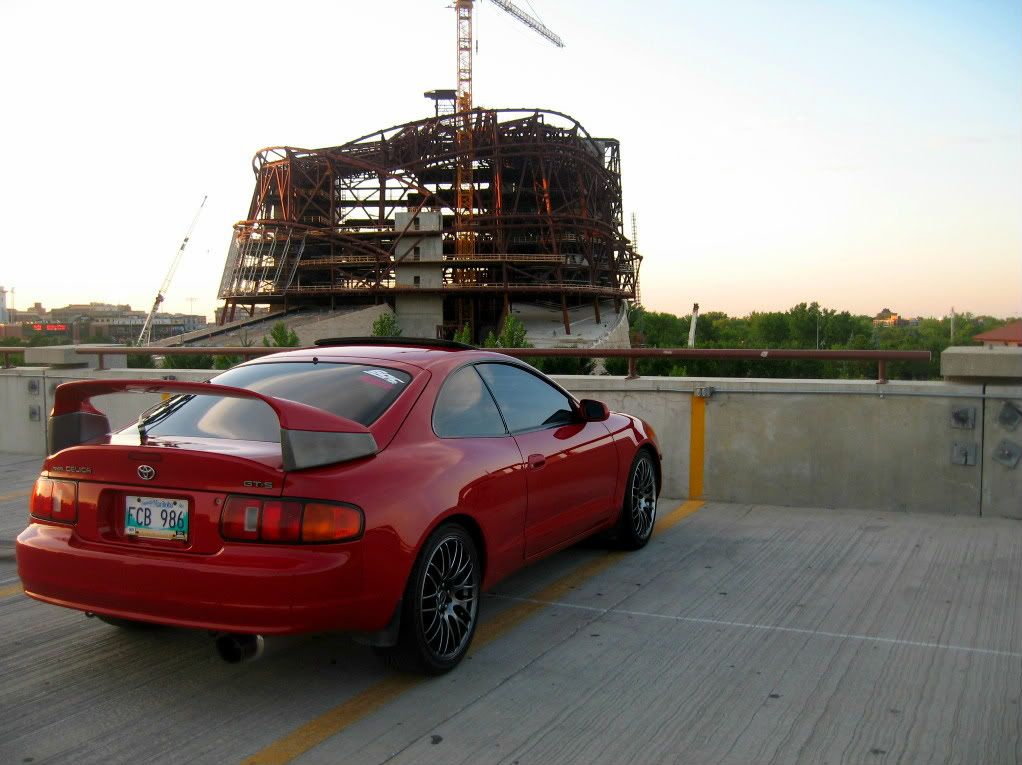
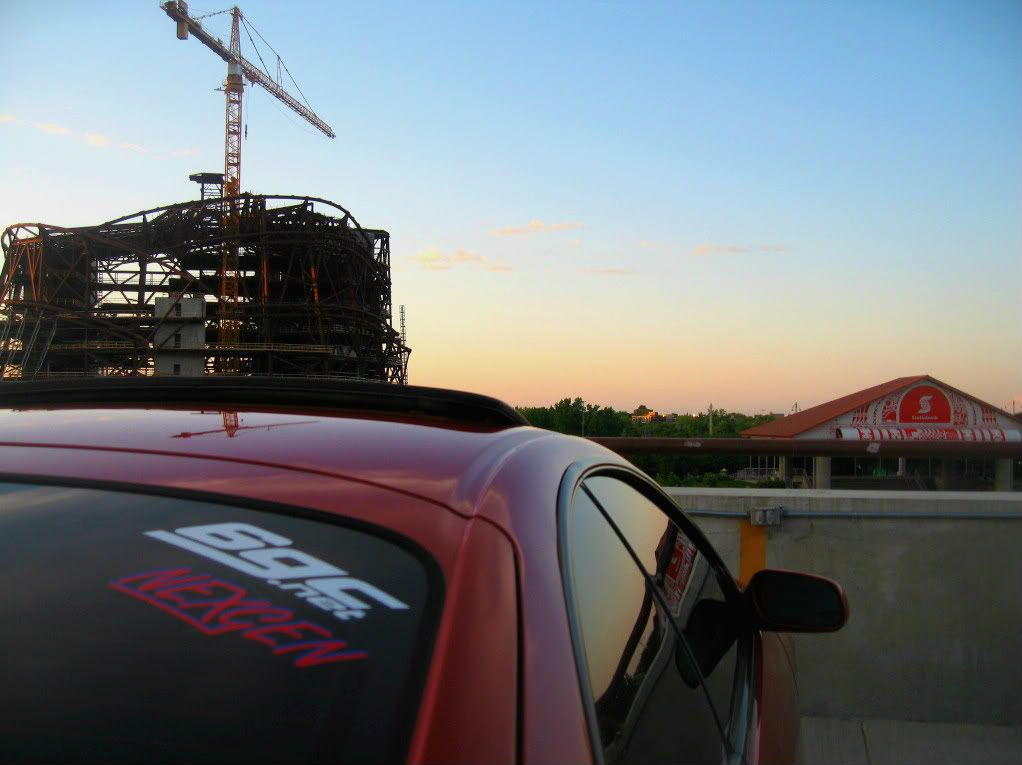
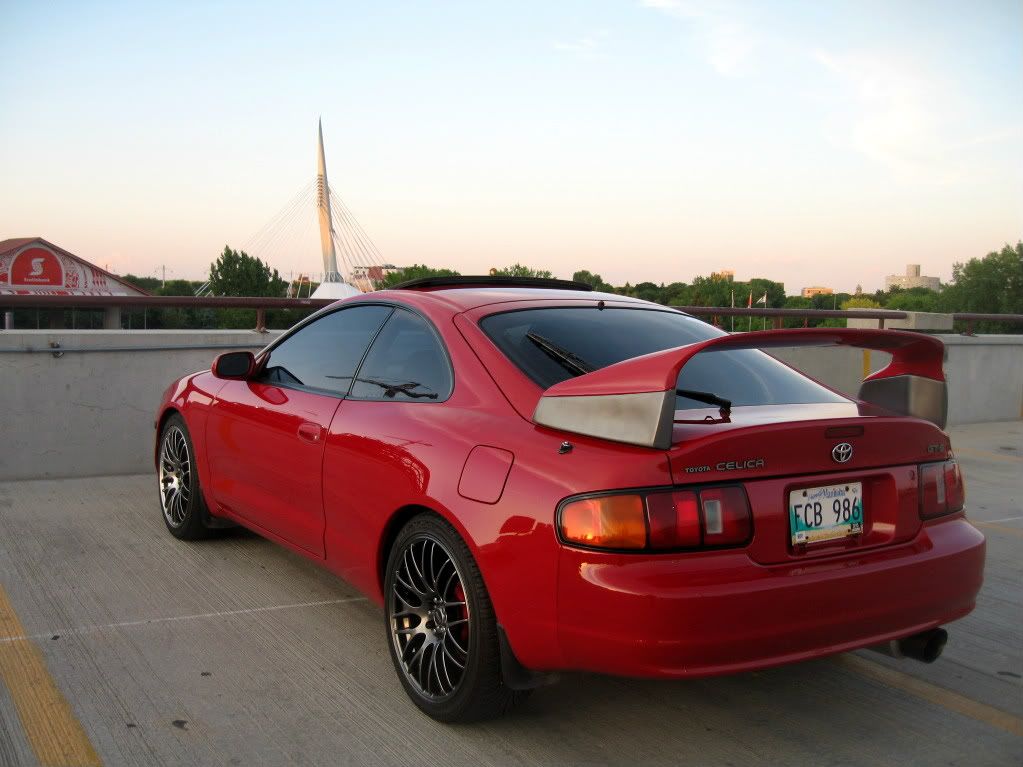
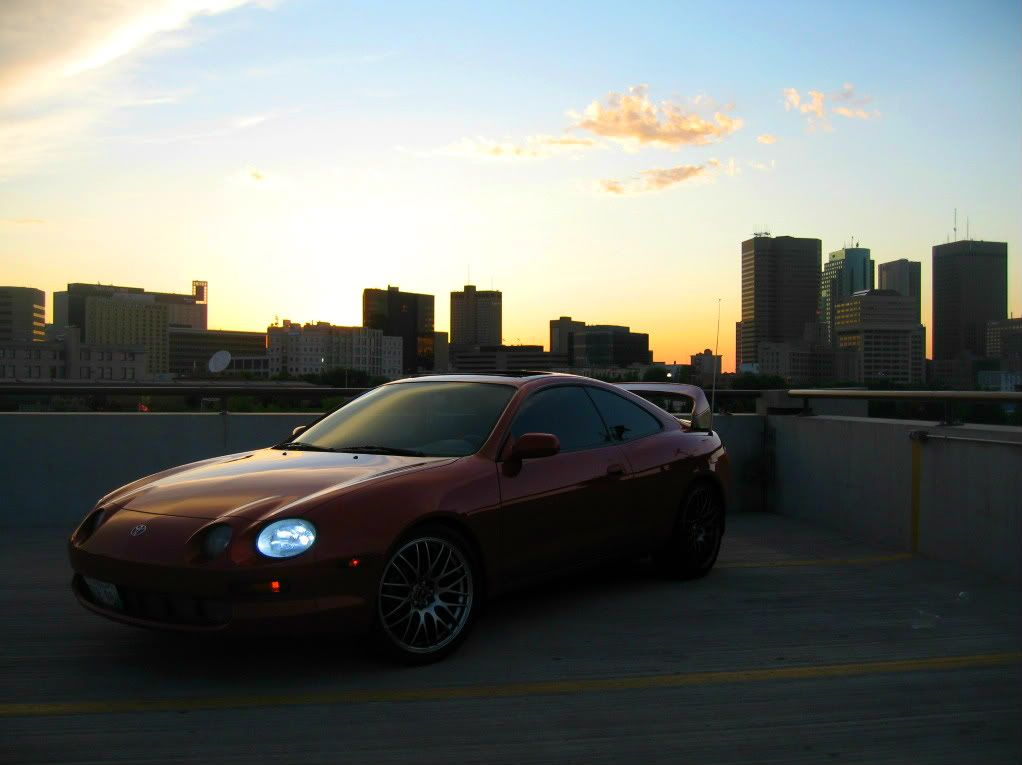
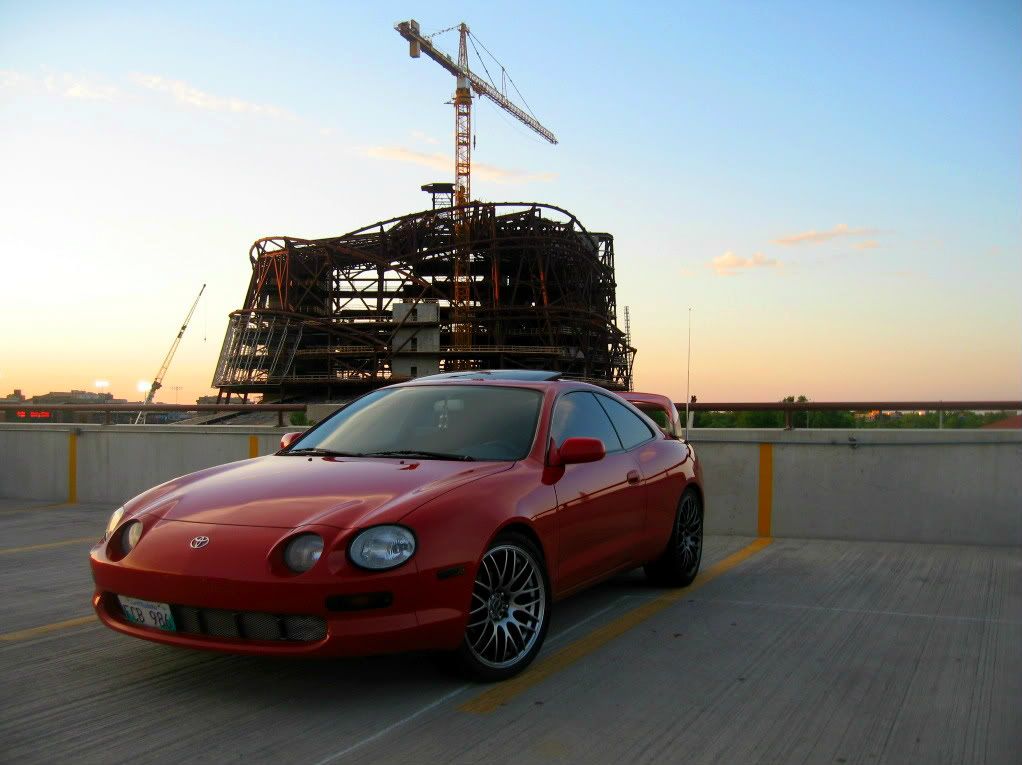
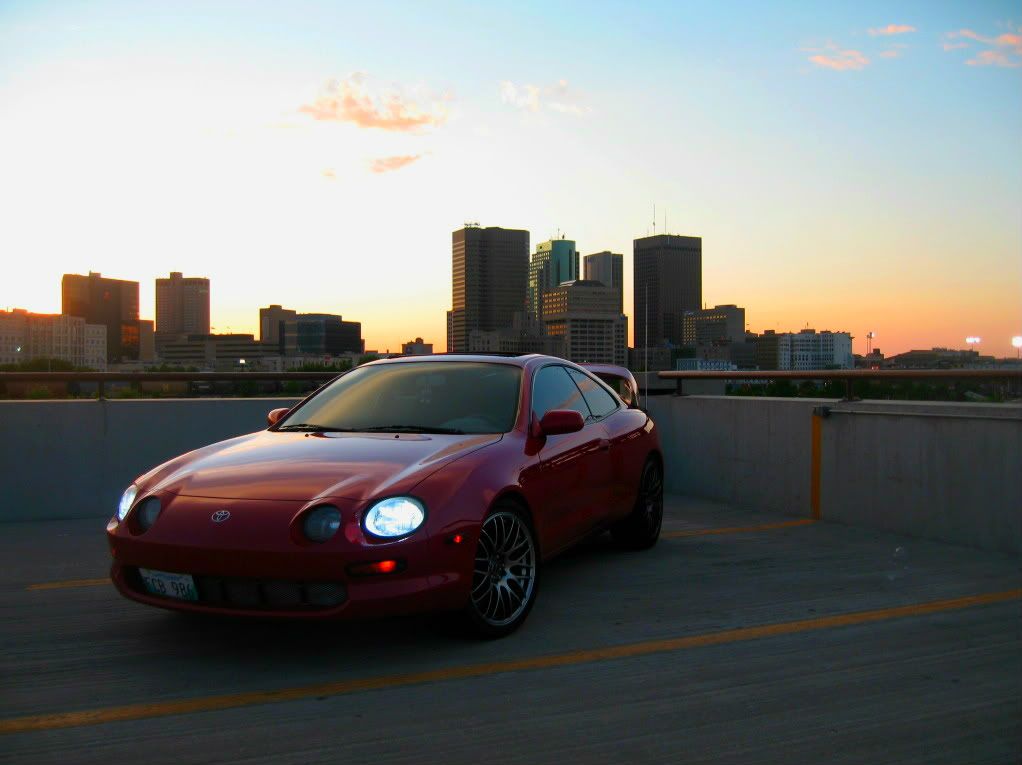
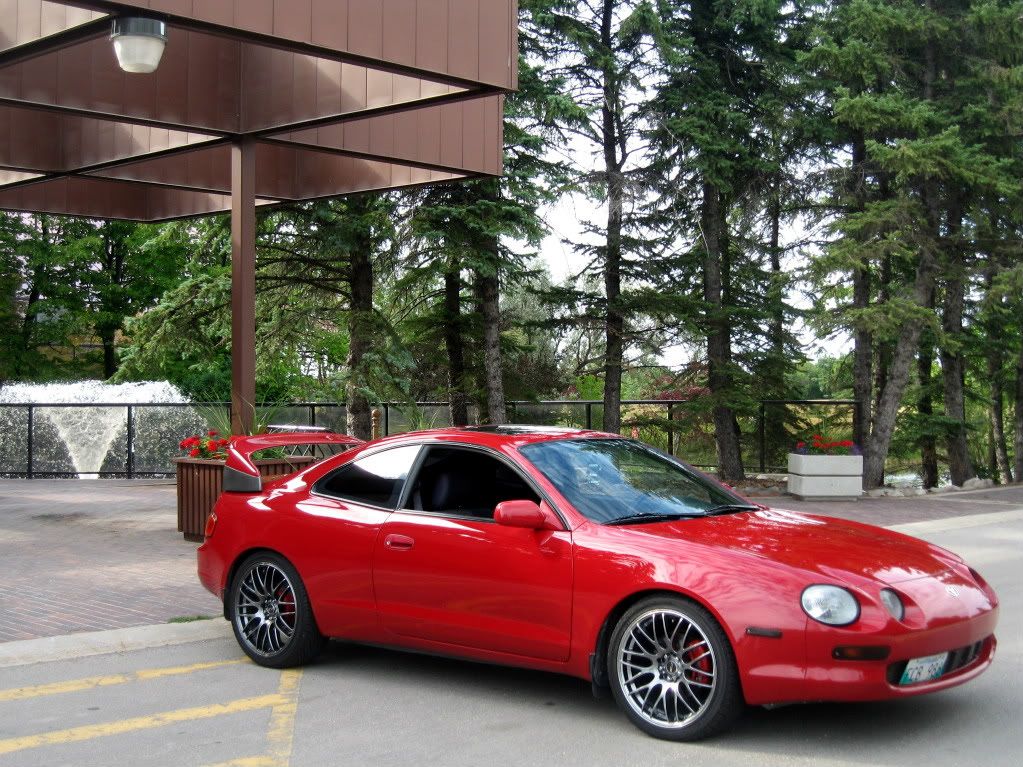
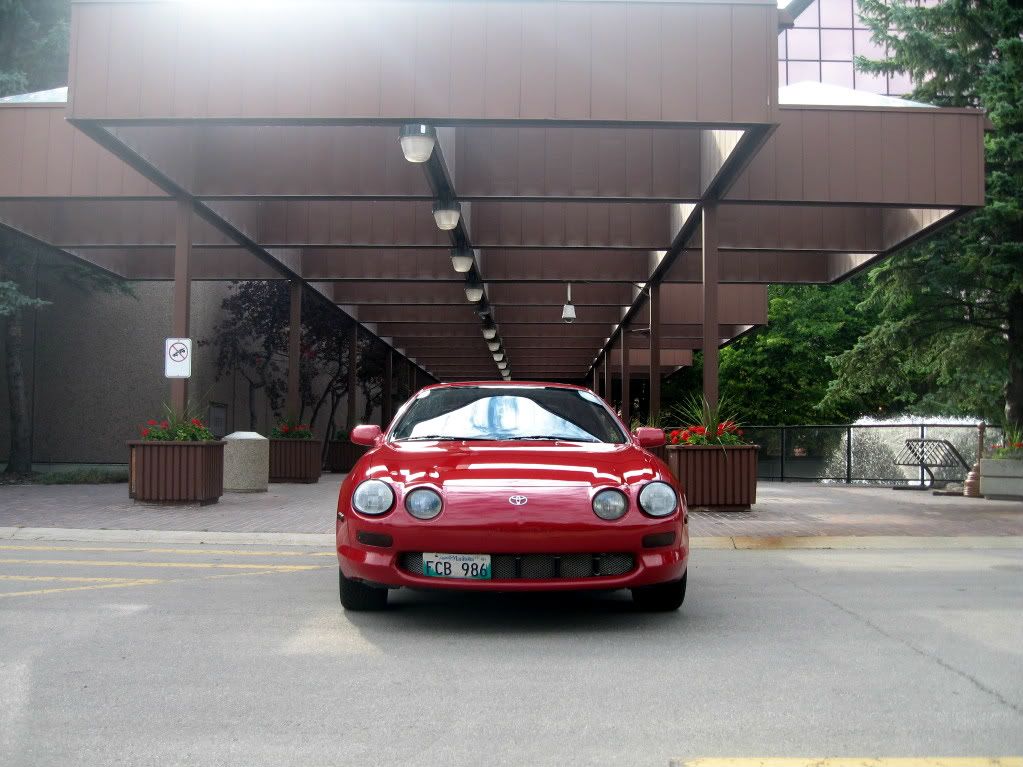
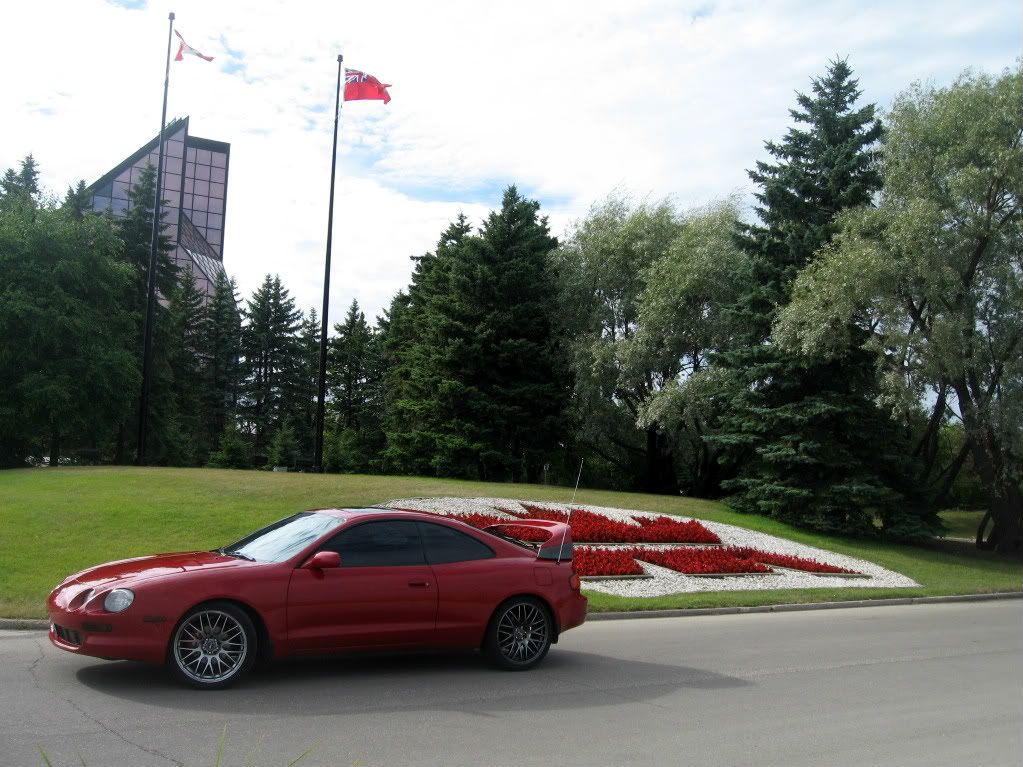
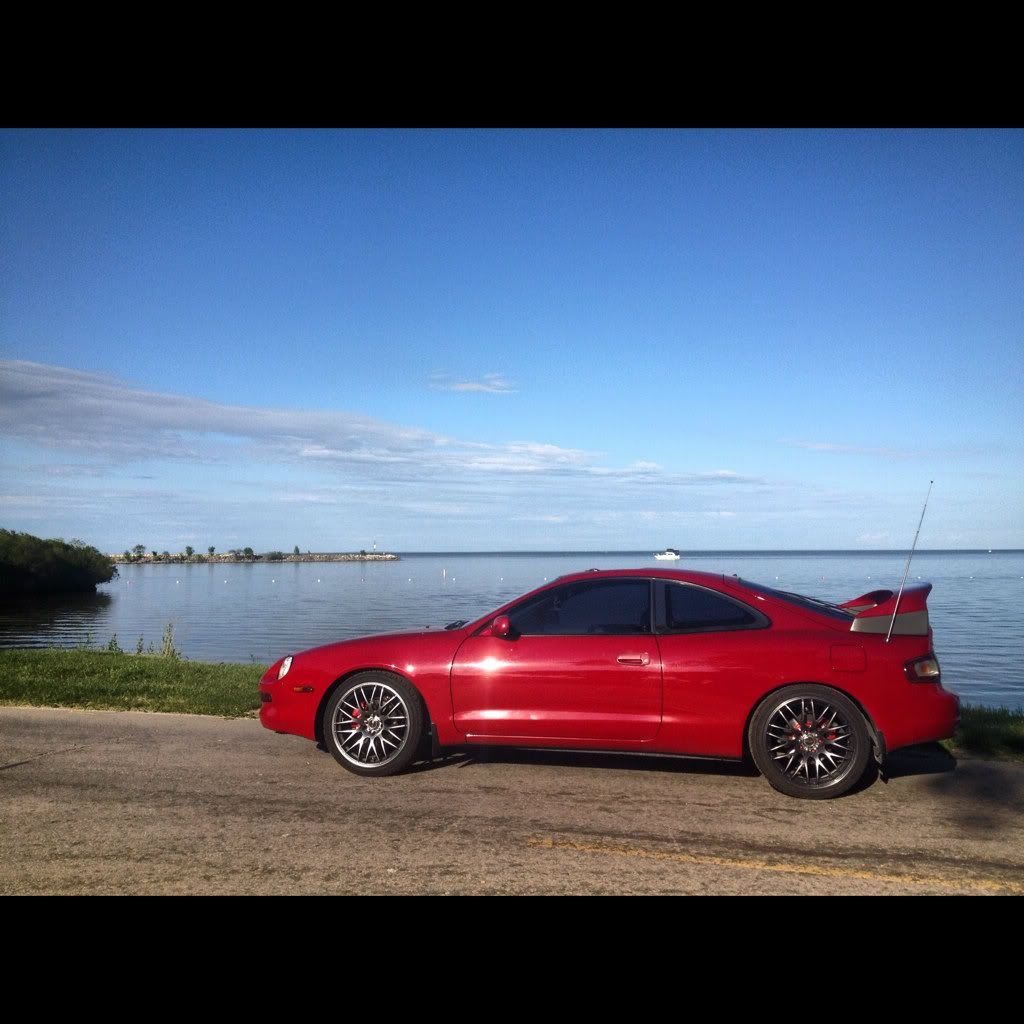
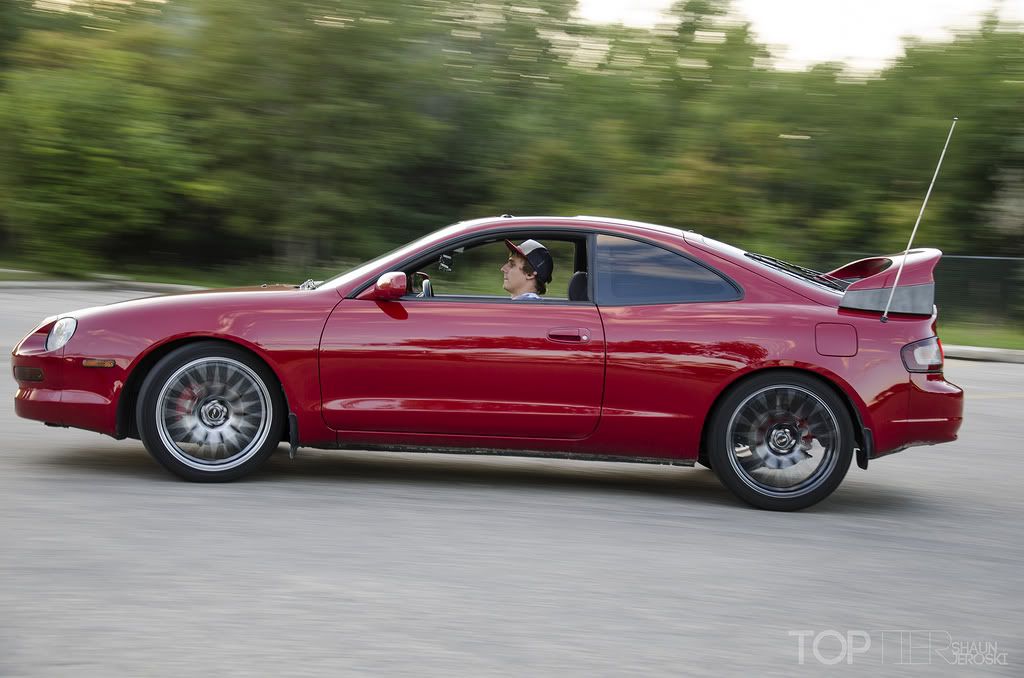
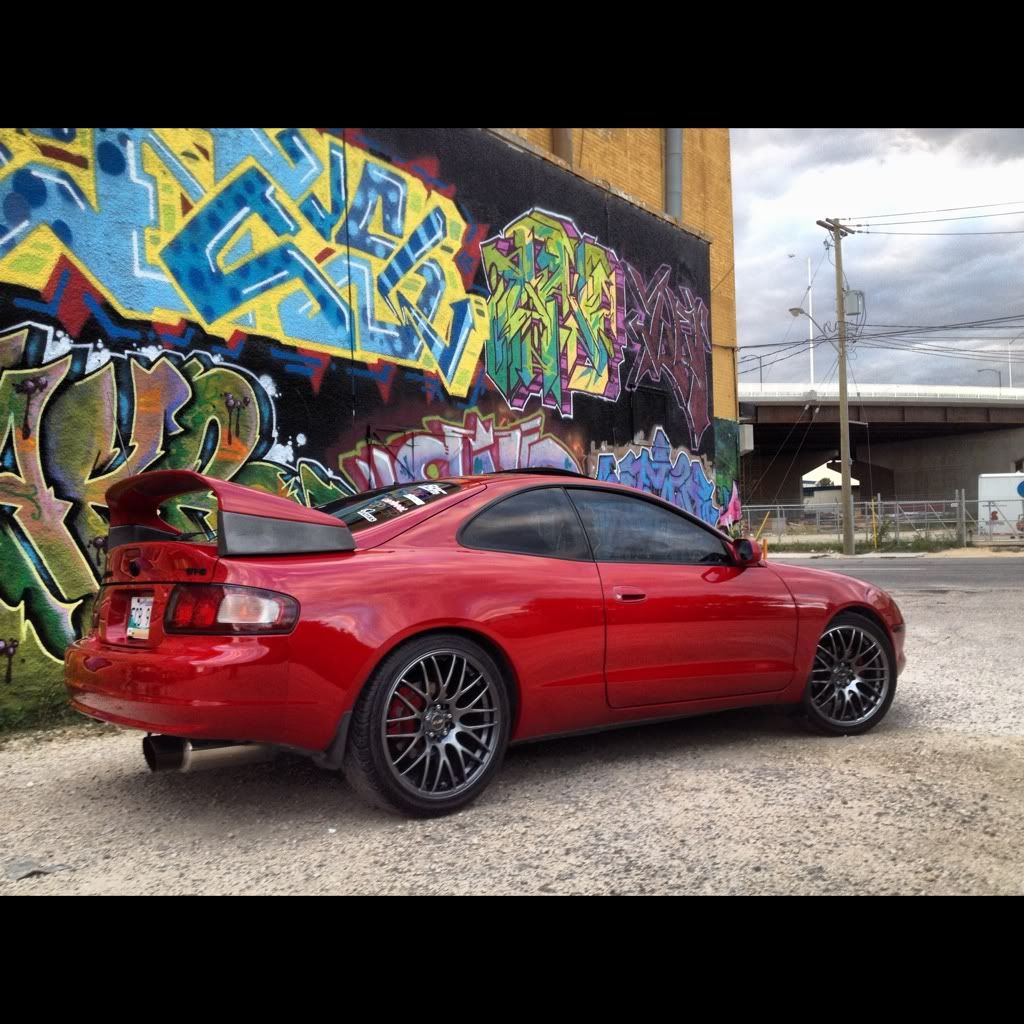
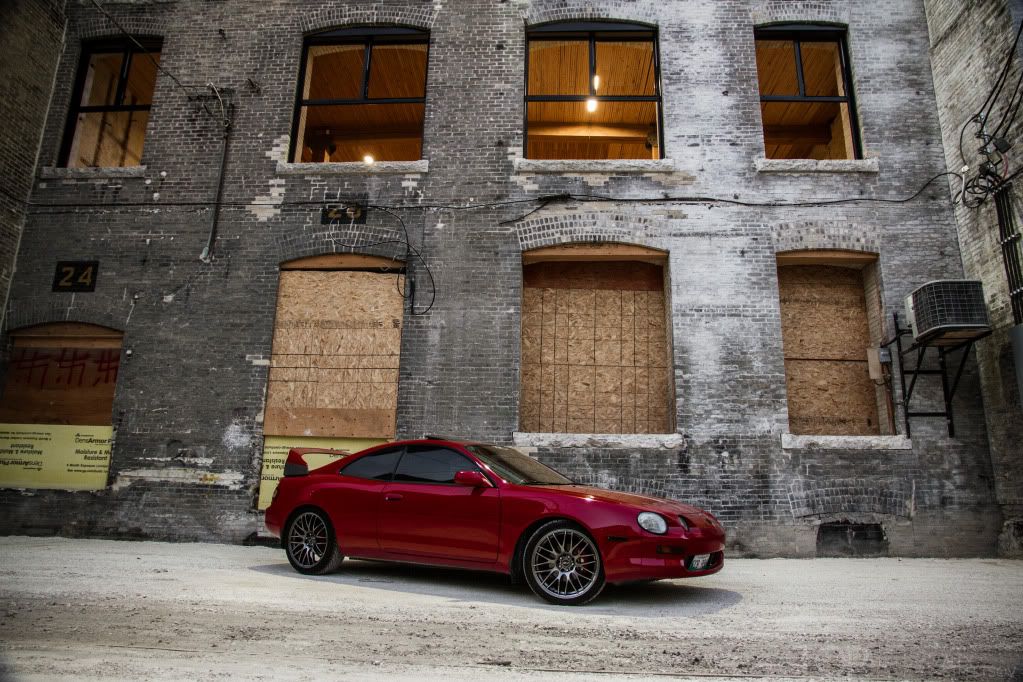
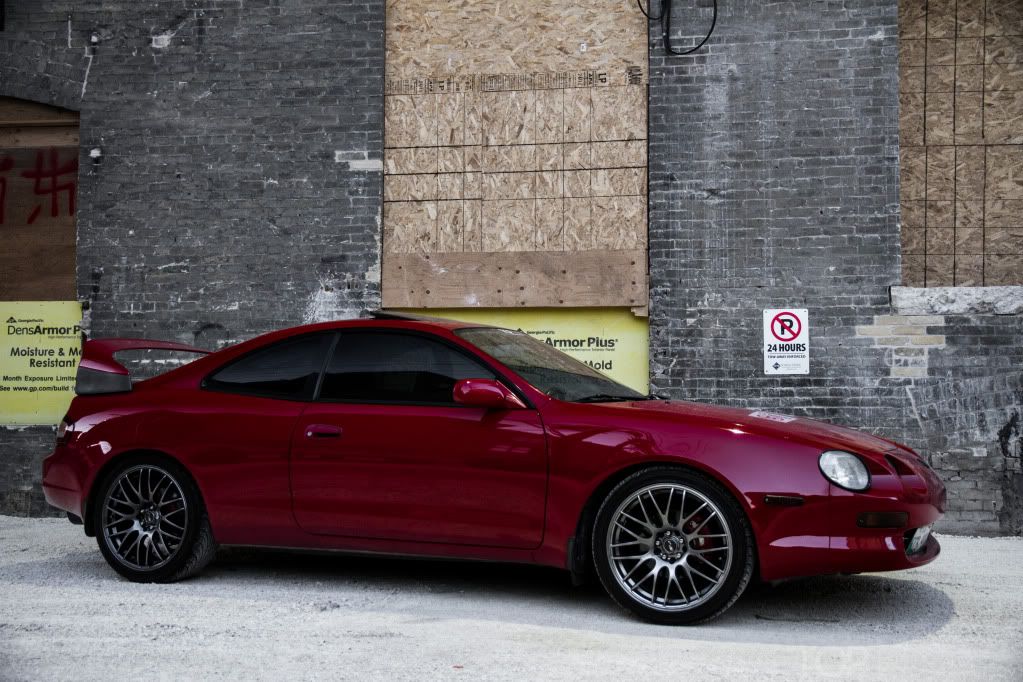
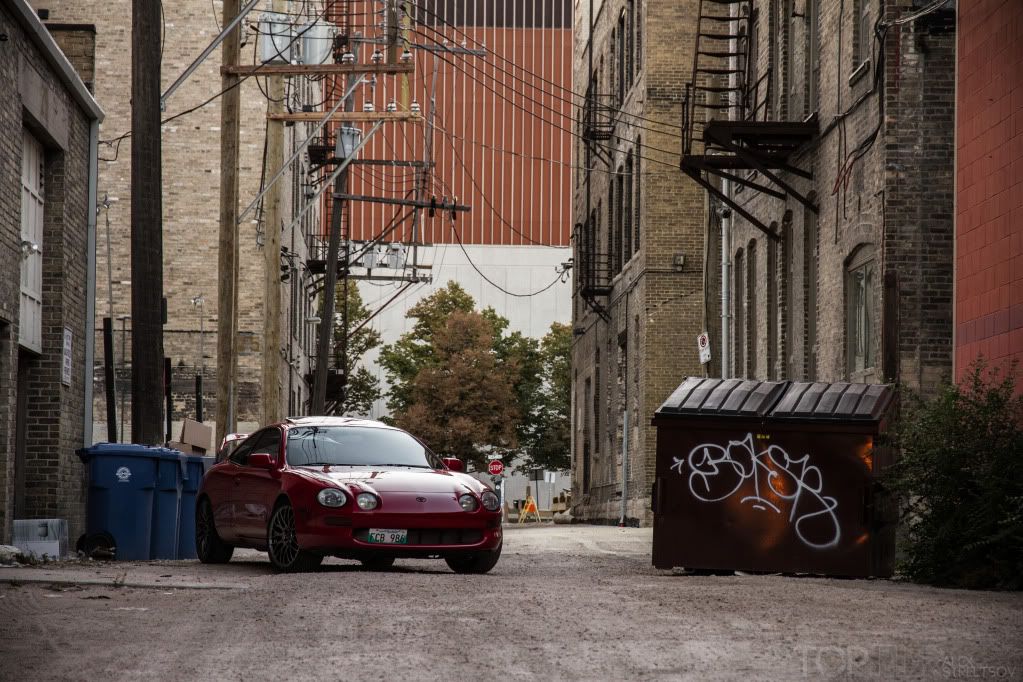
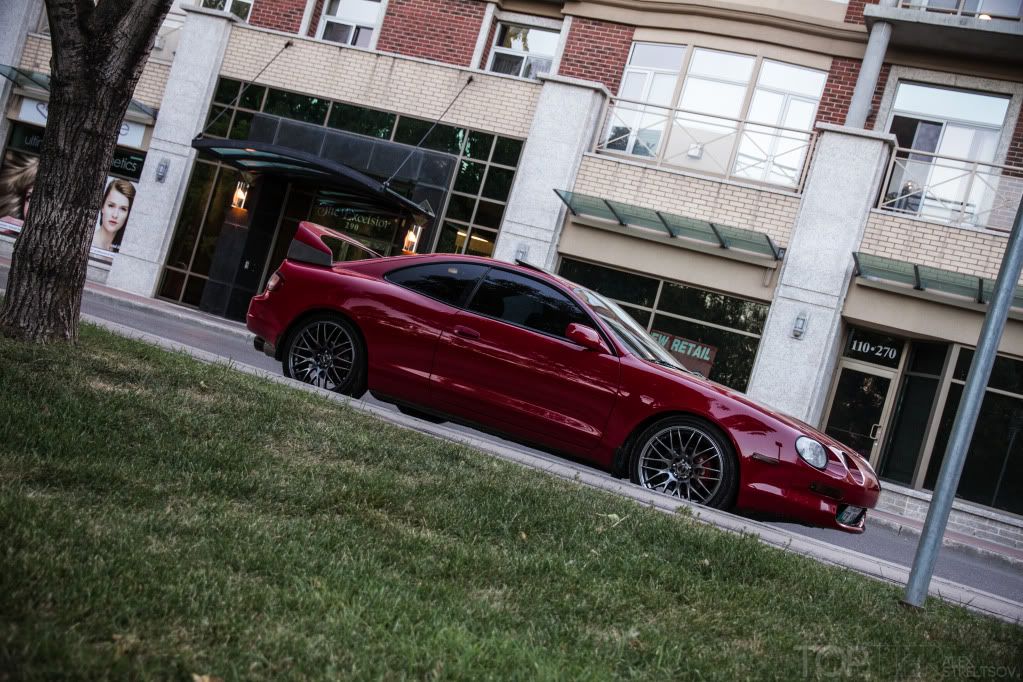
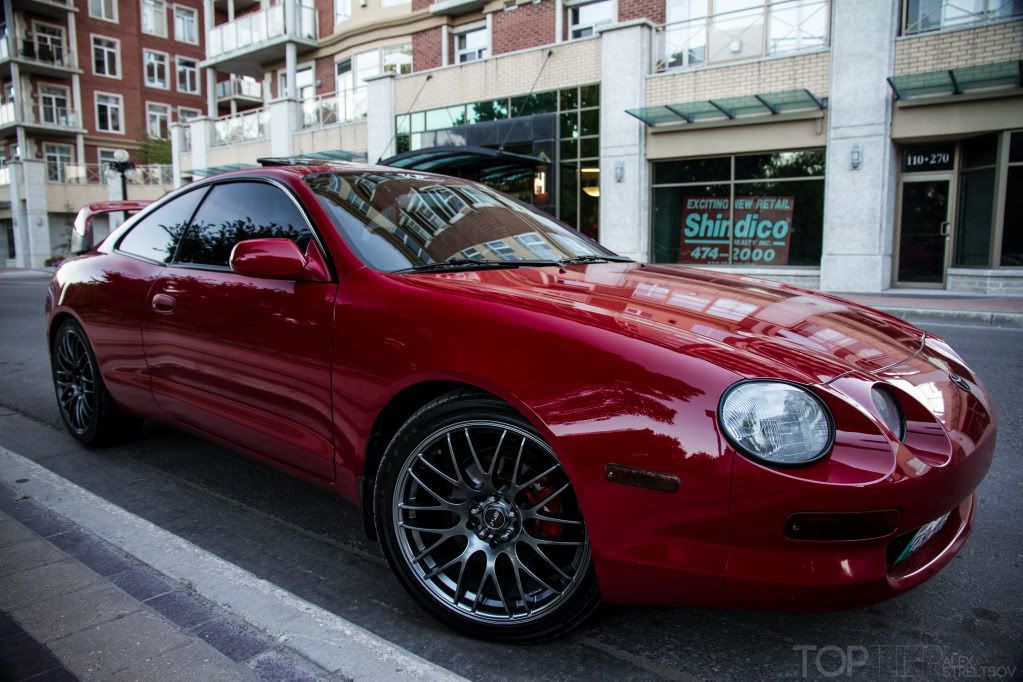
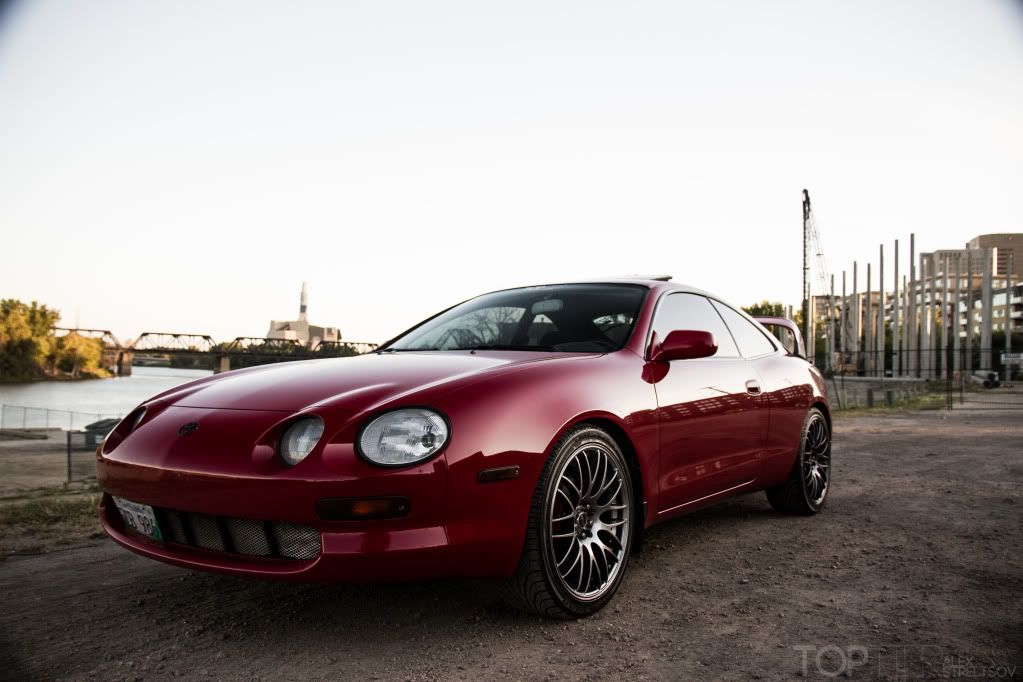
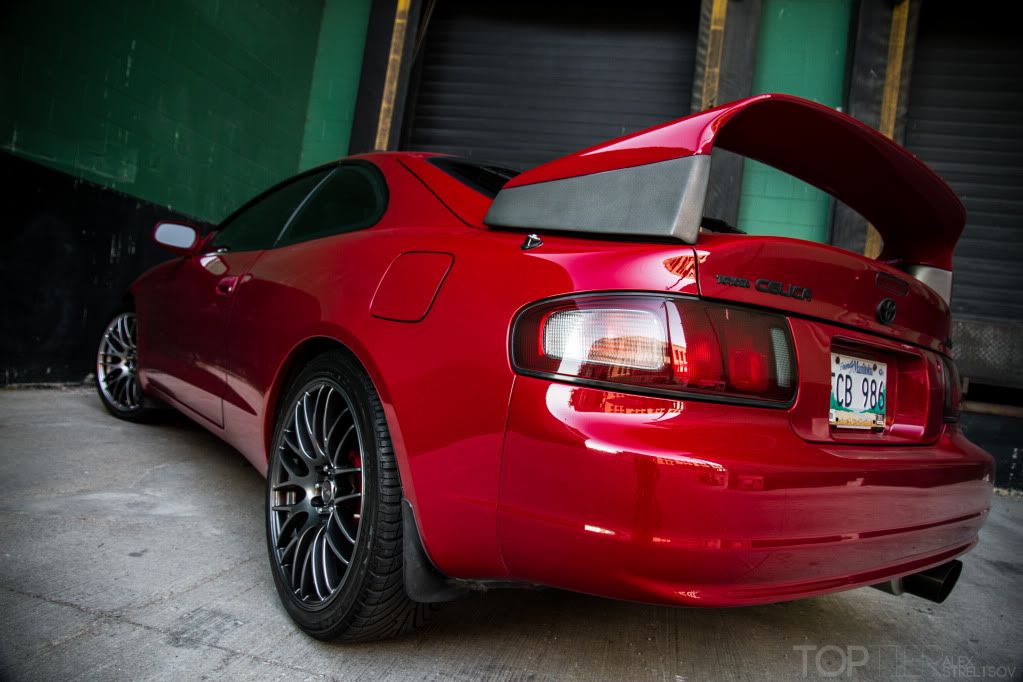
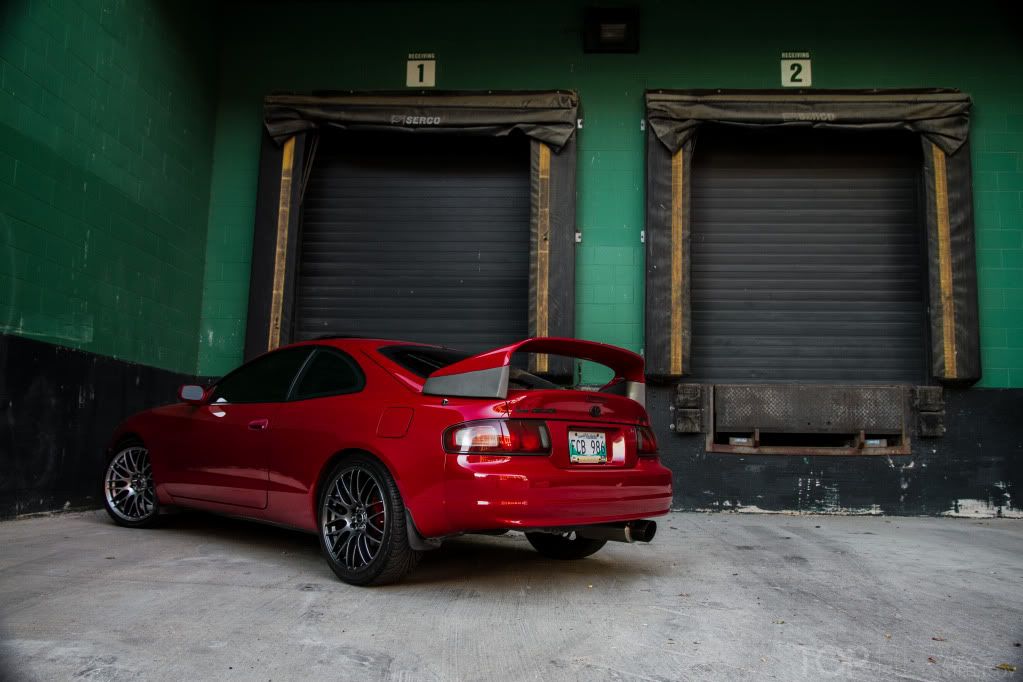
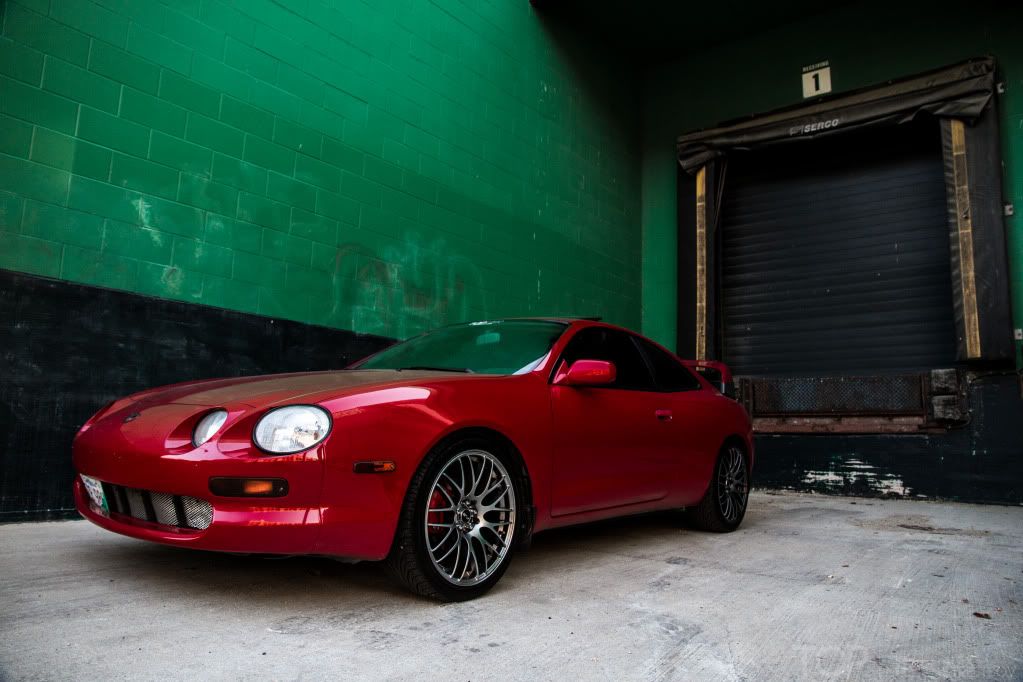
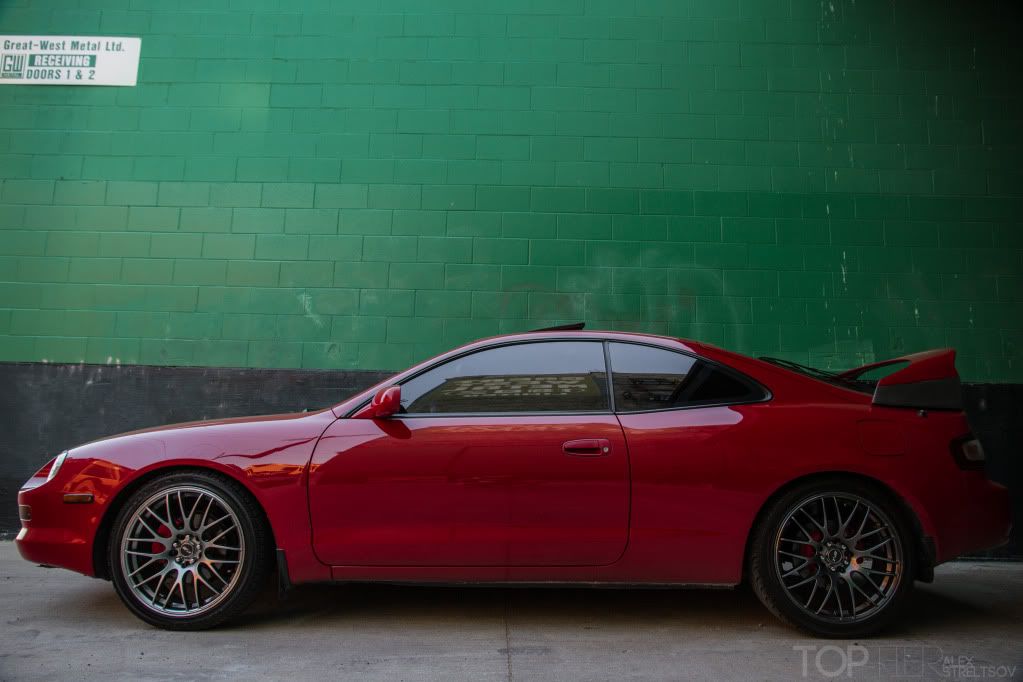
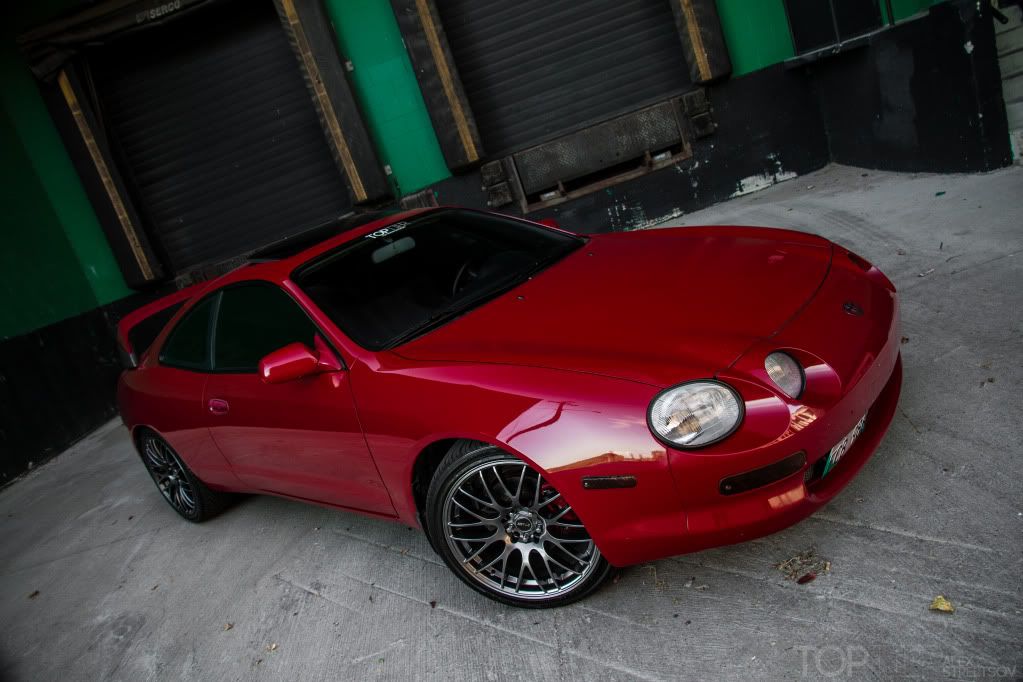
Alright, so as promised I got some more pics. I went out with my girlfriend, and her sister(the photograhper) and got some nice shot's with the new wheels.
I'm pretty happy with how they turned out.
I know they are not the best photo's, but she's never taken pictures of cars before but here's the best of what we got: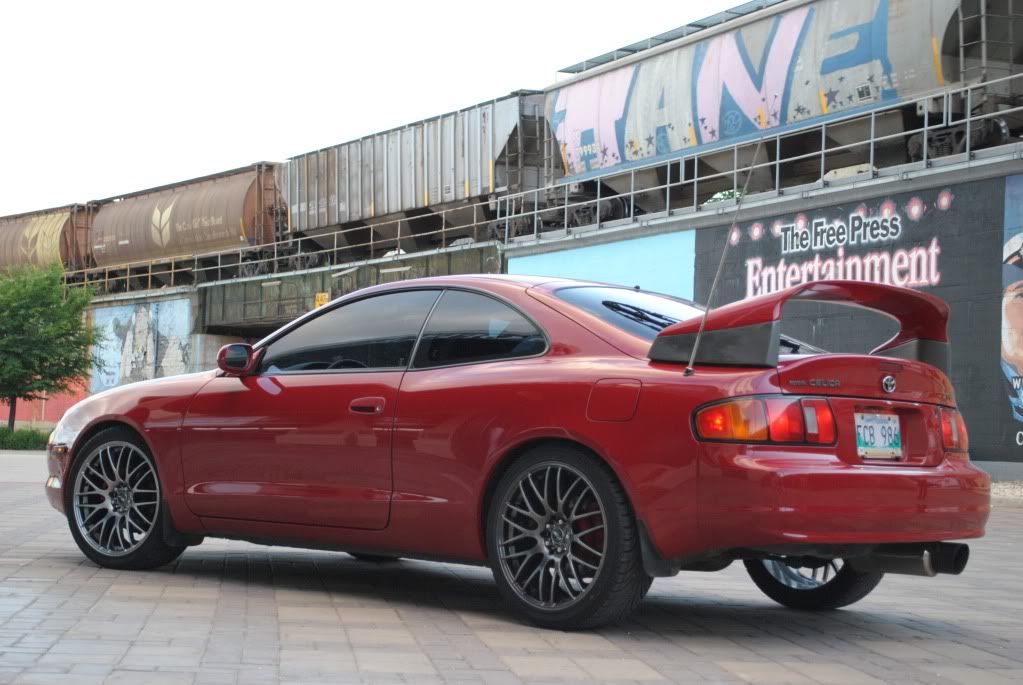
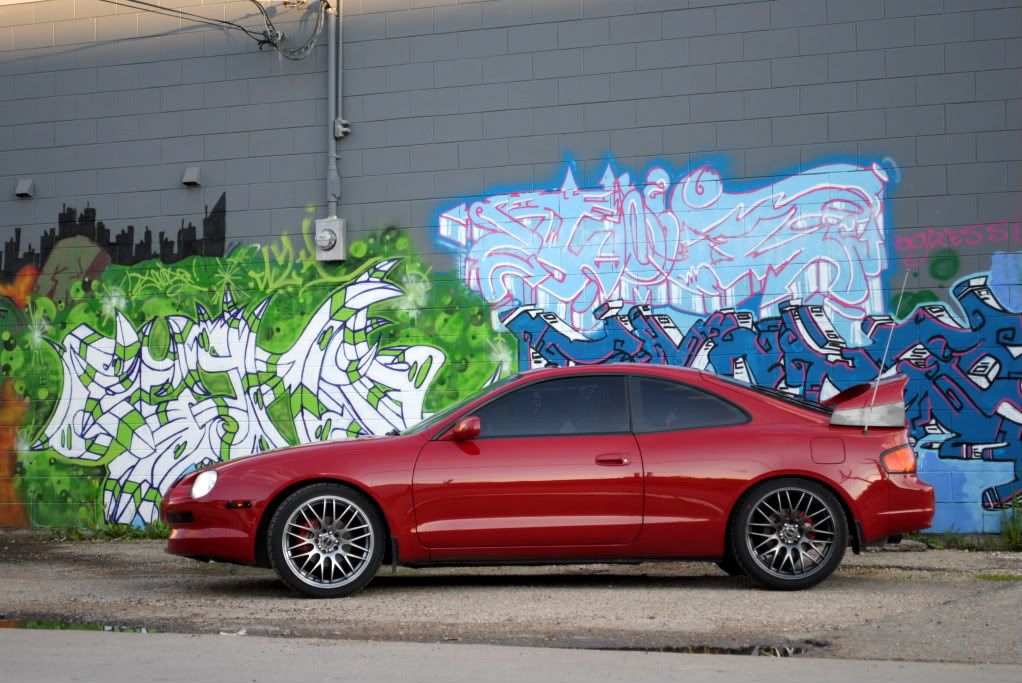
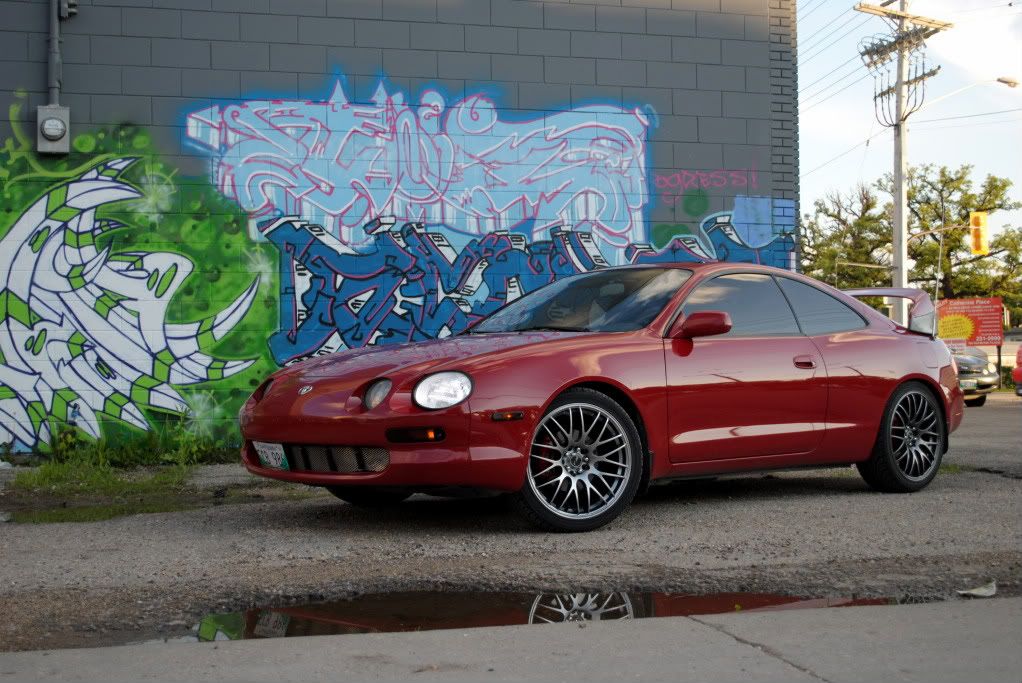
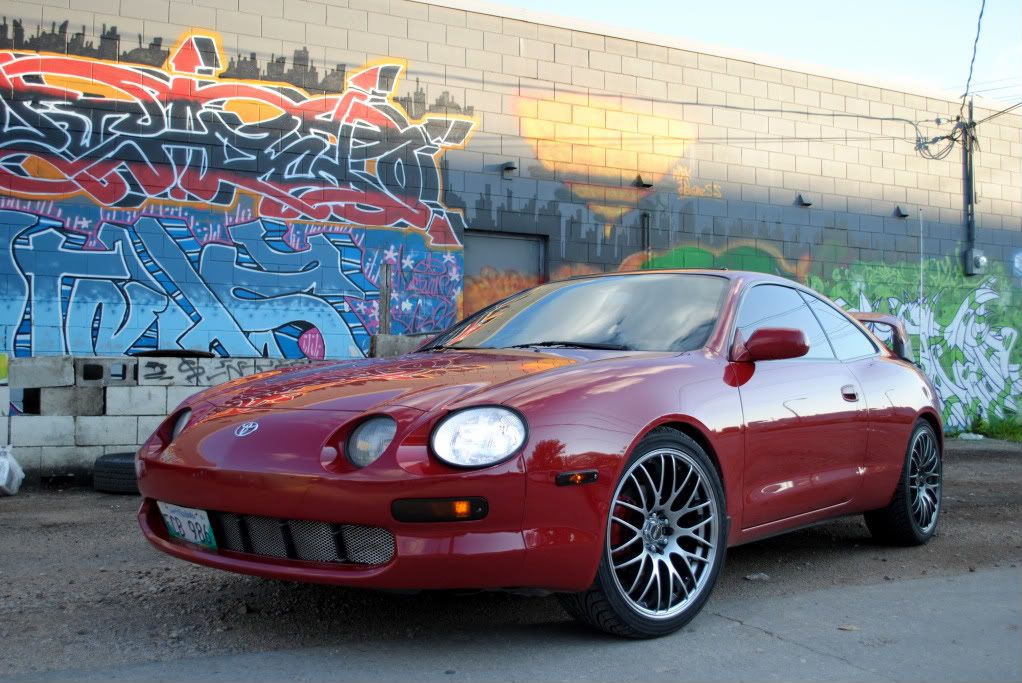
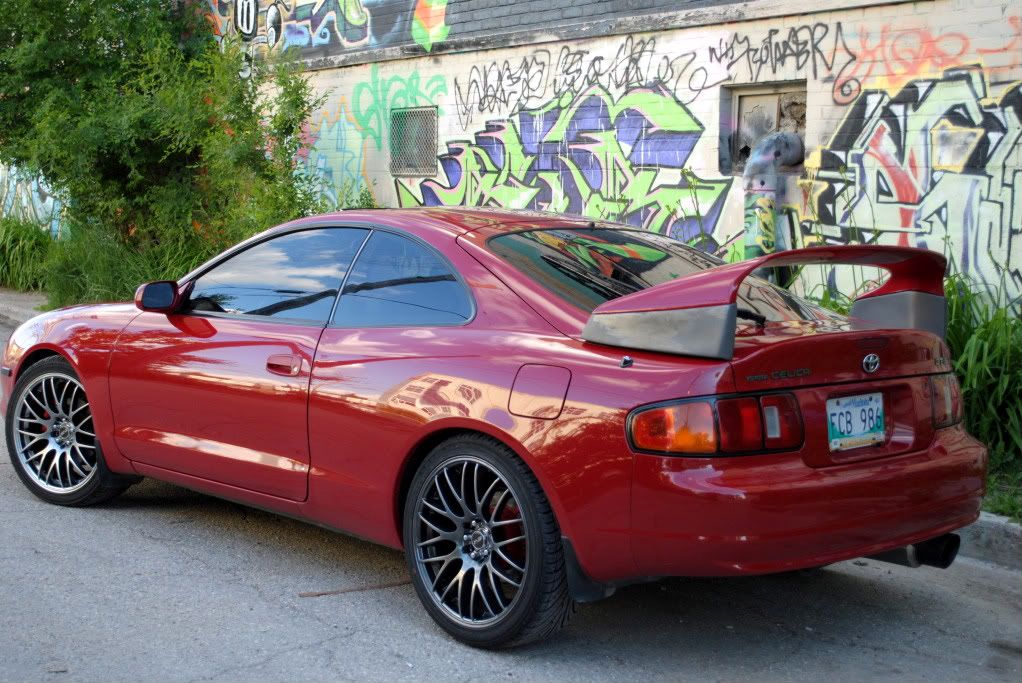
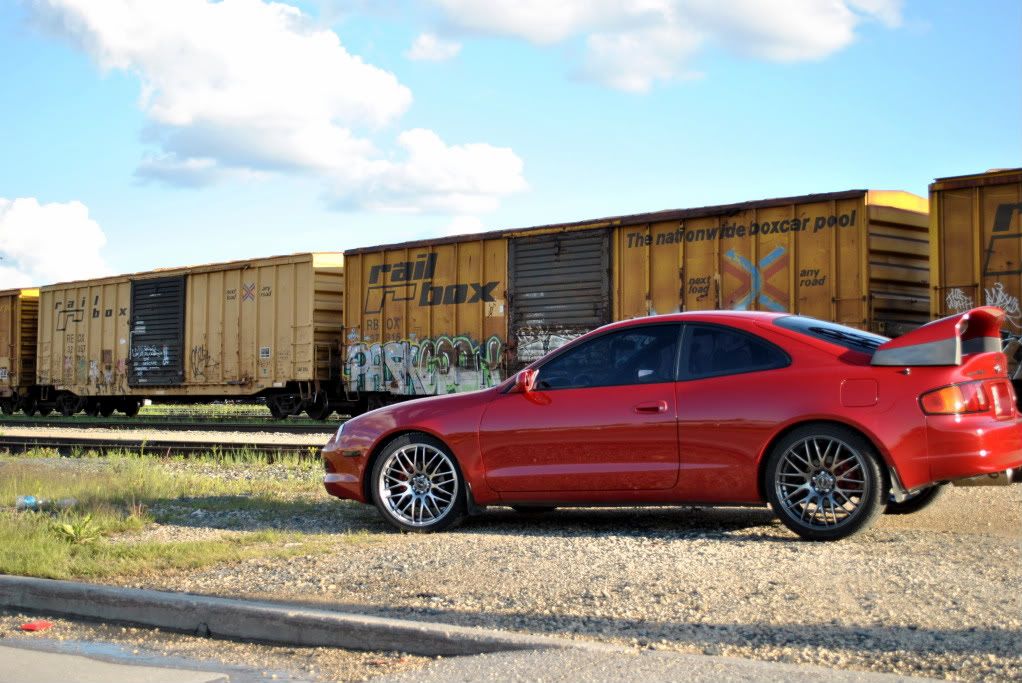
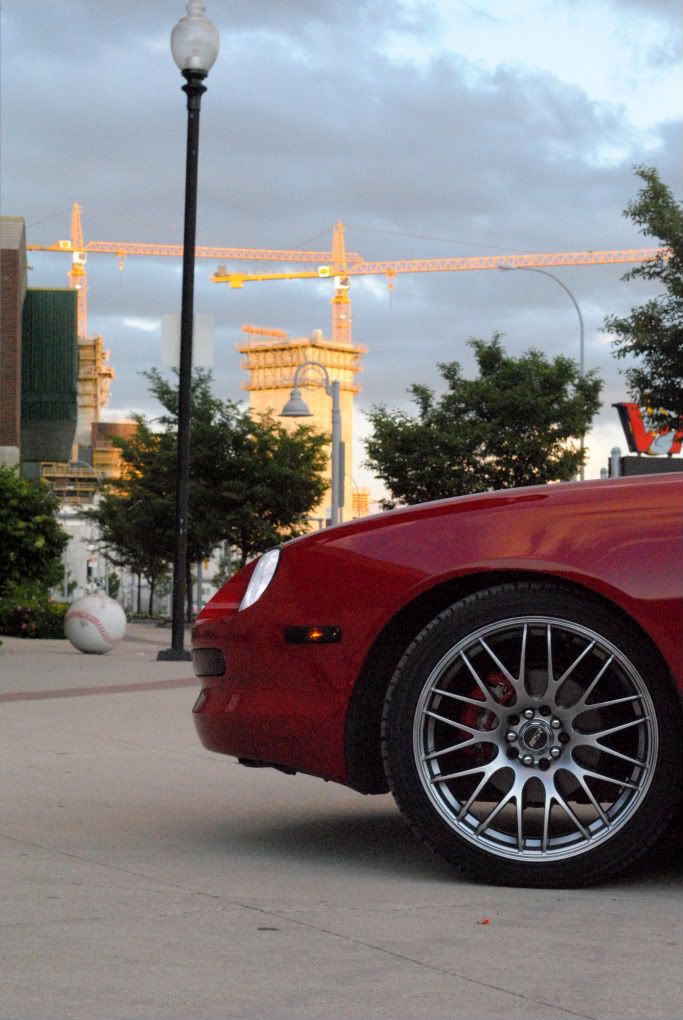
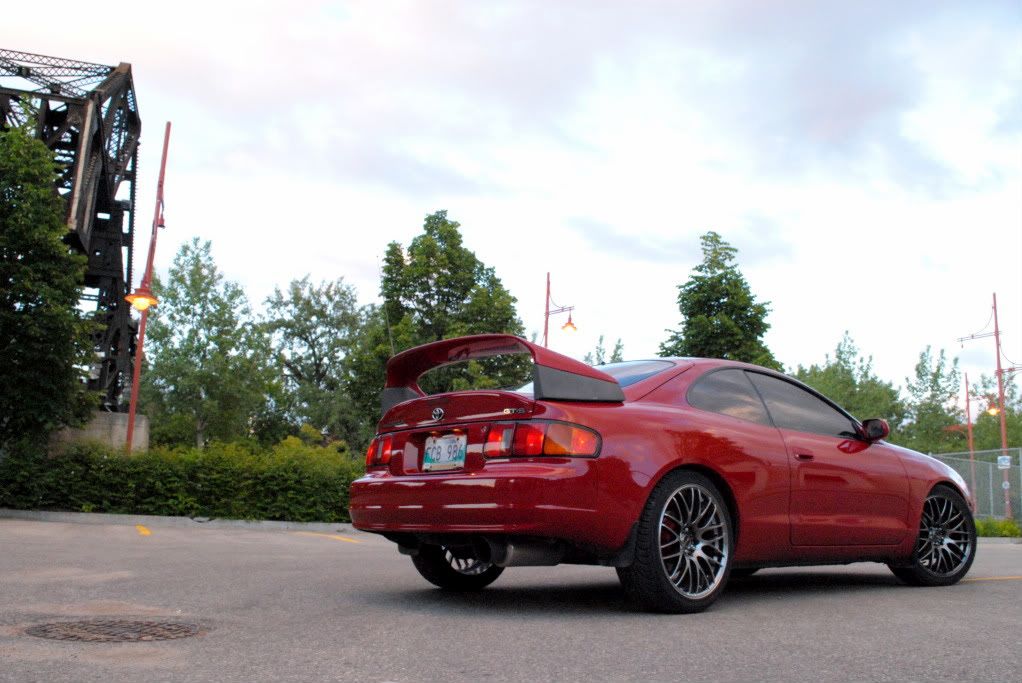
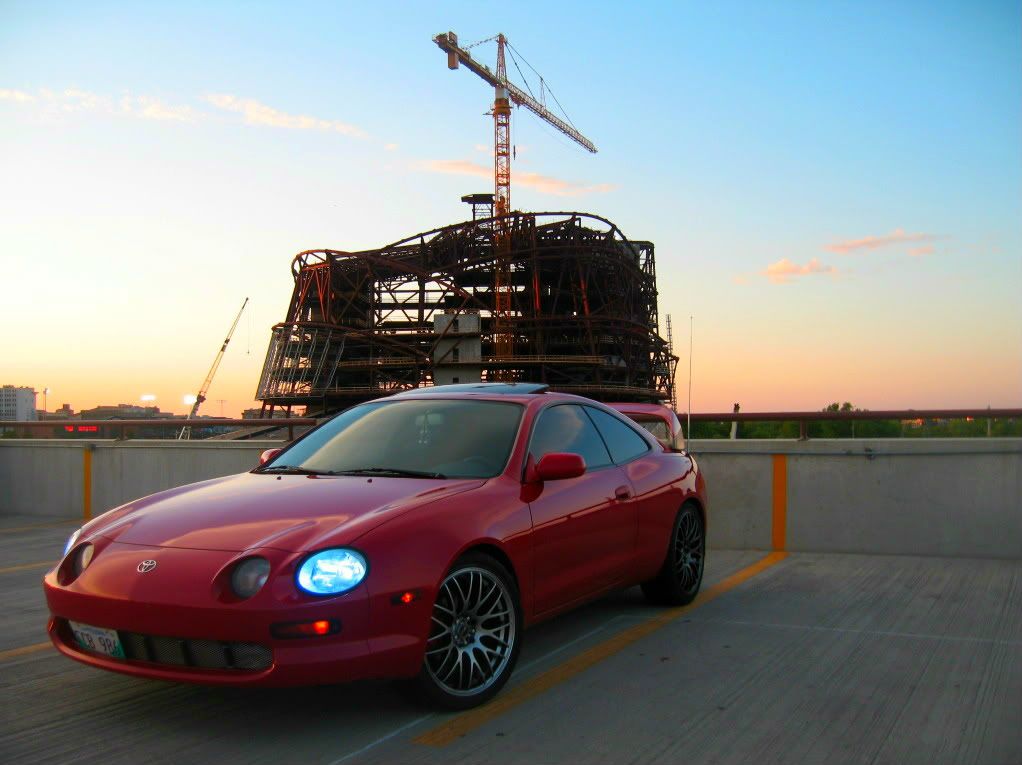
I know the one of the wheel with the crane is really blurry, But I thought it was such a great picture either then that, that I had to post it, haha. Anyways this is my car so far.
Comments are welcome.
Posted by: bhawk94 Jun 8, 2010 - 10:08 AM
Your wheels look really good with the stance of the car, but can I suggest removing the grill mesh? I think the car would be much cleaner without it.
Posted by: Goonter Jun 8, 2010 - 3:14 PM
Actually i think the mesh would look good black. Simple rattle can job
Posted by: jordisonjr Jun 8, 2010 - 4:22 PM
I think it looks wayy to open with nothing there.
Do you really think its that bad?
Posted by: Remy Jun 8, 2010 - 5:48 PM
You need the 94-95 OEM JDM/Euro fog lights it'll look soooo much better.
Posted by: bhawk94 Jun 8, 2010 - 7:06 PM
Do you really think its that bad?
I agree with you that it is very open, but putting a cheap piece of metal mesh in there doesn't help it look better. I feel that I can say this because I did the same thing a couple of years back, I even painted it black at one point. I realized a liked it much more without it. The OEM fog lights and/or a nice front lip would be better. In the end do what you want to do, after all it's your car

Posted by: Tigawoods Jun 8, 2010 - 7:22 PM
need to get a kit now. the car seems a bit too high for the rims and it would be hard to lower it any more than it already is ( i assume its lowered)
get some skirts and lips er somthing!
Posted by: jordisonjr Jun 8, 2010 - 7:48 PM
bhawk94: Yea I know what you mean by not wanting to put a cheap piece of metal in there lol. I only did it as a temporary fix, and I guess it sorta grew on me and I overlooked it. I can't really afford fog lights right now, ut it was a part of the plans eventually, but I do have some other things I would like to get on the car first that take prioirty.
Tigawoods: It is lowered on Tien S-Techs. Right now, I think I want to do some Trd front and rear splitters, and Trd or 404 skirts. I don't have the moeny for it now, but it is the plan for the future, but who knows how long that will last, I've changed my mind so many times already, so we'll see what happens haha.
Posted by: NGHTKD Jun 8, 2010 - 8:18 PM
I think it look gets great right now. ST205-esque style is the only that looks good without a kit. I'd just drop it a bit more. Good work!
Posted by: Euphoria Jun 8, 2010 - 10:13 PM
looks awsome! maybe some jdm tails and a facelift bumper or gt4 front 
Posted by: jordisonjr Jun 8, 2010 - 10:58 PM
Im not a huge fan of the facelift bumper, unless its got a full SS III kit, but I really like the prefacelift with trd front and back splitters, so I don't think I don't think i'd go with a facelift just cause its more money that could be spent else where on the car.
Posted by: zonz540 Jun 8, 2010 - 11:53 PM
The new wheels make a night and day difference, good choice. Now, drop it!
Posted by: Tigawoods Jun 9, 2010 - 6:31 AM
Tigawoods: It is lowered on Tien S-Techs. Right now, I think I want to do some Trd front and rear splitters, and Trd or 404 skirts. I don't have the moeny for it now, but it is the plan for the future, but who knows how long that will last, I've changed my mind so many times already, so we'll see what happens haha.
sounds like your on the right track! now make up your mind and get em! lol
Posted by: jordisonjr Jun 9, 2010 - 4:54 PM
zonz540: It's lowered on Tien S-techs, It just doesn't look as low cause the rims make the car sit high, but once theres skirts and lip it will look a lot lower. Unfortunatelly, the terrible roads in my city wil not allow me to have it slammed.
Tigawoods: My mind is pretty set on the TRD kit, but moneys an issue with paying for college and stuff. But hopefully it can happen soon!
Posted by: block Jun 9, 2010 - 10:16 PM
nice. i miss my red one. imo, best color for the celica.
Posted by: jordisonjr Jul 25, 2010 - 8:39 PM
Alright so I got a small update.
Ever since I got my rims on I've been hearing an awful clicking sound coming from the rear.
Found out that the endlinks were loose and it was movement in the sway bar causing the sound.
So I went to tighten up the endlinks, and they are basically stripped so i didn't want to tighten them anymore so...
I've ordered new Endlinks from twosrus and they are in the mail as we speak..
Posted by: jordisonjr Aug 4, 2010 - 9:57 PM
Installed the st185 rear endlinks.
Definately got rid of the noise from the rear end and Im pretty satisfied.
Camera is not uploading pics right not, so there will be some later on.
he ride is back to normal again, proformance wise there wasn't much of a change but I haven't really pushed it yet, and the links are also at the same length as the stock ones.
IM kinda confused on the length they should be for a car tha has been lowered. I've done some research and still can't figure it out, so if anyone wants to give some input, that'd be great.
Posted by: jordisonjr Aug 8, 2010 - 10:45 PM
Posted by: Ted95 Aug 8, 2010 - 11:18 PM
i noticed on the grill u made u have what looks like the tie wraps around the black bars, what i did with my mesh grill was take the black bar covers off, tie wraped the mesh to the bar then placed the cover over it, if u do it properly with the tie wrap lock facing the back of the car the covers will go on easy and it will look better, jus my input.
love the rims btw
Posted by: jordisonjr Aug 9, 2010 - 5:03 PM
Ted95:
Really? I didn't even know those came off haha.
I did it a long time ago, they used t be black but they faded a lot and are more visible now.
Do the covers just snap off?
Thanks for the input and I'm glad you like the rims haha.
Posted by: jordisonjr Aug 13, 2010 - 6:11 PM
Finally Got pics uploaded
here are the twosrus st185 rear endlinks: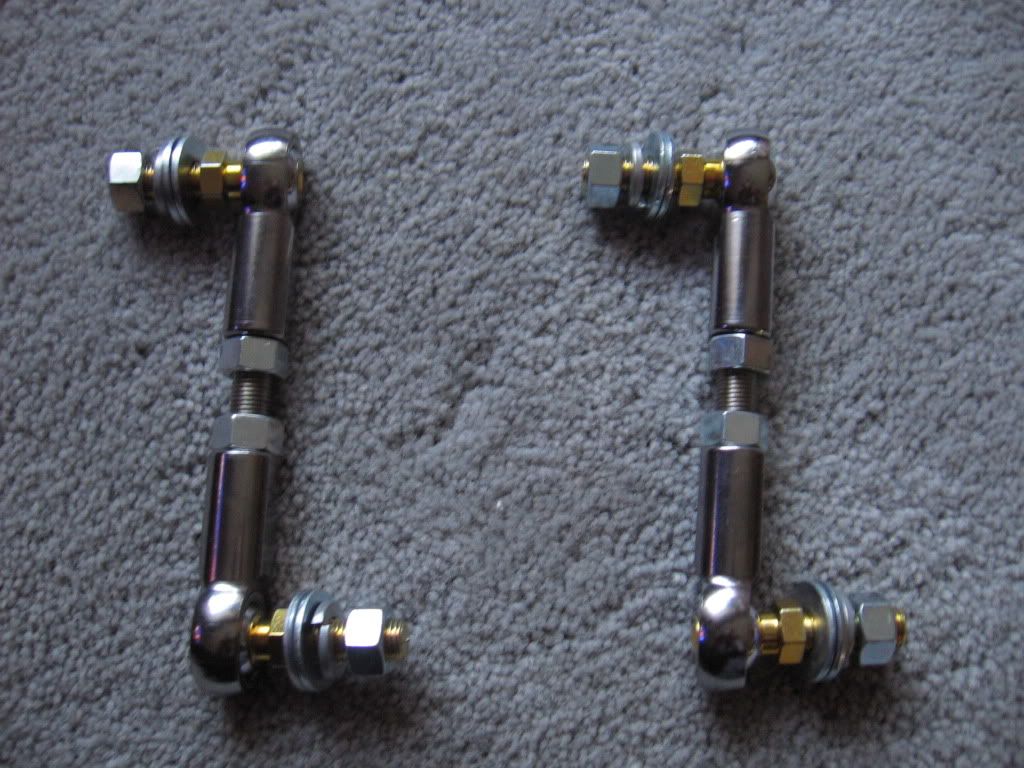
And installed:


Also working on repainting my gt four riser blocks.
The paint got taken off the day after i painted when I washed it
So there should be an update soon.
Posted by: jordisonjr Aug 13, 2010 - 6:29 PM
.
Posted by: jordisonjr Aug 22, 2010 - 7:05 PM
FINALLY, got the riser blocks re install after painting them once again.
Basically, had to keep redoing them becasue Im a perfectionist and kept finding flaws.
They still aren't perfect, but I redid them so many times that I got sick of it.
Pics: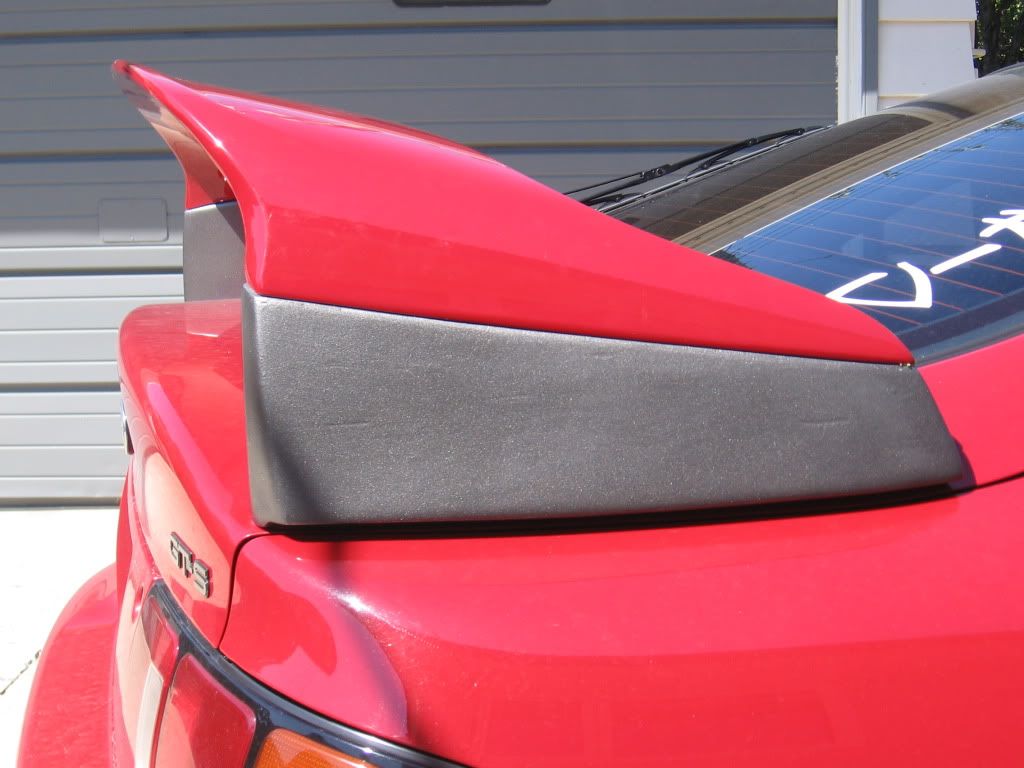
Posted by: Ted95 Aug 22, 2010 - 8:03 PM
Really? I didn't even know those came off haha.
I did it a long time ago, they used t be black but they faded a lot and are more visible now.
Do the covers just snap off?
Thanks for the input and I'm glad you like the rims haha.
ya they snao right off, then u can just slide them back on. i kno this because when i painted my car i took them off so thats how i found that out lol
Posted by: jordisonjr Aug 22, 2010 - 8:20 PM
Really? I didn't even know those came off haha.
I did it a long time ago, they used t be black but they faded a lot and are more visible now.
Do the covers just snap off?
Thanks for the input and I'm glad you like the rims haha.
ya they snao right off, then u can just slide them back on. i kno this because when i painted my car i took them off so thats how i found that out lol
Ha thanks man, I defiantely didn't know that.
Ill have to get that done soon haha.
Posted by: block Aug 22, 2010 - 8:27 PM
st185 endlinks fit on our cars? sweet. ill order some.
Posted by: jordisonjr Aug 22, 2010 - 9:30 PM
Yea those or the Miata endlinks from Racing Beat.
Although im not sure if the front endlinks from either fit out car.
I only got the rears
Posted by: azian_advanced Aug 23, 2010 - 12:03 AM
st185 twosrus fronts will work on our cars.. just not the racingbeat ones.
Posted by: jordisonjr Sep 18, 2010 - 6:27 PM
Quick cell phone pic
Posted by: jordisonjr Oct 7, 2010 - 4:17 PM
Well bad news.
The Celica needs a new clutch.
Winter's in a few months here, so its really not worth it for me to replace it now whennits just gunna go away for storage.
It'll be money spent on a winter car, and I guess we'll see what happens next year.
Posted by: azian_advanced Oct 7, 2010 - 9:16 PM
Winter driving in the celi is so much fun though.. and its way more comfortable than other cars I've driven. I might be the only 6gc in the city who drives through the winter..
What car are you planning to get for the winter?
Posted by: jordisonjr Oct 7, 2010 - 10:28 PM
Yea, I've done in once.
The reason for not winer driving it isn't because of the weather.
I snowboard, and my interior started to get really beat up the first winter I drove it, and its really inconvenient driving from spot to spot and having to remove my boots cause its 5 speed.
Always driving from rail spots around the city so its sort of a pain.
I also can't fit all the gear i need like lights and shovels and boards and people haha.
I'm not really sure what Im getting for the winter. I'm not to picky.
Looking for an auto four door, and preferably an import, thats not a piece of **** that i can keep for more then one winter.
Okay, maybe I'm picky.. haha
Looking to spend around 2000 ish cause I still got school to pay for and stuff.
Posted by: Euphoria Oct 8, 2010 - 8:41 AM
Its pretty crazy how much wear winter puts on your cars, even 25 year old cars here don't look like that underneath here in Australia.
Car looks great on the outside though!
Posted by: jordisonjr Oct 8, 2010 - 12:10 PM
Yea I know winer is really hard on cars, esppecially where I live.
Fortunately I'm prety sure i was the first to winter drive it because there is like 0 rust on it either than the doors.
And i've seen some 6gc's with some bad rust so I'm pretty lucky.
That was another reason I decided to stop.
And thanks for the compliment, but is still not at the look I want yet.
The mod bug has taken over, but school is more important ATM.
Posted by: Goonter Jan 20, 2011 - 4:43 AM
I actually drive mine. As far as i know Kloud is too. I saw his car the other day with no lip and sideskirts on it. Denley does also >.> TBH i think i've seen 4 6GCs that i dont know that drives theirs.
Posted by: jordisonjr Jan 20, 2011 - 11:33 AM
Yea I saw Kloud's recently too.
I dunno who Denley is, I didn't know there was others from Winnipeg aha.
I've also seen a few driving around too, but they were prety beat, and rusty. Mostly older people driving them.
I wish I was driving my car. I'm sick of a 4 door automatic cavalier with no sounds system haha.
Looking at pictures of the Celica doesn't help either.
Posted by: Goonter Jan 21, 2011 - 2:37 AM
I dunno who Denley is, I didn't know there was others from Winnipeg aha.
I've also seen a few driving around too, but they were prety beat, and rusty. Mostly older people driving them.
I wish I was driving my car. I'm sick of a 4 door automatic cavalier with no sounds system haha.
Looking at pictures of the Celica doesn't help either.
I've seen a matte black one witha veilside kit. and another black one at superstore on mcphilips, both in their 20's i would say. Denley is my close friend, he bought Azian's tom's lip for hit GT4. I'm torn between going back to the philippines for a month of selling my car to my GF and getting a GT4.

Posted by: jordisonjr Jan 21, 2011 - 4:18 PM
I've also have a potential buyer for my car so I can't ge a GT four. Hopefully the price is right though, and i just gotta fix the clutch first and we'll see what happens.
Does Denley have a legit GT four, or just the front end conversion?
If its a gt four is it black, cause I've only seen one gt four in the city and it was black. Its was the first and only time I've seen it, and I was daaammnn jelous, hahaha.
We should definately get a meet or a photoshoot goin this year, theres quite a few in winnipeg now.
Posted by: azian_advanced Jan 21, 2011 - 7:49 PM
yeah, denley has a legit st205 in red. denley let wynn (Goonter) and i drive it, and it was awesome.... i could only imagine him taking advantage of the traction on the 'four laughing at the rest of the fwd and rwd all going 10 below the speedlimit. but anyway there's also a black one (http://www.6gc.net/celicas/1994-gt-4-hatchback-11510) and another white gt-four which i've only seen once in the st. james area, so that's 3 st205's in winnipeg as far as i'm aware.
Posted by: Mycurse180 Jan 23, 2011 - 7:13 PM
Beautiful car man. Great taste.
Posted by: jordisonjr Jan 24, 2011 - 1:02 PM
Azian: Thats sick, Im hoping I can get a gt four this summer or next if the two potentials buyers for my car will come through.
Mycurse: Thanks man.
Posted by: Goonter Jan 24, 2011 - 6:58 PM
Theres 3 GT4s that i know of in the city. 1 is my buddy Denley, and the other two i met in AWD meet last fall. Ian an Ryan both black GT4s. i havent seen the white one yet. if all the guys i know of were to have a meet we'll have 7  . If the ones ive seen came we'd have about 10
Posted by: jordisonjr Jan 25, 2011 - 1:39 PM
I'd say that would be a pretty decent turnout. Gotta get my clutch fixed first though, if thats actually what's wrong with it, Im still not convinced..
Posted by: jordisonjr Feb 2, 2011 - 3:33 PM
My poor carcovered in snow for the winter
Got a huge snow storm so i figured i should clear it off, snapped a quick pic too.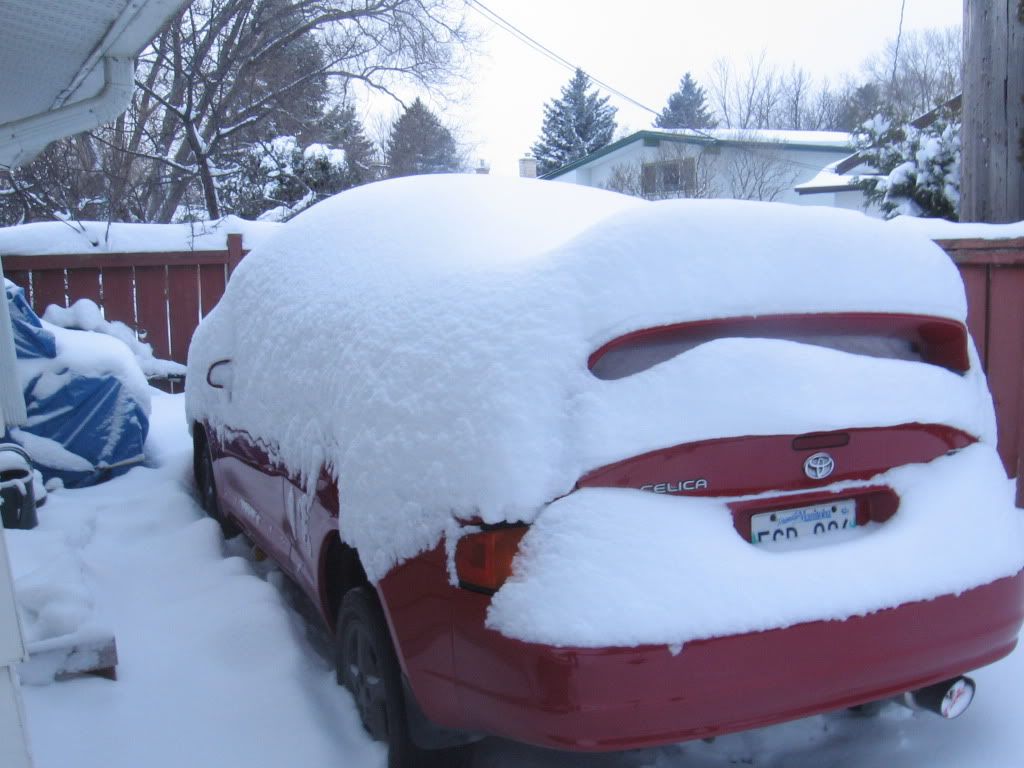
Posted by: delusionz Feb 3, 2011 - 3:30 AM
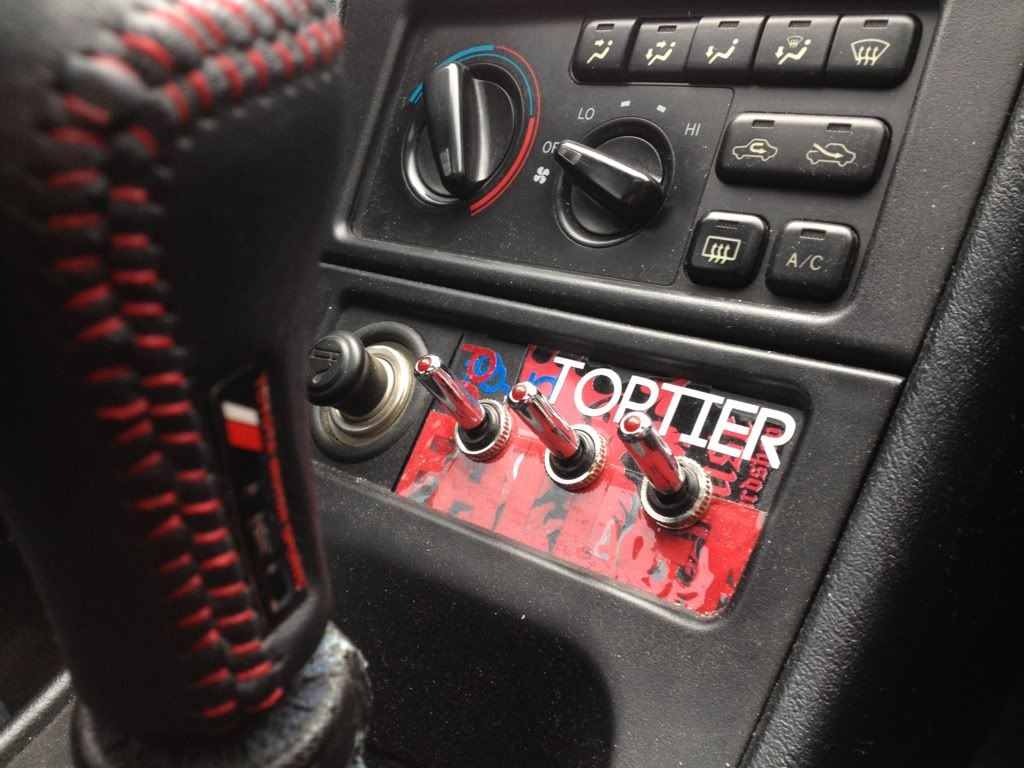
Do those 3 switches turn off individual lights?
I like what you've done with the air vents
I like your head unit too
Posted by: jordisonjr Feb 3, 2011 - 11:05 AM
Yea I have lights under the dash/seats, and then the ones in the vents.
One switch is for the vents and the other for the ones under the dash and seats.
I was gunna wire my amp to the middle one so I could turn my subs on and off but I didn't really get aroudn to it.
I didn't really use the compartment there so I thought why not throw some switches in there. Make it look a little cooler. If it was turbo'd I definately would have put gauges, or some other elctrical thing for the turbo haha.
I put those lights in a long time ago, I've kinda outgrown them but don't raelly want to go through the hassle to take them out, plus its in storage haha.
Posted by: Needles Feb 3, 2011 - 3:23 PM
Got a huge snow storm so i figured i should clear it off, snapped a quick pic too.
yeah u should clear it off cause it can damage your suspension if u leave all the snow there....
Posted by: jordisonjr Feb 3, 2011 - 4:58 PM
Yea i have been everytime it snows, thats just from one storm.
The car is on jackstands as well so it won't affect the suspension.
Posted by: jordisonjr Apr 3, 2011 - 11:01 PM
Been a while since last updated.
But winter is just about over now so some parts are coming in.
Order a clutch from lithiatoyotaparts.com, nothin' special just the OEM replacement, but the local delaership wanted 550 for parts alone, and I ended up getting it for 260 shipped, so I'm pretty happy with what I saved.
Next I just gotta find a shop to do it for a decent price.
Also will be getting a new battery in the near future, and reinstalling my subs, amp, deck, and HIDs back into the car, and she'll be ready to go again!
I can't wait, itd been a looooonnng winter.
Posted by: THE20V Apr 4, 2011 - 4:29 AM
I have to say, I really respect what you have done with your car. There's not many people who know how to tastefully mod a car on a budget without making it look cheap. But you sir have succeeded wonderfully. My hat goes off to you.
You have only done minor mods, but together, the car looks awesome.
Posted by: jordisonjr Apr 4, 2011 - 11:36 AM
Thanks a lot man.
Yea its hard for me goin to college, I come on this site daily, and everyday see something new I want haha.
There's a ton of stuff I wanna do to it but just can't afford right now.
I'd rather not do anything at all to the car and wait to do it right then put some cheesy parts on that will make it look worse.
I already get enough crap from locals about the riser blocks, but I like it haha.
But thanks!
Posted by: jordisonjr Apr 18, 2011 - 3:01 PM
FINALLY!
Came home from school to see this: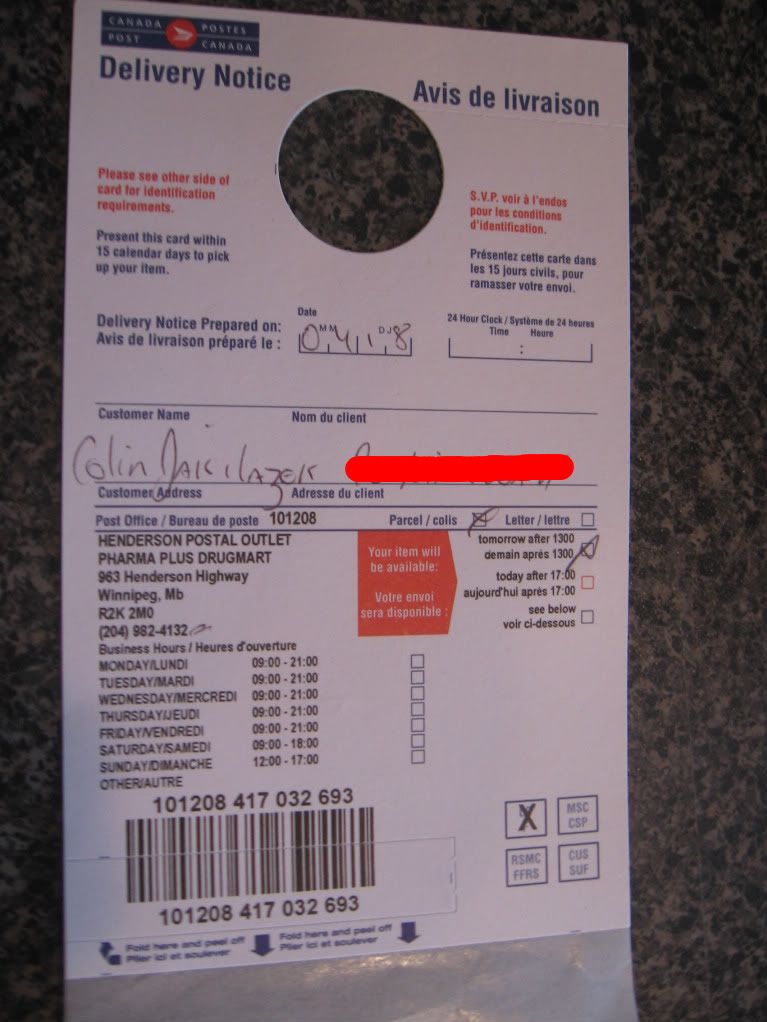
My clutch has finally arrived, so now I can buy a battery, and pull it out of storage and get the clutch in.
Unfortunately I missed the delivery guy, and I have to wait till tomorrow to pick up my new parts
Posted by: dudeofchaos Apr 19, 2011 - 11:39 AM
Sick mods nice man. You celica looks very good!
I have the exact same delivery notice in my car right now for my tune up parts. I can't wait but I went there 3 times and they said that my package was being suspended or something like that. Meaning it is probably held by the mail guy or whatever, lol. Still waiting to have my jdm tails and trs shift knob.
You should get the tail lights too man, it would give it a whole new sick look!
Posted by: jordisonjr Apr 19, 2011 - 1:01 PM
Thanks a lot man.
I know my next mod is gunna be either a header or jdm tails, i dunno what I can afford yet though.
Can't really afford a whole lot of mods this year cause of school, but Im getting a 45% rebate on my insurance, and just had a job interview at an engineering firm so finger crossed and maybe Ill be able to afford some new parts haha,.
Also just got a text from my buddy who works at the post office and they have arrived, so Ill be picking them up after class!
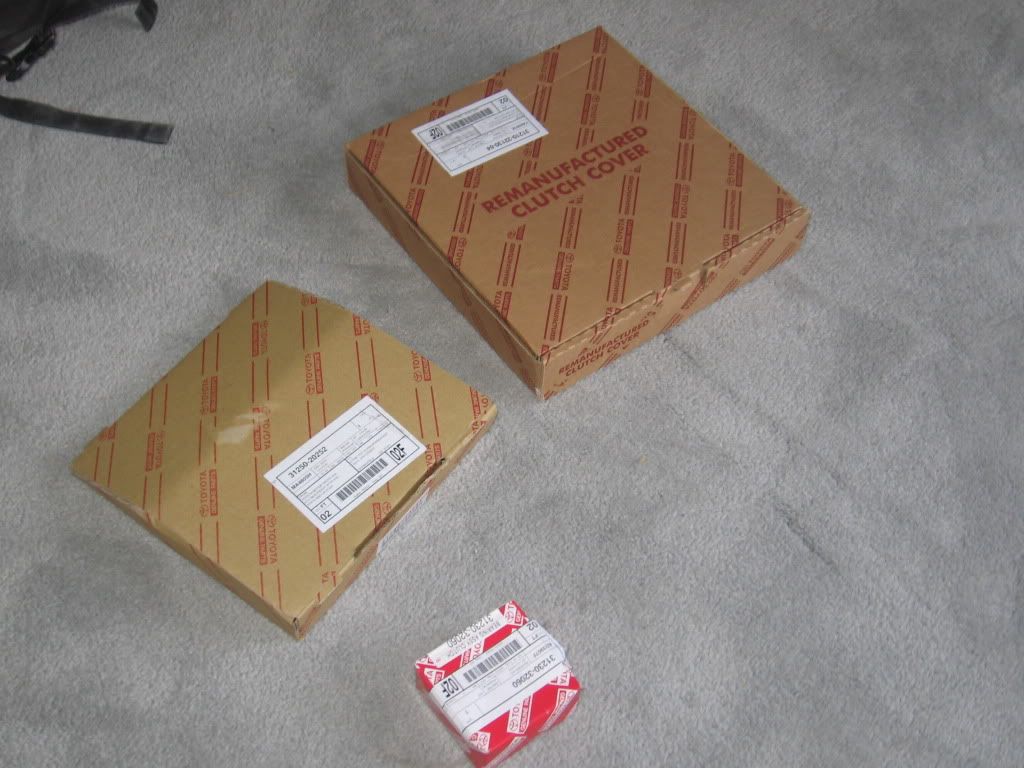
Posted by: jordisonjr Apr 19, 2011 - 5:58 PM
Wooooo got my parts!
Now all I need is a battery so I can pull my car out of storage and take it in to have the clutch installed.
Posted by: jordisonjr Apr 28, 2011 - 4:31 PM
Wooo just dropped the car off at the transmission shop.
Clutch is getting installed and it should be done sometime tomorrow!
So pumped.
Posted by: jordisonjr Apr 29, 2011 - 7:00 PM
Well today was a frustrating day.
Was supposed to pick up the car at 4, so I called just before i was gunna leave, and they said don't bother because they damaged one of the axle seals and needed to find a new one.
So I got a call about 45 min later and they said they found a seal, so I was off to pick up my car, halfway across the city.
Get there, pay for it, my ride leaves and I go to leave in my car. GO to take of and all I hear is clunk clunk clunk.
Got the car up on the hoist to see what went wrong(sounded like the axle popped out) checked it out and the axle was still in place and did not slide out.
SO they drove it on the lift and everything was fine, so they dropped it back to the ground.
Backed it out of the shop no problem, put it in first and clunk clunk clunk again.
Back on the lift, they tried to pry the axle out of the tranny and it wouldn't budge, But it still clunked and would not drive, as if the axle was out.
This was right before the shop closed so they said they'll look at it on monday.
Called my house, no one was home, called my dad who was my ride and he didn't have his phone.
So I sat outside the shop for 45 mins while I wanted for my buddy to pick me up.
Definately not impressed.
Posted by: Nartanian Apr 29, 2011 - 7:21 PM
Sorry to hear. Hopefully it gets resolved quickly. What clutch did you get?
Posted by: jordisonjr Apr 29, 2011 - 8:32 PM
Yea hopefully, Im thinking they just rushed puttin in the axle and something screwed up, but I guess I gotta wait till Monday.
I just got the OEM Toyota clutch, I don't see a swap or turbo being very feasable anytime soon anyways.
Posted by: jordisonjr May 2, 2011 - 8:29 PM
Picked the car up and I was super stoked. Got my rims on and the stereo re-installed and drove it basically all day... and then I heard more clunking.
Apparently I picked the worst trans and diff shop in the city because this is the second problem.
They ended up breaking one of the clips on the driver side axle so it would not go into the tranny properly.
But now the passenger side is clunkin, everytime I shift, hit a bump, or start pressing the breaks, and I know it has something to do with what they did.
I took a look at it, and I'm thinking it has something to do with the nut that bolts the hub in, because it was basically finger tight, and with no wheel on the lugs had about an 8th of movement within the rotor, which shouldn't happen. So I'm thinking they just forgot to tighten something, but I don't want to start messing around with things before I contact the shop, because then they could turn around and say you messed with it so we're not gunna touch it now.
Sonow I gotta wait till tomorow and talk to the shop, and hopefully this will solve the problem.
But I can say one thing, I'm very unimpressed and beyond frustrated.
Posted by: njccmd2002 May 2, 2011 - 9:34 PM
sorry bro, thats why DIY is better.
Posted by: jordisonjr May 2, 2011 - 9:44 PM
Yea definately.
Only thing is I had a cast on for 2.5 months cause I needed surgery on my wrist, so there was no way I would have been able to get anything done on it.
Definately wish I would have gone another route..
Posted by: opie_7afe May 11, 2011 - 8:53 PM
if your in canada i would keep yer celica as your winter DD and save up for a GT-4 as your legaly able to import/own them there......would be the best route and be less work needing to do a swap..... looking good though man keep it up!
Posted by: Needles May 11, 2011 - 9:32 PM
Now all I need is a battery so I can pull my car out of storage and take it in to have the clutch installed.
nice part !
Posted by: jordisonjr May 11, 2011 - 10:28 PM
looking good though man keep it up!Thanks man.
I've definately thought about it and looked into it a lot.
But right now its just not feasable for me money wise, with paying for college and everything, but maybe one day.
My parents are also really against RHD, especially my dad because of stories he has heard about his buddys helix and my buddies silvia, he doesn't believe that almost all of the parts froma USDM celica are interchangable.
And they co-signed for my car so I can't really argue with them right now, but who knows, maybe sometime in the near future, or if this motor goes out, or something major happens, I could do a 3sgte swap. I've just started reading about that swap for interests sake, so maybe one day haha.
But for now I gotta fix whats wrong with it before I can mod anything else like I planned for this year, Unfortunately.
Gotta love unexpected problems happening all at once..
Posted by: jordisonjr Jun 1, 2011 - 2:26 PM
Took it back to the shop, and they said there was nothing wrong with it, and that I could drive from Winnipeg to Calgary and back(over 1000km) and it would be safe 
So I took it to another shop adn they checkd over everything that the first place would have had had to touch in order to do the clutch, they said they couldn't find anything. They found that the front brake caliper was sticking so they cleaned it out and nothing.
The only thing they could think of was worn out bearings within the axle, but that they couldn't tell untill they pulled it apart.
They recommended I get a new axle, so I got it back, and the proble is still there.
The motor moutns and everything were checked and all other bushings and they were a little worn, but nothing that would cause that problem.
He said the only other thing he could think of would be the struts, beacause he had it driving good right after, and then when he took a u turn, there was a big bang and the sound came back. So he readjusted the spring within the strut and it drove good again, and then the same thing happened.
I knew the struts need to be replaced anyways, so I may as well give it a try, even if its not the solution, which Im hoping it is.
So I ordered some KYB gr-2's and KYB mounts all around.
Got all the parts, and got the two rear struts installed.
WHen I take teh front two out of the box, one of the struts does not rebound at all, So now I have to send them back and wait for a new one arrrive.
I also found out that the rubber spring insulators below the spring were completely torn up, so I ordered those today.
And I'm really hoping this solves the problem, because my car has been sitting on jack stands since before winter, and I'm really anxious to drive it.
The two days of driving it after the clutch was done was such a tease.
Posted by: PolliS_5S-FE Jun 1, 2011 - 6:17 PM
Suprising how these problems always just "seem to happen" after a shop has it aye. One of the many reasons i always try to do things myself as you never really know how much effort theyve put in or if they botched something up and decided to say nothing about it. Bearings are a good exaample of this. I understand in your case you werent able to do it with your wristthough
Posted by: Needles Jun 2, 2011 - 5:17 AM
i had clunk sound on my celica before my swap, i didnt know what that was, my front crossmember was broken, but as i get going i notice a big loose in the driver side spendel, (this some kind of cylinder that can pop out slowly and need to be replace it become loose, i changed all the assembly, from shock to the tab and no clunk no more for me, if that can help
Posted by: jordisonjr Jun 2, 2011 - 9:26 AM
Yea I know exactly what you mean.
I try to do as much as I can as well but sometimes theres things you just can't do.
Although the part that really frustrates me is that no one can really tell me what is wrong with it.
The second shop checked over absolutely everything in the front end, and couldn't find anything really out of place, or that the first shop did wrong.
So what I think happened is that something was worn out, but not enough to make noise, and when the clutch got done, it got distrubed, causing it to make noise once reassembled, which would have happened regardless of where I took it.
I'm really hoping that replacing the struts will fix it, cause if not I'm kinda back to square one not knowing what is causing it.
Althought it will be quite the wait, because Ill have to ship the damaged strut back and wait for the new one to ship out which could take a while.
Although I contacted KYB and they said that the shaft could have dried out or developed some surface rust during shipping and that I should put a bit of lubricant or oil on the strut, and that may cause it to rebound normally again.
So I'm gunna try that tonight after work and hopefully that will do something, which would be really awesome if that did solve the problem.
Posted by: NYp8tBaller07 Jun 2, 2011 - 10:56 AM
man sorry to hear that, hope you get the car in order =)
Posted by: jordisonjr Jun 2, 2011 - 11:19 AM
Thanks I hope so too haha.
As soon as the the rubber spring insulators get here i can atleast put one of the front stuts on, and then i would be able to tell if my problem is solve, cause the noise is coming from the passenger side.
I ordered them yesturday though, so it will be a couple of days.
Posted by: jordisonjr Jun 2, 2011 - 10:04 PM
Finally something good.
Contacted th seller of the struts and he's going to exchange them as long as i pay to ship the bad one back, but he's going to pay to ship the newone to me.
Posted by: jordisonjr Jun 3, 2011 - 2:43 PM
Awesome, more good news!
Toyota just called me and said that the spring insulators I ordered just arrived.
Mine were completely shot, and thats why I could only get the back struts on.
But now that they have arrived I can atleast get one front strut on, and then I just gotta wait for the last one to come in the mail.
Theres also a meet tonight close by, so if I can get it done by then I can atleast drive it there and back.
Posted by: jordisonjr Jun 3, 2011 - 7:24 PM
Well I should have saw this coming.
Put the new strut and spring insulator and mount on the passenger side which was the one making noise.
And sure enough, it still makes the sound.
I have no clue what it is.
Although the rotor on the passenger side can move in and out about 1/4" when the wheel is off, and the driver side doesn't move at all, so I'm thinking that may be the problem.
Posted by: jordisonjr Jun 5, 2011 - 11:51 AM
Any one got any ideas?
Help would be great.
Cause I have absolutely no clue what it could be.
Posted by: jordisonjr Jun 6, 2011 - 11:32 PM
So me and a buddy crawled under there today and were pretty determined to figure out what it was.
We pryed around at the bushings and didn't really find much and were pretty stumped.
So we put the wheel back on and dropped the car, and tried to make the car clunk again just by moving the wheel forward and back by hand.
We managed to make it clunk, so one of us clunked the wheel while the other looked, and we found that the rear bushing on the lower control arm was the culpret.
Everytime it would clunk, the lowere control arm was pivoting forward about an inch or so forward and back, so I guess when the break is applied it puts a force on the LCA which caused that clunk only at initial breaking.
I find this kind of odd, because the noise was not there before the clutch was replaced, and after it was one the clunk was present. I'm thinking mayb just having them working around the front end agitated the already worn out bushing enough to produce a noise.
The other thing that kind of pisses me off is that the second shop could not figure it out, because they said they checked all the bushings and that some were a little worn, but couldn't produce that noise, and made me go and change the struts and the axle. Now I know the struts needed to be changed, but to have to change the axle when it was not needed was quite the waste of money, so now I have a perfectly good axle sitting in my garage.
But on the other hand, i had been looking into the poly urethane bushings from gt4-racing.eu already, so now I have the chance to upgrade, and hopefully my car can be back on the road ASAP.
Thanks for everyones help, I appreciate it alot, I dunno what I'd do without 6GC.net, I've learned so much already ust from reading.
And If anyone is looking for a GT passenger side axle, I may sell it for the right price.
Posted by: NYp8tBaller07 Jun 6, 2011 - 11:43 PM
thats great that you found the problem =)
Posted by: jordisonjr Jun 7, 2011 - 9:51 AM
Yea, its too bad I had to dump all that cash into it, but at least it was fixing one thing that already needed to be done haha.
Posted by: NYp8tBaller07 Jun 7, 2011 - 10:01 AM
yea im going to have to get new suspension soon, thinking of progressive springs and new struts
Posted by: RabidTRD Jun 7, 2011 - 12:24 PM
I have the same problem with my 94. It's that bushing at the base of the rear adjustable control arm. Both sides clunk when I go over bumps. Dealer wants $300 for both sides, so I just have to come up with the money.
Posted by: jordisonjr Jun 7, 2011 - 1:16 PM
I just called Toyota and its even more in Canda.
ITs 256 per side, for each control arm.
They don't sell teh bushings separately.
Your better off to just get the poly urethane bushings for 100 bucks, and put them in.
Even if you ahve to apy someone to do it, it will probably be cheaper than buying new control arms and installing them yourself.
I'm planning to get teh Poly urethane bushings, ASAP, and Ill try to put them in myself with a buddy.
It doesn't look too difficult
Posted by: RabidTRD Jun 8, 2011 - 10:15 AM
Does energy suspension make bushings for them? I would totally do that. That way I wouldn't have to get an alignment. I already have the bushings for the sway bars by energy.
Posted by: jordisonjr Jun 8, 2011 - 10:50 AM
I'm pretty sure they don't.
As far as I know there is only one person who makes them.
Theya re polyurethane bushings, so it will improve your suspension as well not just make it stock.
But I just ordered mine from here: http://www.gt4-racing.eu/index.php/toyota-celica-at200/suspension-bushes Because thats what most of the other members are using and I've heard good things.
And I couldn't find anywhere else that had them.
Posted by: RabidTRD Jun 9, 2011 - 9:51 PM
Wow thanks for that link. That'll help for sure.
Posted by: jordisonjr Jun 9, 2011 - 11:20 PM
Yea no problem man.
I just found it myself actually. ordered from them on tuesday:)
Hopefully I can tackle the task of installing them myself.
The most work i've ever done on my car was lowering it.
Posted by: jordisonjr Jun 15, 2011 - 12:33 PM
Well the car is basically ready for the strut and the bushings to be installed, just have to remove the control arms, and wait for the parts to get here.
Unfortunately, Canada post is on strike and only deliver a couple of days of the week ATM, so hopefully it doesn't take too long for the bushings to get here..
Posted by: azian_advanced Jun 15, 2011 - 8:59 PM
We're almost half way through the summer and you haven't driven your car yet? ouch. It seems like there's always one problem after another. Well goodluck with the repairs. Hope you get the car back on the road asap.
Posted by: jordisonjr Jun 15, 2011 - 10:11 PM
Yea its been a nightmare.
Just one thing after another, and its all been out of my control.
Shouldn't be a problem gettin it done, as long as nothing else comes up once its done..
Posted by: Needles Jun 16, 2011 - 6:39 AM
when its happen to me whit my old 5gc 1991, (paid 300 buck) i didnt want to spend money , so i fix it for 0$ in 10 minute, putting whit hammer some little nail inside around the bushing, and cut some rubber in circlev( buy strap rubber and cut it) and put it on the back of the bushing and put back the bolt whit some washer to push the rubber , it will affect the movement if you tightened too much, but
pro- its work, no shaking no more
cons- u lose comfort and stability, since its metal to metal, and no more bushing
but u feel more the road from the rear, not a big difference for normal driving,
u have keep the wheel centered to keep alignement- tough (u can change the alignement later whit some more pin inside the bushing
but i wont suggest to do that,
but for someone who dont have money or want to fix it now, it can help
that least on my old celica till she died
Posted by: jordisonjr Jun 16, 2011 - 9:09 AM
You want me to put nails in my bushings?
No thanks.
I don't want to ghetto rig my car like yours..
Posted by: jordisonjr Jun 17, 2011 - 11:50 PM
A buddy came over tonight to give me a hand.
On the driver side we got every bolt out for the lower control arm, except we ran into the endlink dilema.
Could not get the end link off, so we moved to the passender side.
On the passenger side, there was no problems with the endlink, except the bolt on the control arm that threads into the sub frame (19mm), came out about an inch and will not come out any farther by turning it with a wrench.
It started to rain, and I don't have a garage to work in so we had to call it quits.
With the endlink, I tried using the allen key method and a wrench, and the allen key started to slop so I left it so it didn't strip.
We then tried to hold it with a vice grip and turn it with a socket/wrench, and it didn't budge.
I want to avoid having to cut the endlink at all costs, cause I can't afford new endlinks right now.
If I do have to cut it, is it a harm to drive the car without the front sway bar hooked up for a while till the endlinks came in the mail?
Not sure what to do with the last control arm bolt, has anyone else ran into this problem while removing their lower control arms?
Posted by: azian_advanced Jun 18, 2011 - 7:46 AM
it's ok to drive without the front sway bar hooked up but you will have to drive slowly through turns and avoid large bumps while avoiding sudden movement with the steering wheel to avoid body roll. a temporary solution would be to get some wire and loop it through the sway bar and control arm several times, but you'd still need to buy a pair of links asap if you do.
Posted by: jordisonjr Jun 18, 2011 - 10:56 AM
Yea, I'd just be thinking about driving it like that while waiting for endlinks to get here. and I twould only be on the driver side, because we managed to get the passenger side off.
I'm still gunna give it another shot today later on after the car show.
Posted by: jordisonjr Jun 19, 2011 - 5:14 PM
Quick update.
Thanks to Batmans advice, I was able to remove the control arm from the passenger side, and got one of the bushings out.
Now I just gotta torch what's left of the bushings, and then wait for the new bushings to arrive.
And figure out how to save my endlink on the driver side.
Posted by: Batman722 Jun 19, 2011 - 6:45 PM
good job man.
Posted by: jordisonjr Jun 21, 2011 - 1:53 PM
Woooo!!
While I went to get a torch to remove the remainder of the bushings from the passenger side control arm, somehow my dad got the driver side endlink without cutting it.
So last night I finished everything I could do; I removed the driver side control arm, and forced the bushings out using a drill, hammer, and a propane torch.
Just have to wait for the bushings to get here and then I can finish the job off.
I just wish Canada Post wasn't on strike right now..
Does anyone know if the control arms will be just as difficult to get back into the car as they were to remove?
Posted by: RabidTRD Jun 21, 2011 - 3:11 PM
They will be harder. Your best bet is to bring it to a shop with a press and have them press them in. If you have a shop like Advance Auto Parts, we have a loaner tool program and you can try using the rental press... but idk if it'll work.
Posted by: jordisonjr Jun 21, 2011 - 3:23 PM
Im talking about gettin the control arms mounted into the car, not the bushings into the control arm.
I'm already expecting to have some problems getting the bushings into the arms, but Ill give it a shot myself.
Posted by: Batman722 Jun 21, 2011 - 6:51 PM
make sure you get the metal ring out of the arm bushing holes. Use a dremal or something to cut just the ring, then use a chisel and hammer to pop it out. Getting the bushings in is easy, use a vise and don't be shy on the lube.
Getting the arm back in is 100% easier then taking it out.
Posted by: jordisonjr Jun 21, 2011 - 7:37 PM
Do you mean a metal ring that would sit on the outside of the bushings, but the inside of the control arm(hole for the bushings)?
Me and my dad were looking at it, and I couldn't figure out if there was a ring in there that had to be removed or not.
EDIT
Just took a look at it and I do have to remove that ring.
Is a dremel strong enough? or could I use something like a wire wheel on a drill?
Do I have to worry about the inside of the control arm getting scratched/marked up from removing that ring?
And is this ring only on the larger diameter bushing that mounts to the chasis?
The smaller diameter one did not require a torch, i was able to just pound that one out with a hammer
Posted by: Batman722 Jun 21, 2011 - 8:04 PM
both rings should came out (the small with the bushing as you know), just take the ring out of the big hole, don't worry.
I used a sawz-all but I was careful, I wouldn't reccomend using one because you can damage the bushing hole.
Just get the ring out, the bushing fits better without.
Posted by: jordisonjr Jun 21, 2011 - 8:08 PM
Do you think a hammer and large flat head screw driver would get it out?
Without causing damage to the big hole
Posted by: 95gtschick Jun 28, 2011 - 3:26 PM
so have you fixed it up yet? hopefully you'll be able to drive it soon!!
Posted by: jordisonjr Jun 28, 2011 - 4:07 PM
Not yet, because Canada post just felt they had to go on strike as my parts were in the mail.
My car is sitting on jack stands with a missing strut and no control arms.
Hopefully they will be here soon.
Then I can get them on, and allignment done and FINALLY get it going again.
Can't believe I ahve only driven it once in the past 6 months,
Posted by: 95gtschick Jun 28, 2011 - 4:24 PM
they're back to work today!!! hopefully you get your parts soon.
Posted by: jordisonjr Jun 28, 2011 - 6:36 PM
haha yea I've been watching it like a hawk lately, but apparently it may take up to a week to clear the back log, but I'll keep my fingers crossed
Posted by: RabidTRD Jun 28, 2011 - 7:33 PM
It's going to be like christmas when it comes! Good luck!
Posted by: jordisonjr Jun 28, 2011 - 8:10 PM
You sure got that right!
And thanks
Posted by: Batman722 Jul 22, 2011 - 10:25 AM
update ?
Posted by: jordisonjr Jul 22, 2011 - 12:41 PM
Haha, just a little ahead of me.
Well after a **** load of frustration and waiting, its FINALLY driveable.
The lowere control arm bolts were stripped so I just order some new botls from toyota and they worked fine.
So I got it all together last night and it rode good.
However i am still getting a clunk sound similar to blown struts coming from the rear, even though I changed the mounts.
This is what I replaced: http://cgi.ebay.ca/KYB-Rear-Strut-Mount-/390332582114?pt=Motors_Car_Truck_Parts_Accessories&fits=Year%3A1995%7CModel%3ACelica&hash=item5ae1a288e2 in the front and the rear, along with all 4 struts.
I'm thinking maybe there are some other componants of the mount that should have been replaced as well?
Either than that the car runs pretty good, and i'm pretty satisfied I finally ahve it done, I thought this time was never going to come haha.
Posted by: RabidTRD Jul 23, 2011 - 7:36 PM
Are the KYB's cartridge type? Did you get struts or the shock insert? If it's the insert, make sure the holding device is tightly secured. Sometimes the nut on top (or bottom like in my Koni case) is coming lose and makes a horrible sound.
Posted by: jordisonjr Jul 24, 2011 - 2:16 AM
I got the full struts.
So All I had to do is take my old ones out and put the new ones in, not just cartriges.
Posted by: jordisonjr Aug 4, 2011 - 11:19 AM
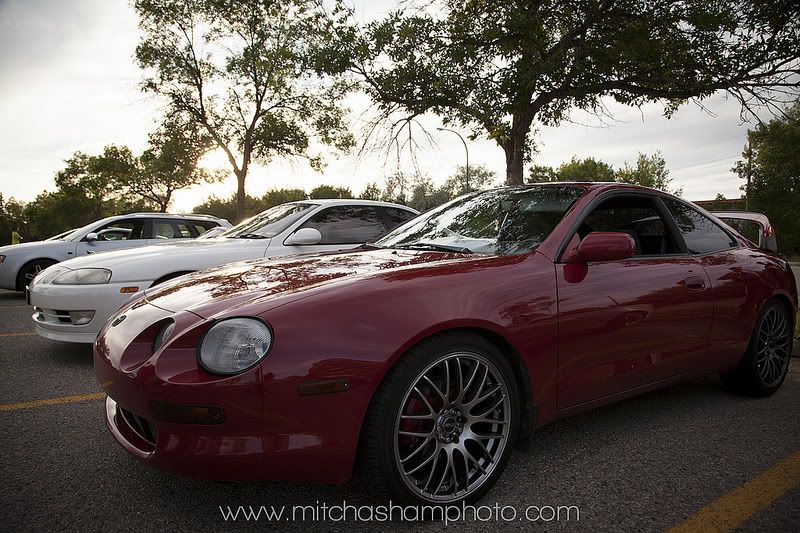
Washed the car up quick today, and snapped a couple pics with my sisters crappy point and shoot.
Didn't really know what I was doing so I just threw it on auto haha.
Some are pretty dark, put osme turned out pretty good IMO.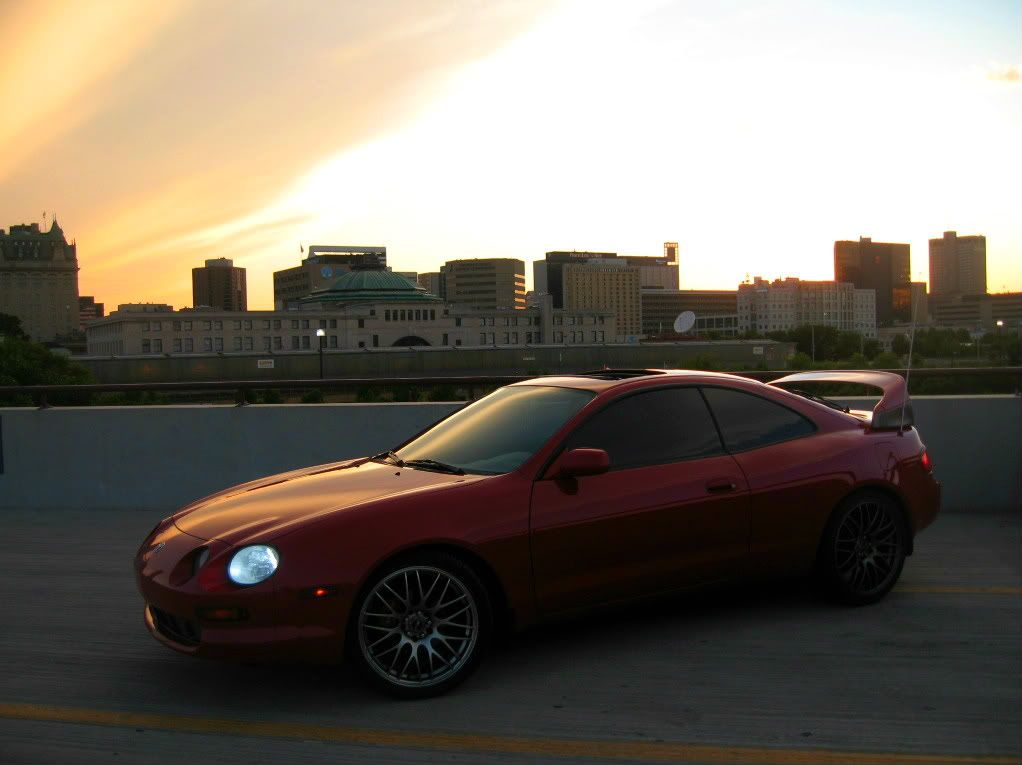
Car is in need of a good wash/clay bar/wax, which I might get around to this weekend depending on the weather.
Any tips/opinions welcome.
Posted by: jordisonjr Aug 23, 2011 - 3:56 PM
Couple more quick shots
Posted by: Goonter Sep 27, 2011 - 11:24 AM
Sell car -> GT4!!!
Posted by: jordisonjr Sep 27, 2011 - 1:23 PM
haha believe me.
I've considered it a lot.
I don't think I'd get nearly what I paid for the car if I sold it though.
I've had it up for sale for a bit and had absolutely no response on it.
Posted by: Goonter Sep 27, 2011 - 2:37 PM
Damn. i just got lucky i guess.. The GT4 is just a whole new car. it's ridiculous. You lose a bit of your gas mileage for something so much more. Replacing parts WILL be a bit more of a hassle than our USDM counterparts but its still just a couple days difference cause of shipping. But i definitely love mine. Kinda sucks though since im in university and it gets kinda costly paying for a car and university at the same time
Posted by: jordisonjr Sep 27, 2011 - 4:22 PM
Yea, i paid way too much for my car, because i didn't really know anything about it at the time, or what it was worth.
If I would have known I could have gotten a gt four for not much more, i definately would have done that.
But I guess you live and learn.
But the whole VIU thing kinda turns me away from bringing one over, and the fact that all of my friends with jdm/rhd/turbo'd cars have had nothing but problems with them.
Either they run like ****, or have a hell of a time trying to find parts.
Posted by: jordisonjr Sep 30, 2011 - 9:31 AM
Cars back on the road again.
That weird revving problem that started a year ago and took me on a wild ride through numerous parts, turned out to be the distributor like some had said.
Thanks to Stephen_lee for selling me his used distributor, saved me quite a bit of money, toyota wanted like 500 bucks for a new one.
6gc.net comes through again, and helps me solve all my car issues
Thanks guys!
Posted by: RabidTRD Sep 30, 2011 - 10:24 AM
What the heck is that monster in the back of your photos?
Posted by: jordisonjr Sep 30, 2011 - 1:05 PM
Lol what monster?
I don't see anything.
Posted by: RabidTRD Oct 2, 2011 - 9:56 PM
Didn't really know what I was doing so I just threw it on auto haha.
Some are pretty dark, put osme turned out pretty good IMO.
Car is in need of a good wash/clay bar/wax, which I might get around to this weekend depending on the weather.
Any tips/opinions welcome.
Looks like some kinda torture rollercoaster
Posted by: jordisonjr Oct 3, 2011 - 9:17 AM
Ohhhh that hahaha.
Its a museum of human rights that is currently under construction.
Its p[robably one ofthe weirdest buildings in our city, or will be when its completed.
It would probably be a lot easier to tell if I had a better camera lol
Posted by: stephen_lee Oct 4, 2011 - 8:05 PM
That weird revving problem that started a year ago and took me on a wild ride through numerous parts, turned out to be the distributor like some had said.
Thanks to Stephen_lee for selling me his used distributor, saved me quite a bit of money, toyota wanted like 500 bucks for a new one.
6gc.net comes through again, and helps me solve all my car issues
Thanks guys!
NP bro. Glad it worked for you!
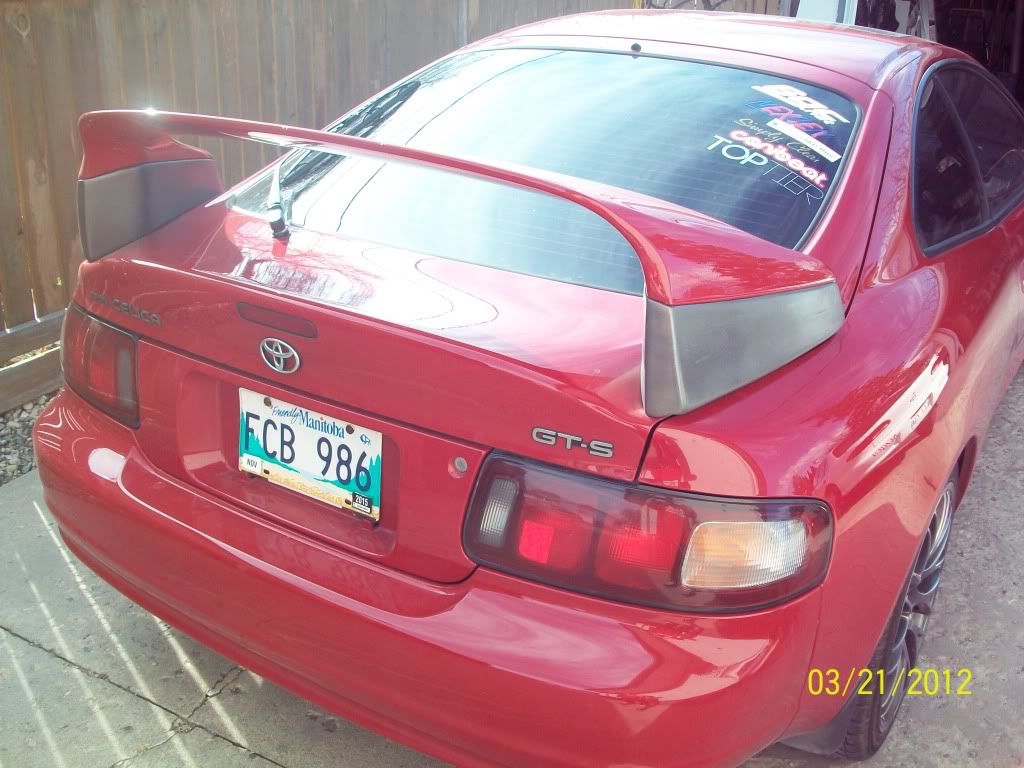
Posted by: jordisonjr Mar 20, 2012 - 8:00 PM
Aquired some JDM Tails, and an Apexi ST205 strut bar!!
Jdm tails are in, not sure if the Strut bar will fit yet, so if not it'll be for sale shortly.
Pics soon to follow.
Posted by: jordisonjr Mar 21, 2012 - 4:50 PM
Posted by: ricochet1490 Mar 25, 2012 - 6:09 PM
What wheels are those if you don't mind me asking?
Posted by: jordisonjr Mar 25, 2012 - 7:29 PM
They're MSR 0457 18x8 +35
I recently realized they look similar to BBS LM's without a step lip, not sure if they are suppose to be replicas or what but they have the similar spoke style.
Posted by: bruiseboy2 Apr 14, 2012 - 10:55 PM
get honda s2000 stub antenna so your car doesnt like like a remote control car anymore. Maybe wrap the riser blocks in C/F. this is one beautiful celica though, they rims sit nice. One question though, does the car feel kinda strange on those rims? Meaning does it seem slower acceleration and loss of handling or on the contrary. I have heard of some people putting too large of rims on 7th gens and losing a **** ton of handling. all and all sweet ride
Posted by: jordisonjr Apr 14, 2012 - 11:22 PM
Thanks man I apprecaite it. I feel like my car isn't special cause all the cars I roll around with are RHD, trubo'd, or SLAMMED lol.
I've thought about wrapping in carbon Fibre, but I'm not really a fan of the vinyl wrap on the exterior, and I think I would do a poor job of making it look nice, so Im probably just going to leave it for now.
I'm pretty happy with how it is right now though, although it coudl use some sideskirts, but can't really afford (or find them haha) right now. I've also thought of doing the s2000 antenna but kind of got sidetracked haha. I think to keep it simple, I would just unplug the motor to the antenna or something to keep it down, because I don't really use the radio, so that sort of solves the problem.
As for the wheel thing, I didn't really notice much of a difference at all. I drove on the stocks about a month ago and when I switched over to the 18's again i didn't notice much change at all, but it could have something to do with the width as well.
Thanks for the compliments!
Posted by: bruiseboy2 Apr 16, 2012 - 8:37 AM
yea no problem. Thats what I ended up doing was just undo the motor to it. Man I wish I had a less rusted out celica. Damn north east.
Posted by: jordisonjr Apr 16, 2012 - 12:33 PM
Yea these cars are really bad for rust, I got really lucky when I bought mine as it has none at all.
There's a little bit of rust on the bottom of the doors on the inside, and a little spot near the wind shield but thats about it.
Posted by: JohanFer Apr 19, 2012 - 3:41 AM
I like what you did to your car. It has inspired me to start a thread of my own in case I start and continue with my project car.
Posted by: jordisonjr Apr 21, 2012 - 4:02 PM
^ Thanks man.
Just got my Poly Urethane Rear Sway Bar bushings from Energy Suspension.
Just gotta find some time to put them in.
Side note:
-Another Local Meet
Posted by: jordisonjr Apr 28, 2012 - 7:48 PM
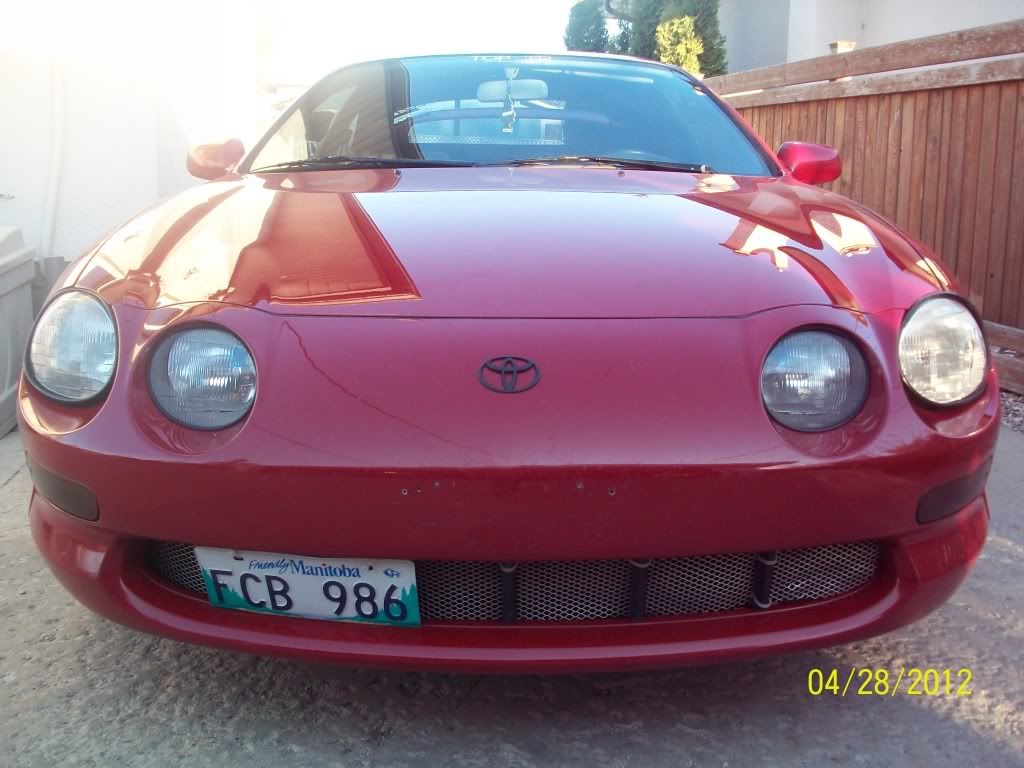
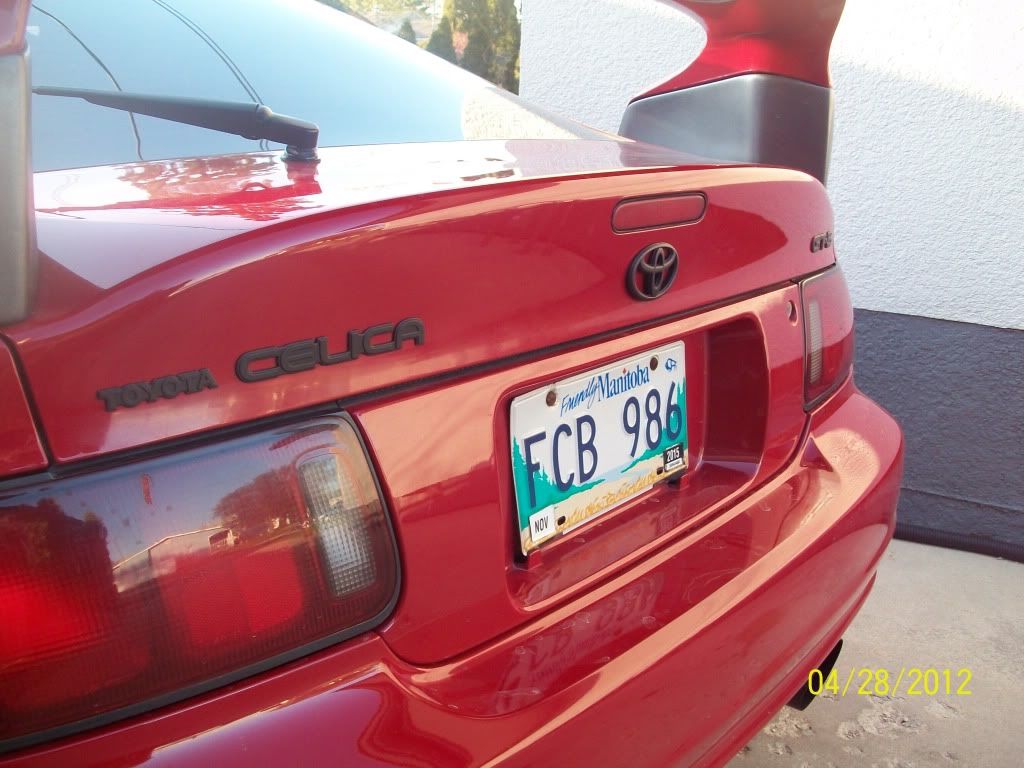
Blacked out the front and rear emblems using Plasti-dip to follow suit with the black/red theme I got going on.
Not sure about the rear yet, I wanted to debadge everything but the toyota, but I think there would be outlines from scratches in the clear and whatnot, and its more work than I want to put in to make it look like nothing was there, so I may just keep it like this for now.
Less talk, More pics.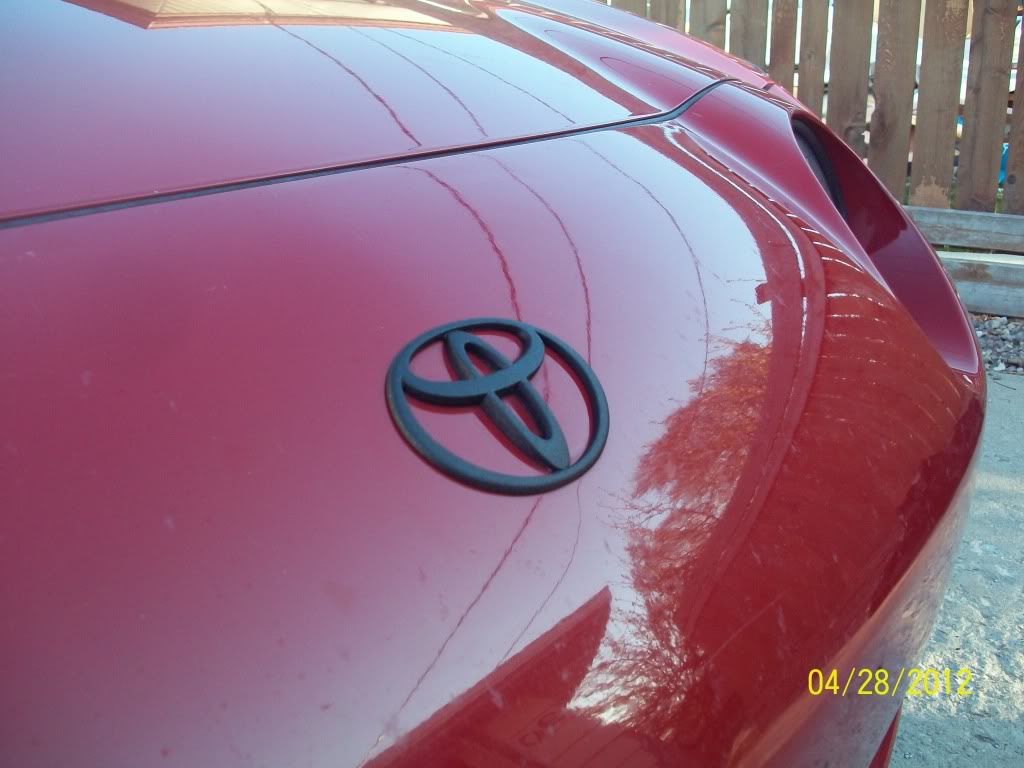
Posted by: Timmyface Apr 28, 2012 - 8:16 PM
Looks sweet dude!! I was considering doing it also, but ran out of plasti dip now
You need some black zip ties for your front grill too
Posted by: jordisonjr Apr 28, 2012 - 10:10 PM
hahaha Yes, you're right I definately do.
Just haven't had time to get around to it due to exams and such, but now...
I"M DONE! I'M FREE!!
Haha, i ahve a list of things built up from the last two weeks that I want to get done, on the car and other stuff.
So maybe that'll fit in there as well cause its an easy task.
First on the list is sway bar bushings, was going to tackle it today but ran out of time.
Posted by: jordisonjr May 2, 2012 - 2:18 PM
Well I got the Sway bar bushings in today.
Seems to have tightened up the rear a bit, and definately has reduced the body roll.
going over bumpy corners where my car would rub at high speeds, no longer rub anymore.
And most importantly they got rid of the clunking that soudned like blown struts in the rear.
Posted by: jcbass7 May 2, 2012 - 4:11 PM
Seems to have tightened up the rear a bit, and definately has reduced the body roll.
going over bumpy corners where my car would rub at high speeds, no longer rub anymore.
And most importantly they got rid of the clunking that soudned like blown struts in the rear.
Glad to hear they help, did you get the 17.5mm non-greasable ones?
Posted by: jordisonjr May 2, 2012 - 5:32 PM
I went with 16mm non greasable.
I read on here that some were using 16 and some were using 17.
Decided to go with the 16 because I didn't want the 17 to be a little two large, and stilll have the clunking sound because the stock ones only had a tiny bit of play.
atok also had 16mm
16's had the slightest gap where they were cut, maybe a mm or 2, but they fit.
Posted by: jordisonjr May 27, 2012 - 12:59 PM
Posted by: celica74 May 27, 2012 - 3:30 PM
switches to engage warp drive?
Posted by: jordisonjr May 27, 2012 - 3:58 PM
No, Hydraulics Bro!
lol just kidding.
I put leds under the dash and in the vents a couple years ago.
Dont really use them much anymore, and probably wouldn't take the time to put them in another car, but also not going to spend the time to take them out haha.
Posted by: jordisonjr Jun 1, 2012 - 1:34 PM
Went out with a buddy of mine and did a litttle photoshoot:
http://www.flickr.com/photos/mitchasham/7311731154/
http://www.flickr.com/photos/mitchasham/7311731154/ by http://www.flickr.com/people/mitchasham/, on Flickr
http://www.flickr.com/photos/mitchasham/7311731622/
http://www.flickr.com/photos/mitchasham/7311731622/ by http://www.flickr.com/people/mitchasham/, on Flickr
http://www.flickr.com/photos/mitchasham/7311732078/
http://www.flickr.com/photos/mitchasham/7311732078/ by http://www.flickr.com/people/mitchasham/, on Flickr
http://www.flickr.com/photos/mitchasham/7311732446/
http://www.flickr.com/photos/mitchasham/7311732446/ by http://www.flickr.com/people/mitchasham/, on Flickr
http://www.flickr.com/photos/mitchasham/7311733430/
http://www.flickr.com/photos/mitchasham/7311733430/ by http://www.flickr.com/people/mitchasham/, on Flickr
Posted by: Promasta Jun 1, 2012 - 10:05 PM
man we should do a shoot with that mitch guy when i'm in winnipeg
Posted by: jordisonjr Jun 1, 2012 - 10:45 PM
Yea man he does some Great work.
Was going to throw it up on here, but didn't because its more of a local forum, but you should check out toptierimports.com.
We've been doing cruises every friday night as opposed to sudnays to avoid sundays, and we just had the first official meet last week and had close to 100 cars out.
Its a way better atmosphere than Heights, similar to how it is on 6gc but with all sorts of cars.
You should join up and possibly come out to some of the meets if you're ever in the city.
Theres a couple 205's on there already, some 5th and 7th gens as well.
Posted by: jordisonjr Jun 17, 2012 - 4:24 PM
Posted by: ricochet1490 Jun 18, 2012 - 9:20 AM
SHAWT SHIFTA NEEDED lol
In other news, what head unit are you using?
Posted by: jordisonjr Jun 18, 2012 - 12:01 PM
Short Shifter is Definately needed haha, but I don't really mind this one for now.
Just doesn't look the greatest.
Its a Pioneer DVH-P4000, its a little dated, but it does everything I need it to, so I'm still happy with it.
Posted by: jordisonjr Jun 30, 2012 - 11:32 PM
Was out at my cabin today, and the car was clean so I took a few shots on my phone.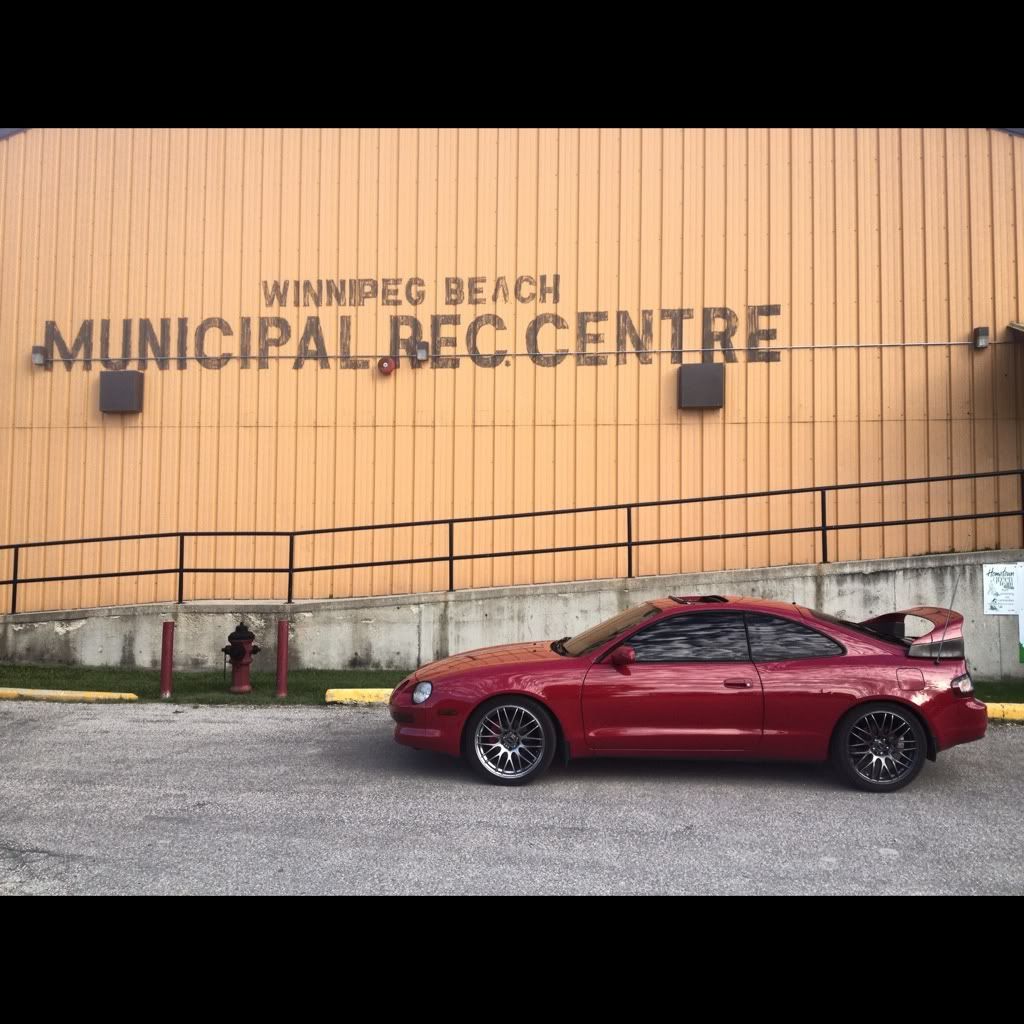
Posted by: Kaizee93 Jul 1, 2012 - 7:53 AM
Love the work and effort you have put into your car mate! keep it up looks sick!
Posted by: jordisonjr Jul 1, 2012 - 10:26 AM
Thanks alot! Appreciate it!
Posted by: jordisonjr Jul 2, 2012 - 4:43 PM
Fresh wash and Wax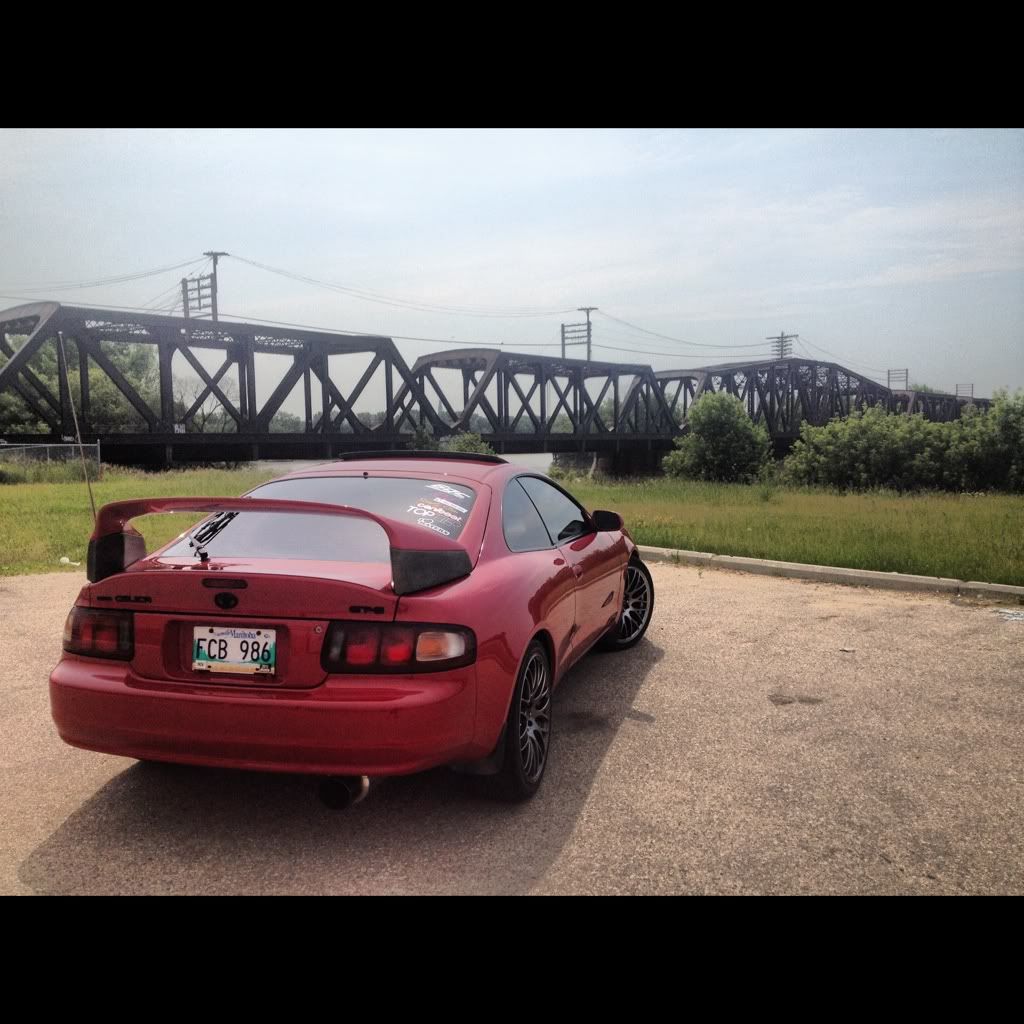
Posted by: jordisonjr Jul 31, 2012 - 1:09 PM
Nokya yellows as a DRL/High Beam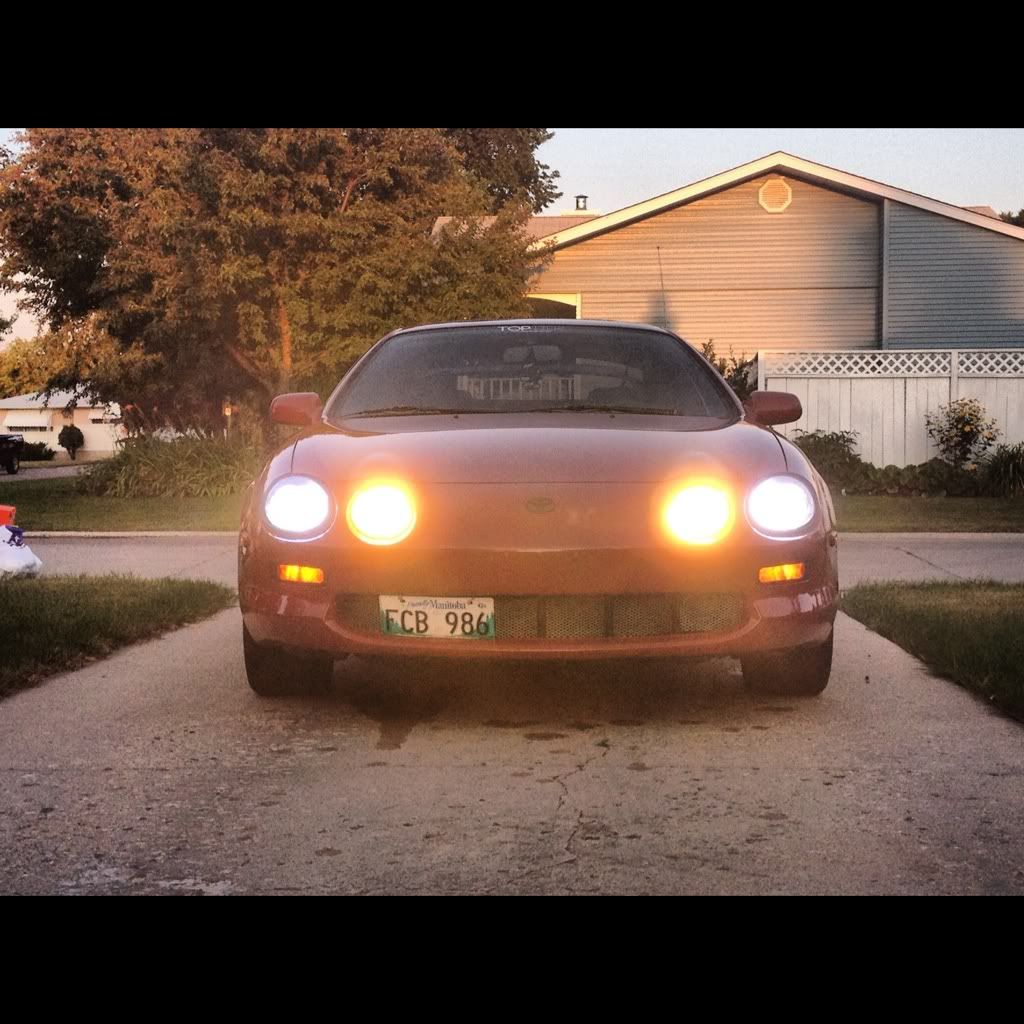
Posted by: jordisonjr Aug 18, 2012 - 2:34 PM
Couple shots, one with my buddy driving: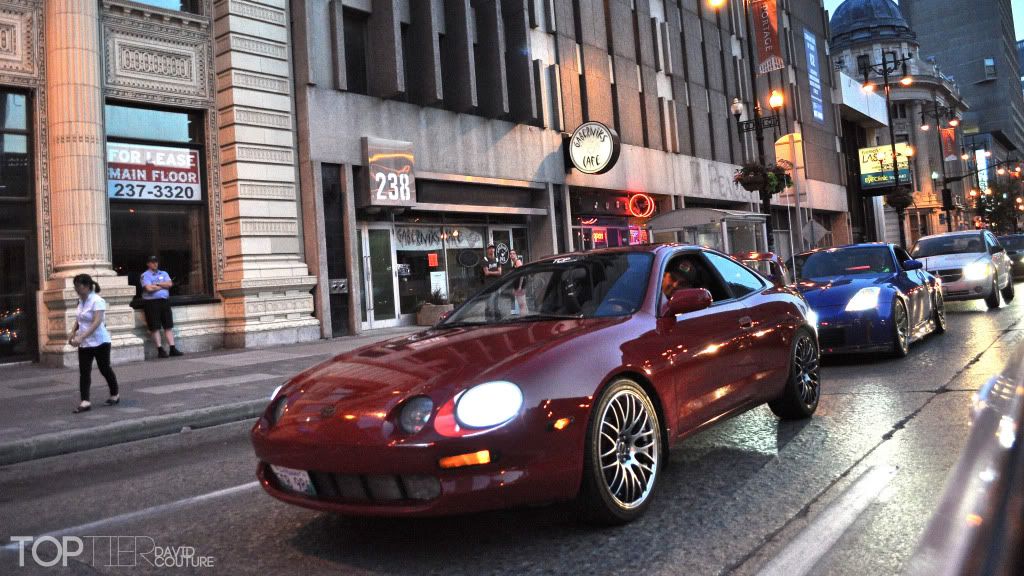
And did this the other day:
Posted by: jordisonjr Aug 29, 2012 - 2:23 PM
Posted by: jordisonjr Oct 29, 2012 - 1:16 PM
Buddy of mine did a photoshoot a couple weeks back, never got around to posting:
EDIT: Pictures weren't working.
Posted by: sr666 Nov 3, 2012 - 12:33 PM
That looks amazing mate. Have you thought about adding skirts / spats I think it'd finish it nicely?
Some awesome pics there too you've given me a few more ideas cheers
Posted by: jordisonjr Nov 5, 2012 - 2:14 PM
Thanks a lot.
I have thought about it, ust been waiting for a good deal to pop up on skirts (which is not easy).
Although lately i've been thinking of selling it, so I'm not sure how much more I want to invest in it.
Posted by: jordisonjr Dec 11, 2012 - 2:11 PM
A buddy did a shoot for me in summer, and I never got around to posting pics, here they are:
Posted by: kloudkicka Dec 11, 2012 - 7:13 PM
looking good bro, i need one of those photo shoots without a camera phone lol
Posted by: jordisonjr Dec 13, 2012 - 1:03 PM
Thanks man!
Check out the local forum we've started, toptierimports.com
Usually have local meets every friday and the turn out is pretty big, and its a completely different atmosphere than winnipegheights.com (pretty sure you're on there as well)
That's where all of my recent photos have come from.
Posted by: kloudkicka Dec 13, 2012 - 7:04 PM
ya i've cruised around that site from time to time, just to check out parts for sale and local galleries, i just havent joined as of yet, i was actually gonna go to one of the meets back in august wit my friend who drives a white supra, but my car battery screwed up on me that day so i didnt make it out
Check out the local forum we've started, toptierimports.com
Usually have local meets every friday and the turn out is pretty big, and its a completely different atmosphere than winnipegheights.com (pretty sure you're on there as well)
That's where all of my recent photos have come from.
Posted by: jordisonjr Dec 15, 2012 - 9:02 PM
Oh yea I think I know the car. White MK4 with black BBS LM reps, xxr's maybe?
Check out the local forum we've started, toptierimports.com
Usually have local meets every friday and the turn out is pretty big, and its a completely different atmosphere than winnipegheights.com (pretty sure you're on there as well)
That's where all of my recent photos have come from.
Posted by: ricochet1490 Dec 15, 2012 - 9:55 PM
your car is always so clean. And the paint looks good. Is that a good buff job or have you had it resprayed?
Posted by: jordisonjr Dec 16, 2012 - 12:12 AM
Its actually the original paint from what I've been told.
When I bought the car four or so years ago from a dealership they said they got it from an older lady, the original owner.
A couple of the shots I just posted are edited though, so that may have something to do with it, but all the other pictures I have only have none or minor editing.
I do what i can to keep it clean as possible, regular wash/wax and clay bar, but I've never polished it or anyhting like that before. Also not winter driving it may help too.
Posted by: Nihil Dec 16, 2012 - 5:03 AM
I like how you don't have splitters and sideskirts and it looks great!
Posted by: Tigawoods Dec 16, 2012 - 11:54 AM
When I bought the car four or so years ago from a dealership they said they got it from an older lady, the original owner.
A couple of the shots I just posted are edited though, so that may have something to do with it, but all the other pictures I have only have none or minor editing.
I do what i can to keep it clean as possible, regular wash/wax and clay bar, but I've never polished it or anyhting like that before. Also not winter driving it may help too.
you should get ceramic paint protection!
Posted by: kloudkicka Dec 16, 2012 - 7:54 PM
yup thats the one
Check out the local forum we've started, toptierimports.com
Usually have local meets every friday and the turn out is pretty big, and its a completely different atmosphere than winnipegheights.com (pretty sure you're on there as well)
That's where all of my recent photos have come from.
Posted by: jordisonjr Dec 17, 2012 - 2:07 PM
Thanks, I've actually always wanted skirts, but when they come up forsale, I don't have the money, so its pretty much a waiting game.
Prob would have went with 17, if I knew I had to wait this long for skirts

When I bought the car four or so years ago from a dealership they said they got it from an older lady, the original owner.
A couple of the shots I just posted are edited though, so that may have something to do with it, but all the other pictures I have only have none or minor editing.
I do what i can to keep it clean as possible, regular wash/wax and clay bar, but I've never polished it or anyhting like that before. Also not winter driving it may help too.
you should get ceramic paint protection!
What's that?
Check out the local forum we've started, toptierimports.com
Usually have local meets every friday and the turn out is pretty big, and its a completely different atmosphere than winnipegheights.com (pretty sure you're on there as well)
That's where all of my recent photos have come from.
Such a sick car.
Posted by: Tigawoods Dec 18, 2012 - 8:39 AM
to put it simply its harder/more resilient against swirling/scratches/etc than waxing is. And it will last alot longer than wax. You just have to find a place that will do it for you, or just get one of the DIY kits
Posted by: jordisonjr Dec 18, 2012 - 2:02 PM
Interesting, may have to look into that.
Posted by: snagmor Dec 31, 2012 - 3:12 PM
Hey man, your ride is awesome, and you have done some nice and very clean mods to it, but I have to ask something pretty nooby.
I took off my license plate from the bumper and really want to put it in the mouth of the car, like you did, now that iv been ticketed for not having one in front. I looked at your pictures here and cant get a really good view of how you did it, was it just zipties? what did you attatch it to?
Thanks so much for any help!
Posted by: jordisonjr Jan 2, 2013 - 2:15 PM
I took off my license plate from the bumper and really want to put it in the mouth of the car, like you did, now that iv been ticketed for not having one in front. I looked at your pictures here and cant get a really good view of how you did it, was it just zipties? what did you attatch it to?
Thanks so much for any help!
Ahh you got nailed with the old no front plate too hey? I got the 2 or 3 times and I got sick of paying for it.
Yea its basically just zipties tied to more zipties which are tied to the posts in the bumper haha.
Basically I made small loops with zipties and then ziptied another one to the plate, to the other loop (hopefully that makes sense)
But I pretty much just crawled under there, and configured a load of zipties together to hold it in place.
Good Luck!
Posted by: jordisonjr Jul 31, 2015 - 9:06 AM
Wow has it been ages since any sort of significant update. Aside from upkeep/maintenance I haven't really done anything to the car. But FINALLY I have an update.
After about 5+ years or so waiting for a decent set of side skirts that didn't cost an arm and a leg + another arm to ship, I finally managed to get my hands on a set of OEM skirts, and locally too.
They actually Came of Azian_advanced old wrecked Celica, the same vehicle I took the JDM tail lights off of from an auto wrecker. At teh time, the car was sitting right on the ground with no wheels, so the skirts were impossible to get off. This was about two years ago, so maybe the car was moved since then, but if not i have no idea how the guy got them off the car.
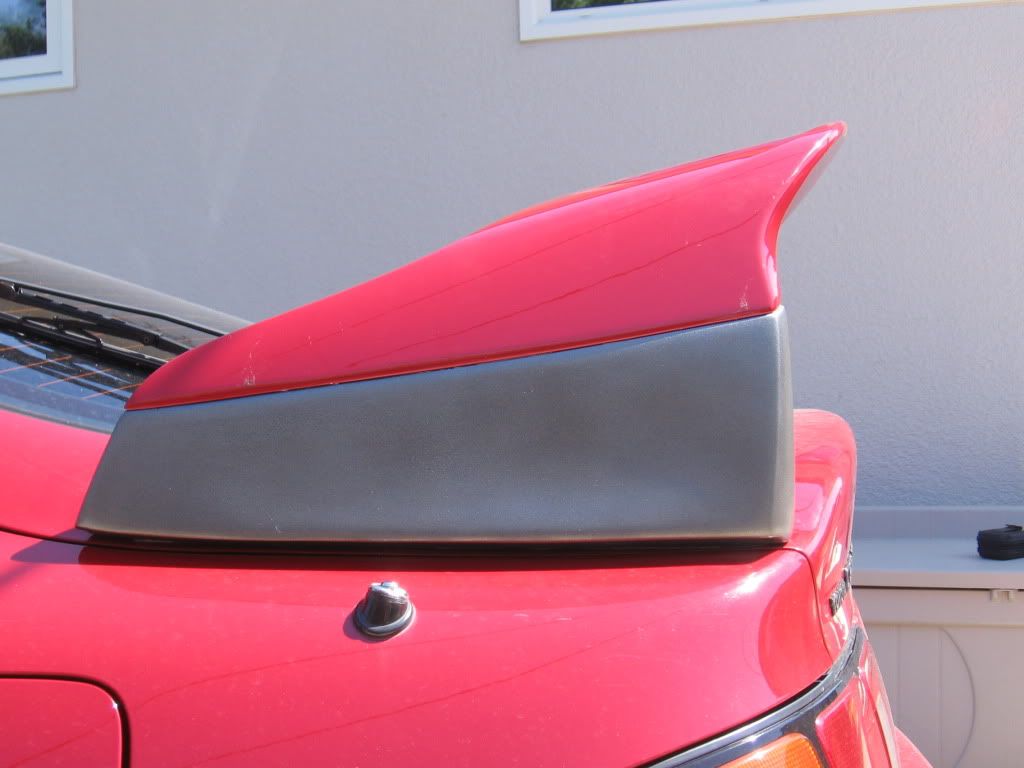
With the skirts I managed to get his rear SS-III Splitters and a WRC hood spoiler which is now for sale. The splitters aren't in the greatest shape, with one corner being cracked and needing some new paint.
Pic of the damaged area. I'll be using fibreglass cloth to repair this. Unfortunately I forgot to take pics of the paint damage, but both looked like there was some sort of impact causing the paint to flake everywhere.
http://s654.photobucket.com/user/jordisonjr1/media/photo%201_zpsp4hc1wwx.jpg.html
Last night I started prepping the splitters for paint, went at it with 100 grit to remove the clear/paint and to rough up any imperfections. Only picture I took, but there wasn't too much excitement anyways
http://s654.photobucket.com/user/jordisonjr1/media/photo%204_zpsqxhyjjrv.jpg.html
Took off the mudguards and mocked up the OEM skirts. This is probably the worst looking skirt of the two, with some paint damage at the bottom from scraping, and a bit at the top of the door, I guess from Passengers getting in and out.
http://s654.photobucket.com/user/jordisonjr1/media/photo%202_zpsy5d8z9ul.jpg.htmlhttp://s654.photobucket.com/user/jordisonjr1/media/photo%203_zpsfn3ge47i.jpg.html
And here's the Driver side, not as much paint damage on this side aside from a couple small scrapes
http://s654.photobucket.com/user/jordisonjr1/media/photo_zpslckqnbzx.jpg.html
As you can see the paint matches fairly well on the skirts, so I'm a little on the fence whether I should repaint them or not, or just live with the small imperfections and do a bit of touchups on the white spots/stone chips.
I think I'm going to re-do the splitters, and I will make a decision on the skirts based on how well the splitters come out. Given I have very minimal painting experience and will be using rattle cans as opposed to a real paint gun.
Regardless I can't wait to get these on the car!
Posted by: kloudkicka Jul 31, 2015 - 12:39 PM
Your welcome hahahahaha
Posted by: jordisonjr Jul 31, 2015 - 4:15 PM
Yea yea, I would have found them a couple hours after you emailed me the link
Posted by: jordisonjr Jul 31, 2015 - 8:50 PM
Picked up a fiberglass repair kit today and when to town fixing the crack in the splitter. Laid one cost of fiberglass cloth, and it was easier than I expected. Tip for anyone doing this, wear gloves. I had to sand the resin off my fingers and trees still stuff stuck to them
I'll decide tomorrow if I'm going to do another layer of fiberglass or if this will be sufficient. Also going to pick up paint and priemer from PegGTS tomorrow
http://s654.photobucket.com/user/jordisonjr1/media/Mobile%20Uploads/image_zpswoucuegb.jpg.html
Posted by: jordisonjr Aug 1, 2015 - 3:29 PM
Stopped by Rondex today and picked up some supplies; Primer, paint, and clear coat, thanks to WpgGTS for helpin' out.
Got home and went right to it. Finished up the sanding, started off with 100 and then 150 to take out the imperfections as the paint was pretty cracked and flaking from impact.
Once the was done I went at it with 220 and the 320 and it was off to primer.
Primer complete:
http://s654.photobucket.com/user/jordisonjr1/media/Mobile%20Uploads/image_zpsucsu3ucr.jpg.html
For a rattle can primer I'm pretty happy with the results. On one of the splitters had paint that was slightly cracked but still adhering fairly well, so I didn't bother sanding it all off. After laying down the primer, its evident that the cracks from the paint below have started to show through. It's hard to see in this pic, but you can see a small amount of it, but theres a bit more than you can see
http://s654.photobucket.com/user/jordisonjr1/media/Mobile%20Uploads/image_zpsfbojdcph.jpg.html
There's also a couple minor imperfections, that I'm hoping will be worked out once I hit it with 320 and 600 grit. If not, I'll probably just end up painting over it and hope for the best. I'm not expecting professional quality paint, but as long as its better than before, I'll be satified. I also ran out of primer so I'd have to wait untill next weekend to get to the shop to grab more primer, so I'll risk it.
Posted by: PegGTS Aug 1, 2015 - 7:09 PM
Looks good! Surprised you ran out of primer...were you drinking it?
Posted by: jordisonjr Aug 1, 2015 - 9:39 PM
I must have been a little stoned on paint fumes when I wrote that, cause i meant to say if I fixed the cracks, I most likely would have ran out of primer.
Just finished up the final coat of clear and I'm really impressed at how it looks so far, given that its a rattle paint and clear. As expected, the small amount of cracking and imperfections are still visible through the paint and clear, but I'm not to bothered by it at the moment.(Ill try and photograph that later) I look at it as a learning experience, as I wasn't really expecting perfection from it either.
Here's the splitters after the final coat of clear, still drying:
http://s654.photobucket.com/user/jordisonjr1/media/Mobile%20Uploads/image_zpsvcua4tlp.jpg.html
Can't wait to get these installed on my car and FINALLY have a small update to the exterior look. Will post more once they're mounted up
Posted by: jordisonjr Aug 3, 2015 - 6:26 PM
Got the splitters all finished up, and installed today.
Ended up breaking one of the bolts on the rear bumper due to rust, but managed to make it work. Now I just gotta pick up mounting hardware tomorrow to mount the skirts up.
http://s654.photobucket.com/user/jordisonjr1/media/Mobile%20Uploads/image_zpswgwzpgdk.jpg.html
http://s654.photobucket.com/user/jordisonjr1/media/Mobile%20Uploads/image_zpsvlosnkpp.jpg.html
http://s654.photobucket.com/user/jordisonjr1/media/Mobile%20Uploads/image_zps179iv3vr.jpg.html
http://s654.photobucket.com/user/jordisonjr1/media/Mobile%20Uploads/image_zps4m6sp1ua.jpg.html
Posted by: Box Aug 13, 2015 - 10:09 AM
Wooo o.e. body kit!
Posted by: jordisonjr Aug 19, 2015 - 11:03 AM
Starting Prepping the Skirts this past week, got them all sanded down and laid 3 coats of primer on one of the skirts.
Wasn't sure if I was going to have enough primer so I was going to do it one at a time. I think Ill be okay with what I have so Im going to prime the second, and then lay some paint down
Posted by: Box Aug 19, 2015 - 11:45 AM
I could never find the 3L2 touch up paint in a spray can when I owned mine.  I was thinking if I ever came across the o.e. skirts, lip, and splitters I'd just do them in black.
Posted by: jordisonjr Aug 19, 2015 - 12:00 PM
I was thinking if I ever came across the o.e. skirts, lip, and splitters I'd just do them in black. There's actually a local paint/body shop that mixes off the paint codes.
Results were better than I had expected too.
Posted by: Box Aug 19, 2015 - 12:39 PM
So it was a bajillion dollars a can. *waits for finished product*
Posted by: PegGTS Aug 19, 2015 - 6:04 PM
I work there so I hooked him up with the paint for free
Posted by: Box Aug 19, 2015 - 7:07 PM
Make sure no one else sees.
Posted by: PegGTS Aug 20, 2015 - 12:17 AM
I'll trust you won't tell anyone Box
Posted by: Box Aug 20, 2015 - 12:51 AM
I'm good at keeping secrets.
Posted by: jordisonjr Aug 26, 2015 - 8:23 AM
I've been prepping the side skirts for the last week or so. I once again realized I should have done a bit more prep work as there are still some imperfections with the skirts, but overall, I'm happy with the outcome as they still look better then the original paint that was on them.
I ran into some issues after laying a second coat of clear. For some reason the clear became cloudy and almost spotted on one of the skirts, and had a large cloudy area on another. I'm not really sure what cause this, but after reading it may have been the ambient air since I painted while it was raining. Although it wasn't too humid, the air temp/moisture still cold have had an effect on the clear coat, but who knows.
With the advice of a friend I did a rough sand with 1000 grit sand paper to clear up the cloudyness. Being the first time I've really painted much, and had this issue, I was a little bummed when the whole skirt was scuffed white, and was skeptical that spraying clear over this surface would turn out how it should. But I didn't have much material left, so there was much to lose, aside from having to repaint if it didn't work out.
Luckily, the next two layers of clear turned out great. Theres a couple rough spots, and slight orange peel, but from what Ive read/been told, this can be corrected easily with wet sanding, although, I'm not too concerned with it.
http://s654.photobucket.com/user/jordisonjr1/media/Mobile%20Uploads/image_zps0gvltbay.jpg.html
http://s654.photobucket.com/user/jordisonjr1/media/Mobile%20Uploads/image_zpsz4zqmbvb.jpg.html
After painting the splitters, and the skirts, I've realized that its a lot easier to paint and get a good result on smaller items than larger, and by now, I think I've had enough issues/experience to get a near-perect finish once I get front splitters to paint!
Posted by: Box Aug 26, 2015 - 9:48 AM
Woooo!!! Now just to get them on.
Posted by: jordisonjr Aug 26, 2015 - 9:56 AM
Hopefully this week, or by the end of next they'll be on forsure.
Just have to find the time.
Posted by: PegGTS Aug 26, 2015 - 3:08 PM
Damn man those look like they turned out awesome! Should look sick when you get them on.
Posted by: jordisonjr Aug 26, 2015 - 3:50 PM
Yea I can't wait. Thanks again for helpin out!
Posted by: cheela Aug 28, 2015 - 11:47 AM
everything turned out great. I spray painted my kit as well. wish I could've done a better job but yeah it was my first time as well.
it's gonna look good when it goes onto your car. gonna need to do more photoshoots now. hahha
Posted by: jordisonjr Aug 28, 2015 - 12:07 PM
it's gonna look good when it goes onto your car. gonna need to do more photoshoots now. hahha
Yea I was prety stoked on the turnout considering its pretty much my first time painting (aside from riser blocks which I royally Botched), and it was all rattle can.
I've wanted to do shoots, but my car has stayed relatively the same so there' really hasn't been a need.
Hoping to be able to source and install some SS-III front splitters before the car goes away for storage. Although, it seems everyone wants OEM price, for rep Splitters
 Keith (kloudkicka) and I have been talking about doing a shoot with both of our cars, so hopefully that pans out.
Posted by: cheela Aug 28, 2015 - 12:12 PM
haha. funny I still gotta spray my risers and spoiler.
yeah I saw you've been searching for them for a while. hopefully a set pops up at a good price for you.
I know how it feels, I searched a good 3 years for my TOMs lip and 4 or 5 for a greddy SP1 muffler.
OMG a photoshoot with both of your cars will be epic!
Posted by: jordisonjr Aug 28, 2015 - 12:17 PM
yeah I saw you've been searching for them for a while. hopefully a set pops up at a good price for you.
I know how it feels, I searched a good 3 years for my TOMs lip and 4 or 5 for a greddy SP1 muffler.
OMG a photoshoot with both of your cars will be epic!
Yea' since I found these parts i've been looking.
There was a set in Chicago that I was going to pull the trigger on, but they ended up going locally like a day before I was going to pay.
A couple have also popped up, but for way more than I'm willing to pay for reps. 200usd plus shipping, and then another for about 120 usd for shipping, both on the facebook page. With the canadian exchange its still pretty pricey.
Been debating snaggin' the reps from paul in Poland. Couple more days and I may just pull the trigger, just hesitant on how the fitment of reps will be. Especially because I'm sure the screws are going to break on the front of my bumper when I try and remove them, if they haven't already
Posted by: PegGTS Aug 28, 2015 - 4:08 PM
If my car is up and running by the time you guys do that photoshoot let me know. I'd be down too!
Posted by: jordisonjr Aug 31, 2015 - 8:38 AM
Definitely.
How's that coming along?
Posted by: PegGTS Aug 31, 2015 - 11:12 AM
Good! Got the timing belt done and pretty much everything swapped over. Also got the interior back together so basically just gotta get the flywheel and clutch on the new engine then the tranny and in she goes.
Posted by: jordisonjr Sep 1, 2015 - 8:31 AM
Got the side skirts all mounted up yesturday evening.
I'll have to admit I was a little hesitant to drill 3/8" holes in each side of car, but once I had the first side taken care of, and realized that everything was going to line up correctly, it wasn't that big of a deal.
It took inbetween 3-4 hours to install, as for the first side, i checked everything 4 times, as I didn't want to make a mistake with drilling holes, and being hooped with a bunch of holes in the wrong spots. Big thanks to the EXCELLENT How to in the Sticky for walking me through, although my install went slightly different than describes, but for the most part was the same.
Overall I'm impressed with how the paint matched. The two way tape I used doesn't seem to have worked the greatest, as there is a small gap on the passenger side (I think due to a bent clip, ill probably fix that down the road), and a couple parts were already starting to pull off this morning, but no biggy. I may opt for a more permanent solution, depending if they pull off anymore, but I'll see how that goes.
Anyone else have some tips on what they've used instead of the two way tape? Or a different brand/method that works better than the 3M stuff?
Now, enough yackin' on to the pics!
(Please excuse my filthy car, I got caught in a ran storm yesturday morning and didn't have time to wash it)
Passenger side:
http://s654.photobucket.com/user/jordisonjr1/media/photo%201_zps51d1f1tk.jpg.html
Driver side right after installing:
http://s654.photobucket.com/user/jordisonjr1/media/photo%204_zpsqnr7nlva.jpg.html
And driver side this morning:
http://s654.photobucket.com/user/jordisonjr1/media/photo%205_zpsfz8a09jq.jpg.html
Im glad there's still enough clearance to get my jack under the car as well. It would have been a pain if the skirts hung down just enough to not be able to fit it:
http://s654.photobucket.com/user/jordisonjr1/media/photo%202_zpsjw7tarx7.jpg.html
Still trying to source out a set of front SS-III Splitters, preferably OEM, or reps that have a decent fitment, if anyone has any leads
Posted by: cheela Sep 1, 2015 - 8:46 AM
skirts look great! 
and I can't remember the last time I used a normal jack like that. I got a low profile racing jack and the other one's just been collecting dust in my garage. hahaha.
Posted by: jordisonjr Sep 1, 2015 - 8:56 AM
and I can't remember the last time I used a normal jack like that. I got a low profile racing jack and the other one's just been collecting dust in my garage. hahaha.
Yea its suuuper old.
I have a newer one, but in order to use it in the front, I need to jack this one up about 1/4", and then use the newer one. But I had both sides in the air so i was able to use both.
Just glad I don't need to get yet another new one
Posted by: Box Sep 1, 2015 - 10:17 AM
Yay skirts! 3M makes a tape that's kind of foamy, seems to work better for stuff like that,
Posted by: PegGTS Sep 1, 2015 - 11:25 AM
Other than double sided tape, you could try using an adhesive sealer like Sika for a more permanent solution. Try talking to RoadRage, I think that's what he used on his.
Posted by: jordisonjr Sep 1, 2015 - 11:52 AM
Ill have to do that. My dad also mentioned something called butyl tape that may work as well.
I may look into that.
Posted by: jordisonjr Sep 9, 2015 - 10:19 AM
I haven't really posted any proper photos since the sideskirts install. So here's a couple.
http://s654.photobucket.com/user/jordisonjr1/media/photo%201.png_zpsdseijfv5.jpeg.html
http://s654.photobucket.com/user/jordisonjr1/media/photo%202.png_zpsmsk09wno.jpeg.html
http://s654.photobucket.com/user/jordisonjr1/media/photo%203.png_zpsh0bzxip2.jpeg.html
Posted by: JoshuaM Sep 9, 2015 - 10:27 AM
Your car is one of the few that I've liked without side skirts..... But it looks even better now!!!
Posted by: jordisonjr Sep 9, 2015 - 11:06 AM
Haha really?
I've always thought it sat too high without side skirts, although 18's didn't really help that.
But when I bought wheels I didn't think it would take 5+ years to find TRD sideskirts.
Little did I know, i'd have to settle for OEM
Posted by: JoshuaM Sep 10, 2015 - 3:23 AM
Haha really?
I've always thought it sat too high without side skirts, although 18's didn't really help that.
But when I bought wheels I didn't think it would take 5+ years to find TRD sideskirts.
Little did I know, i'd have to settle for OEM
Yeah, it has never looked as low as it actually is, but you get a bit of the rally look with the spoiler and the car always looks really clean and well done. The fact that you always have nice photos also helps
Posted by: cheela Sep 10, 2015 - 8:38 AM
I will have to agree with Joshua, yours was one of the cars I didn't mind that sat the way it did with no sideskirts. but now that you got the skirts...... a drop is in need. hahha
Posted by: jordisonjr Sep 10, 2015 - 8:45 AM
Damnit, of course.
FS: OEM 3L2 Skirts
Front Splitters are at the top of the list right now.
Posted by: Nial Sep 18, 2015 - 12:47 AM
This chap might be worth a call?
http://www.ebay.co.uk/itm/Toyota-celica-beams-ss3-3sge-st202-200bhp-breaking-/281798637479?hash=item419c81f7a7
Posted by: jordisonjr Sep 18, 2015 - 8:13 AM
http://www.ebay.co.uk/itm/Toyota-celica-beams-ss3-3sge-st202-200bhp-breaking-/281798637479?hash=item419c81f7a7
Thanks for the heads up.
But I actually have a set on the way!
Posted by: jordisonjr Sep 22, 2015 - 12:19 PM
Well after mounting my sideskirts the first time around, I wasn't really happy with how well the 3M tape held on.
In some spots it was pulling off the car but not the skirt, and in some sections off the skirt but not the car. There's a small gap that I don't mind, but when you can see the tape where the gap is, it looks pretty brutal in my opinion.
After posting on the facebook page and talking with some friends, I pulled off the driver side, and cleaned both surfaces with Isypropl rubbing alcohol 70% and remounted. So far it seems to be holding up well, and that was from sunday. If it still looks good by the weekend, I'm going to go ahead and redo the passenger side as well, as that one had a larger gap than the driver side originally did.
Also, Got a text from my sister while I'm at work with this:
http://s654.photobucket.com/user/jordisonjr1/media/e8113607-a023-4090-8893-6dc7af0e0e28_zps9wmebotf.jpg.html
Any guesses?
Posted by: CelicaDICE Sep 22, 2015 - 1:48 PM
Hmmm...SS-III front splitters??
Posted by: jordisonjr Sep 22, 2015 - 2:11 PM
Damn right
Posted by: cheela Sep 22, 2015 - 3:03 PM
WHOOO! about time! hahaha
Posted by: jordisonjr Sep 22, 2015 - 3:09 PM
Bit the bullet and bought some reps.
Although, a set of OEM Front and Rears came up on ebay like the day after
Posted by: cheela Sep 22, 2015 - 3:17 PM
yup. always works that way.
Posted by: jordisonjr Sep 23, 2015 - 8:21 AM
Did a bit of a "test fit" by placing them up against the front bumper ( ) and it looks like the fitment will be pretty good. Although I won't really know until I actually bolt them on from the bottom. I didn't get a chance to do that last night as I still need to drill holes in the splitter to mount them, which I plant to get to tonight.
I also hope to start prepping so I can get them painted before the cooler weather hits. I ended up going with the Replicas from paul in Poland after looking for about 2-3 weeks without any luck on finding OEM, or even other reps for that matter. I think these should do just fine.
http://s654.photobucket.com/user/jordisonjr1/media/photo_zpsjnnc1mwn.jpg.html
Posted by: jordisonjr Sep 24, 2015 - 9:02 AM
I managed to get some holes drilled in the splitters last night, and tossed them on the car just to see how the fitment was. Well, its not great. I'm not sure if its cause they're replicas, or if its because they aren't meant for the preface bumper, or both.
Below is a picture of the driver side, as well as both sides mounted up. Keep in mind this is with one bolt each, and zip ties in the rest of the holes, and no tape. I think I should be able to get the gap closed up a bit better, but not sure how much more.
http://s654.photobucket.com/user/jordisonjr1/media/photo%201_zpsxxayhckb.jpg.htmlhttp://s654.photobucket.com/user/jordisonjr1/media/photo%202_zpshtefmc75.jpg.html
Driver side from above:
http://s654.photobucket.com/user/jordisonjr1/media/photo%203_zpsmafwdomt.jpg.html
Passenger side from above:
http://s654.photobucket.com/user/jordisonjr1/media/photo%204_zps35alalwi.jpg.html
As you can see, the fitment isn't anywhere near perfect. I'm debating what I want to do. I don't mind the gap, if you can see through to the ground. I was thinking I could fill the gap with a foam of some sort, that could stick to the splitter, and then just touch the front bumper.
Or, I could use fiberglass and make a flat portion along the top of the splitter, that goes perpendicular to the ground, and contacts the fender/bumper, and just trim it accordingly untill it fits proper. Although, I'm not sure how well my fiberglass skills would be to be able to pull this off, as I've only used it once, and it was to repair the crack in the rear splitter.
Any other suggestions/opinion?
Do people running OEM splitters have this gap as well, before applying the tape? I know the OEM are much more flexible than the Fiberglass ones are.
Posted by: RoadRage Sep 25, 2015 - 2:35 AM
I've got OEM on pre-face and from memory I had a very tiny gap, not that big, Double sided tape fixed it for me..
try to see if tape manages to flex it enough to have no gap first, before any fibreglass attempts
Posted by: jordisonjr Sep 25, 2015 - 8:22 AM
try to see if tape manages to flex it enough to have no gap first, before any fibreglass attempts
Yea I met up with PEG GTS (Paul) last night, and realized that the OEM ones also have a similar gap, but the material i what makes the difference as the OEM ones are able to flex enough to fit with tape, where as the Reps may not be.
Yesturday I did some more test fitting, to see if I wanted to keep these, or try and sell them to replace with some OEM ones. I did some sanding around the corner that wraps around the wheel well, and the flat section on the fender near the wheel well. And managed to significantly reduce the gap. I'm hoping this will be enough so that the 3M tape will be able to hold it in place. Although, the reps, unlike the OEM, do not have the flat lip that contacts the body, where you would mount the tape. So I'm a little concerned if the tape will have anything to grab on to.
I think tonight I'm going to try and mount it with a couple pieces of tape, to see if there is enough surface area to grab. If not, I may just fiberglass a small lip on the inside of the splitter, so it has something to grab onto. All this for reps that were "perfect fitment"
I realize they are reps, and they weren't going to fit 100%, but I was hoping for a little better fitment than this.
Posted by: PegGTS Sep 25, 2015 - 11:34 AM
Yeah they didn't seem to be very flexible at all. But I think if you use that 3M adhesion promoter or running alcohol like you used on the skirts on both the splitters and the fender/bumper the double sided tape should hold them on. Could try that out before painting them just to be sure they do stay on.
Posted by: jordisonjr Sep 28, 2015 - 8:38 AM
I spent thursday and friday evening doing what I could to make these splitters fit better. I realized that there was a flat spot just in front of the wheel well on the fender, that hadn't really been accounted for in the shape of the splitter, and that if I sanded this out, it would suck the splitter in closer to the body. I also re shaped the lip that wraps inside the fender, to allow the rest of it to come close to the fender/bumper.
Once I had these fitting as I wanted to, I went straight to it, and shot some primer on friday night. Saturday, I got right to painting in the morning, and was able to get them cleared by mid after noon. In between shooting coats of paint, I went a re-mounted my passenger side skirt as there was an atrocious gap that I wasn't really happy with. 2 of the mounting tabs on the inside of the skirt, where the plastic pegs were removed, had miss shaped the skirt, and didn't allow it to completely contact the body, causing the gap. So I cut these out, and now the skirt fits flawlessly and has 0 gap whatsoever, so I couldn't be happier with the fitment now. But I unfortunately don't have pictures of these.
Back to the spliters, I hadn't originally planned ot get them on this weekend, but last night I had some extra time, so I tossed them on, and it didn't even take too long. I'm stoked on how they look.
Here's the gap on the Driver side splitter from above. Fitment isn't perfect, as you can see right around the wheel well, but not a huge concern in my opinion:
http://s654.photobucket.com/user/jordisonjr1/media/84564c4f-f51c-4d9a-8a61-078afe8347b3_zpsaezdriv1.jpg.html
And now the passenger side. This one had the worst fitment from the start, and a gap way larger than this, as you can see posted above. It looks a little worse in this shot, because its the perfect angle to see the gap, but this is what I was able to bring it down to:
http://s654.photobucket.com/user/jordisonjr1/media/photo%205_zpsgiqdydte.jpg.html
I tried using the two way tape and rubbing alcohol to clean the surfaces, but it didn't really want to stick very long, due to the fiberglass being fairly rigid and inflexible. But from a distance, it really isn't that noticeable(ignore the dirty car, and driveway shots):
http://s654.photobucket.com/user/jordisonjr1/media/photo%201_zpsgwocaipu.jpg.html
http://s654.photobucket.com/user/jordisonjr1/media/photo%202_zpsi96xl6q0.jpg.html
http://s654.photobucket.com/user/jordisonjr1/media/photo%203_zpsmknbpjpy.jpg.html
Overall, I'm happy with how I managed to get them to fit, considering how poorly they fit from the start. Although if I did it again, I would probably just go with OEM. I just wanted these on before the end of the summer.
Also on friday, I ended up re-tinting my front turns and side markers, as it was really faded before. They're fairly dark, but the light passes through still, and you can even see the reflector through the side marker (required in Winnipeg) when light hits it. Some may think its a "ricer mod" but it'll do for now, untill I can get clear turns in there.
Posted by: cheela Sep 28, 2015 - 11:10 AM
the tint matches the rest of your car, windows and riser blocks.
and sucks about fitment but it looks good though.
Posted by: jordisonjr Sep 28, 2015 - 11:15 AM
and sucks about fitment but it looks good though.
That was my original plan when I had did it the first time.
It just got reaaaally faded so I decided to re-spray them
A buddy recommended that I do the front grill black as well, which I think I'm going to tackle tonight.
Posted by: RoadRage Sep 28, 2015 - 8:44 PM
Looks neat!
Is that just clear and thats it, or did you buff after?
I was talking to Paul a few days before about here in Aus, the clear I get here sprays on hazy and have to super sand it and buff it to come out looking that shiny
Posted by: jordisonjr Sep 29, 2015 - 8:19 AM
Is that just clear and thats it, or did you buff after?
I was talking to Paul a few days before about here in Aus, the clear I get here sprays on hazy and have to super sand it and buff it to come out looking that shiny
That's just clear coat.
The haziness you get may have something to do with humidity/temperature/ambient air. When I was clear coating my sideskirts, I sprayed on a hot humid day, and it came out milky/hazy. I solved it by wetsanding with 600 grit (I think it was 600, but I could double check if you need) and then resprayed clear over top on a less humid day, and they cam eout much better.
It also could have something to do with the actual clearcoat you've used, it may be poor quality. I've used duplicolor clear in the past, and I had that issue no matter what I did, so this time around I got my supplies from an actual paint supply store, rather than a hardware store that happens to sell paint and other materials.
I could go back and wetsand these with a 1000-1200 grit, to have even more shine, but I think I'm happy with the overall look, and don't want to damage the surrounding areas, or remove them from the car, so I'll probably just leave them as is.
Posted by: jordisonjr Oct 11, 2015 - 8:59 PM
I went out for two shoots this weekend with some local photographers. Ill let the photos speak for themselves:
https://flic.kr/p/znNJg9https://flic.kr/p/znNJg9 by https://www.flickr.com/photos/dtiderman/, on Flickr
https://flic.kr/p/yHwm98https://flic.kr/p/yHwm98 by https://www.flickr.com/photos/dtiderman/, on Flickr
https://flic.kr/p/yHnBtqhttps://flic.kr/p/yHnBtq by https://www.flickr.com/photos/dtiderman/, on Flickr
https://flic.kr/p/znTReihttps://flic.kr/p/znTRei by https://www.flickr.com/photos/dtiderman/, on Flickr
https://flic.kr/p/zC6AKNhttps://flic.kr/p/zC6AKN by https://www.flickr.com/photos/dtiderman/, on Flickr
https://flic.kr/p/zFi9zzhttps://flic.kr/p/zFi9zz by https://www.flickr.com/photos/dtiderman/, on Flickr
https://flic.kr/p/yHpQ6Lhttps://flic.kr/p/yHpQ6L by https://www.flickr.com/photos/dtiderman/, on Flickr
https://flic.kr/p/yHyySvhttps://flic.kr/p/yHyySv by https://www.flickr.com/photos/dtiderman/, on Flickr
https://flic.kr/p/znPzmAhttps://flic.kr/p/znPzmA by https://www.flickr.com/photos/dtiderman/, on Flickr
https://flic.kr/p/zDkXdJhttps://flic.kr/p/zDkXdJ by https://www.flickr.com/photos/dtiderman/, on Flickr
https://flic.kr/p/yHpNSdhttps://flic.kr/p/yHpNSd by https://www.flickr.com/photos/dtiderman/, on Flickr
https://flic.kr/p/znW3x6https://flic.kr/p/znW3x6 by https://www.flickr.com/photos/dtiderman/, on Flickr
https://flic.kr/p/znW3gVhttps://flic.kr/p/znW3gV by https://www.flickr.com/photos/dtiderman/, on Flickr
https://flic.kr/p/znR45Yhttps://flic.kr/p/znR45Y by https://www.flickr.com/photos/dtiderman/, on Flickr
https://flic.kr/p/zFkBS6https://flic.kr/p/zFkBS6 by https://www.flickr.com/photos/dtiderman/, on Flickr
Posted by: jordisonjr Oct 11, 2015 - 9:03 PM
After Owning my car for about 7 years, Keith and I have wanted to get together for a shoot, and I finally felt I had made enough progress to shoot together!\
https://flic.kr/p/yGk9kMhttps://flic.kr/p/yGk9kM by https://www.flickr.com/photos/kenau/, on Flickr
https://flic.kr/p/zmAVpGhttps://flic.kr/p/zmAVpG by https://www.flickr.com/photos/kenau/, on Flickr
https://flic.kr/p/zmG3ABhttps://flic.kr/p/zmG3AB by https://www.flickr.com/photos/kenau/, on Flickr
https://flic.kr/p/zATRqEhttps://flic.kr/p/zATRqE by https://www.flickr.com/photos/kenau/, on Flickr
https://flic.kr/p/yGjASXhttps://flic.kr/p/yGjASX by https://www.flickr.com/photos/kenau/, on Flickr
https://flic.kr/p/zE6rpBhttps://flic.kr/p/zE6rpB by https://www.flickr.com/photos/kenau/, on Flickr
https://flic.kr/p/zC7cbhhttps://flic.kr/p/zC7cbh by https://www.flickr.com/photos/kenau/, on Flickr
https://flic.kr/p/zmBdffhttps://flic.kr/p/zmBdff by https://www.flickr.com/photos/kenau/, on Flickr
https://flic.kr/p/zmGjkxhttps://flic.kr/p/zmGjkx by https://www.flickr.com/photos/kenau/, on Flickr
https://flic.kr/p/yGb2nNhttps://flic.kr/p/yGb2nN by https://www.flickr.com/photos/kenau/, on Flickr
https://flic.kr/p/zmBj8Chttps://flic.kr/p/zmBj8C by https://www.flickr.com/photos/kenau/, on Flickr
https://flic.kr/p/zE6GyKhttps://flic.kr/p/zE6GyK by https://www.flickr.com/photos/kenau/, on Flickr
https://flic.kr/p/zmGuv2https://flic.kr/p/zmGuv2 by https://www.flickr.com/photos/kenau/, on Flickr
https://flic.kr/p/zE6MuBhttps://flic.kr/p/zE6MuB by https://www.flickr.com/photos/kenau/, on Flickr
https://flic.kr/p/zE6PSThttps://flic.kr/p/zE6PST by https://www.flickr.com/photos/kenau/, on Flickr
Posted by: cheela Oct 12, 2015 - 8:45 AM
the full kit totally transforms your car. pics look great! keep up the good work. makes me feel lazy.
Posted by: jordisonjr Oct 12, 2015 - 10:51 AM
I agree it definitely makes a world of difference. Don't feel lazy, before this, I can't even remember the last time I did something to it!
Posted by: jordisonjr Jun 6, 2016 - 4:27 PM
After taking my car out of storage and driving for a couple days, one of my tires no longer holds air. I knew it was coming, but didn't think it was going to happen this soon.
I was originally planning on getting some 17's for the summer, but after this I was in a bit of a scramble to get wheels, as my OEM wheels and tires are in rough shape.
I ended up finding a set of Enkei RP-01's with tires for a decent price. Cheaper than what I was originally going to go with (New CR-Kai Reps, and new tires) So I'm pretty pumped it worked out. Put them on the car, knowing they'd be fairly sunk at 16x7 +35, but they fit better than I expected. Now I just need a set of spacer, and possibly powdercoat them white, but these will do for the time being.
http://s654.photobucket.com/user/jordisonjr1/media/E38B56A0-E45F-40AC-B4CC-694BAC555B75_zpsszbutdql.jpg.html
Posted by: Malek Jun 6, 2016 - 5:17 PM
Nice find! Spacers would suit it well but doesn't look bad at all how it is.
How's that extra sidewall feel? lol
Posted by: CelicaDICE Jun 6, 2016 - 6:20 PM
Very Nice! I have the exact same wheels as you do(except for the Center caps cause i didnt like the "racing" engraved)! Only difference is that I haven't mounted mines on the car yet. Oh, and they use to be in Silver too! Anyway, the Enkei RP01's look fantastic on the 6G's.
Posted by: ricochet1490 Jun 6, 2016 - 8:04 PM
the other wheels were better imo lol
why not get new tires for the 18s?
Posted by: PegGTS Jun 6, 2016 - 11:23 PM
He's better off with these wheels where we live lol
Posted by: cheela Jun 7, 2016 - 7:12 AM
I always like the look of extra meat on the tires.
Posted by: jordisonjr Jun 7, 2016 - 12:06 PM
How's that extra sidewall feel? lol
Definitely go to invest in spacers, but for now I just wanted to get a reliable set up in the car. But it does look a lot better as is, than I thought it was going to. The extra sidewall is great. It even feels better than the OEM wheels which had the same
Profile tire.
Oh, and they use to be in Silver too! Anyway, the Enkei RP01's look fantastic on the 6G's. Yeaaa the center caps are kind of lame, maybe I'll change those out one day, I didn't even k ow you could hah. What do your centers say now?
why not get new tires for the 18s?
Honestly, they were just too big for my liking. I was kind of over how they looked. Ideally I wanted 17's but wheels with the proper specs for this car are difficult to find, in "real" wheels or reps, and then these turned up and it seemed to be the cheapest and easiest, and I liked the look of them, so I just went for t.
The 18's were also really heavy, which I think cause a bunch of wear. I also had them for a long time so it was time for a change.
Yea it looks good IMO. I've kind of always been for bigger wheels, but I like how this set up looks on the car right now, and I can't co plain with how it rides either!
Posted by: Box Jun 7, 2016 - 2:16 PM
I'm the same way, the rubber band look doesn't do anything for me. At the same time neither does the monster truck tire look. Around 4" of sidewall give or take a little usually looks ideal to me. Anyhow, I think the new Enkei 16's look great.
Posted by: Zeros2 Jun 7, 2016 - 4:08 PM
Looking slick man I like the rp1 much better the 18's almost look to much, takes away from the style I think
Posted by: jordisonjr Jun 7, 2016 - 5:08 PM
Thanks for the kind words guys!
Posted by: CelicaDICE Jun 7, 2016 - 6:48 PM
Oh, and they use to be in Silver too! Anyway, the Enkei RP01's look fantastic on the 6G's. Yeaaa the center caps are kind of lame, maybe I'll change those out one day, I didn't even k ow you could hah. What do your centers say now?
They currently have the "Toyota" emblem on them. Once I have the time to mount them on(tomorrow hopefully), I'll show you.
Posted by: richee3 Jun 7, 2016 - 9:06 PM
I like the RP01's much more than the old wheels.
Posted by: jordisonjr Jun 8, 2016 - 10:48 AM
Oh, and they use to be in Silver too! Anyway, the Enkei RP01's look fantastic on the 6G's. Yeaaa the center caps are kind of lame, maybe I'll change those out one day, I didn't even k ow you could hah. What do your centers say now?
They currently have the "Toyota" emblem on them. Once I have the time to mount them on(tomorrow hopefully), I'll show you.
That would be solid! Not super keen on "racing" in the center either haha
Me too! I was a little concerned before buying, but happy with the final outcome for now
Posted by: jordisonjr Jul 29, 2016 - 12:11 PM
Been a while since I've updated, and this ones not the greatest either:
Well I'd been having some issues with the car that started a couple weeks back. Had some bad vibrations, and a whirring/growling sound coming from the drive side front end. Vibrations were so bad that I could feel it through the floor with my feet, and as the speed increased it also increased.
With my experience with wheel bearings (I've done a couple now) I was convinced this was the issue. So I order a driver side wheel bearing and tore into it once it arrived.
As soon as I got the wheel off, I realized I didn't have a deep enough 30mm socket. So I did some running around, and called some friends, and managed to pick one up, so just a minor setback. Everything went fairly smoothly after that, except getting the tie rod out of the knuckle. This took about an hour of hammering to get out, making this job take quite a bit longer than expected.
I was pretty frustrated:
http://s654.photobucket.com/user/jordisonjr1/media/36C36F29-65F1-4559-B784-93F59745FE21_zpssvat3znh.jpg.html
Anyways, took it to a shop to get the bearing pressed in the next day, and got the car back together.
Overall I paid 80 for the bearing and shipping, 80 to have it pressed and 15 for the socket I had to buy (but that's an investment, in my eyes), so about 160 bucks, after bein quoted 350 from a shop, so I was stoked on the savings.
Get the car back on the ground, and the exact same noise persisted. At that point I was pretty pissed and just left it. Came back the next day and after posting on the facebook page, and chatting with friends, looked into everything it could be, and didn't see anything out of the ordinary, and I was pretty stumped.
I ended up taking it in to a shop to have it done and over with, and because I was already tired of driving my moms Kia Soul (they suck!  ) . SO, turns out, somehow, the axle on the passenger side wasn't spinning correctly on an axis, and ended up taking out the PASSENGER wheel bearing. No I have no idea how this happened, but I've learned that when a noise is coming from one side, don't always assume the culprit is on that side. So the shopped ended up saving the axle, nd replaced the wheel bearing for cheaper than expected.
After he called me and told me the problems, I received another call about an hour later, saying my air filter was pretty clogged, I had 2 nails in my rear tire, and that the motor had ZERO oil in it. I was pretty shocked and blown away at this as I like to monitor those types of things, ad was also curious why he was looking at other things on the car, that weren't related to the issue. He told me the bottom end was likely on its way out, and that I should consider selling, after being driven without oil for that long. We continued chatting and the things he was telling me didn't really make sense, so I asked "You are talking about the Celica right", and he instantly replied, oh SH!T I've got the wrong guy.
Luckily, some other poor sap has its motor on the way out, and not me
I considered changing the bearing myself, but the car was there, and he'd need to take it all apart to get at the axle anyways so I just let him finish it off.
And now I know that both my bearings should be good for a while now, I hope
Posted by: Box Jul 29, 2016 - 12:27 PM
See but now you're glad it was just wheel bearings and not the engine having been run low on oil.
Posted by: jordisonjr Jul 29, 2016 - 3:05 PM
Exactly. And I ALSO don't have to decide between rebuilding, swapping, or buying a different car
Posted by: cheela Jul 29, 2016 - 3:30 PM
oh god, i was waiting for a horror story about that shop. like they put nails in ur tires and ran it with low oil etc. hahaha. glad it's getting all figured out though.
Posted by: jordisonjr Aug 13, 2016 - 10:50 PM
Luckily it was nothing like that! But it was still pretty brutal haha.
Did a wash, Clay bar and wax today. It's been a while since I've done it, so I kind of forgot how much of a difference it makes. As always, pretty happy with the results.
http://s654.photobucket.com/user/jordisonjr1/media/CCA454C4-C4BB-4845-83F7-BD3C4DBF02A0_zpseuywktf4.jpg.html
http://s654.photobucket.com/user/jordisonjr1/media/4EDB4A27-1B2B-4034-BF01-BE13070861A9_zpsahqmauc4.jpg.html
Posted by: jordisonjr Aug 18, 2016 - 3:02 PM
Purchased a couple goodies for the car the other day. I've been searching for some projectors for a while, but nothing really had come up in my price range/the condition I was wanting. Luckily I ended up finding someone who was willing to get these off of Yahoo Japan auctions for me. At a steal of a deal as well. Thanks to RoadRage for referring me to the guy who bought them!
http://s654.photobucket.com/user/jordisonjr1/media/A3E0F925-1535-463C-91E3-D11AB7993EDE_zpshcny5fqj.png.html
I've also been considering foglights over this summer as well. After keeping a close eye to the for sale threads, I've realized that the pre-facelift fogs are fairly difficult to come by. So I thought why not take a look through yahoo auctions for these as well since I was already having something shipped. Ended up finding this set for suuuper cheap, way cheaper than expected, and will save on shipping all the items together.
http://s654.photobucket.com/user/jordisonjr1/media/B351313E-900D-4E49-A2B1-9094BA472A19_zpswxdoz70i.png.html
Now I just need to wait..
Posted by: Box Aug 18, 2016 - 4:20 PM
The waiting is the hardest part, though getting them at a good deal kind of balances it out.
Posted by: RoadRage Aug 19, 2016 - 7:53 AM
Glad i could help
Cant waint to see them on the car
Posted by: jordisonjr Aug 26, 2016 - 8:54 AM
Got these in the mail the other day! I was expecting it to take about a month, so I was surpised when they got here withing 4 days. Turns out the shipper used EMS and that's why they got here so quick. Since I thought it would take forever to get here, I was rather pokie on ordering bulbs, and the H1 bulb adapter, so I can't really install the low beams untill those get here. And there's really no point in installing the high beams, and then the low beams at another time. It would be doing hte same job twice, so Ill just hold off a couple days untill the bulbs get here. I can rig them in to stay in the headlights untill the adapters get in.
I was a little worried about shipping, after hearing people have had issues with glass breaking in transit, but managed ot get these all in one piece, aside from one mounting tab breaking off on a low beam, whihc can be fixed fairly easily as I have the tab still.
http://s654.photobucket.com/user/jordisonjr1/media/F27F676B-42E0-4F4B-B29F-0D35842978C5_zpsmsiyp3ax.jpg.html
As for the fog lights, I'm going to install these as soon as I can! However I'm a little stumped as to how I can wire them in. I was debating wiring htme into my Daytime running lights (Required in canada, always on when the car is on, except when the low beams are on), as well as the sidemarkers, so essentially they would always be on)
The other option is to run it on its own power, with a switch in the cabin, but I'm not quite sure how to do this. Where would I grab power from for this, and would I use an inline fuse? Or somehow tie this into the existing fuse panel? Not quite sure if there is an open spot for fog lights, since the 95 did come with fog lights, just not my particular vehicle.
Any adivce on wiring these in would be Greatly appreciate, as I don't really know a whole lot about wiring.
Posted by: PegGTS Aug 26, 2016 - 9:49 AM
Gonna look sick dude! Get them on before FNL tonight
Posted by: jordisonjr Aug 26, 2016 - 9:52 AM
haha I don't have bulbs yet
So I'd essentially be driving with no headlights, or my high beams on hahaha.And its my girlfriends birthday, so I don't think thats going to happen.
Posted by: PegGTS Aug 26, 2016 - 10:39 AM
haha I don't have bulbs yet
So I'd essentially be driving with no headlights, or my high beams on hahaha.And its my girlfriends birthday, so I don't think thats going to happen.
Bring her and get her some BDI
Posted by: Box Aug 26, 2016 - 1:55 PM
As far as wiring goes you have a few options. Either way you'll need an inline fuse, 10A would be about right using standard wattage bulbs. One method will require a relay and another will require a basic on/off switch. In either case you can take the negatives for your bulbs and ground them to the body to save some trouble, that or run them to the battery or tap into grounded wiring for a more certain connection. For the switch method you'll take the positive from your bulbs into one pin of your switch, then you wire from the other pin on the switch to an inline fuse then to either the positive on your battery or to an unused constant power source in the fuse panel. For the relay it gets slightly more involved but nothing too bad, just need a standard four pole relay. You have four pins that're arranged like so:
-----87
86-------85
-----30
85 goes to the chassis ground, your trigger source(in this case tapping into the positive wire on a DRL or side marker) goes to 86, 87 goes to the positive on your bulbs, then 30 goes to an inline fuse and then to battery or an unused constant power source in the fuse panel. Think that more or less covers it.
Posted by: jordisonjr Aug 26, 2016 - 2:08 PM
-----87
86-------85
-----30
85 goes to the chassis ground, your trigger source(in this case tapping into the positive wire on a DRL or side marker) goes to 86, 87 goes to the positive on your bulbs, then 30 goes to an inline fuse and then to battery or an unused constant power source in the fuse panel. Think that more or less covers it.
Super Helpful!
Do you know if there would be a spot on the fuse panel for fogs, even though my car didn't come with fogs? As I know some did.
What exactly does the relay do? I noticed in the option with the switch (I have a switch installed already but nothing wired to it) that a relay isn't used. Is that an issues?
Also would tapping power from side markers or the DRL's be an issue?
I was considering getting a universal wiring kit like this: http://www.princessauto.com/en/detail/12v-40a-universal-lighting-harness/A-p8392201e and using my own switch. It may even be more cost effective than buying all the individual pieces, as I don't have this lying around.
Posted by: Box Aug 26, 2016 - 4:59 PM
It's been two years since I had my Celica, but generally you'll have some unused live feeds in the fuse panel. Easiest way to check is with a multimeter/voltmeter, put your negative probe onto ground then poke around the fuse panel with the positive probe until the meter displays 12+ volts. I want to say cars back then had a universal harness so even if your car didn't come with a certain option the wiring was still there, new cars on the other hand only have wiring for what's there. If the wiring for fog lights is there then you should be able to use a factory relay and switch, but I can't say for certain not having the car in front of me. You should be able to look into the relay panel and see if there are pin sockets where the fog relay would go and try to see if the wiring is there.
The relay acts as a switch which is why, the purpose in having a switch and relay would be so that they could only be turned on when something else is already on(whatever was tapped to trigger the relay). Which doing that you'd just put a switch between the relay and inline fuse. Tapping into them really won't draw power, just a really miniscule amount to trip the relay and then the relay draws power from the battery or live feed to send to the bulbs. If it were me I'd get some 12 gauge wiring off eBay or Amazon, then depending on how you want to go about it a relay or use the switch you have.
Posted by: jordisonjr Aug 26, 2016 - 6:49 PM
I took a look at the car, and there is a spot in the fuse box under the dash designated for the fog lights. But there doesn't seem to be wiring near the front bumper where the fogs would be installed. There also is no relay in either of the fuse/relay boxes under the hood.
Would there be wiring leading to the fuse panel (under dash) and maybe tied up or loose somewhere in the engine bay?
Posted by: Box Aug 26, 2016 - 9:20 PM
If the wiring isn't there it could've been a separate harness that was added in, I want to say I looked for it on mine at one point and there were no signs anywhere of it. Could be North American market cars didn't have it at all since fog lights weren't an option over here, really wouldn't make sense to sell so many cars with a good chunk of wiring that'd go unused. Perhaps where it was an option even non optioned cars have the harness, but I know today if a car doesn't have fog lights or even power seats from the factory the wiring won't be there. It's not too big a deal, really the hardest part is in routing wiring and making things look neat.
Posted by: Tigawoods Aug 27, 2016 - 6:03 AM
look up a generic fog light wiring diagram. Put in an inline fuse and inline relay, have it go to a switch and boom. got yourself foglights!
Ive wired mine a few times. If you want it super OE. You can take out the fuse box in the engine or under the dash to access the rear of it to be able to add in some new fuse and relay connections.
Posted by: jordisonjr Aug 27, 2016 - 10:26 AM
Yea I was mostly hoping it would be there to keep it OEM looking. But I don't think it would be too bad to just wire it in on my own.
Ive wired mine a few times. If you want it super OE. You can take out the fuse box in the engine or under the dash to access the rear of it to be able to add in some new fuse and relay connections.
That's what I was wanting to do, keep it OEM as possible, and a life running wires through the firewall. However looking more into it, it seems like quite the pain for something not really required. Especially removing the fuse panel, seems like quite the mission (although I only quickly glanced at it). The more I look into this, makes me lean more towards just buying a universal kit and installing. Everything will be included with the kit. And will save me multiple trips to the store to install, being more cost effective in the long run haha
Posted by: jordisonjr Sep 6, 2016 - 9:31 AM
After receiving the projectors and foglights, I wanted to have everything ready for install on the weekend, so that I didn't have any issues when the car was apart and had to make unnecessary runs to pick up parts.
So the past week I had been doing some reading as to what I needed to get the HIDs working etc. I ended up getting a universal fog light wiring kit, and did as much running of wires that I could, without actually connecting anything, or installing the foglights yet. Just so I could avoid doing this when it came time ot mount the fogs.
I also ordered HID bubls, the OEM style bulb holders, and got some yellow Nokya bulbs for the fog lights. After reading aobut installing HIDs in the projectors, I determined that I didn't need to create the adapter, as I already had HIDs so I could just swap the bulbs and I'd be good. When the bulbs came in, I took a quick look at the car and thought I screwed up and actually did need the adapters. So I did a bunch of running around looking for the right H1 plugs so I could create this harness.
No where locally that I looked had it(perks of being in canada ), and I really wanted to avoid ordering online cause then I'd have to wait even longer to install. So I messaged a buddy and it turned out he had some in stock at a shop he worked at. So now I just needed the 9006 end of the harness. Thinking aobut this, I remembered I had an old set of HID bulbs that didn't work, so I could cut the connector of this. When I went and actually looked at the bulb, I realized that I didn't actually need to make this harness as I had everything I needed already. Lesson learned: Measure twice, cut once, doesn't just apply for carpentry
So at this point I've got everything I need to install the projectors and fogs except for one thing. The accent bulbs. The seller from Japan cut the wires for these pigtails extremely short:
http://s654.photobucket.com/user/jordisonjr1/media/10A38A58-FDBF-4DED-9EF8-B5474DDB30C4_zpsb5uprb8z.jpg.html
So extending these wires with connectors were out of the question. I did some reading on repinning and for some reason was not able to get the wires out, no matter how much I followed forum posts, youtube videos, etc. So I ended up soldering wires on, and it actually worked much better than expected. So these got tied into my side markers.
So now I've got everything ready for install.
Knowing how much of a pain it is to get the front bumper off I started early on saturday, around 10 am, and took my time with the whole job. Surprisingly, the bumper was much easier to get off this time around. I found that removing 3 of the fender liner bolts, jacking the car up slightly, and turning the wheels really helped, and I didn't have any issues getting these off. I actually found it more difficult getting the nuts back on to reasemble, but even then, the top nut was the hardest and the middle two were a breeze.
Workstation:
http://s654.photobucket.com/user/jordisonjr1/media/D28C5435-6883-4C41-98E1-66317281DE07_zps4fqodfve.jpg.html
I ended up breaking the middle stud on the passenger side inside fender, but, weight reduction, so no problem . Also, broke one of the bolts within the crash bar, that mounts the foglights, so I spent a bunch of time drilling that out in order to mount the foglights.
It was quite the mission of the job, and I finished around 7PM, but I wans't really in a rush to get it done, and wanted to make sure everything was properly done, so I didn't have to do it again. But, enough rambling, here's the outcome:
http://s654.photobucket.com/user/jordisonjr1/media/0AB675F4-C0FB-4F2C-9246-B94E5D13A312_zpsls9nkmib.jpg.html
http://s654.photobucket.com/user/jordisonjr1/media/4AABD8FA-5D13-4F2F-9CDE-D4EA70136284_zpstlemrpnk.jpg.html
http://s654.photobucket.com/user/jordisonjr1/media/99C3DE61-FDC9-4AFE-BE3E-1DA80B0FAE69_zpsynbwx934.jpg.html
http://s654.photobucket.com/user/jordisonjr1/media/5233E95E-201A-4EA6-96C0-FAB6838876D0_zpsjqmwsowx.jpg.html
http://s654.photobucket.com/user/jordisonjr1/media/5E2BB630-1594-4450-8425-2EB60B5D7F87_zpste9ls0va.jpg.html
http://s654.photobucket.com/user/jordisonjr1/media/EE9CA2D5-663E-427C-8894-FD9A61D33620_zps3asnjfgu.jpg.html
Overall, I'm super pumped with how these change the look of the front end. It makes the car look much newer, and less dated in my opinion. More/higher quality pictures to follow!
Posted by: cheela Sep 6, 2016 - 3:31 PM
they look great. really updates the front end. mine needs that update sometime in the future. haha
Posted by: jordisonjr Sep 6, 2016 - 4:02 PM
Yea it really does! It just makes my bumper look like sh!t now because the clear is wearing in a bunch of spots haha
Posted by: UndaGrwnD Sep 7, 2016 - 1:07 AM
projectors are always a good update!
liking the rims very much!
Posted by: Box Sep 7, 2016 - 3:10 AM
It's amazing how much just the projectors change the look of the car.
Posted by: jordisonjr Sep 7, 2016 - 8:41 AM
liking the rims very much!
Thank you sir!
Yea it definitely is quite the difference that's forsure! It ties the exterior all together nicely.
Posted by: jordisonjr Sep 19, 2016 - 8:47 AM
After all the changes this summer and last, I decided to do a shoot with one of the local guys. It started raining after the first location, but we decided to carry on, and I think it still worked out well.
https://flic.kr/p/Ln5g8nhttps://flic.kr/p/Ln5g8n by https://www.flickr.com/photos/shaun_j/, on Flickr
https://flic.kr/p/Ln5fP6https://flic.kr/p/Ln5fP6 by https://www.flickr.com/photos/shaun_j/, on Flickr
https://flic.kr/p/Ln5fCKhttps://flic.kr/p/Ln5fCK by https://www.flickr.com/photos/shaun_j/, on Flickr
https://flic.kr/p/LmTFv3https://flic.kr/p/LmTFv3 by https://www.flickr.com/photos/shaun_j/, on Flickr
https://flic.kr/p/Ln5ffFhttps://flic.kr/p/Ln5ffF by https://www.flickr.com/photos/shaun_j/, on Flickr
https://flic.kr/p/Ln5f1xhttps://flic.kr/p/Ln5f1x by https://www.flickr.com/photos/shaun_j/, on Flickr
https://flic.kr/p/Ln5eQnhttps://flic.kr/p/Ln5eQn by https://www.flickr.com/photos/shaun_j/, on Flickr
https://flic.kr/p/Ln5eCthttps://flic.kr/p/Ln5eCt by https://www.flickr.com/photos/shaun_j/, on Flickr
https://flic.kr/p/Ln5exDhttps://flic.kr/p/Ln5exD by https://www.flickr.com/photos/shaun_j/, on Flickr
https://flic.kr/p/Ln5edahttps://flic.kr/p/Ln5eda by https://www.flickr.com/photos/shaun_j/, on Flickr
https://flic.kr/p/Mc4FCBhttps://flic.kr/p/Mc4FCB by https://www.flickr.com/photos/shaun_j/, on Flickr
https://flic.kr/p/Ln5dSFhttps://flic.kr/p/Ln5dSF by https://www.flickr.com/photos/shaun_j/, on Flickr
https://flic.kr/p/Mc4Egihttps://flic.kr/p/Mc4Egi by https://www.flickr.com/photos/shaun_j/, on Flickr
https://flic.kr/p/Ln5d7nhttps://flic.kr/p/Ln5d7n by https://www.flickr.com/photos/shaun_j/, on Flickr
https://flic.kr/p/Mc4DeDhttps://flic.kr/p/Mc4DeD by https://www.flickr.com/photos/shaun_j/, on Flickr
https://flic.kr/p/Mg9etohttps://flic.kr/p/Mg9eto by https://www.flickr.com/photos/shaun_j/, on Flickr
https://flic.kr/p/Mg9eeWhttps://flic.kr/p/Mg9eeW by https://www.flickr.com/photos/shaun_j/, on Flickr
https://flic.kr/p/Mg9dD7https://flic.kr/p/Mg9dD7 by https://www.flickr.com/photos/shaun_j/, on Flickr
https://flic.kr/p/Ln5bNkhttps://flic.kr/p/Ln5bNk by https://www.flickr.com/photos/shaun_j/, on Flickr
https://flic.kr/p/Mg9d3Chttps://flic.kr/p/Mg9d3C by https://www.flickr.com/photos/shaun_j/, on Flickr
Posted by: cheela Sep 19, 2016 - 9:01 AM
Celi keeps looking better and better. great shots!
Posted by: RoadRage Sep 19, 2016 - 11:34 AM
Love the pics! 
Now pls go get more dings so my car can keep up with it hahaha
Posted by: Box Sep 19, 2016 - 2:28 PM
Car looks great, even if it is red.
Posted by: jordisonjr Sep 19, 2016 - 3:00 PM
Whoa Whoa Whoa, Red is best.
I'll overlook your negativitey and than you for the compliment
Powered by Invision Power Board (http://www.invisionboard.com)
© Invision Power Services (http://www.invisionpower.com)