Printable Version of Topic
Click here to view this topic in its original format
6G Celicas Forums _ My Project _ RHD BEAMS Progression/Build Thread
Posted by: ricochet1490 Oct 29, 2011 - 7:36 PM
Just some teasers of things to come...
Where this car used to be... http://www.6gc.net/forums/index.php?showtopic=73135
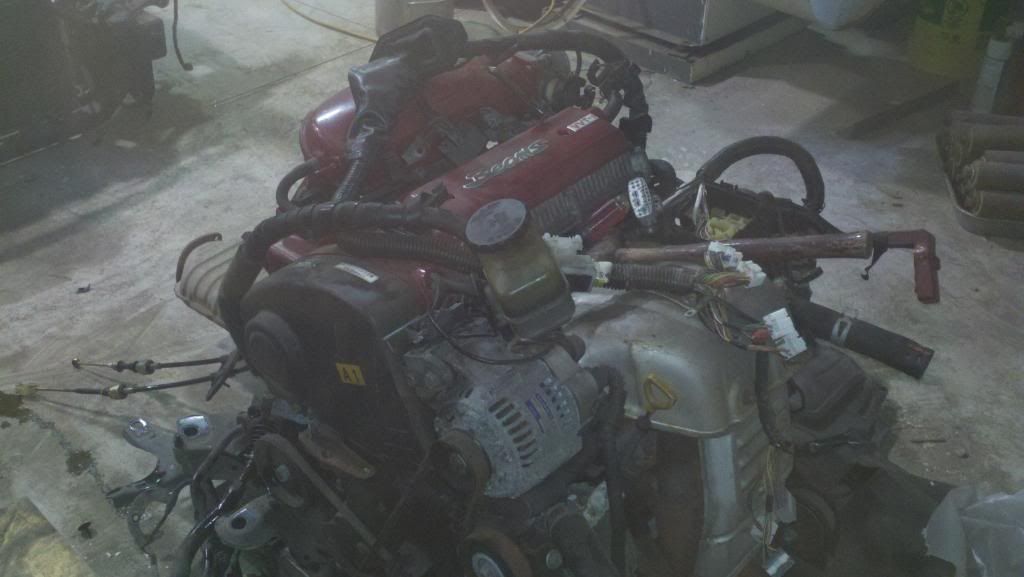
Where it is now (at my garage)
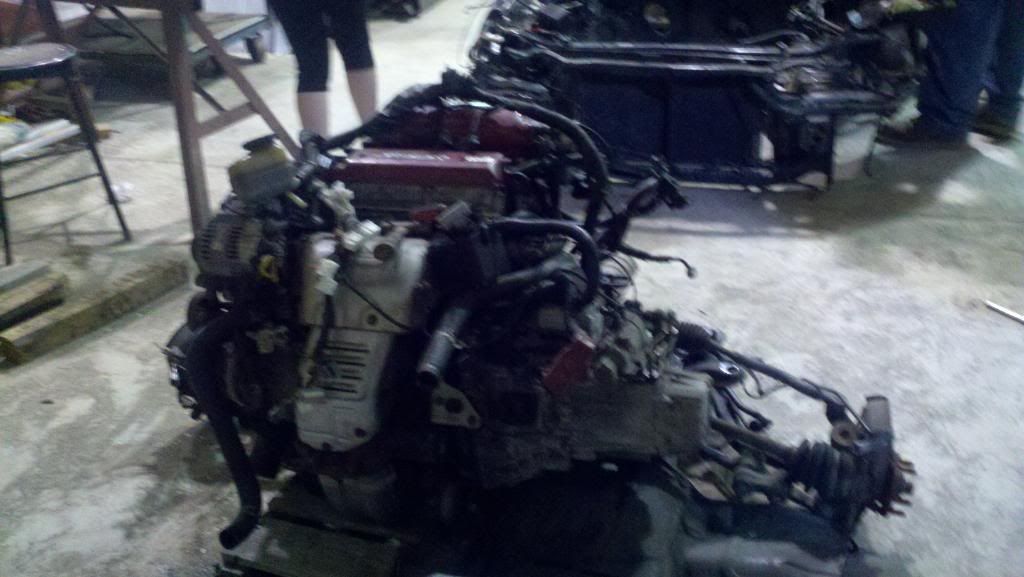
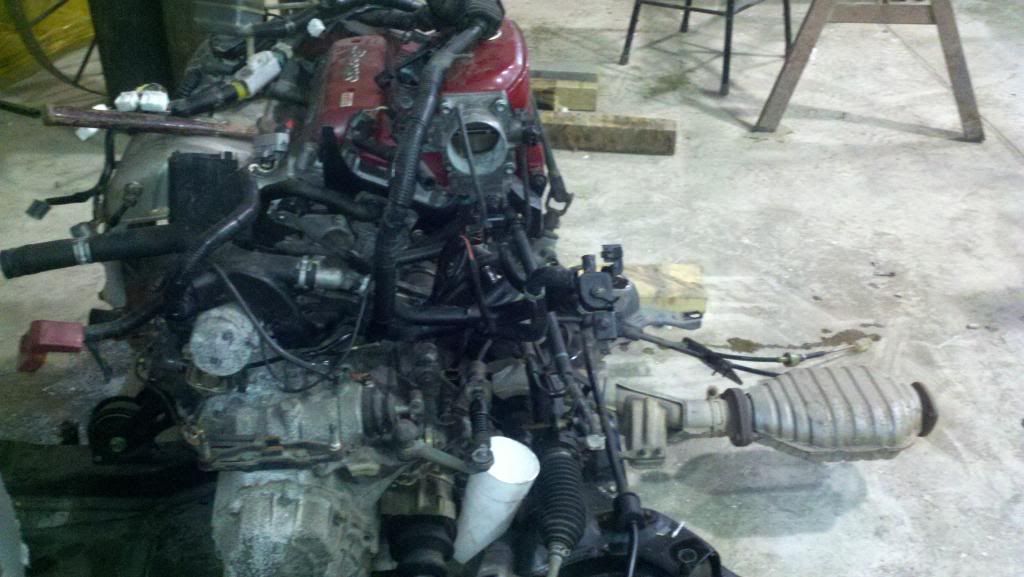
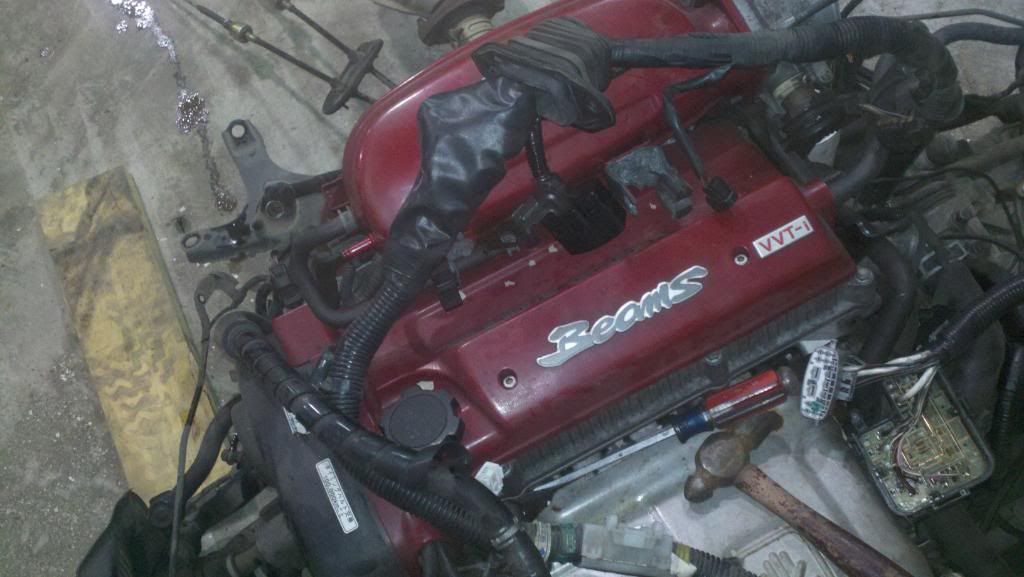
What it's going to be getting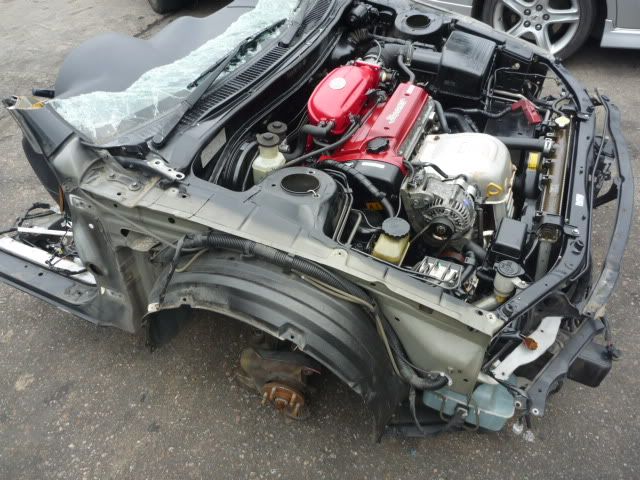
and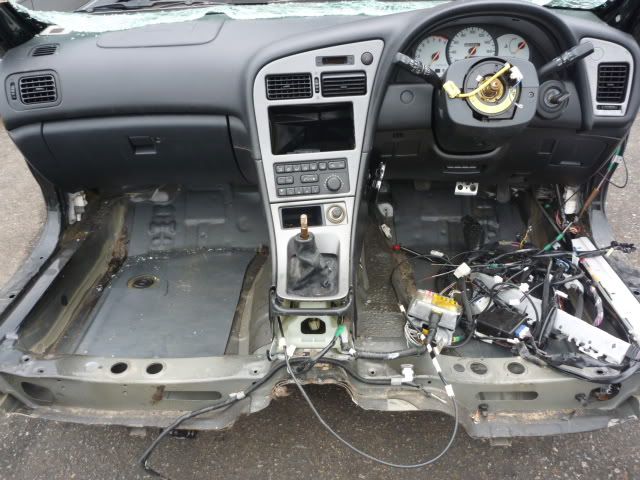
Stay Tuned!
Posted by: richee3 Oct 29, 2011 - 7:57 PM
Nice! I've been waiting for this thread. I demand pictures every step of the way. Any help you need, feel free to call me. I'll try to come up there and lend a hand with the swap if I can. That clip looks fantastic. Are you pulling the motor apart for maintenance or just dropping it in?
Do I spy an IS 300 in the background?
Posted by: enderswift Oct 29, 2011 - 8:08 PM
great clip dude! good luck with the swap 
Posted by: rave2n Oct 29, 2011 - 8:49 PM
My attention has shifted.
Posted by: kurt95gt Oct 29, 2011 - 11:40 PM
you need anyhelp let me kno man
we need to meet up sometime so I can see this in person lol
Posted by: ricochet1490 Nov 4, 2011 - 11:27 PM
Sunday!
Posted by: BonzaiCelica Nov 5, 2011 - 12:20 AM
glad too see this going into your celica. Also very glad that community of 6gc is starting to swap in redtop engines left and right without hesitation 
Posted by: ricochet1490 Nov 5, 2011 - 12:24 AM

Thank-you.

Eventual plans are to make it look like it came from the factory that way. You better believe RHD is on the way
Posted by: ricochet1490 Nov 7, 2011 - 12:16 AM
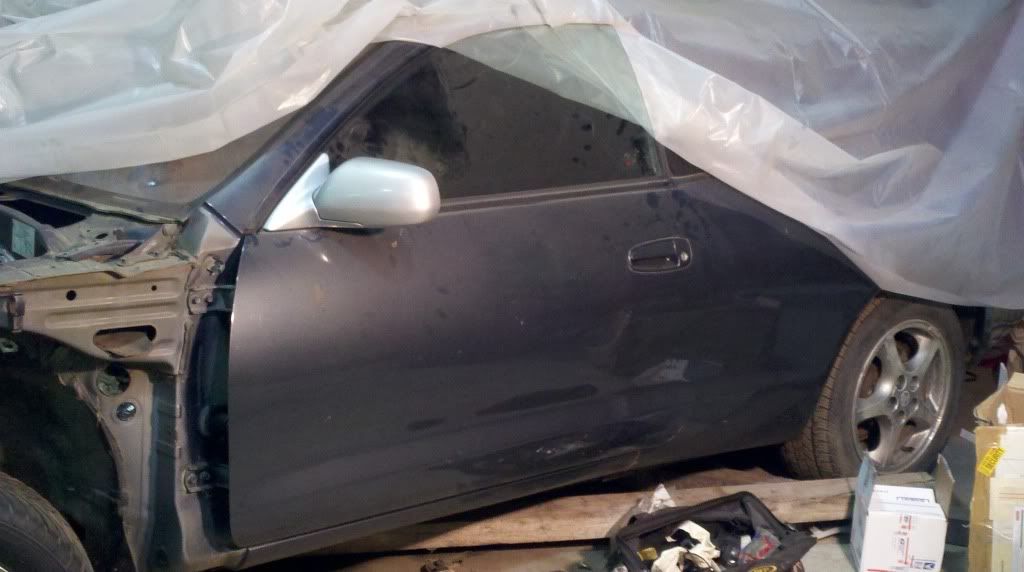
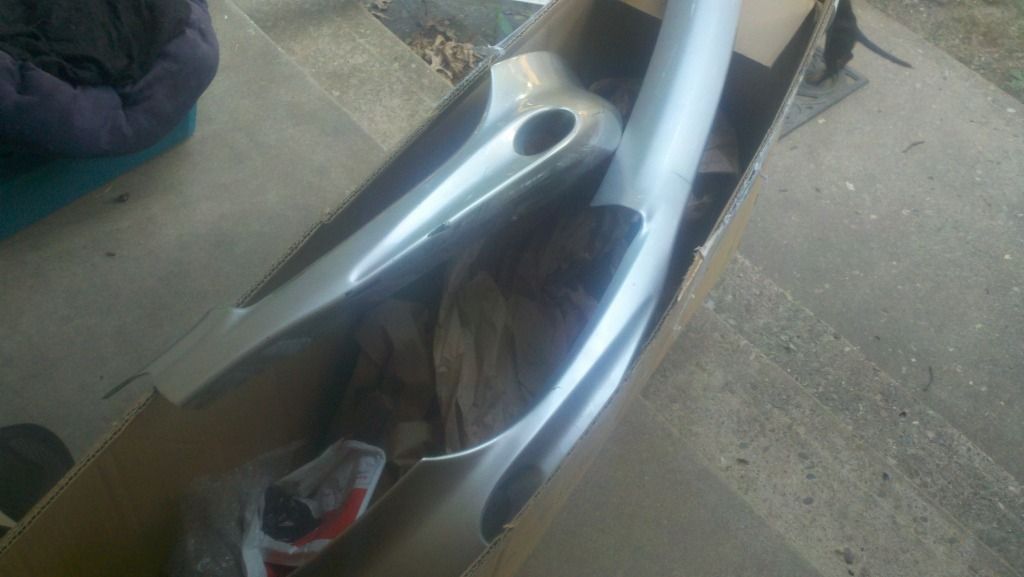
Picked up the clip today in cincinatti....
So now this progression will become a reality as soon as finals are over.
Shout out to Richee3 for the CLEAN shell at a great price with all the right parts.
Shout out to FORGMANN for the CLEAN clip at a great price complete with extra parts.
Shout out to BOTH of those guys for a ton of support, parts, and kindness. You've made this a reality for me.
This will not be halfazzed. It will retain U.S. VIN# for ease in registration and liscensing. Firewall swap over for RHD. Every part from the clip will be used with the exception of the control arms and various other parts that I will need to retain USDM suspension. Even though there are some good prices on Superstrut on the forums now.... not knowing what that means for my usdm rear end in the car and what it means for replacement parts.... I will retain all usdm suspension and brakes. The exception is the JDM anti-ock brake system. Auto climate control will also be installed.
Items I will need if anyone has these at a good price lol.... i'm not in a hurry because they are cosmetic but before I drive it I'll have to have it... but just keep it in mind haha
1) set of jdm tails
2) ssiii riser blocks and accompanying spoiler
3) ssiii body parts. splitters etc.
4) set of 17" wheels
Keep me in mind guys!! lol
On a more serious note - here is the plan of action:
1) finish finals, week of Thanksgiving (Nov 2_th)
2) weekend after deer season begin tear down of shell, complete gutting, interior, carpet, dash, everything (complete by end of first weekend in december)
3) firewall of shell cut out either that weekend or shortly thereafter. Saving all cables for trunk pop/gas etc. - setting aside all usdm parts for later install into my DD, sale on 6gc, give back to Richee3 because of all of his previous kindness.
4) drop motor from clip out of the bottom ( I have a forklift etc.) and begin clip tear down (noting and saving all bolts and wiring locations) Drop motor by christmas.... have clip torn down and parts organized by Jan 15 2012
**Classes start back up and progress will drastically slow so I need to do as MUCH as I possibly can before Jan 3. **
5) reweld clip firewall into shell and begin running chassis wiring. Have wiring run and dash parts more or less installed by Feb7 (my birthday)
6) install interior with EXTRA sound deadening everywhere with legit RHD center console ( from FORGMANN, he's the man) Complete by Feb 22
7) Install engine bay parts and tie up odds and ends like wiper bulkhead. Matching spray paint color to car - paint firewall- Complete by March 12.
8)Install engine subframe into shell by installing from bottom. Hello forklift - Hook up all engine electronics/fluids/fuel etc - Complete and have running by March 26 (end of spring break)
9) Install exterior parts/pieces tails, jdm fenders, bumpers etc. - finish by april 15
10) bleed brakes - bolt on wheels - drive to buereau of motor vehicles and get registered and liscensed - May 5th
11) Run the piss out of the car for a weekend, park it and begin all remaining body work that MIGHT need to be done if I haven't gotten to it yet. - Send to paint and have painted the color she was.... sleight blue gray.
12 Project complete for my College graduation.. Present to myself.
HERE WE GO!!
Posted by: kurt95gt Nov 7, 2011 - 2:11 AM
Sounds like you got this figured out
now I need to get ob the ball like you
Posted by: richee3 Nov 7, 2011 - 1:23 PM
That's a very detailed itinerary. I'll bet you can get it done sooner than that! Stripping the car's interior doesn't take long. If you had one solid week to work on it, no messing around, I'd bet you could have the RHD conversion and BEAMS swap finished.
About the RHD conversion, is the dash/firewall/console the only bits being converted to RHD? Like you're going to use the passenger seat as the driver's seat and keep the floorboard the same shape? What about power windows? If it was me, I would totally pick up another relay so the passenger side (soon to be driver side) window is auto down. Or get fancy and make them both auto up and down. Of course, if you move the USDM driver side window controls over, the wrong button will be illuminated, buts starting to get too nit-picky. I'm mostly just curious about the floorboard, if you're keeping the USDM floorboard or welding the RHD floorboard in.
Posted by: ricochet1490 Nov 7, 2011 - 1:29 PM
haha Dan. i didn't want guys to be like..... WHOA! that's WAY too fast. You need to slow down and do MOAR RESEARCH! lol I'm hoping to have the motor in much sooner than that.
Edit:
I may not rebuild anything.... this car is NOT a DD, it is a garage car/weekend car.... here's why - I may crack the tranny to inspect the flywheel and clutch. But that would literally be the only replaced part.
Posted by: richee3 Nov 7, 2011 - 1:34 PM
Like I said, just send me a text when you get ready for the swap. Chris and Stacy were kind enough to drive 10 hours to help me swap, so the least I can do is pay it forward. You already know the BEAMS swap forwards and backwards but having a second set of hands is always useful.
Edit: you should swap that entire gauge cluster. If its RHD, might as well know how many kilometers an hour you're doing as well!
Posted by: ricochet1490 Nov 7, 2011 - 1:42 PM
the floor boards don't look to be that different. I'm using the stock carpet for sure. I'll have to mod the seats so that the seat belt light is triggered in the drivers seat. The door panels are the same. The switches will likely get changed to jdm ones to utilize power folding mirrors (yet to be acquired or decided if I even want them) The auto up and down..... I don't know if the actuator takes care of that or if it's the switch, I haven't got to that point yet lol. Those are definitely final touches. I haven't even asked anyone that question yet and there are def some guys who have done full RHD conversions, I'll have to look into that. i wil do the floor pans if I have to, but i haven't planned to. Shouldn't matter. I'll have a small carpet misfit in some locations, but again, I'll make that look right as well.
But you're right, there are several small ticket items like that that are just hanging in the wind lol
Here is czwalgas progress thread with LHD floor boards for sure. comparing them to the above picture tells me there is little to no difference.
http://www.6gc.net/forums/index.php?showtopic=76086&st=20
Posted by: richee3 Nov 7, 2011 - 4:31 PM
I was mostly just curious about a dead pedal in the passenger floorboard. You did bring up a good point though- no Celica out of the 5 I've had have cared about the seat belt light. To be honest, I can't even remember if I've ever even seen the light in my black one. It never mattered whether it was plugged in or not. So the seat belt light might be a non-issue. I don't think the floor pan matters whether it's RHD or LHD, the exhaust still runs down the same side of the car. I think the difference is the dead pedal and the floor mat.
Posted by: ricochet1490 Nov 7, 2011 - 4:44 PM
FORGMANN hooked me up like the awesome dude he is with some RHD floor mats, celica hyper sports, The dead pedal is a consideration, but I'll figure that out as I go. The carpet i'll have to sew in a spot to cover up somewhere I've been told, prolly around the dead pedal, but I can neither confirm or deny that..... yet lol. But I'll have the wiring from the current drivers seat taken out and hooked up to the passenger seat so that the seat belt light goes off. Drives me crazy when it's on in my own car. Just another thing that is lit up on the dash. but if I can't do that I'll be unplugging the light in the cluster haha. This thing is sooo clean. zero rusty bolts, zero oil in the bay, i don't think it EVER saw snow. Life is good
Posted by: richee3 Nov 7, 2011 - 5:04 PM
You hate the seatbelt light? That's why you should just buckle up 
Seriously though, I know you're very familiar with the swap, but here's some quick reference info:
Wiring:
-EA1 plug, pin 17 goes to pin 4. Pin 17 is the bottom left wire, red with a black stripe. Pin 4 is the thick black wire at the top center of the EA1. Pin 17 needs power when pin 4 has it. This gives the BEAMS spark.
-EA1 plug, pins 2 and 12 need to be bridged. Those are ground wires. They need to be spliced together. There should be two wires, parallel to each other. Just bridge them together.
-Clutch start wire- there are 3 vertical plugs next to the ECU. On the body side of the plugs, you have a white (19 pin) plug, light gray (13 pin) plug, and dark gray (17 pin) plug. The clutch start wire is pin 18 on the white plug. Move it to pin 17 on the dark gray plug.
-Cruise control: Contrary to popular belief, no work is necessary for cruise control. It's a standalone system with no wiring related to the motor.
-To get your airbag light to function properly, you run a wire from the EA1 plug to the light gray interior plug (either pin 4 or pin 5, I have read separate posts saying both and I chose not to do this step so I cannot confirm which pin it is.)
Useful pictures:
EA1 plug, pins 4 and 17 bridged, as well as 2 and 12.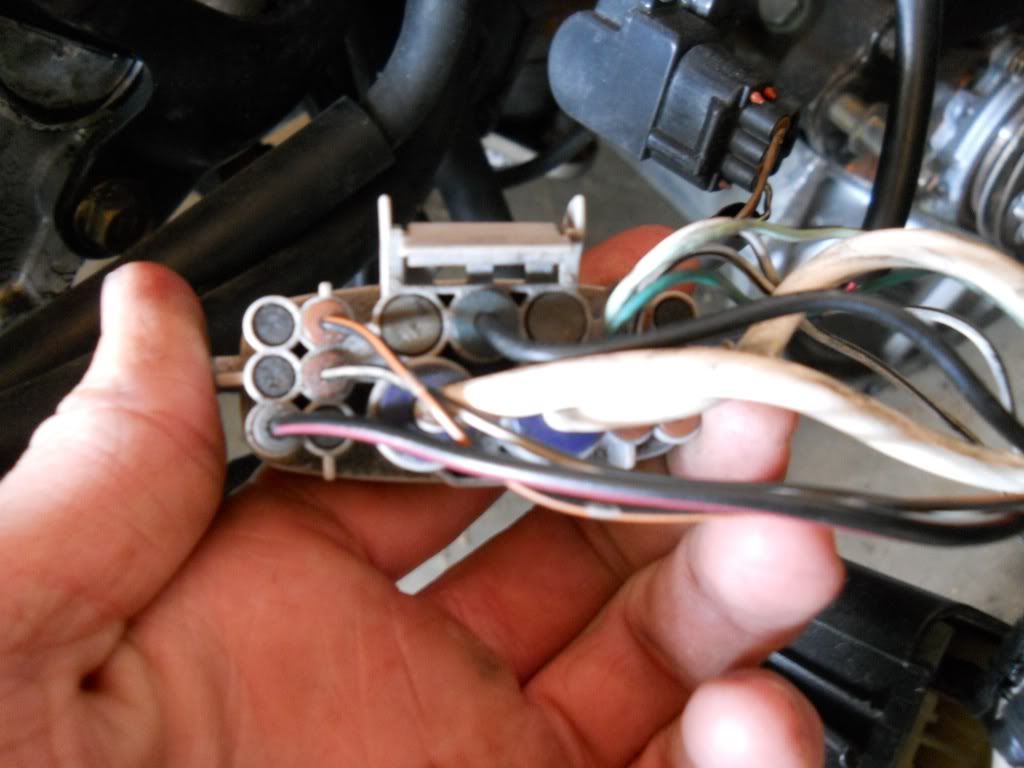
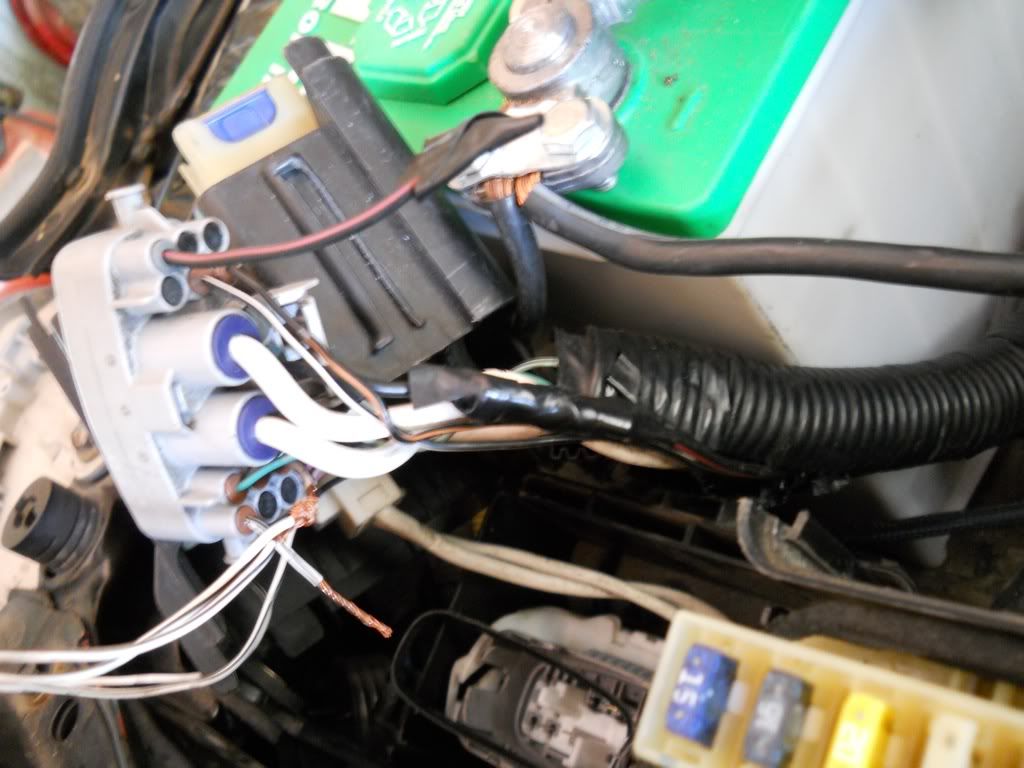
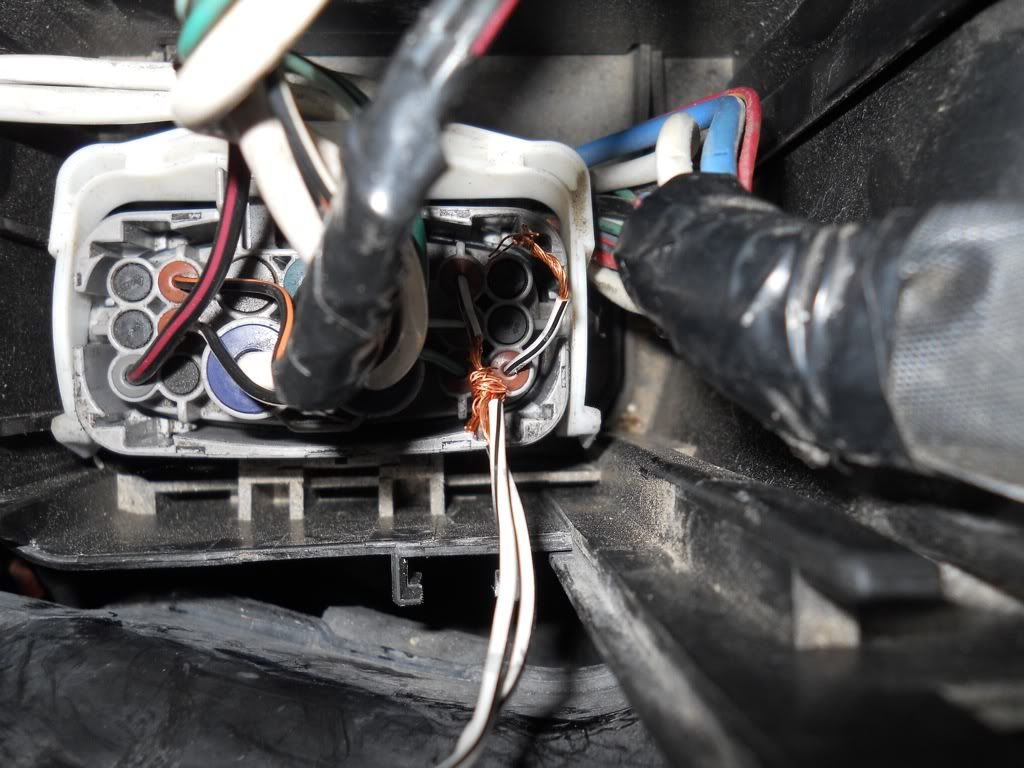
EA1 Plug with the necessary wiring changes.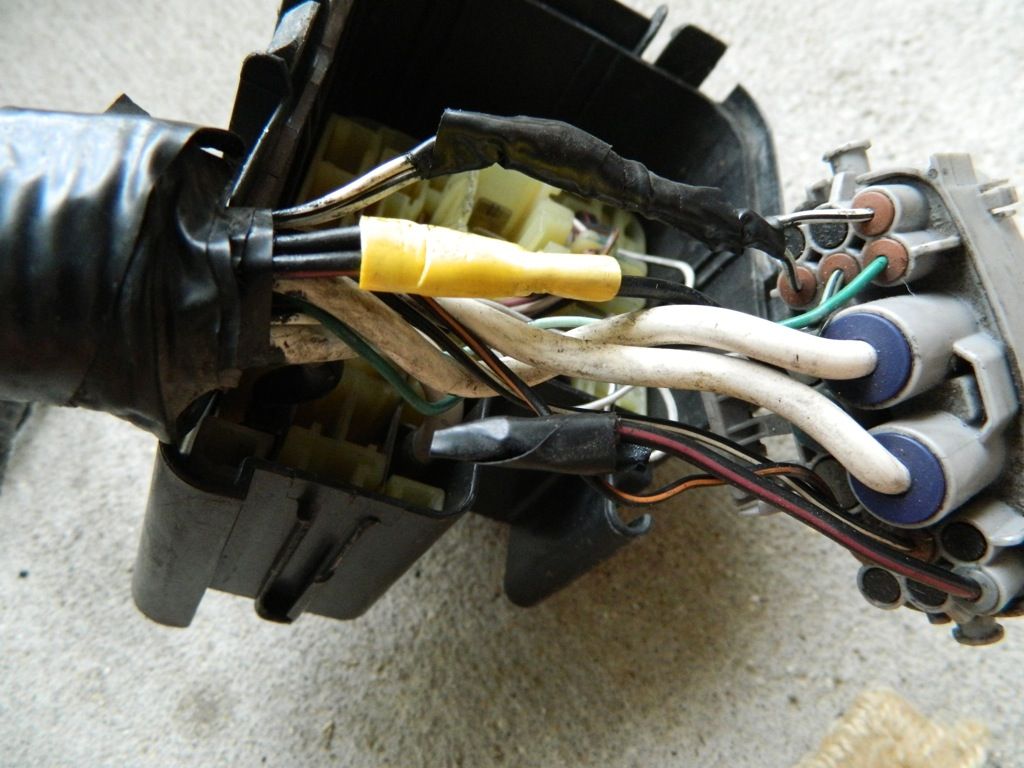
Clutch start wire: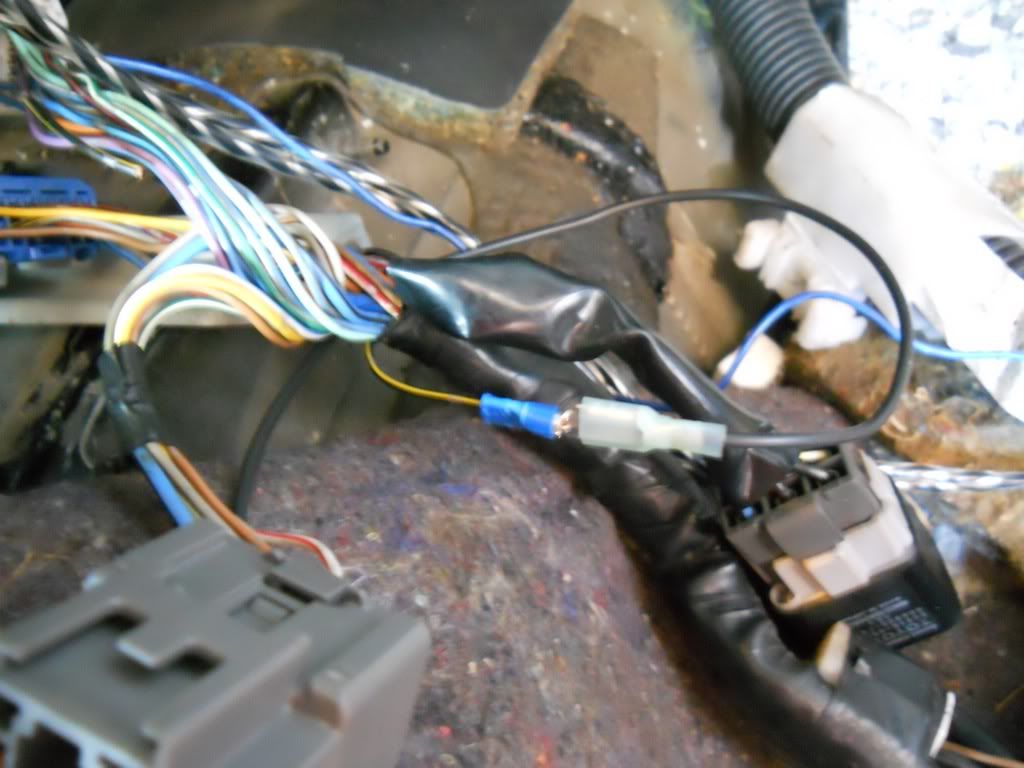
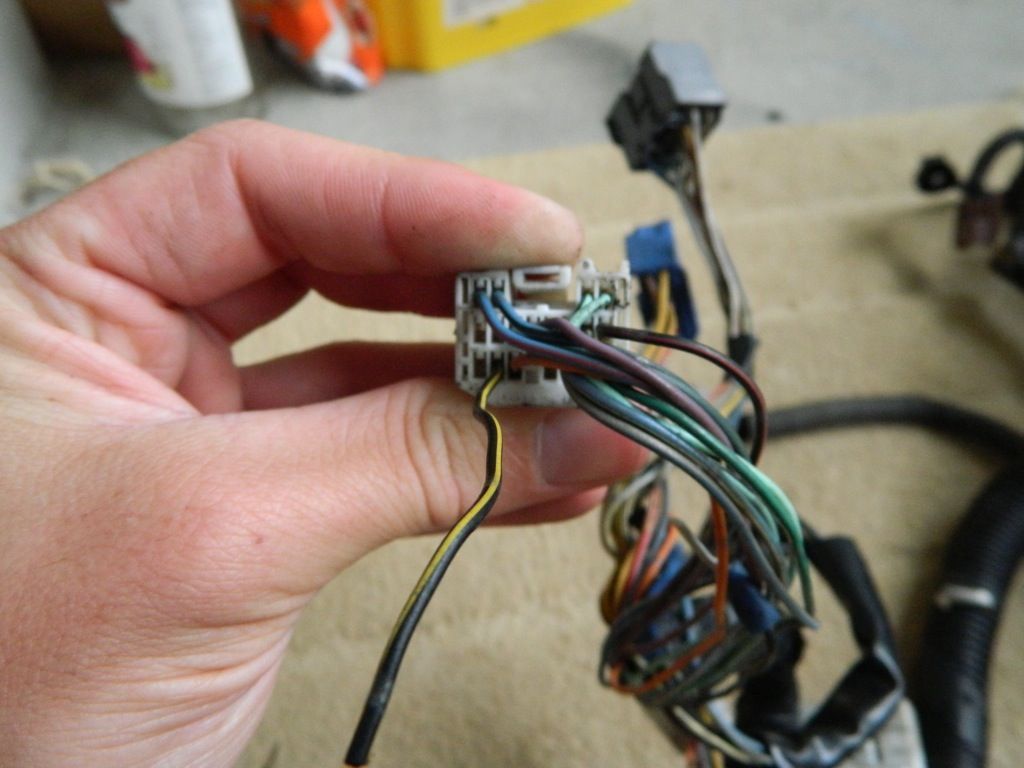
Plug C, wire 27 (Tach signal wire.)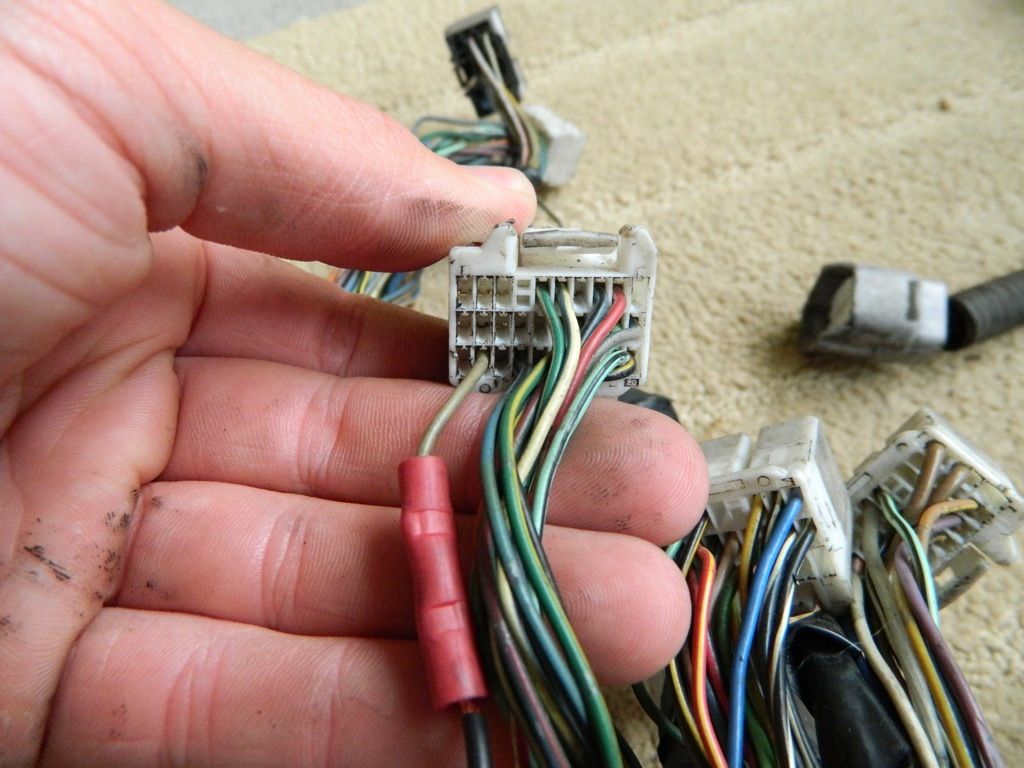
Useful links:
http://www.6gc.net/forums/index.php?showtopic=69585&st=0
http://www.6gc.net/forums/index.php?showtopic=69150&hl=
http://www.6gc.net/forums/index.php?showtopic=69989
http://www.6gc.net/forums/index.php?showtopic=69959&hl=
I have some more pictures that Turnip sent me. I'll upload them and add them later. Any questions, don't hesitate to ask!
Posted by: ricochet1490 Nov 7, 2011 - 5:16 PM
Dang dan, that post took some time to compile. I can tell you that for sure haha. But alas, it might have been to no avail. Here's why. I'm transferring everything from the clip over. This includes dash, dash harness, engine harness, complete chassis harness. EVERYTHING. This means that everything should be plug and play. No repining needed. No splicing needed. Everything should be perfect. makes it easy that way.
Posted by: richee3 Nov 7, 2011 - 5:22 PM
It's mostly copy/pasted from page 16 or 17 of my progress thread. But I did it from my iPhone, so it turned out to be annoying. Lol. Stupid worthless iPhone...
Pointless or not, I'm leaving that post there for future BEAMS swappers!
Posted by: ricochet1490 Nov 8, 2011 - 1:26 AM
Only part I plan on replacing is the clutch... at this moment anyway. the part number I've found through about 2 hours worth of thread searching and good is 31250-20331. Toyodiy has this specified for a jdm st202-blmzf the following
998 TOYOTA CELICA (ST202-BLMZF)
SS3 JPN LB 3SGE MTM
Powertrain / Chassis 31-01: CLUTCH & RELEASE FORK, page 1 of 2...
Search parts:
('9309- ) ST202, 203..MTM, S54 Next >
31126 BOOT, CLUTCH RELEASE FORK
31126‑32010 ST202, 203..MTM 1 $14.91
31204 FORK SUB-ASSY, CLUTCH RELEASE
31204‑20100 ST202, 203..MTM 1 $44.87
31210 COVER ASSY, CLUTCH
31210‑32130 ST202, 203..MTM 1 $154.58
31210‑44010 ST202..MTM..(SS2, SS3) 1 $279.51
31230 BEARING ASSY, CLUTCH RELEASE
31230‑32060 ST202, 203..MTM 1 $62.00
31232A CLIP, RELEASE BEARING HUB
31232‑20020 ST202, 203..MTM, アリ(ス-パ- ストラツト サスペンシヨン), タイプ A 1 $2.02
31232‑32050 ST202, 203..MTM, TYPE B:イラストサンシヨウ 1 $1.62
31236B SUPPORT, RELEASE FORK
31236‑32010 ST202, 203..MTM 1 $14.35
31250 DISC ASSY, CLUTCH
31250‑20250 ST202, 203..MTM 1 $125.84
31250‑20330 ST202..MTM..(SS2, SS3) (12/1997 - 11/1998) 1 $129.50
31250‑20331 ST202..MTM..(SS2, SS3) (12/1998 - ) 1 $129.50
The last part number is in fact the ss3 clutch
A search of that part number from the main page, specifying North american market only reads this
Part 31250‑20331 (DISC ASSY, CLUTCH) was found on the following models:
Date range Model Frames/Options Found in diagram
09/1993-07/1999 TOYOTA CELICA AT200,ST204 31-01: CLUTCH & RELEASE FORK
Model Dates: Matching Models: Model Options: Links to diagrams:
08/1994-09/1995 ST204L-BKMGKA GT, USA, CVT, 5SFE, MTM 31-01
09/1993-07/1995 ST204L-BLMGKK GT, CND, LB, 5SFE, MTM 31-01
12/1997-07/1999 ST204L-BLMSKA ST, USA, LB, 5SFE, MTM 31-01
St204, as specified here with GT option, USA, 5sfe, 94/95.
Does this MEAN that I can use a stock 5sfe clutch from 94/95 with my ss3 beams w/ LSD transmission? This is what I'm seeing here.
On a side note, what about a clutch for an e153? From what I can gather an s series tranny can bolt onto any 5s, 3s, or 3sgte. So can I use that clutch in my tranny??
Any help here is greatly appreciated
Posted by: celicast184 Nov 8, 2011 - 2:48 AM
3sgte clutch has a different spline count than the 5sfe.
so the results are:
3sgte to s53/s54 trans = 3s flywheel & pressure plate, 5s clutch disc
3sgte to e153 trans = 3s flywheel, pressure plate, clutch disc
5sfe to s53/s54 trans = 5s flywheel, pressure plate, clutch disc
5sfe to e153 trans = 5s flywheel & pressure plate, 3s clutch disc
3sgte spline count = 21
5sfe spline count = 20
so count the spines on your transmission to determine which clutch will fit.
Posted by: richee3 Nov 8, 2011 - 7:01 AM
What he said. You can use either a 5S disc or the disc for the BEAMS, (31250-20331). Then you can use a pressure plate from a 5th gen Alltrac and throw out bearing for your stock 5S/S54. All parts are available in the US.
Posted by: ricochet1490 Nov 8, 2011 - 12:16 PM
I mean I knew all of that. I guess I should have geared the question more toward the e153. I think I would just as soon buy the beams clutch kit if I can get it for the right price
Posted by: ricochet1490 Nov 8, 2011 - 2:11 PM
so the results are:
3sgte to s53/s54 trans = 3s flywheel & pressure plate, 5s clutch disc
3sgte to e153 trans = 3s flywheel, pressure plate, clutch disc
5sfe to s53/s54 trans = 5s flywheel, pressure plate, clutch disc
5sfe to e153 trans = 5s flywheel & pressure plate, 3s clutch disc
3sgte spline count = 21
5sfe spline count = 20
so count the spines on your transmission to determine which clutch will fit.
Thank for the spline info. I had always wondered why lol - that answered that.
Thanks again for the help
Dan,
So those are the usdm parts that comprise a full beams clutch then?
Posted by: richee3 Nov 8, 2011 - 5:29 PM
The BEAMS disc is sold in the United States, though I've never figured out what application it has here. I think it cost me like $70 or something like that. The ST185 pressure plate is readily available in the US and has more than ample clamping force for the BEAMS. It's a totally OEM setup and it feels great. None of that weird pedal feel that some aftermarket clutches give.
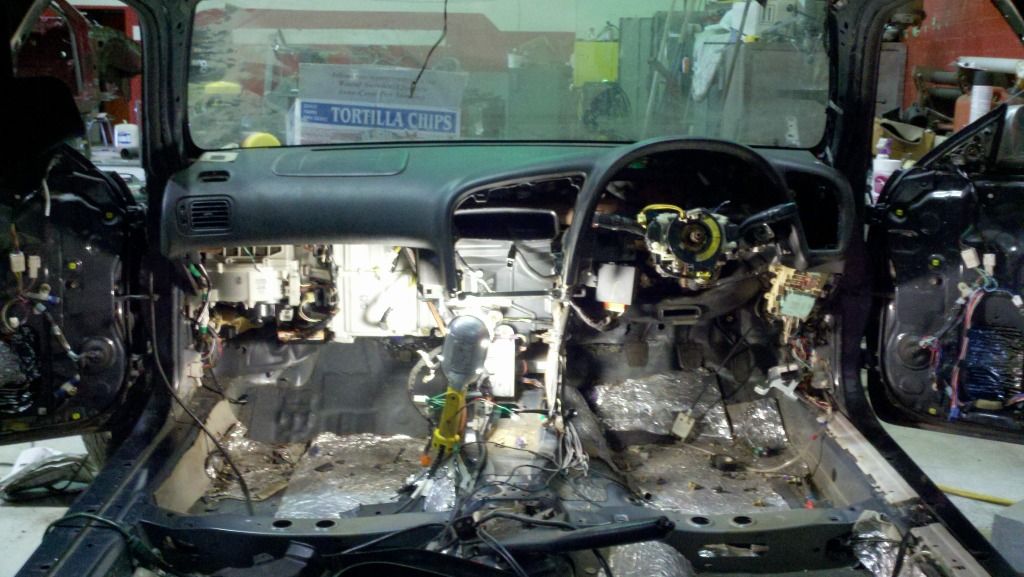
Posted by: ricochet1490 Nov 12, 2011 - 10:52 PM
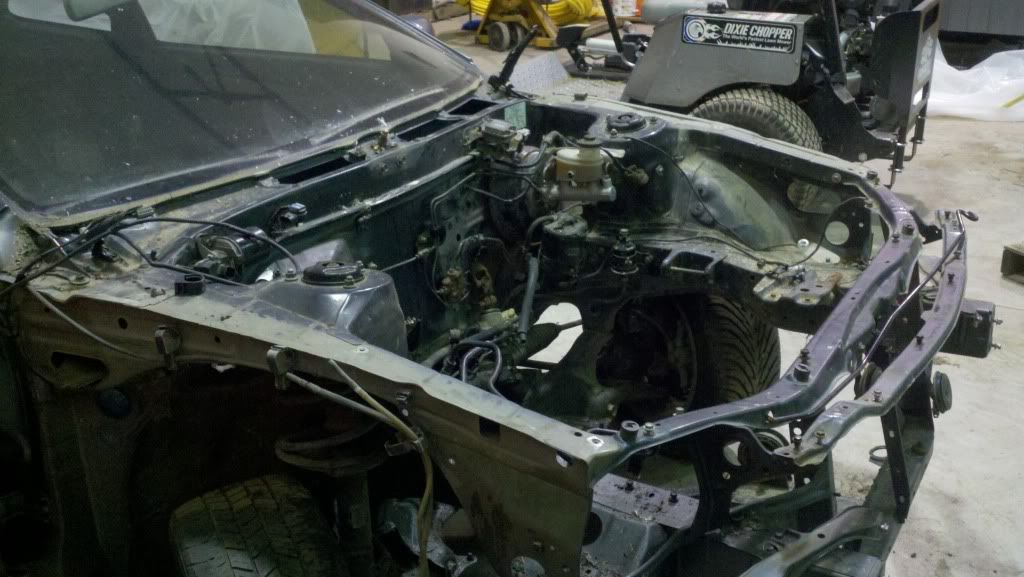
Today it started.... took out most of the interior Everything you see here including the center console, the airbag module, the radio, the center plastic around everything and the shifter/boot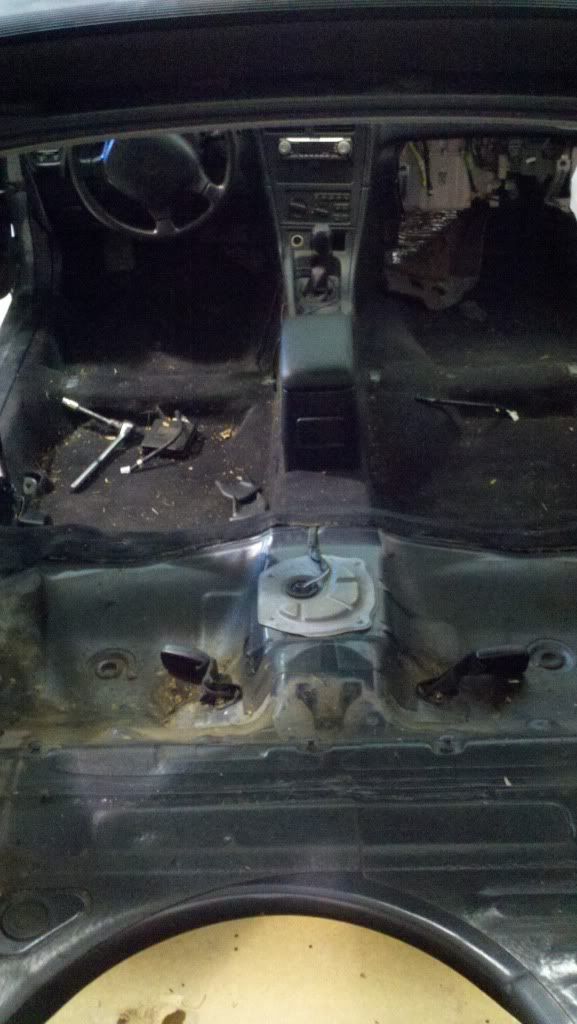
Also, the engine bay of the shell is effectively empty (thanks dan )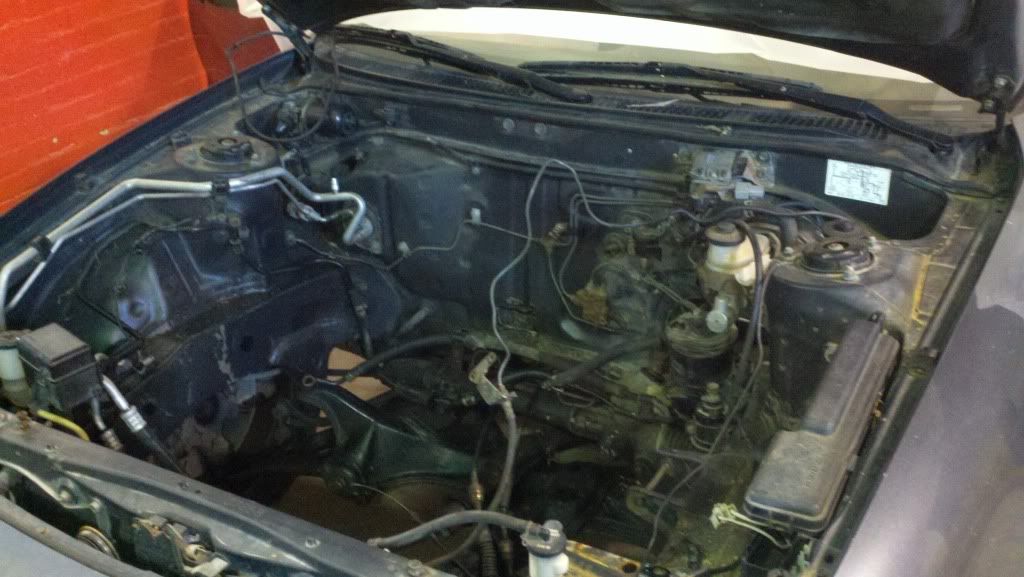
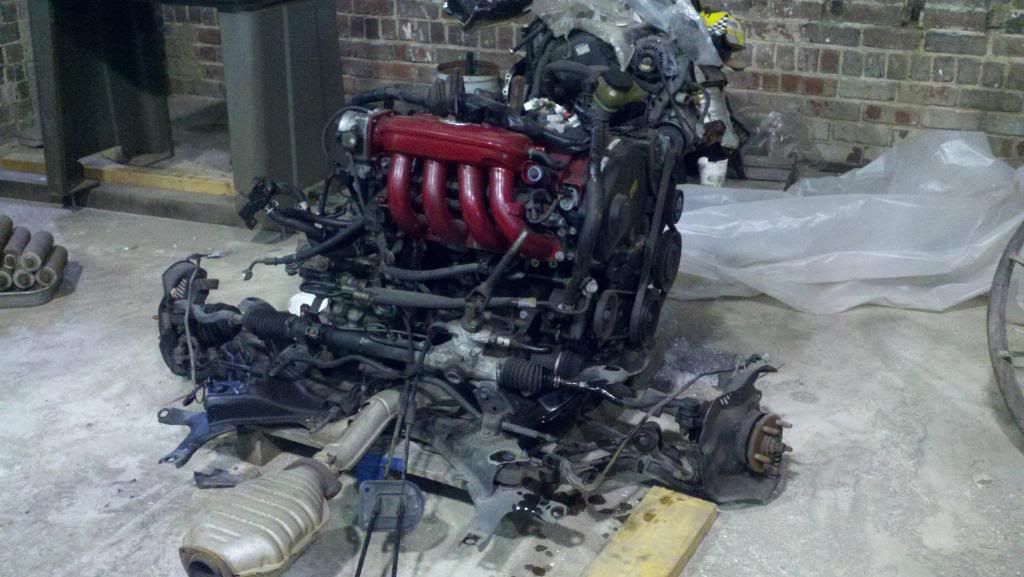
The actual motor going into that bay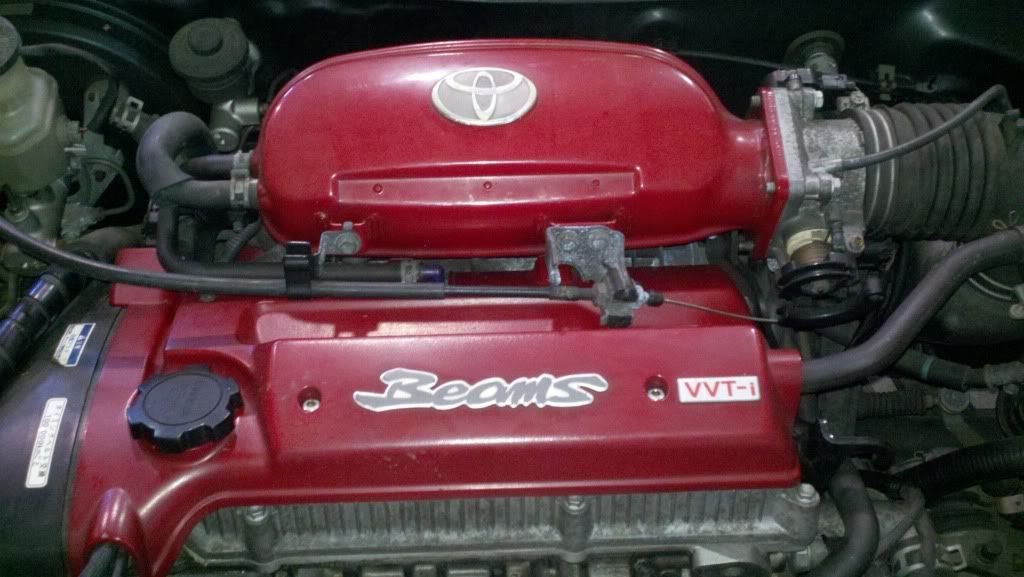
Found a nice little treat in the center console as I removed it - Thanks to one of the previous owners lol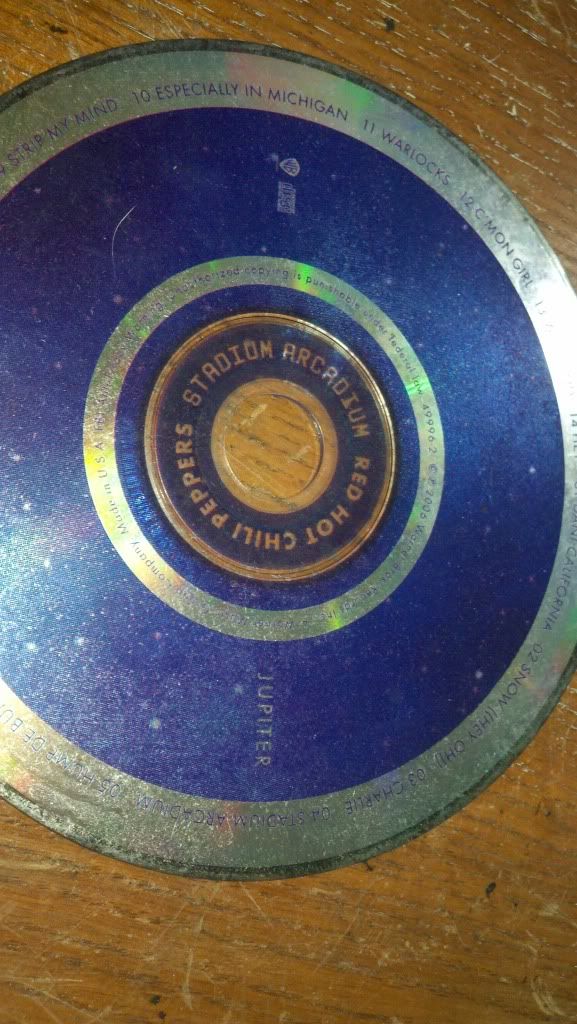
The interior was mostly gutted in about an hour of work
Posted by: kurt95gt Nov 12, 2011 - 11:03 PM
Hey buddy this mean you got a extra shifter boot you could sell?
Posted by: ricochet1490 Nov 12, 2011 - 11:11 PM
unlikely lol - The shift boot on the clip is in questionable condition. if I do find one I'll hit you up haha. You should just make one tho man. I saw your artwork today, I think you could sew one up for sure!
Posted by: kurt95gt Nov 12, 2011 - 11:31 PM
I've been thinking about it lol just gotta have the wife sew it
I can't sew for crap
Posted by: richee3 Nov 13, 2011 - 11:19 AM
Looks good! The interior comes apart pretty quickly. I totally forgot that Stadium Arcadium disc was in the car. I never bothered testing that radar detector either. I found some surprises in the car when I took it apart and I'm sure you've found a lot more.
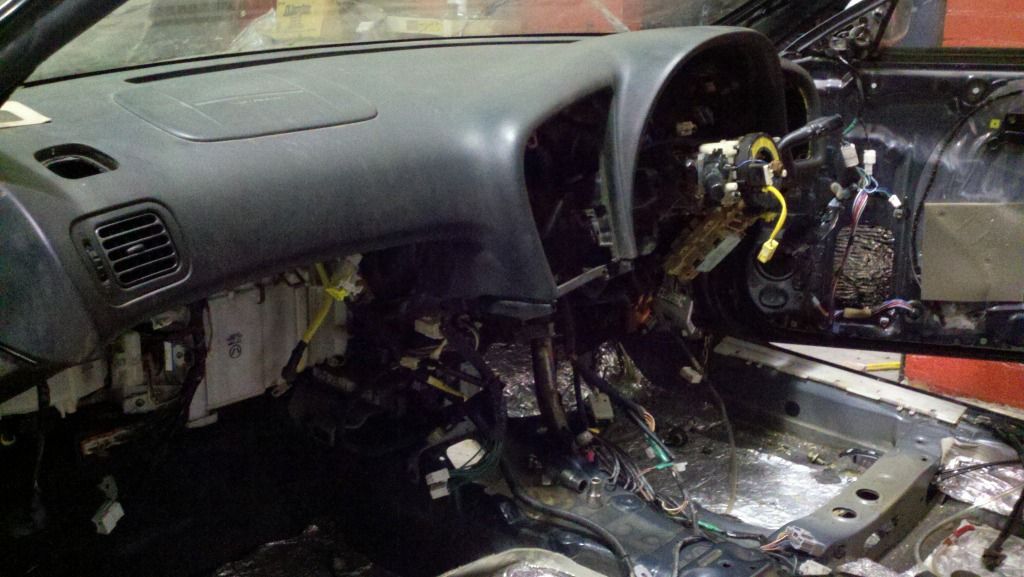
Posted by: ricochet1490 Nov 29, 2011 - 12:54 AM
Took the dash out of the car tonight. Stupid toyota security system wiring... p*ssed me off.... Also put a battery in my clip. All electronics work and the starter kicked on . Because "posts are useless without pics"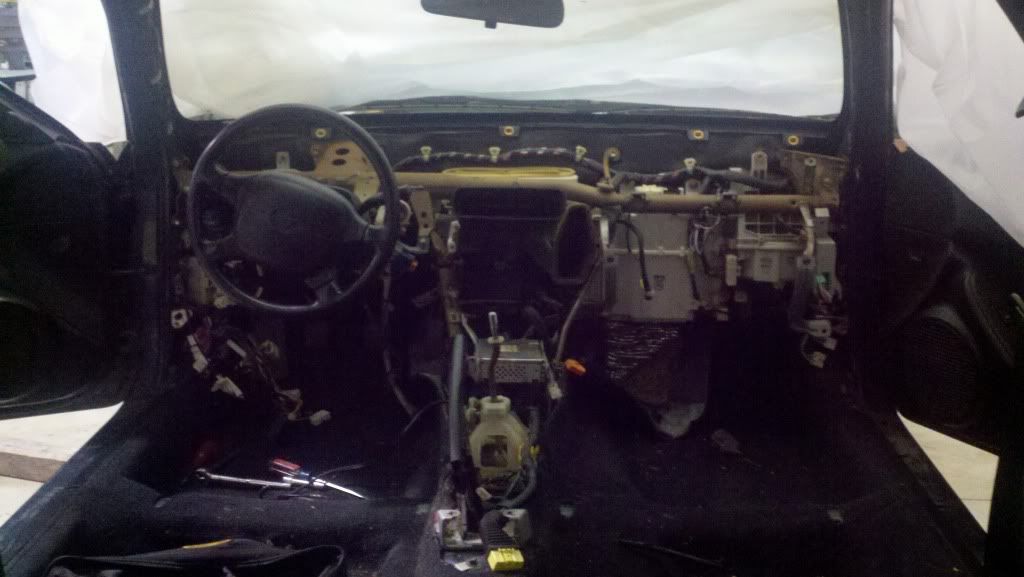
Posted by: kurt95gt Nov 29, 2011 - 1:01 AM
looks like your off to a good start
Posted by: stephen_lee Nov 29, 2011 - 1:07 AM
Posted by: TRD11 Dec 1, 2011 - 7:19 AM
sweet car man love the vvti
Posted by: richee3 Dec 1, 2011 - 2:50 PM
I tried to not mess with the RS3000 security system. That thing goes crazy. Disconnect the battery, reconnect it, and the car alarm goes off. I looked at taking it out one day and quickly changed my mind
I'm a little upset to see my baby's insides ripped out...
But not that upset. Keep it up! Since I'm doing another BEAMS swap, we'll race. Last one to start the BEAMS is a rotten egg!
Posted by: ricochet1490 Dec 5, 2011 - 12:14 AM
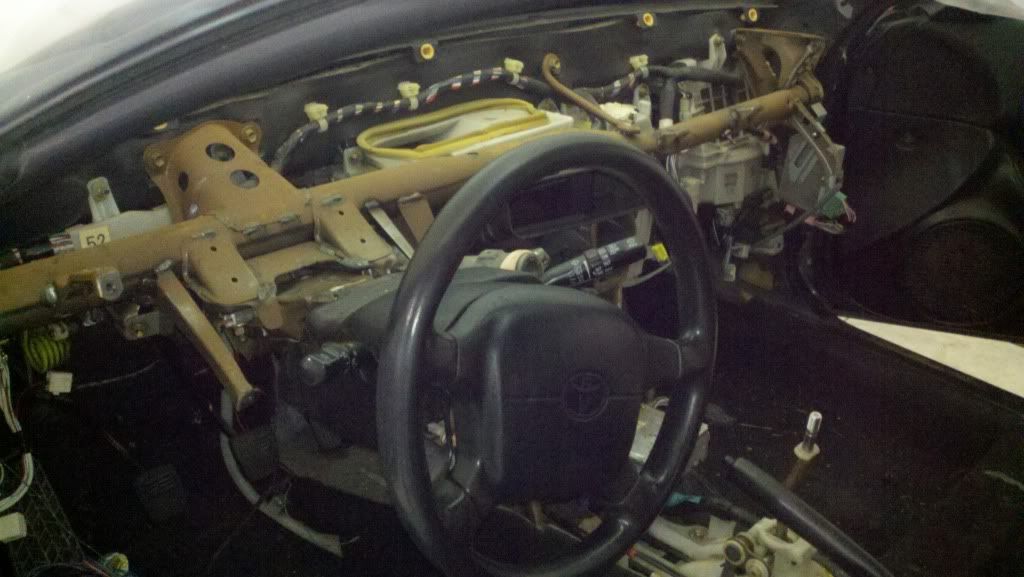
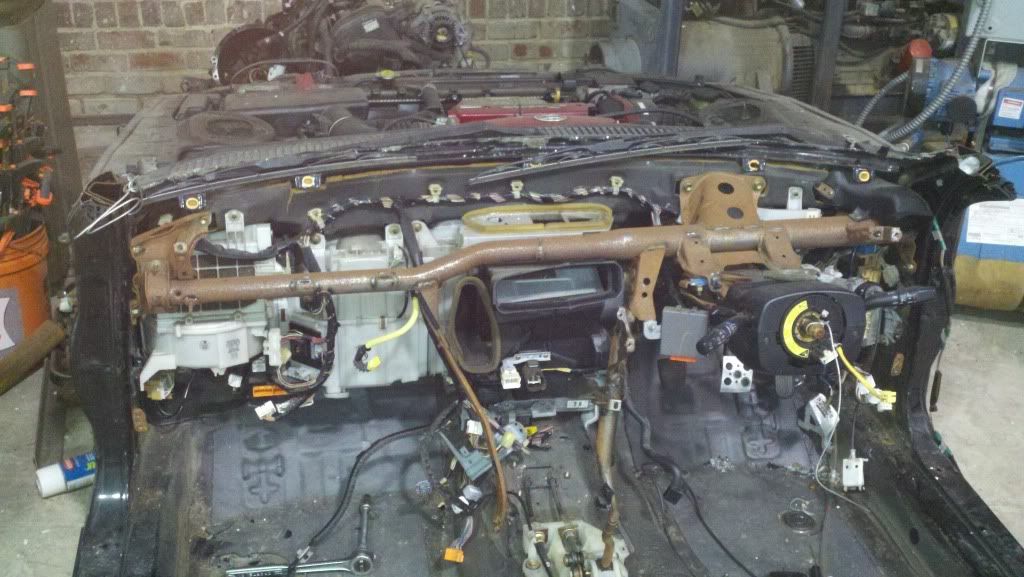
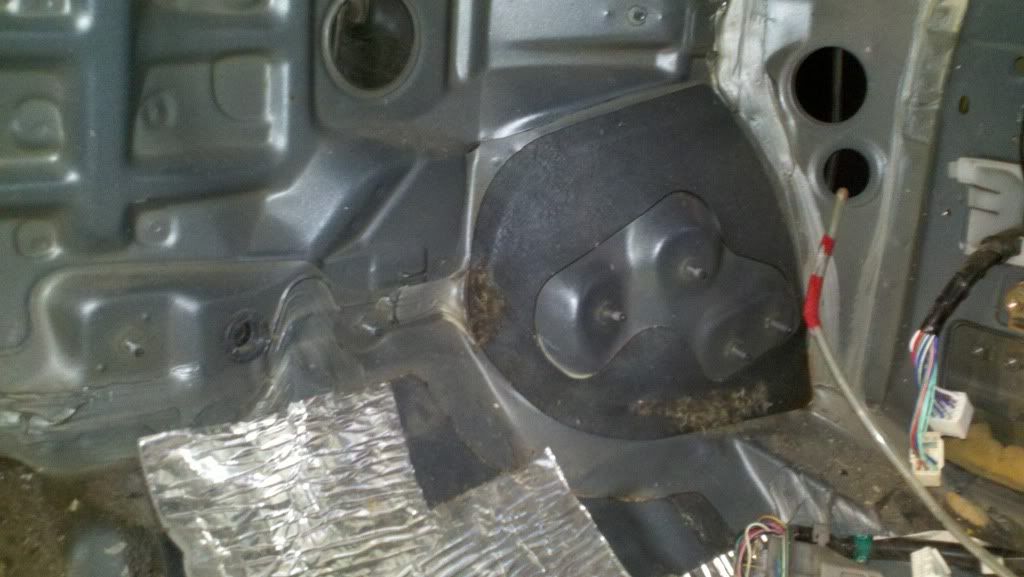
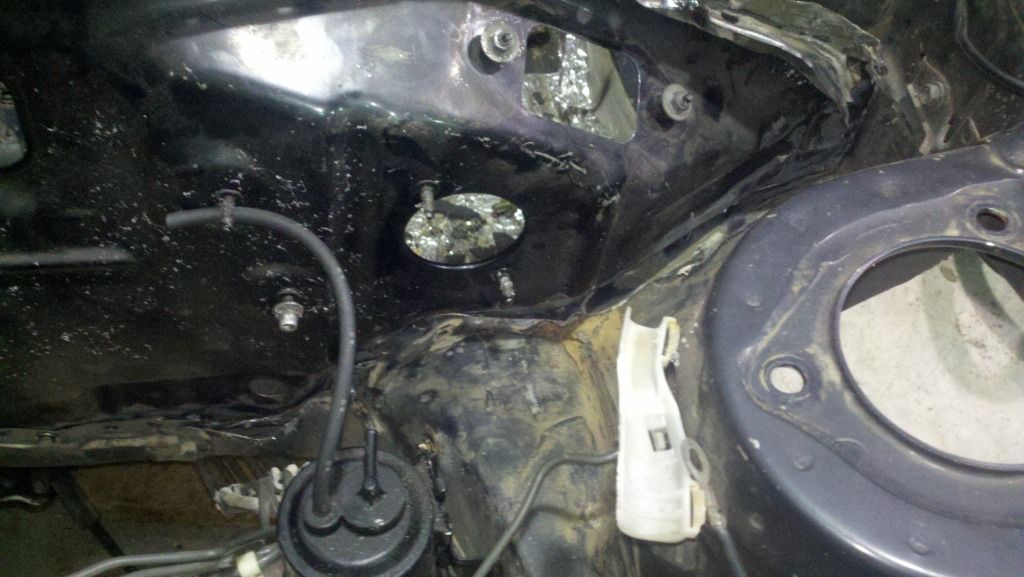
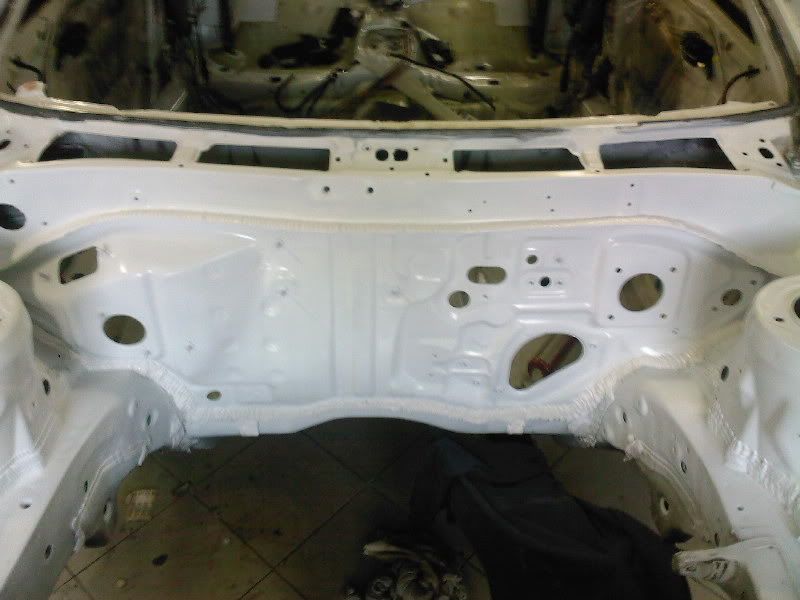
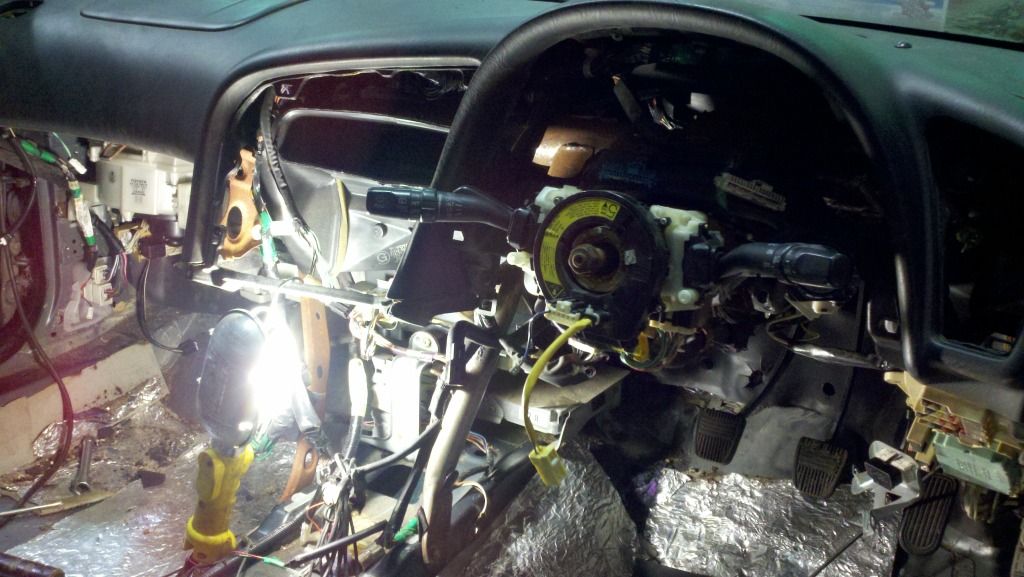
A few more hours of work, got everything taken out for the most part. We're down to just the firewall with the exception of the brake booster.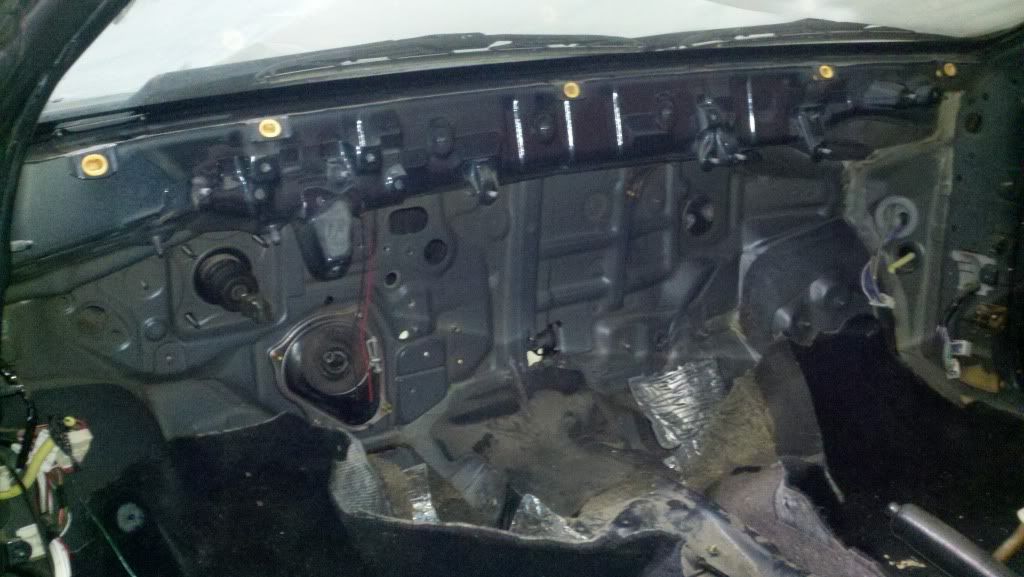
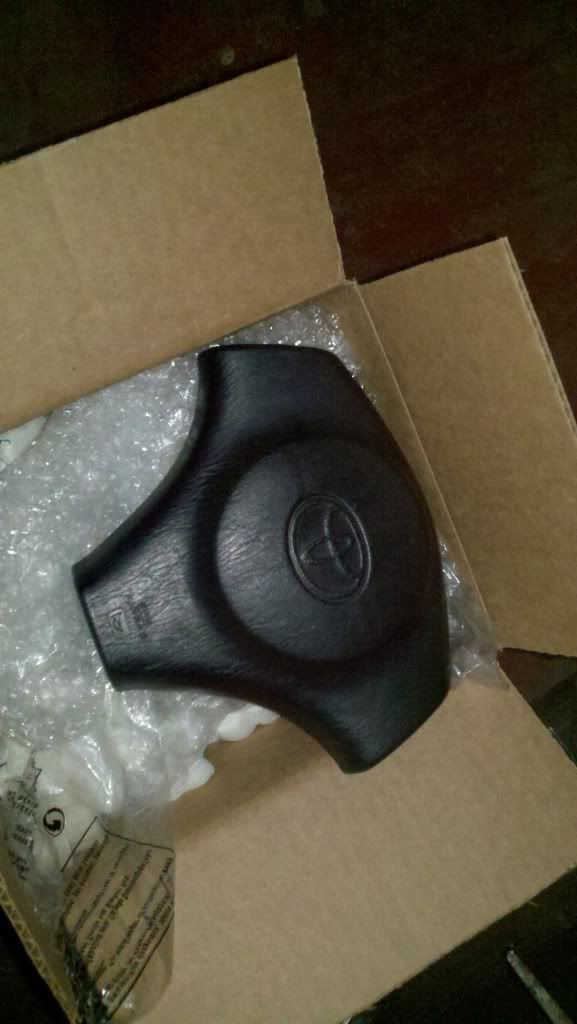
All I need now are some jdm parts. Anyone have a set of tails or a 3 post steering wheel?
sweet car man love the vvtiAnd thank you both! - I also love the project thus far
Posted by: NYp8tBaller07 Dec 5, 2011 - 12:20 AM
great work! cant wait to see it finished =)
Posted by: kurt95gt Dec 5, 2011 - 12:28 AM
man y can't you live little closer
your making me want to gut mine an convert it to rhd
Posted by: ricochet1490 Dec 5, 2011 - 12:48 AM
haha I figured why buy a clip and not use the whole thing! There will be some detailed pics when the more intricate stuff happens here. I won't let you down. You can live vicariously through this thread. I'll allow it
Posted by: ricochet1490 Dec 10, 2011 - 10:31 PM
Some people go spoilerless, I'm going Fenderless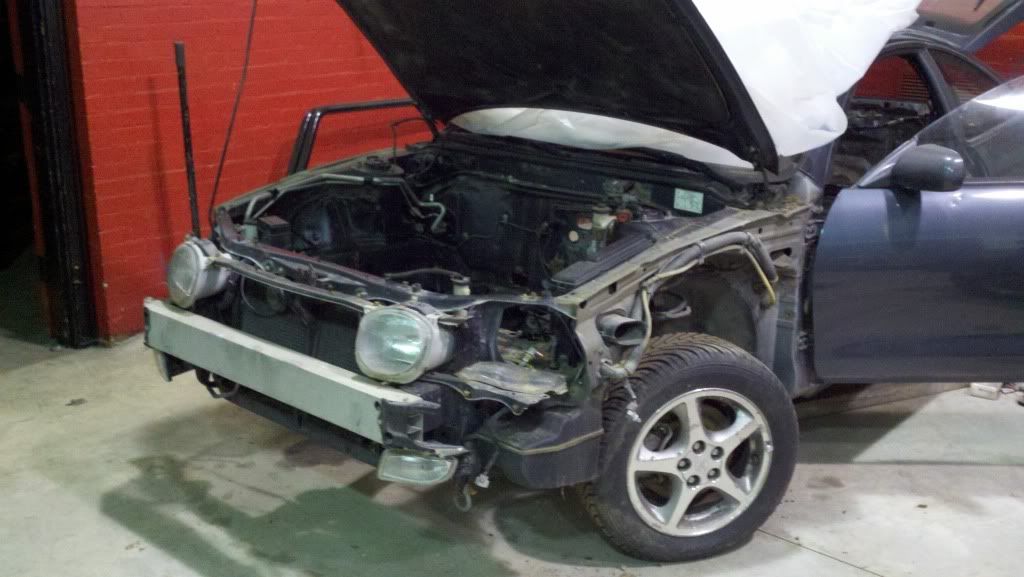
Posted by: richee3 Dec 10, 2011 - 10:43 PM
I definitely sold this car to the right person
Posted by: kurt95gt Dec 10, 2011 - 10:47 PM
Superlight race car lol
so light you could cut out the floor an flintstone that thing
Posted by: ricochet1490 Dec 13, 2011 - 12:12 AM
worked 3 more hours on the car tonight. I have a question if anyone cares to answer it. Will any old 3 spoke airbag work on my jdm airbag harness? I looked for a long while online, ebay etc to try and get a picture of the plug, it looks like I might be ok. Push comes to shove I'd just splice the two wires together (I won't be arming the system with the control module due to availability of passenger side airbag in jdm dash in-case something happened) But I'd like to have everything looking as oem as possible. Thanks guys
So, here's a rough pic of what I have for an airbag plug 
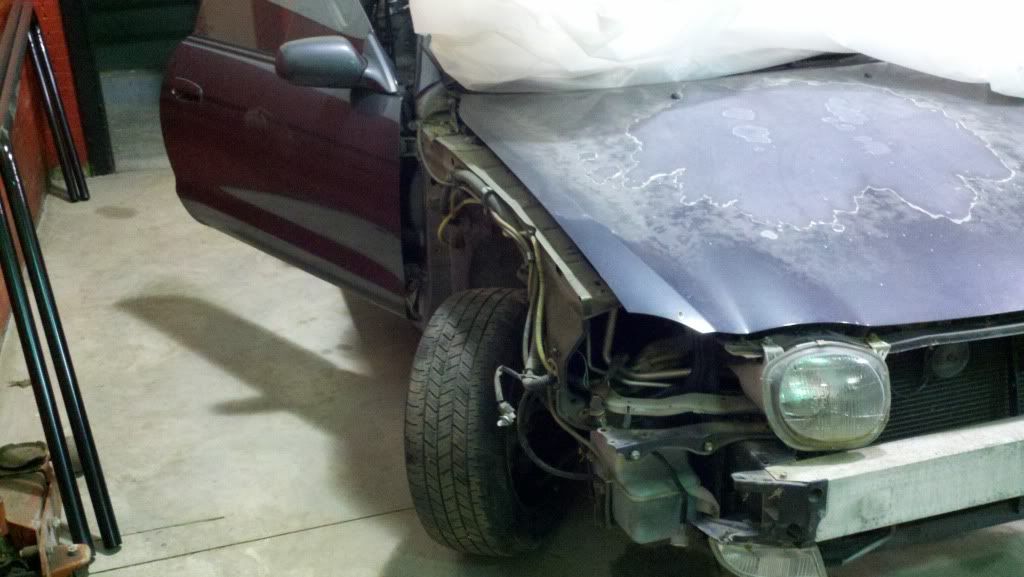
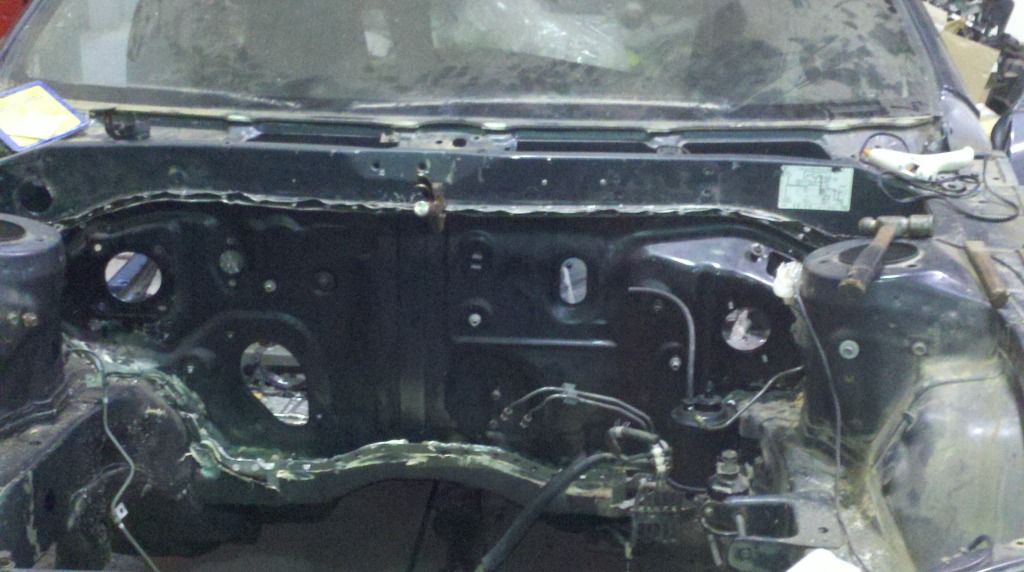
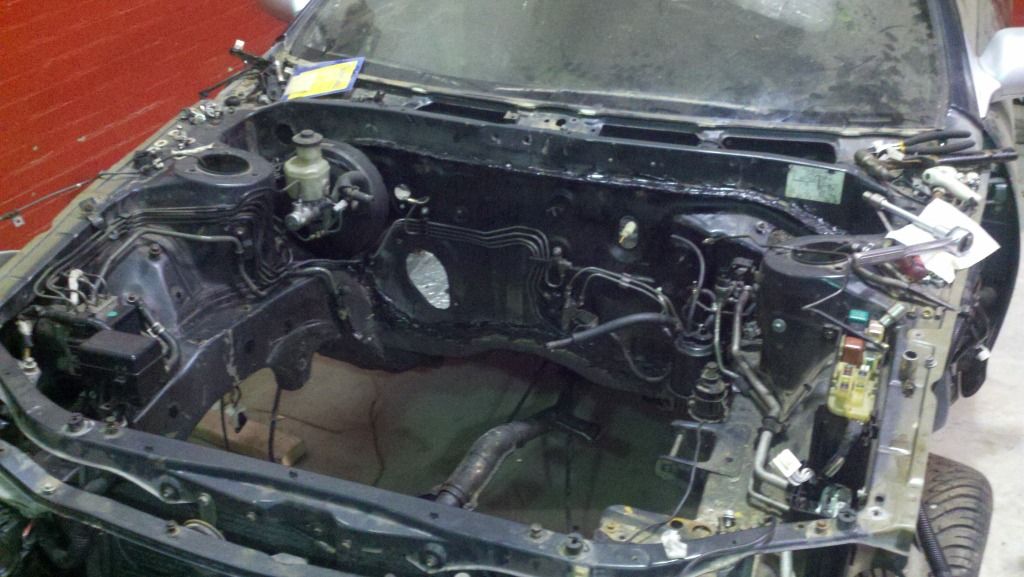
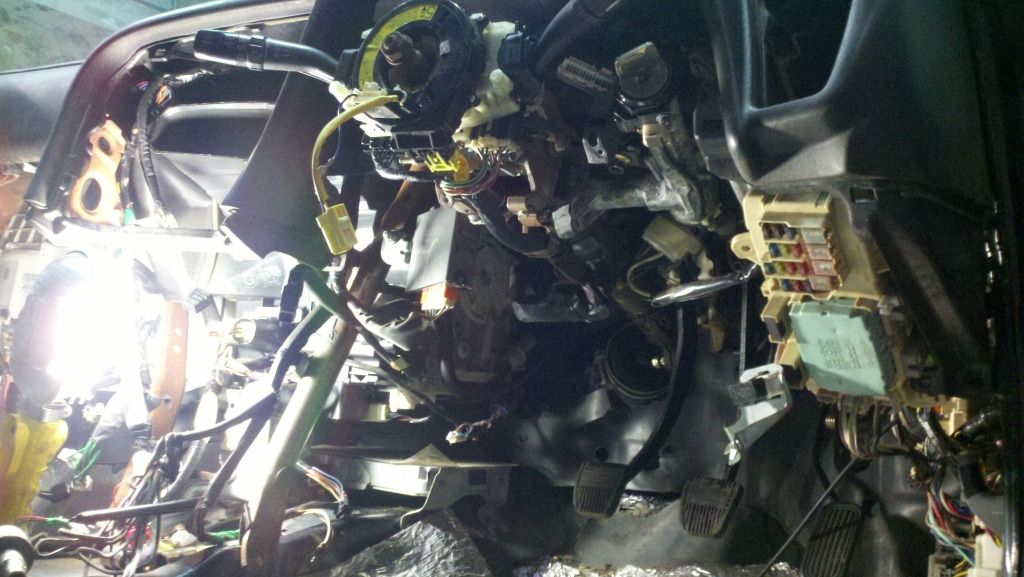
And here is how she sits now. Took out the entire wiring harness in the front of the car, took out the A/C, undid 85% of the brake booster, removed wipers and cowel, took off bumper and highs..... the results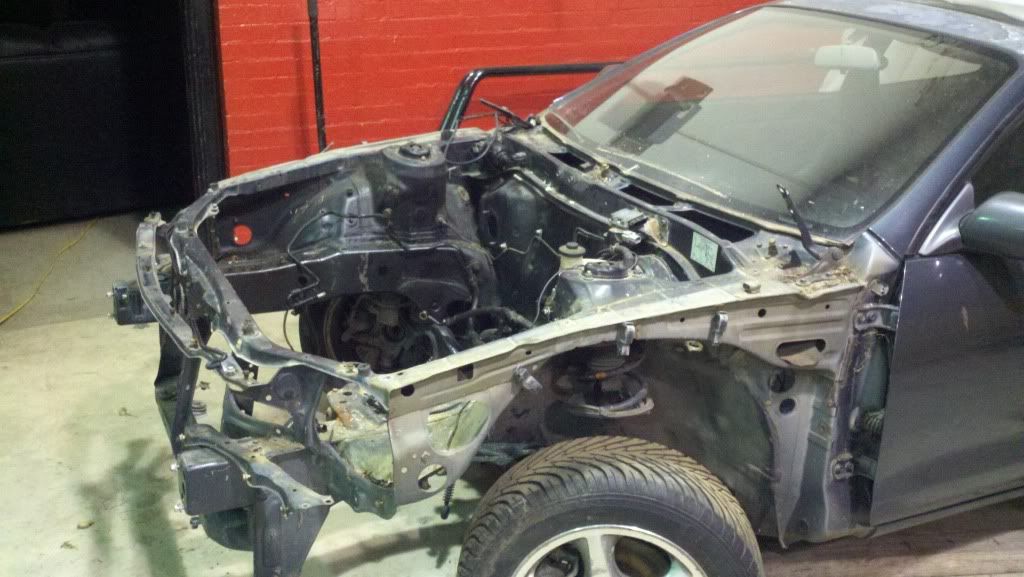
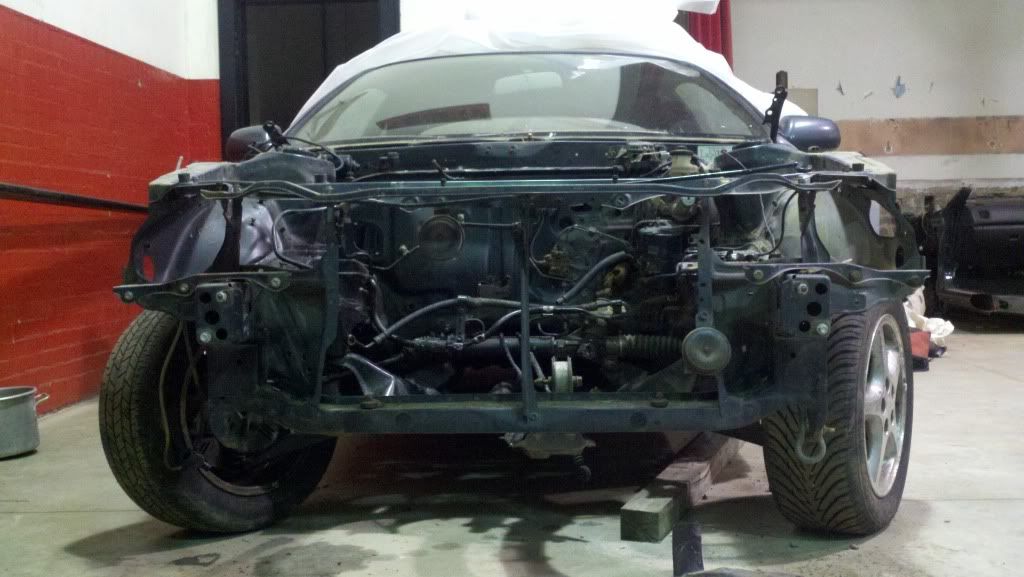
close to being on or ahead of schedule i think....
dan - I believe that to be your shackle on the towing hook as well lol
Posted by: kurt95gt Dec 13, 2011 - 12:33 AM
Wow she's naked
Posted by: richee3 Dec 13, 2011 - 9:11 AM
Lol that shackle... It's been there for a few years. I tried getting it off when I got the car, and promptly gave up. I'm sure enough PB Blaster or WD-40 could break it free, but you saw how I had the car parked by the little hill. I just gave up on it.
As for the airbag, I believe most Toyota airbags should work. I mean, we're always swapping 7th gen/Corolla/Rav4 airbags in our cars and those work. I think you might need to change the clock spring though.
Posted by: ricochet1490 Dec 15, 2011 - 11:13 PM
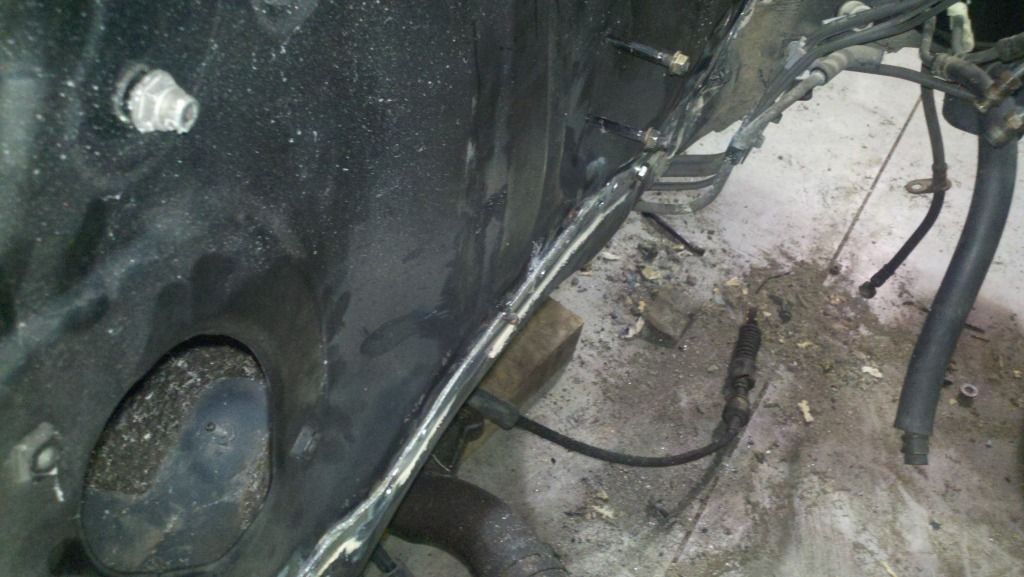
Ok, so finished getting the brake booster out, took out the door panels, and took out the carpet. 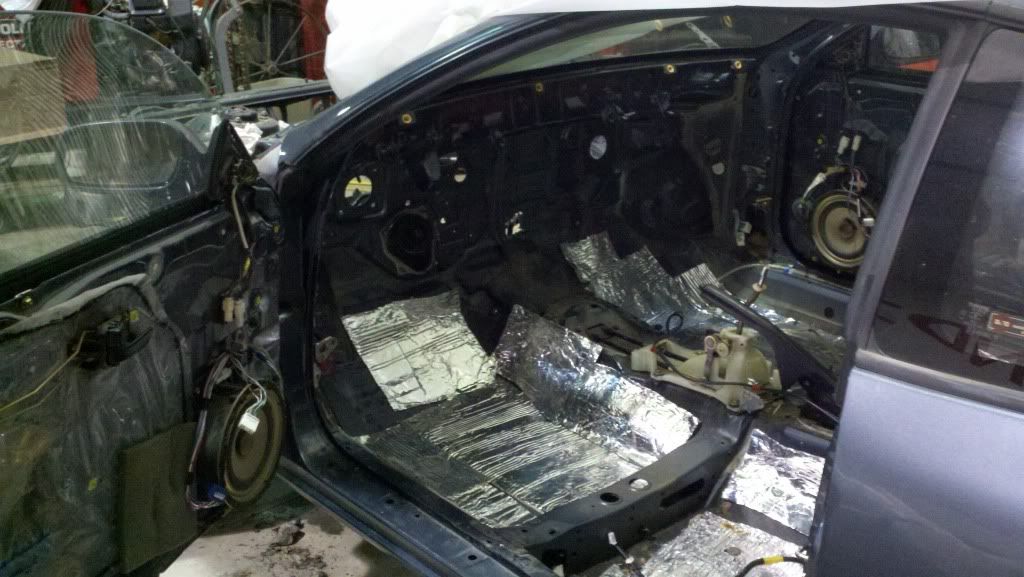
However, there is still a mess of brake and fuel line in the bay  - didn't feel like getting greasy at 9pm on a thursday night
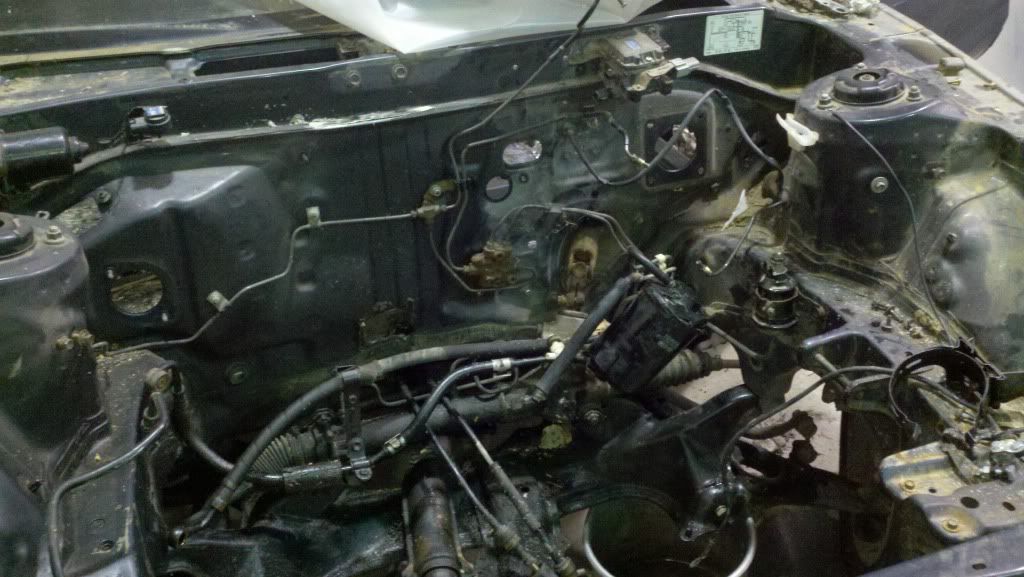
So because I didn't feel like getting greasy, I turned my attention to the clip. 100x easier to take the plastic off this thing than my car because of the auto climate control. It just unplugs! no cables in the dang way!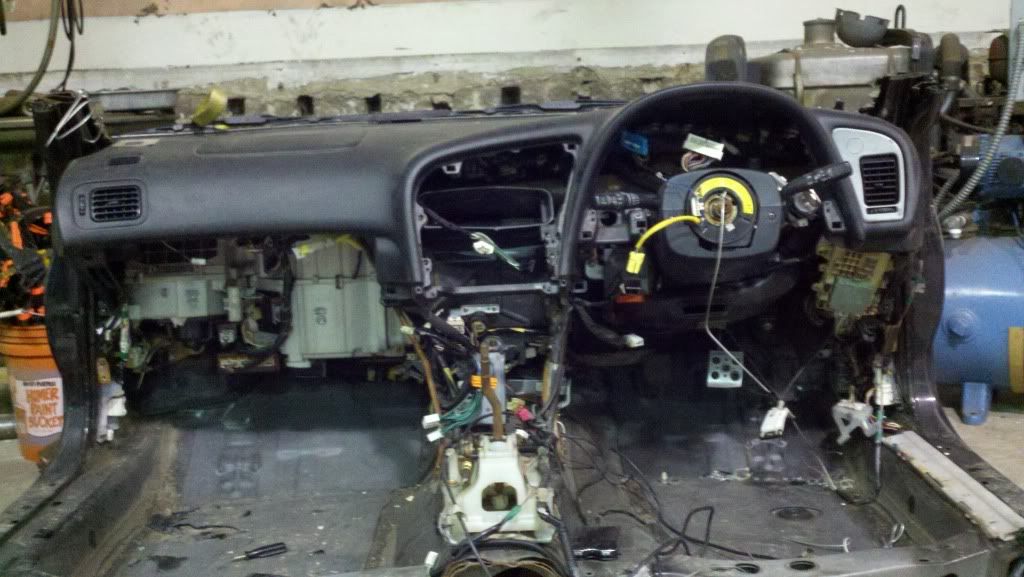
Found this little nugget in the glove box. Maybe I will hook up the airbags after all....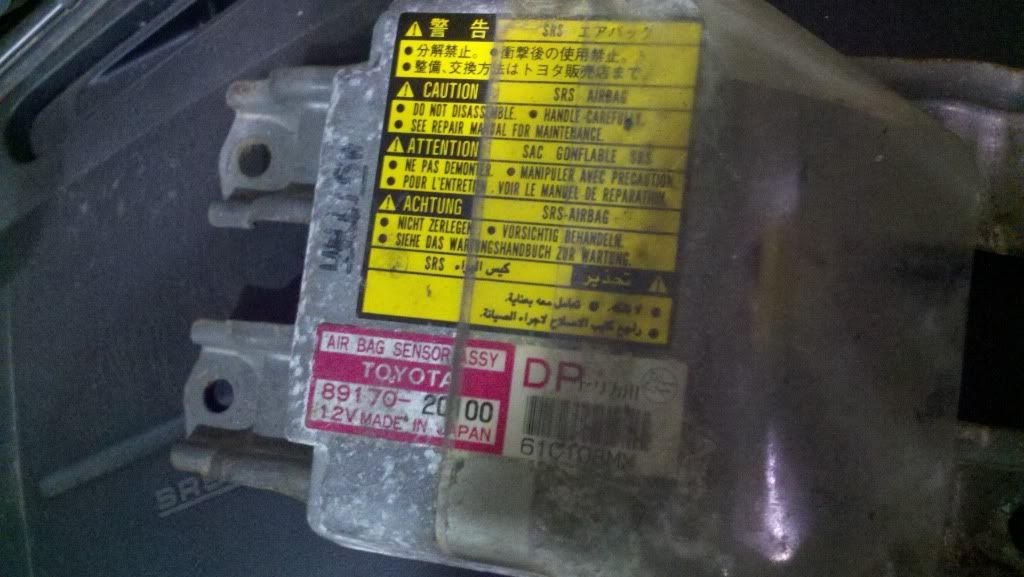
TIME FOR A POLL:
Keep my usdm suspension where I need not purchase anything.
OR
find a set of superstruts and some twin pot brakes.... for no other reason that to make this thing as legit ss3 as possible. You tell me, cause I have no idea....
Posted by: richee3 Dec 15, 2011 - 11:22 PM
Lol at my sound insulation. If you keep it in the car, you'll have to let me know how well the Frost King works.
I say get on ToyoDIY and get some suspension part numbers and find out about how much they'll cost before you have to pay a third party to order and ship them for you. If the cost of repairs is reasonable to you, go SS suspension. If not, throw some coilovers on the car and have a blast.
Posted by: kurt95gt Dec 16, 2011 - 12:36 AM
Coilovers over ss parts readily available for the stock suspension so you wont have to wait (or take chances) on parts from ebay or overseas
Posted by: ricochet1490 Dec 16, 2011 - 12:40 AM
I should probably point out that this project car will NOT be a DD. It's going to be a garage car. Driven on weekends. The car that I can go cruising in when my future kids are driving me crazy. Something that will be taken care of and with any luck, not get any more than 3-5k miles a year.... under ANY circumstances. So with that little use, I'm not worried about suspension going bad really. It's just a hassle thing. pay for SS parts. OR spend time changing A arms, steering knuckles etc so that I can keep mcphearson.... decisions decisions.
Posted by: kurt95gt Dec 16, 2011 - 1:32 AM
Still say stock with coilovers or drop springs to make her handle little better
maybe swap the ss onto the front an the the back the stock usdm
Posted by: BonzaiCelica Dec 16, 2011 - 12:58 PM
go through the supertrut suspension and read all 10 pages that's stickied in the suspension/handling/braking threads. then you'll be able to make your decision.
http://www.6gc.net/forums/index.php?showtopic=28093
Posted by: ricochet1490 Dec 16, 2011 - 7:15 PM
with all due respect, I don't need a lesson on SS. Been there and done that. Not looking to put SS in a lhd car or anything like that. I understand how the SS was "supposed" to be better, but was hardly used by even the racing toyota teams. I'm just trying to gain perspective and opinion on what I should do.
I'm leaning toward keeping the McPhearson suspension though. Unless I get a great deal on some SS and twin pot brakes...... I like my money too much. Not much on lowering either. Seems to me the celica is already pretty low.
idk though... decisions.
Posted by: richee3 Dec 16, 2011 - 7:16 PM
A bit off topic, but did you know your title is misspelled? It has 3S's (haha! 3S! get it?) in
"progression."
I say coilovers. The handling aspects will be superior to an OEM Superstrut setup, plus accidents happen and the coilovers can be repaired with parts available here in the States. Not to mention you can avoid the headache of a complete Superstrut swap, front and rear.
Posted by: ricochet1490 Dec 16, 2011 - 7:40 PM
"progression."
I say coilovers. The handling aspects will be superior to an OEM Superstrut setup, plus accidents happen and the coilovers can be repaired with parts available here in the States. Not to mention you can avoid the headache of a complete Superstrut swap, front and rear.
HAHA thanks - problem solved!!
I would keep stock suspension in the rear for sure. I don't want to deal with SS rears.
But the only headache of SS in the front would be the $$ for a set and the matching brakes.
otherwise I have some part swapping to do. Not a huge deal, but a few bolts for suspension and brakes is easier than everything else needed lol.
But you're prolly right Dan...
Posted by: BonzaiCelica Dec 17, 2011 - 12:01 AM
umm ya what racing toyota teams??? never have I seen a race ready SS-III or ZZT231 fwd celica.
you asked for our opinion so I gave you mine. Even the wrc gt4 acknowledged that the superstrut suspension made them go quicker on asphalt roads. As mentioned before its more of an upgrade with the fwd celica's. Look at the type r legend 4/6 video on youtube. guy driving in a ctr ek9 even compliments that the zzt231 SS-II celi has similar suspension characteristics. hence superstrut in front.
your exact words "You tell me, cause I have no idea...." i was just suggesting a thread. since you did say time for a poll
yes I agree coilovers(mcpherson) will be better than stock ss-III suspension. Rear suspension on a SS-III celica is the same on all N/A Celica's. Rear trailing arms with shocks absorber/spring. (independent multi-link suspension system) only difference on the ss-III is the spring rates are stiffer (so different part numbers)
Posted by: ricochet1490 Dec 17, 2011 - 11:01 PM
I guess I meant 'I have no idea' on what I'm going to do because it's either $$$ or time and work to make the car go forward.
I've read on forums and on here that one of the rally teams(gt4) only used it for two races or something like that and then went back... only repeating what I've read. I wasn't talking about race ready ss3, that doesn't make sense.
Posted by: kurt95gt Dec 17, 2011 - 11:11 PM
id do the ss swap up front if you already got the parts on the new clip
Posted by: ricochet1490 Dec 17, 2011 - 11:11 PM
In other news, I put the JDM wiring harness in the car tonight. Complete chassis harness from dash to trunk.
I have no suspension or brakes with the clip. Hence why I'm partially intersted in Richee3's stuff he just got. cause I have nothing with this thing
Posted by: BonzaiCelica Dec 18, 2011 - 2:11 AM
tte rally teams went back to McPherson due to always having to replace the control arms in the superstrut suspension.
Posted by: ricochet1490 Dec 21, 2011 - 9:36 PM
6 hours of driving to visit 96stgreendemon .... a great price and a trunk full of jdm later.... and I'm a very happy dude!
What could it be???!!
Posted by: Ted95 Dec 21, 2011 - 9:51 PM
sweet build man! have you thought about a color yet?
Posted by: ricochet1490 Dec 21, 2011 - 11:34 PM
the color is staying this slate blue grey color. I love it. It's going to get a fresh respray of the same color because I do have to do some body work in some locations.... but I don't think there is really a better color out there really.
Posted by: Ted95 Dec 21, 2011 - 11:36 PM
good choice i like the color too its unique espically for a ss-III
Posted by: ricochet1490 Dec 22, 2011 - 8:35 PM
More JDM in the mail today.... the anticipation must be killing you
Posted by: ricochet1490 Dec 22, 2011 - 11:22 PM
Compliments of 96stgreendemon
Compliments of Seztor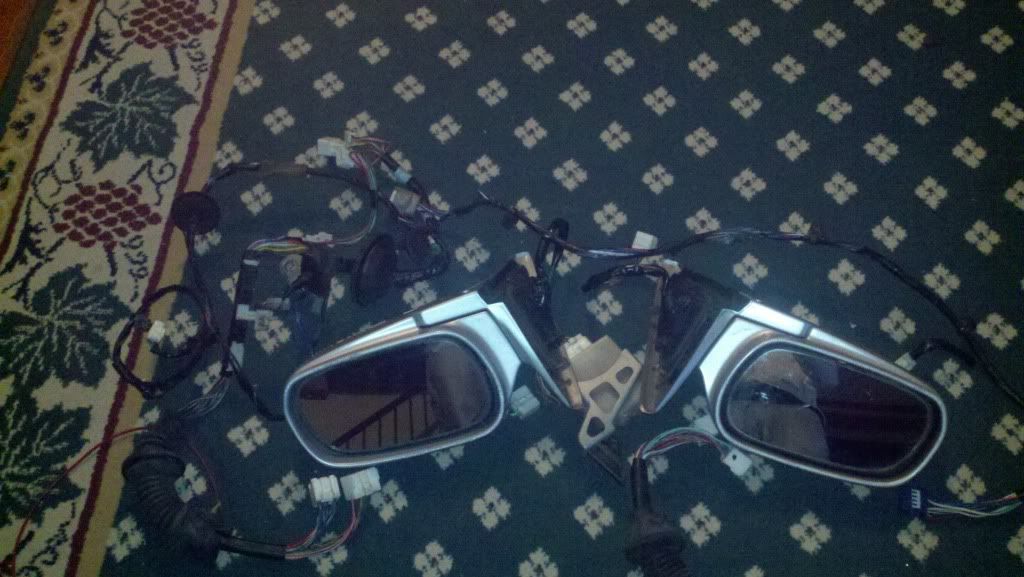
Going to be a busy Christmas break!!
Posted by: SupraKid Dec 22, 2011 - 11:45 PM
Fenders....thats it? COME ON!
Posted by: kurt95gt Dec 22, 2011 - 11:49 PM
wtf just fenders lol
Posted by: richee3 Dec 22, 2011 - 11:51 PM
No no, the fender is just in the way. He got JDM bean bags from Kyle!
Posted by: ricochet1490 Dec 22, 2011 - 11:56 PM
lol - Daniel has this whole forum screwed up! Everybody just expects every new post to consist of $2000 motors, or motor pulls, or projector headlights haha. Power folding jdm mirrors AND fenders thank you very much. tomorrow will be some more important updates for sure. Have faith haha
Posted by: SupraKid Dec 22, 2011 - 11:59 PM
JDM fenders are HARDLY a full trunk load...a rhd swap, now that is a full trunk... lol jk cant wait to see how the car turns out!
Posted by: ricochet1490 Dec 23, 2011 - 12:02 AM
you sir did in fact have a trunk full.... i really couldn't, and still can't, believe you fit everything in there like that. I was impressed for sure!!
Posted by: SupraKid Dec 23, 2011 - 12:04 AM
Trust me, when it fell into the hatch we were both shocked. We had to pull out the rear seats and bracket of course....I wish i could find a set of JDM fenders  .
.
Posted by: kurt95gt Dec 23, 2011 - 12:11 AM
hey mines only 550 dollar motor thank you very much
Posted by: BonzaiCelica Dec 23, 2011 - 2:09 AM
.they are quite nice. just make your own. its easy.
Posted by: EKAn Dec 24, 2011 - 4:15 AM
Agreed that blue gray color is dope
Posted by: ricochet1490 Dec 30, 2011 - 1:36 AM
Posted by: ricochet1490 Dec 30, 2011 - 7:37 PM
Posted by: kurt95gt Dec 30, 2011 - 8:23 PM
Nice work man
Posted by: ricochet1490 Jan 15, 2012 - 1:28 AM
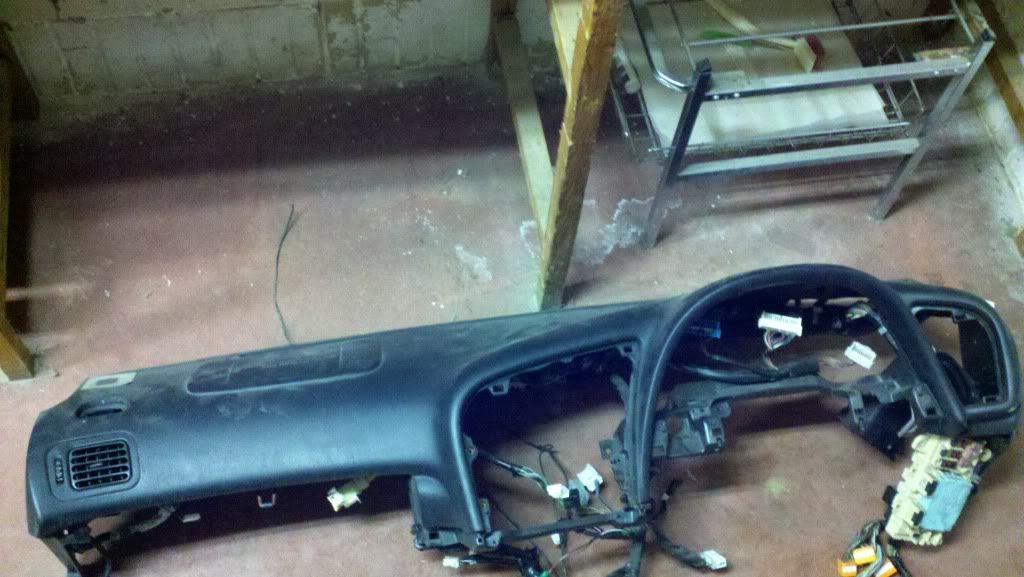
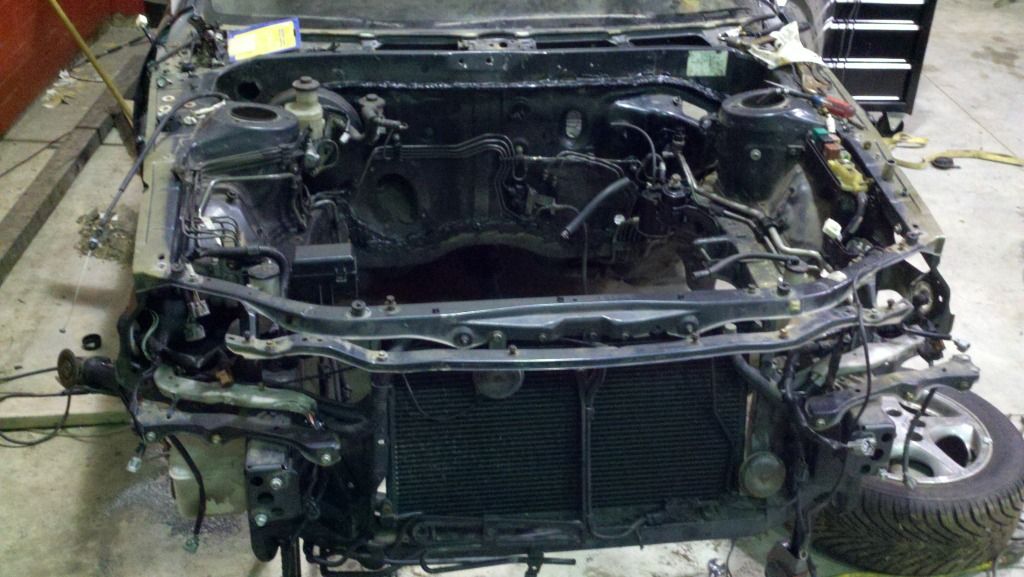
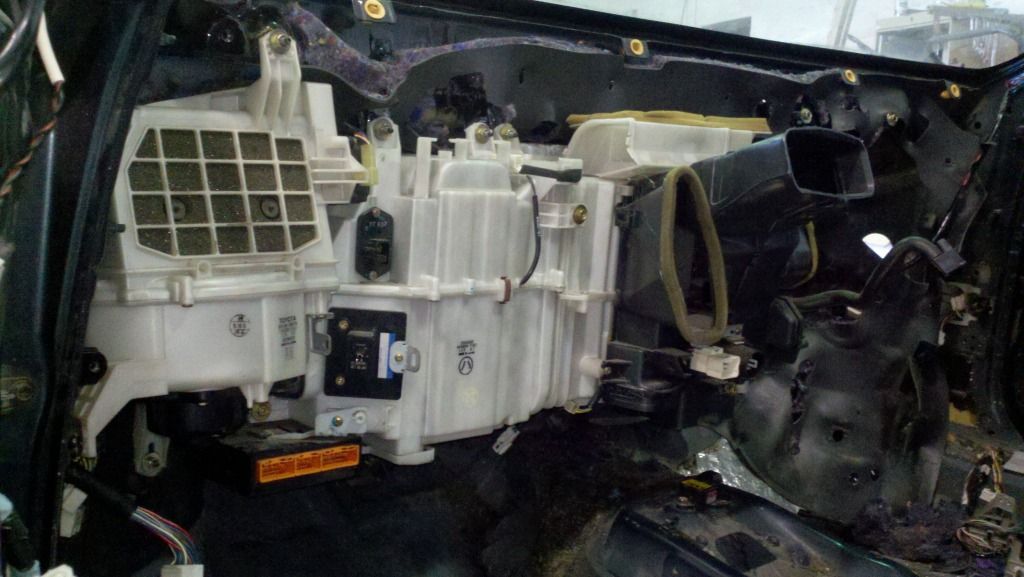
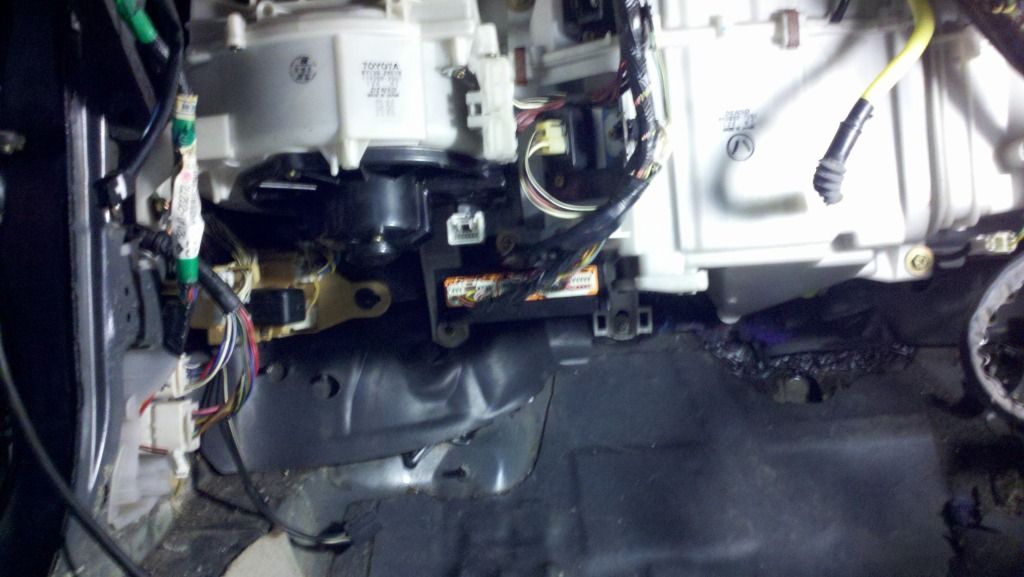
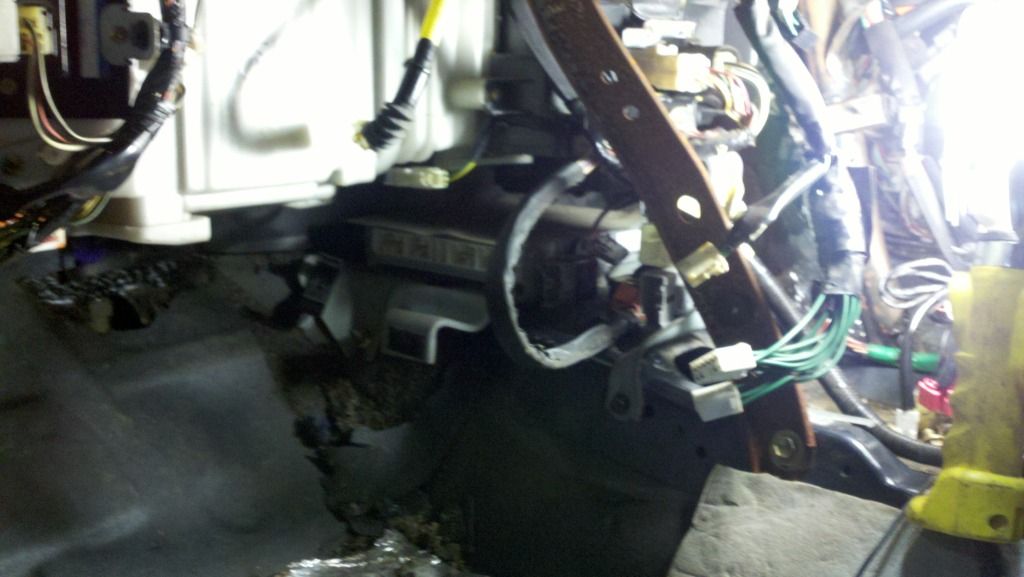
well 4 and and half more hours of work on the car this weekend. Continued taking apart the dash equipment, had to remove some engine components to get to the engine bay bolts that held some of the blower equipment in. Left the heater core in because I didn't have a pan to drain the heater stuff out as I think the radiator and everything still have fluids in them. Either way the carnage....
Awesome JDM pedal clip to get that racing look 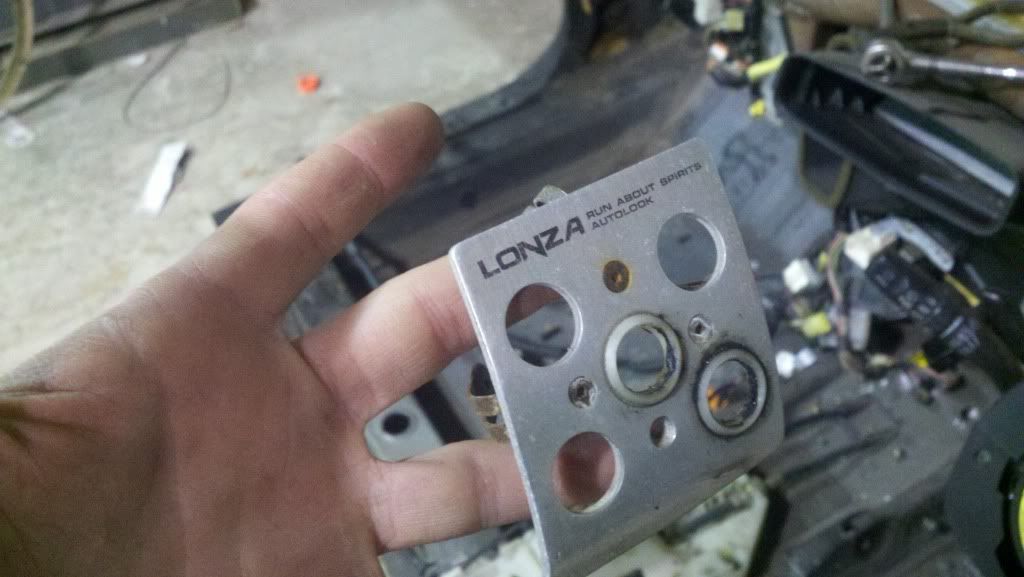
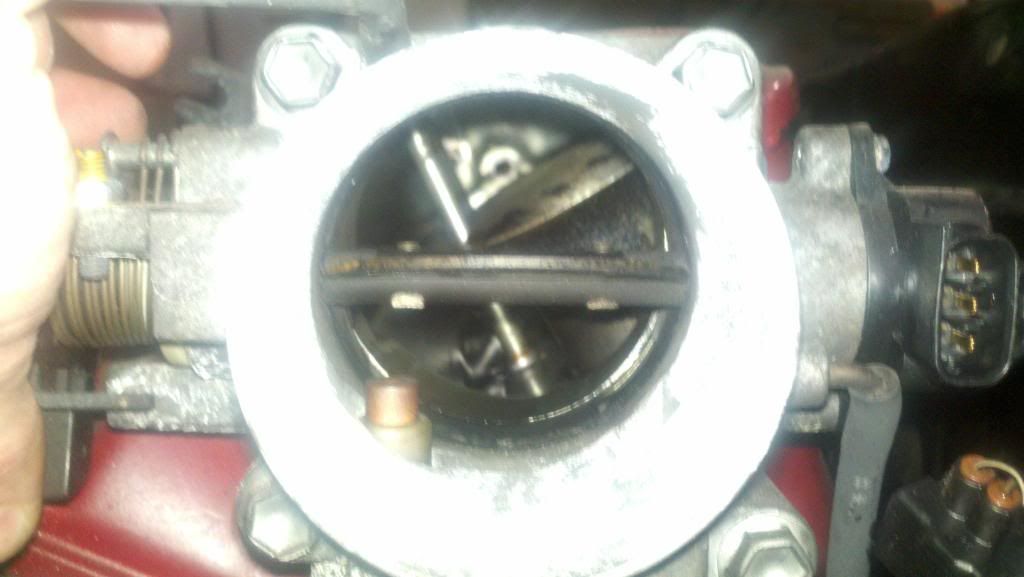
The engine bay with air intake stuff removed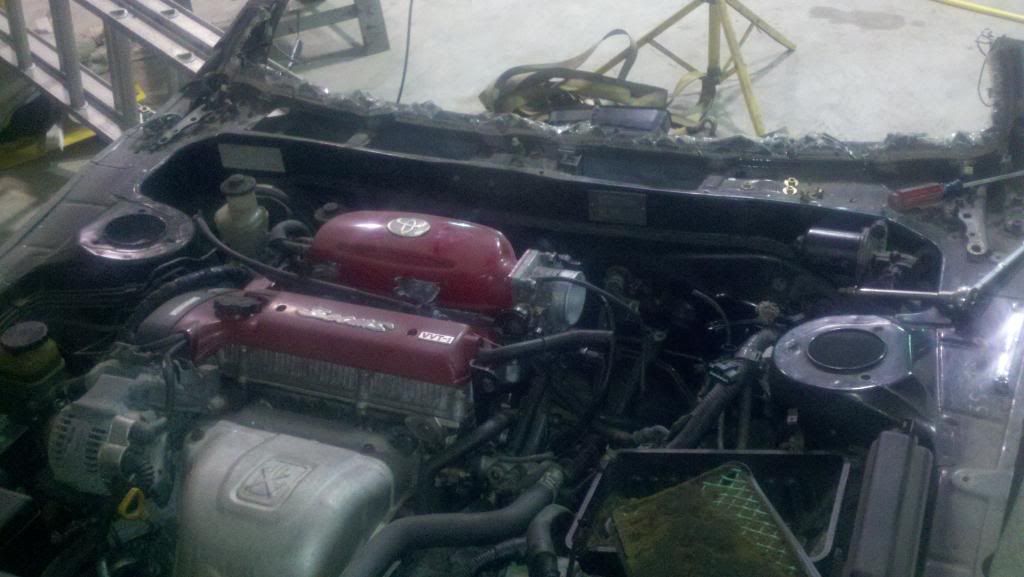
Ultra High Flow JDM airfilter - Guaranteed to add at LEAST 15hp.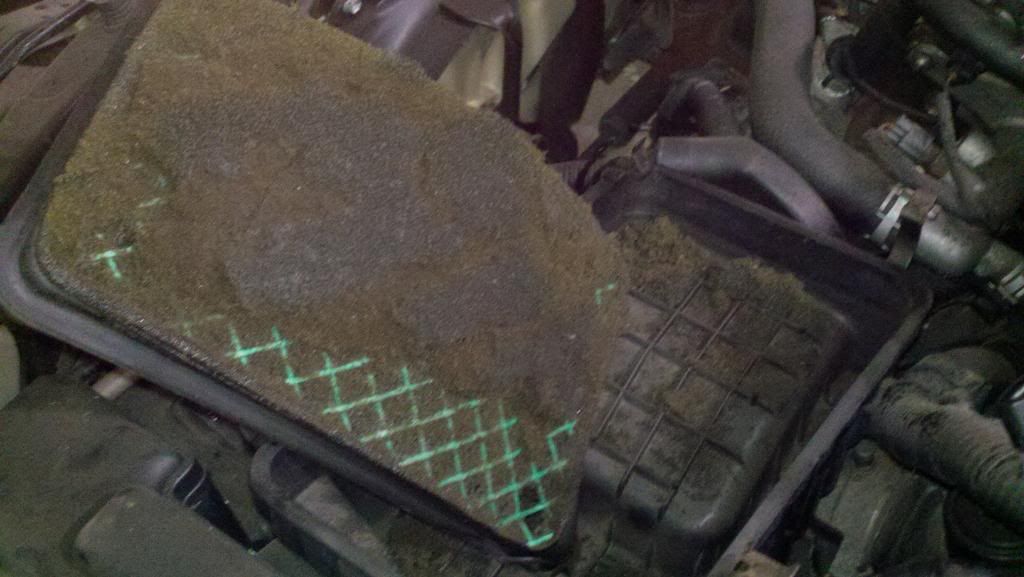
Flap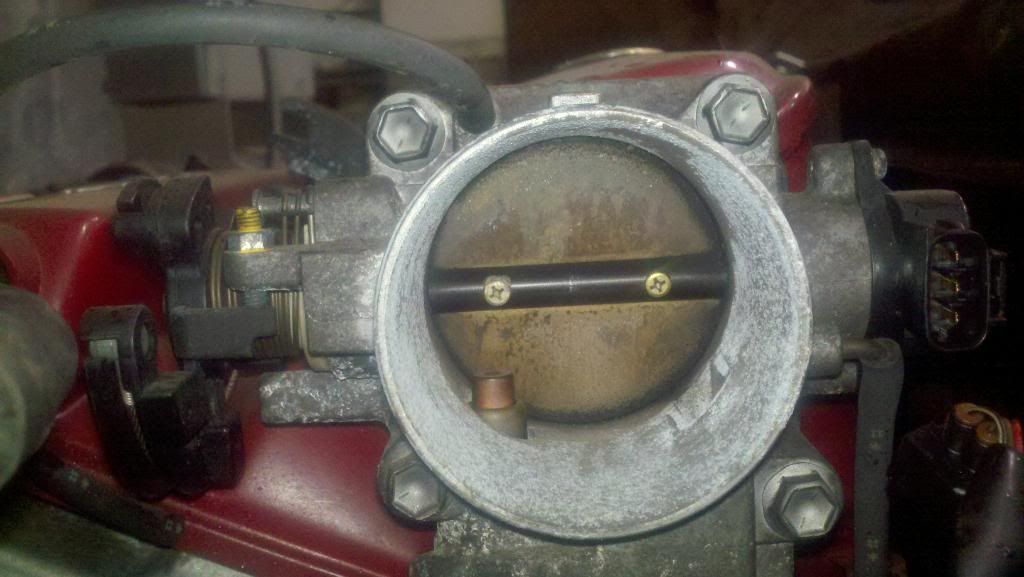
Insides - I think it looks clean enough. just about 50k miles worth anyway. 
The final look of the dash for the night.... It gives me hope for the end.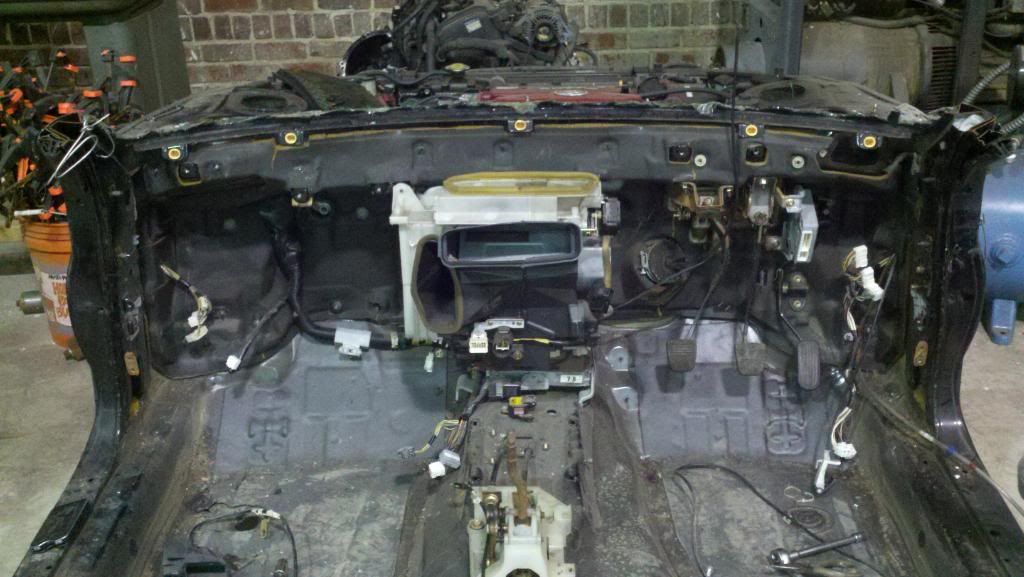
Posted by: richee3 Jan 15, 2012 - 9:57 AM
School is lame. Just drop out of school and finish this beast!
Then go back to school with a wickedmadtyteJDMyo RHD SS-III replica because school isn't as lame as I made it out to be a moment ago.
Posted by: ricochet1490 Jan 16, 2012 - 2:01 AM
^LOL - nice dan. I'm looking to do both at the same time. With any luck I'll finish my BSME this spring as long as I don't have any class conflicts. Once done, it'll be job searching and celica building 24/7.... and you know how job searching goes lol
Posted by: ricochet1490 Feb 3, 2012 - 5:27 PM
Does anyone know off hand if the spring rates are different between st205 factory superstrut and st202 factory superstrut?
Posted by: richee3 Feb 3, 2012 - 5:40 PM
So now this progression will become a reality as soon as finals are over.
Shout out to Richee3 for the CLEAN shell at a great price with all the right parts.
Shout out to FORGMANN for the CLEAN clip at a great price complete with extra parts.
Shout out to BOTH of those guys for a ton of support, parts, and kindness. You've made this a reality for me.
This will not be halfazzed. It will retain U.S. VIN# for ease in registration and liscensing. Firewall swap over for RHD. Every part from the clip will be used with the exception of the control arms and various other parts that I will need to retain USDM suspension. Even though there are some good prices on Superstrut on the forums now.... not knowing what that means for my usdm rear end in the car and what it means for replacement parts.... I will retain all usdm suspension and brakes. The exception is the JDM anti-ock brake system. Auto climate control will also be installed.
Items I will need if anyone has these at a good price lol.... i'm not in a hurry because they are cosmetic but before I drive it I'll have to have it... but just keep it in mind
haha1) set of jdm tails
2) ssiii riser blocks and accompanying spoiler
3) ssiii body parts. splitters etc.
4) set of 17" wheels
Keep me in mind guys!! lol
On a more serious note - here is the plan of action:
1) finish finals, week of Thanksgiving (Nov 2_th)
2) weekend after deer season begin tear down of shell, complete gutting, interior, carpet, dash, everything (complete by end of first weekend in december)
3) firewall of shell cut out either that weekend or shortly thereafter. Saving all cables for trunk pop/gas etc. - setting aside all usdm parts for later install into my DD, sale on 6gc, give back to Richee3 because of all of his previous kindness.
4) drop motor from clip out of the bottom ( I have a forklift etc.) and begin clip tear down (noting and saving all bolts and wiring locations) Drop motor by christmas.... have clip torn down and parts organized by Jan 15 2012
**Classes start back up and progress will drastically slow so I need to do as MUCH as I possibly can before Jan 3. **
5) reweld clip firewall into shell and begin running chassis wiring. Have wiring run and dash parts more or less installed by Feb7 (my birthday)
6) install interior with EXTRA sound deadening everywhere with legit RHD center console ( from FORGMANN, he's the man) Complete by Feb 22
7) Install engine bay parts and tie up odds and ends like wiper bulkhead. Matching spray paint color to car - paint firewall- Complete by March 12.
8)Install engine subframe into shell by installing from bottom. Hello forklift
- Hook up all engine electronics/fluids/fuel etc - Complete and have running by March 26 (end of spring break)9) Install exterior parts/pieces tails, jdm fenders, bumpers etc. - finish by april 15
10) bleed brakes - bolt on wheels - drive to buereau of motor vehicles and get registered and liscensed - May 5th
11) Run the piss out of the car for a weekend, park it and begin all remaining body work that MIGHT need to be done if I haven't gotten to it yet. - Send to paint and have painted the color she was.... sleight blue gray.
12 Project complete for my College graduation.. Present to myself.
HERE WE GO!!
So are you keeping pretty close to your schedule? Also, your upcoming birthday has been noted.
Posted by: ricochet1490 Feb 3, 2012 - 5:48 PM
I'm close. I've done things like run the chassis wiring harness, but still don't have the clip totally tore down. Heater core left (happening tonight). I'll then start dismantling the beams from the bay... brakes, fuel lines, etc and then it'll be a matter of dropping the subframe. So I'm looking, for tonight, to get the heater core out, the radiator out, the remaining front wiring of the clip out, and hopefully that wiring repulled through the shell while it's fresh in my head, and the pedals that are still on the clip.
I've been lazy the first few weekends of the quarter and wasn't as productive as I'd like to be. But when you're the only person turning a wrench, it's tiring sometimes
But I can now see the light
EDIT:
Dan - Thanks for noticing about my birthday.... How thoughtful of you. I mean I would expect us to be that close though because we've shared a celica.... are we bound somehow for eternity now?! haha - Like two guys who've hit the same "piece" lol jk
Posted by: richee3 Feb 3, 2012 - 6:05 PM
I love 6gc and it's members Friday night? Drinking, date night, movies? Nah, we'll wrench on the car instead!
Just saw your edit. I refuse to crack a joke about sloppy seconds... Though it is tempting.
Posted by: ricochet1490 Feb 4, 2012 - 12:57 AM
Well, got most of what I wanted to get done, done.
began by draining out the fluids..... who knew JDM engine coolant was BLOOD red?? 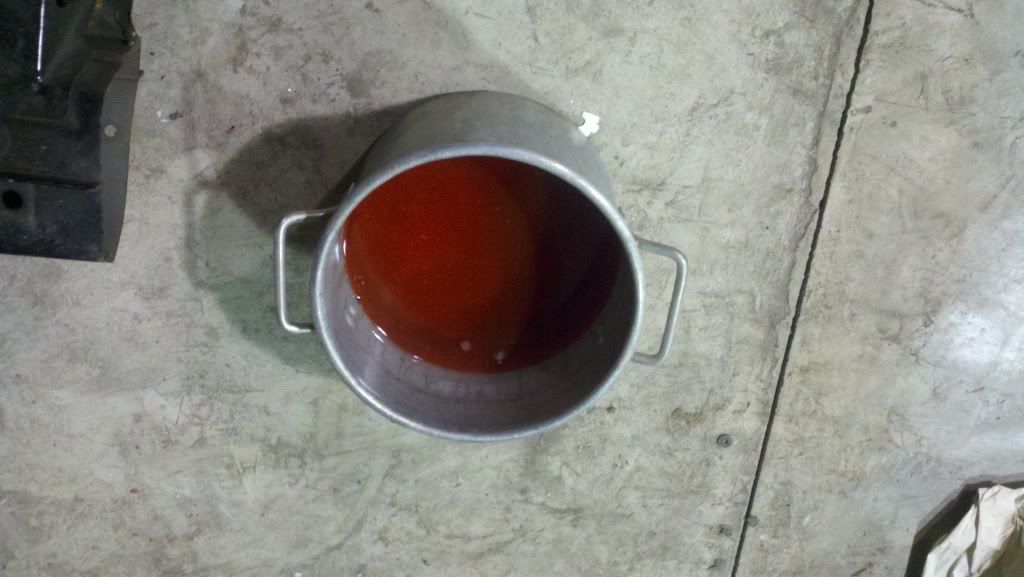
Allowed me to finish gutting the firewall, pulled the wiring through to the fenders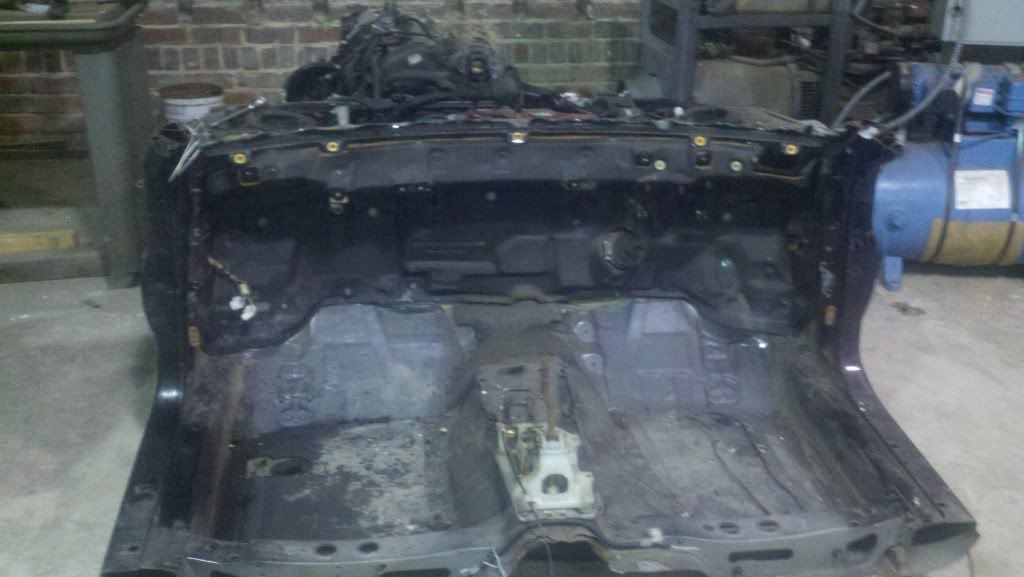
Took out the rest of the airbox, took out the radiator, continued pulling wiring harnesses.... 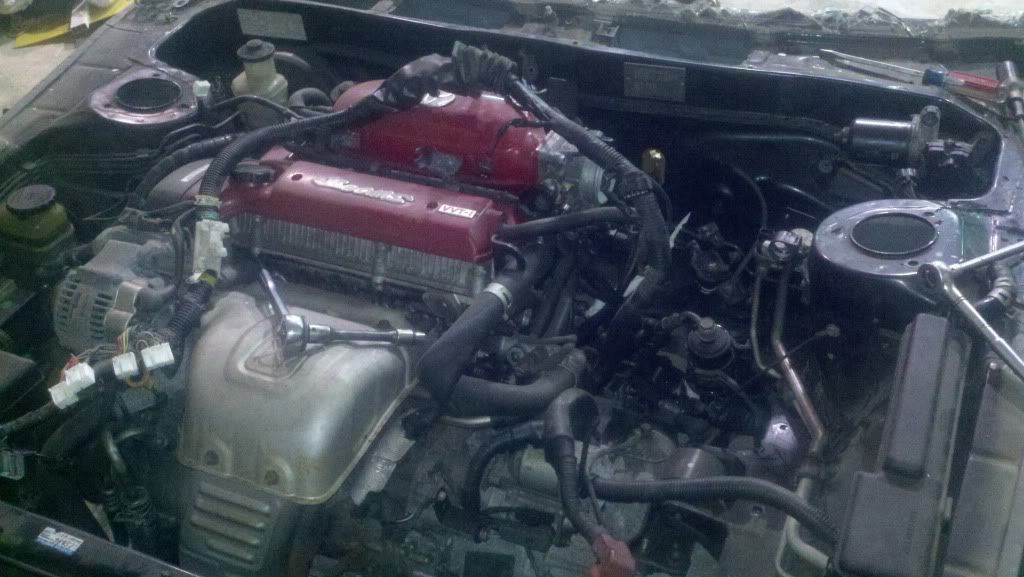
hmmm - 4 hours and that was all I got done. Oh well
Posted by: ricochet1490 Feb 8, 2012 - 12:59 PM
gt-4 strut bar received. Found some Super Strut parts.
So does nobody have any information on whether or not the 202 and 205 spring rates are the same? Or whether it would even make any difference?
Posted by: BonzaiCelica Feb 8, 2012 - 7:44 PM
So does nobody have any information on whether or not the 202 and 205 spring rates are the same? Or whether it would even make any difference?
he sold em to you, didnt you, right??!

Posted by: ricochet1490 Feb 8, 2012 - 8:38 PM
I haven't gotten any pics yet. I would like to find both suspension and brakes as a set up yes. But I might have a set of superstruts from a 205 lined up for about 50$ shipped. Given that, at that price it's worth me asking if there is a difference in spring rates. because that might be worth my while.
You have a mcphearson set up don't you?
Posted by: BonzaiCelica Feb 9, 2012 - 12:25 PM
well I sent him a message and then another pm, but he still hasn't replied.
ST205 part # : 48131-2T110
ST202 part # : 48131-2T050
of course, logically their is a difference in part #'s due to the extra 40 pounds from the transmissions, overall curb weight and AWD.
yes I have mcpherson. I only need the ss-III calipers and hub. I'm looking to get sale/trade my current 55,000 mile gt4 front brake calipers with rotors very soon.
Posted by: ricochet1490 Feb 26, 2012 - 2:46 PM
EPIC EBAY WIN!! - at least 20-30$ cheaper than any others I'd seen. Been really busy with classes, so I buy parts, should have a lot more parts in about 6 weeks.
http://www.ebay.com/itm/360435312156?ssPageName=STRK:MEWNX:IT&_trksid=p3984.m1439.l2649
Posted by: richee3 Feb 26, 2012 - 5:12 PM
I'll trade you a pair of side skirts for them Just kidding. Seriously though, great find!
Posted by: ricochet1490 Apr 1, 2012 - 12:07 AM
motor coming out of clip tomorrow!
With any luck lol.
Posted by: kurt95gt Apr 1, 2012 - 12:11 AM
Sweet!!!!!
Cant wait till this in person
Gotta let me set in the drivers seat once
dont wanna drive it just gotta see how weird rhd feels
Posted by: richee3 Apr 1, 2012 - 11:42 AM
Pictures or it never happened!
Posted by: ricochet1490 Apr 1, 2012 - 6:37 PM
i had a video of the removal.... about 45 seconds to get the whole motor out... but the dang file is corrupt!!! ahhh.... pics to come
Posted by: ricochet1490 Apr 1, 2012 - 8:02 PM
Sorry for the crappy phone pictures...... hopefully I can fix the video.... but here's all I took before leaving the shop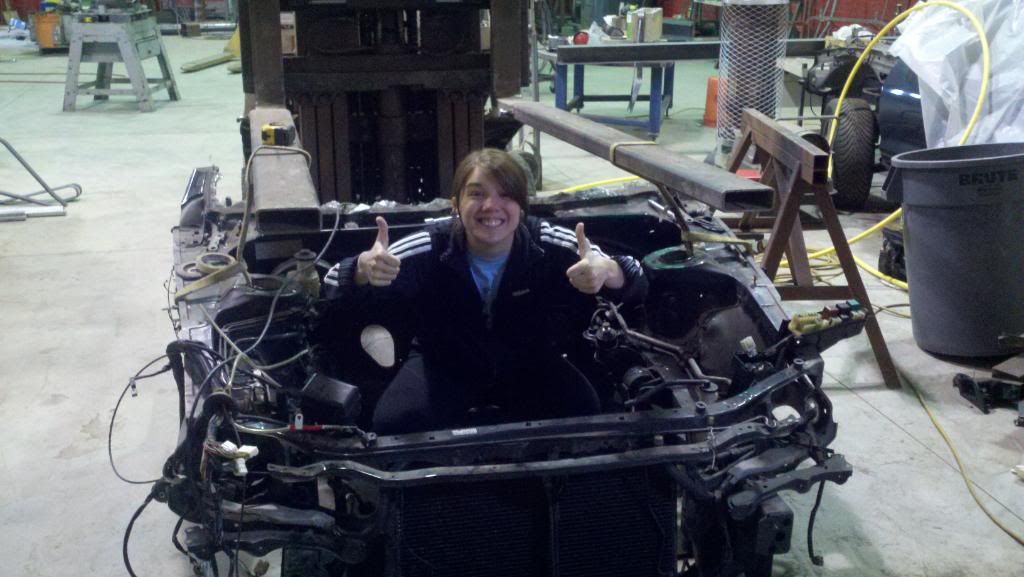
Posted by: kurt95gt Apr 1, 2012 - 8:13 PM
Sweet!!!!
Posted by: ricochet1490 Apr 1, 2012 - 11:07 PM
The video file was corrupted.... don't know how or why..... but this is all I could get out of it tonight.....
The idea here was to show how easy motor removal is via subframe. I had narration in the video, but the audio has seemingly been lost. So in summary, everything is unhooked from the engine bay just like you'd have to do otherwise. The side motor mounts have been removed, and the front and rear mounts have been left in place. The 10 subframe bolts that hold the subframe to the chassis were removed and in this case a fork truck/ or an engine lift will also work, was used to life the body from the motor...... No chain link garbage, no having to fight the dang axles, or removing the front and rear motor mounts, I really think it's about 1/2 the work for the simple fact that you don't have to screw with the axles and the two other motor mounts. You should still be able to gather from this video about how fast the two became separated.
http://s1237.photobucket.com/albums/ff473/ricochet1490/BEAMS%20Build%20Progress/?action=view¤t=trymotortrial.mp4
Posted by: kurt95gt Apr 1, 2012 - 11:41 PM
Stupid phone wont let me watch it
Posted by: ricochet1490 Apr 1, 2012 - 11:46 PM
stupid phone wouldn't save it right the first time
Posted by: kurt95gt Apr 1, 2012 - 11:50 PM
Gotta love stupid smart phones
Posted by: ricochet1490 Apr 25, 2012 - 11:56 PM
just spent $700 last week.... but no more parts buying for a while... ever prolly lol
oh now just to get them all here and get this thing on the reinstall.
Firewall coming out this weekend on both if it rains really good lol
Posted by: ricochet1490 May 5, 2012 - 10:46 PM
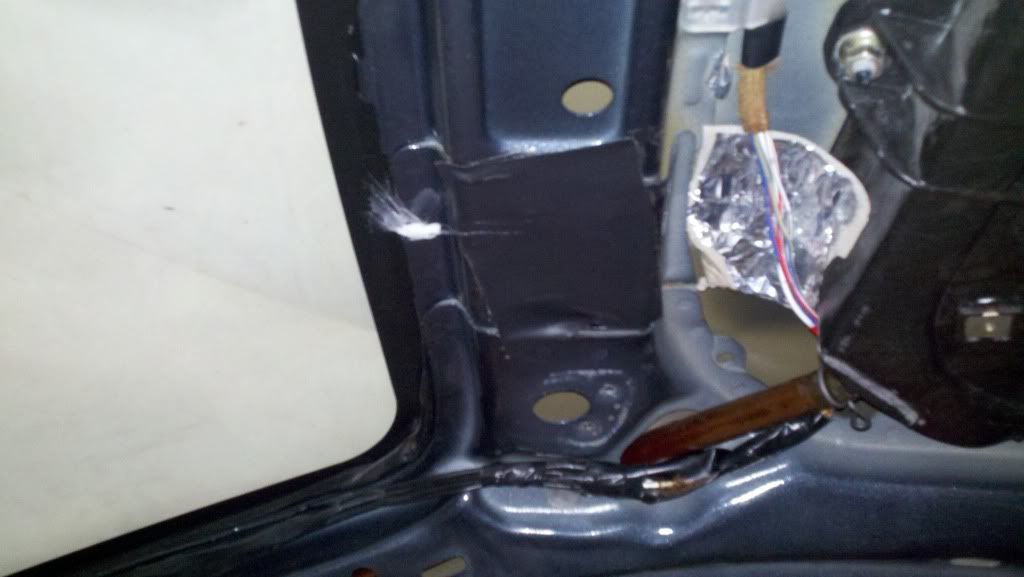
Today was less than eventful, but alas necessary. Started by extending the wiring harness that goes to the roof switches and sunroof. So after some cutting, breaking out of the soldering iron, and some careful measurement, the wiring was re run down the right side to where the fuse box will eventually be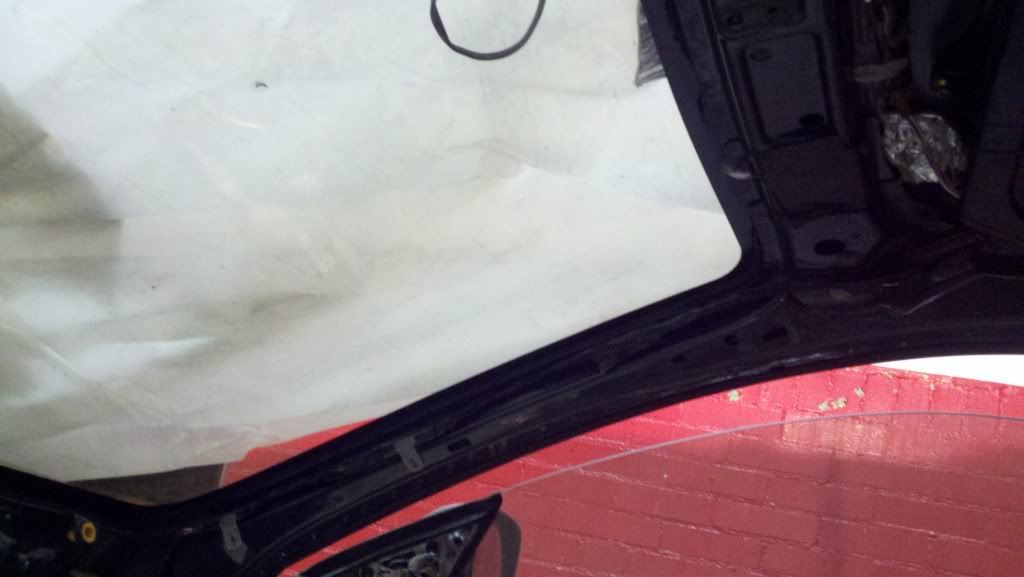
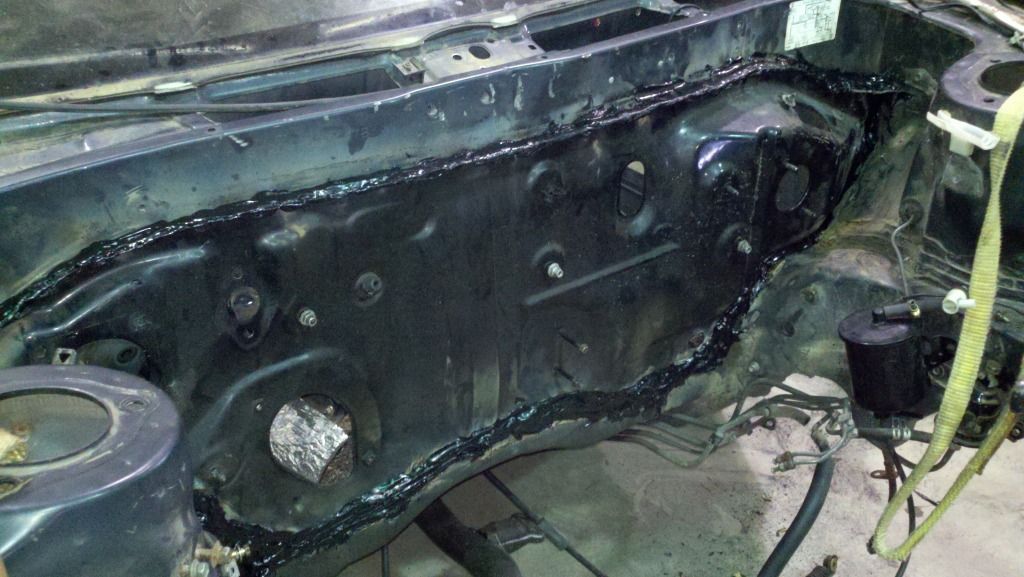
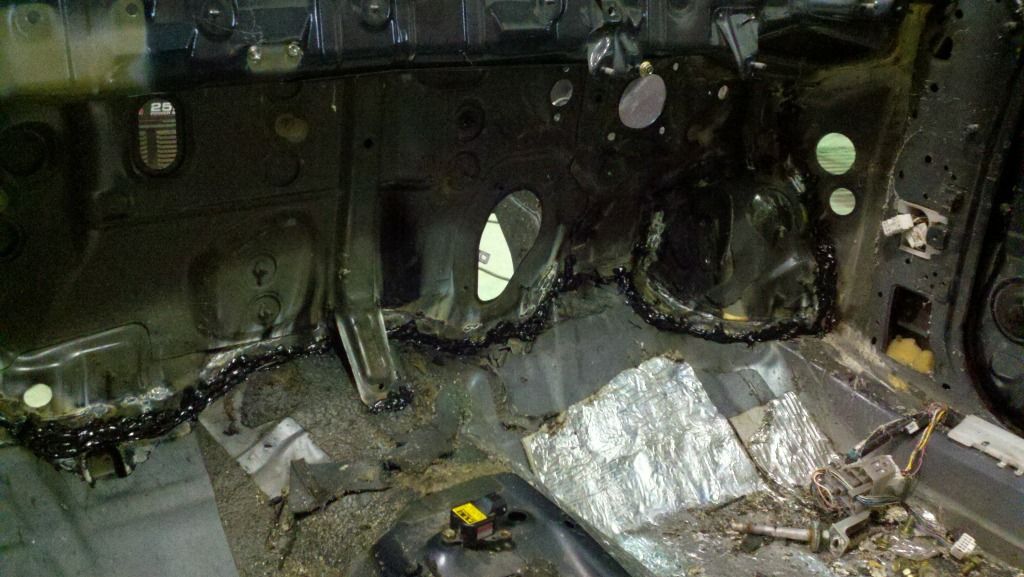
With that done we turned to the firewall. I had already removed much of the seam sealer at this point and wanted to see how difficult or easy drilling out the spot welds would be. We quickly realized this was going to be an all day fare so we again changed topics of work.... but not before...
two little spot welds drilled out
Continuing with the wiring we decided it was about time to tackle the door wiring. Took off the USDM mirror and pulled all the wiring out
We then reran the..... ready for it.... the RHD door harnesses! They just came with the mirrors I bought from seztor and when I got them I didn't know what they were. But this made me feel better because I was concerned about how well the lhd usdm harnesses would translate to the other doors. Now, no worries. 
Wiring run and mirror on
QUESTION:
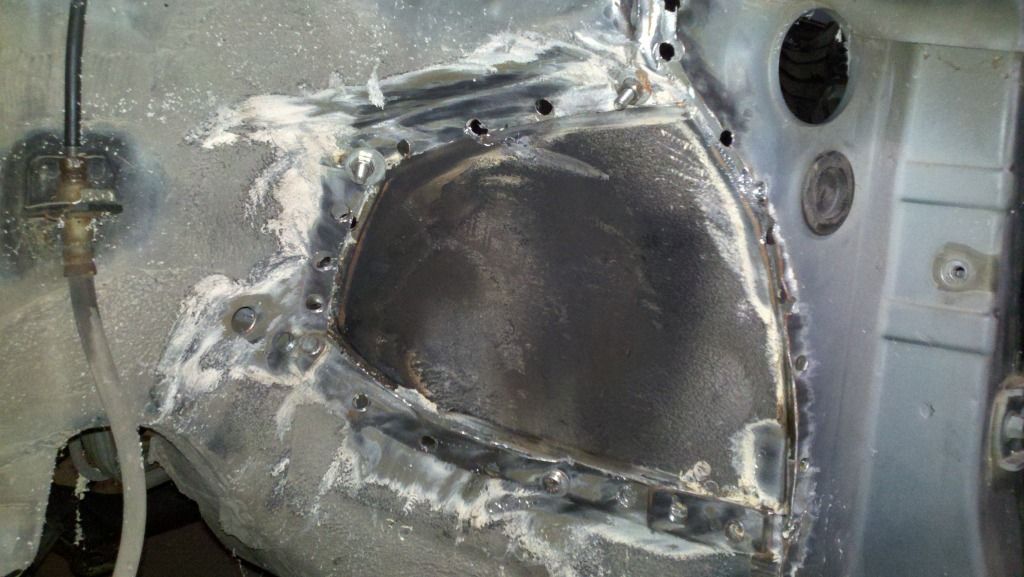
Does anyone know what to do with these "bulkheads" in the lower left and right portions of the firewall? Do they come out with the firewall? or do I have to drill out all of the spot welds around them as well?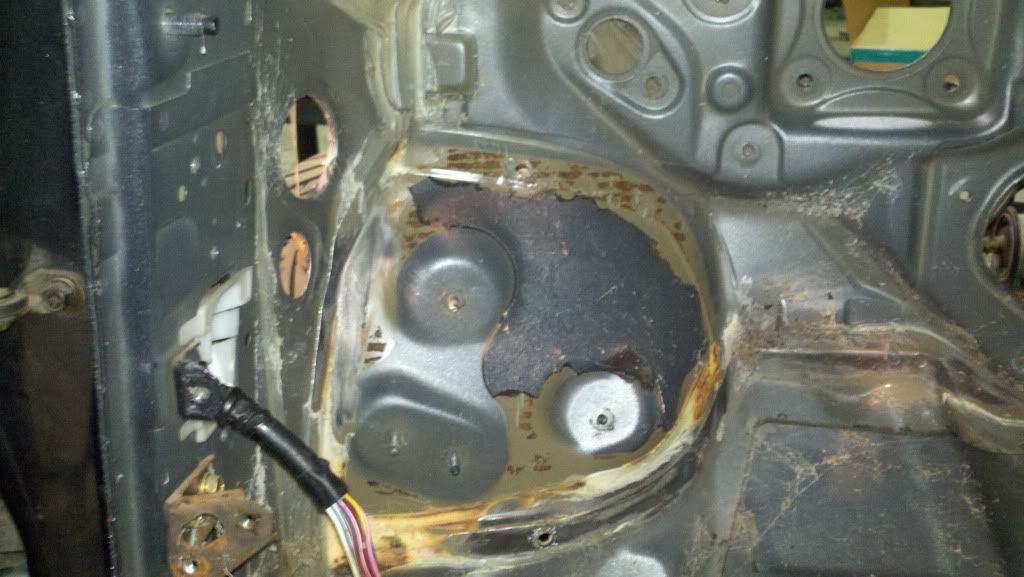
Posted by: kurt95gt May 5, 2012 - 11:15 PM

More work done yay
Posted by: njccmd2002 May 6, 2012 - 8:47 AM
check players thread, or there is a post here, where he put something about the firewall
pics here
http://www.6gc.net/forums/index.php?showtopic=81745&st=0&p=943114&#entry943114
Posted by: ricochet1490 May 6, 2012 - 10:34 AM
Well heck. that answers my questions! I removed the seam sealer around the bulkheads and drilled out two on the left side. Just need to remove the sealer in the wheel wells.
Thanks!
Posted by: ricochet1490 May 6, 2012 - 10:43 AM
 i have posted in that thread before, forgot it existed.... #embarrassed
Posted by: BonzaiCelica May 9, 2012 - 3:32 AM
Still doing the superstrut with twin piston calipers?!
Posted by: ricochet1490 May 9, 2012 - 12:51 PM
already purchased. Just need to find time to pick up
Posted by: vplukas101 Jun 19, 2012 - 5:30 PM
any updates?
Posted by: S8S8 Jun 19, 2012 - 5:46 PM
Nice work mate. I commend you for doing the RHD swap, and I'm glad that we're already RHD here in Australia! Made my Beams swap a lot easier.
Are you going to swap in the auto climate control? It's a bit of extra work, but it's worth the effort.
Posted by: ricochet1490 Jun 19, 2012 - 6:47 PM
It's exactly as the last update has it posted
Had to finish my last quarter of college, had to graduate this spring, move out, spent the last week on vacation, got in Sunday, been taking care of my new dog, going on a small vacation for graduation/fathers day with my dad tomorrow, and then come monday I'll be able to get back to work on it.... just haven't had time as of yet.... but soon
And thanks for the RHD props!! I figured if I'm going to spend 6-7k on a 14 yr old vehicle, I was going to make it interesting haha. But I can imagine how have a RHD car helped haha! I can count on 1 hand how many right hand drive cars I've personally seen in the last 5 years, and 4 of them were jeeps driven by mail delivery guys. I will DEFINATELY be using the auto cliamate control . Will make it much more 21st century. considering car pc or a tablet as a head unit as well to help update it into this new age of cars as well.
Do you like the power of the beams more now?
I'm glad to know someone has read this thread haha
Posted by: S8S8 Jun 19, 2012 - 7:41 PM
Yeah mate I love the power of the Beams now. For some reason it took me quite a while to get used to the way the Beams makes it's power. I guess I was used to a lot of turbo and V8 cars, and getting the best from the Beams requires a totally different way of driving.
Loving it now though.
Posted by: ricochet1490 Jul 9, 2012 - 10:29 PM
todays goodies
I finished the wiring on the "drivers" side door missing a plug for the power mirror switch
Finished the cables to the trunk and gas cap for RHD and got them hooked into the rhd levers.
Also got all my parts out to the shop...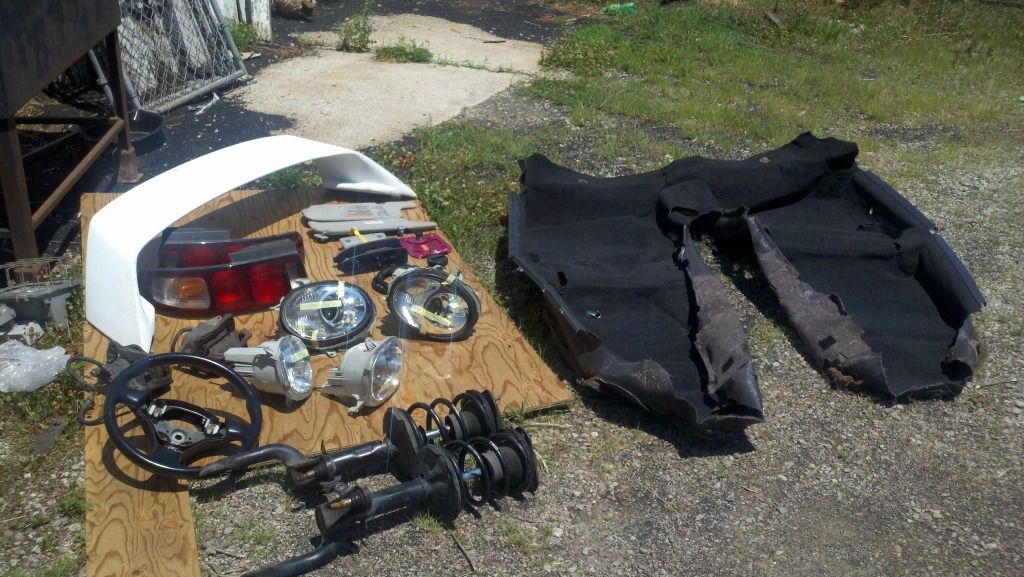
read the springs (superstrut)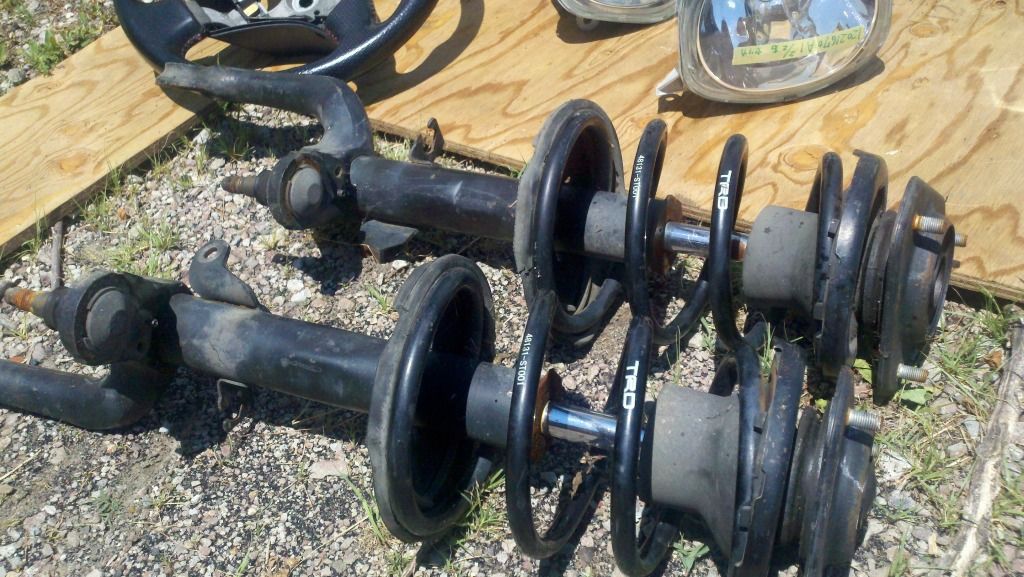
red stitch wheel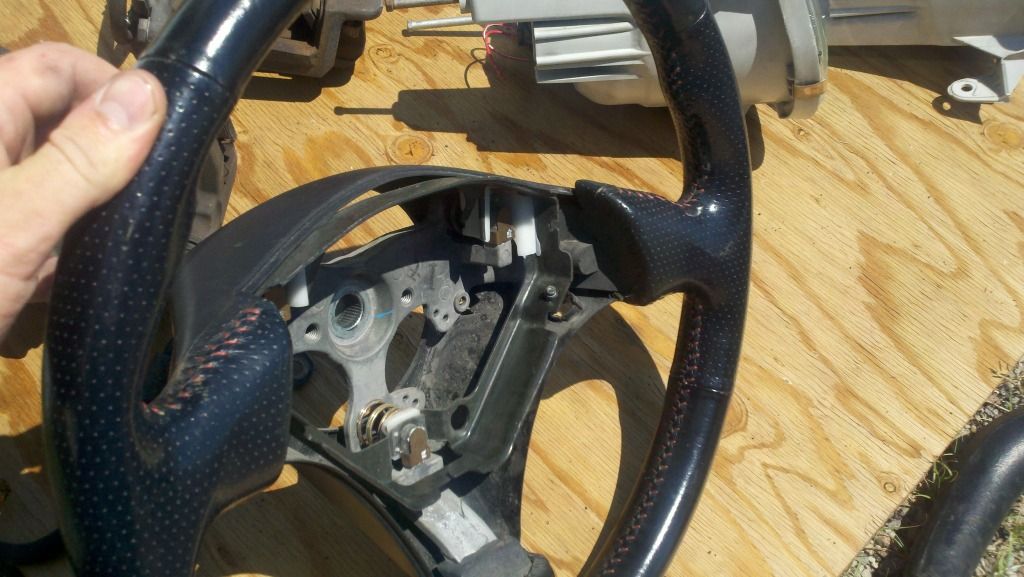
twin pot brakes
broken tabs on my projector lows 
jdm visors and gas lid
TRD short shifter
RHD switches etc 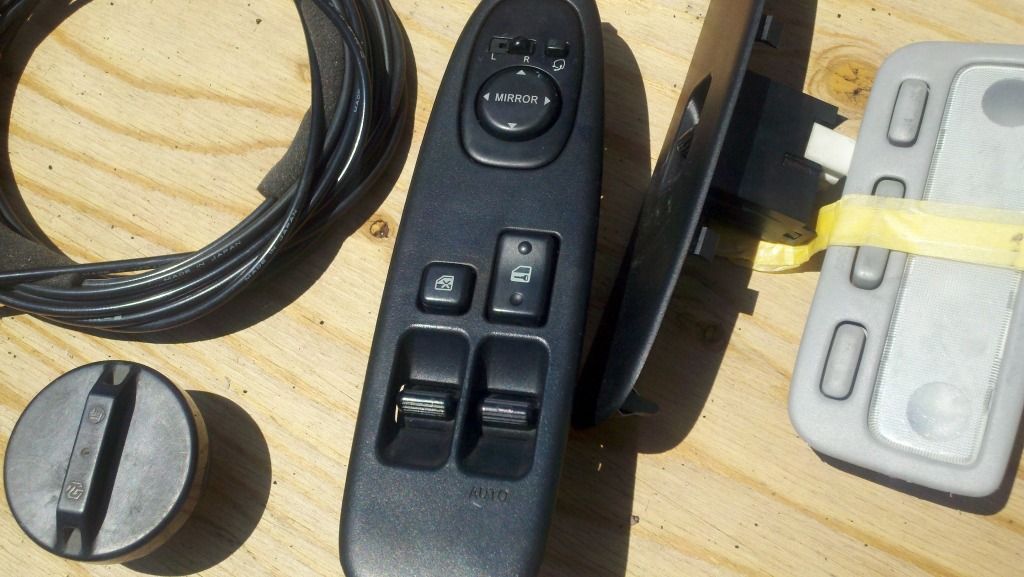
And that is a eurou wing...
not sure if I'm going to use it or not though...
anyway,
HOPEFULLY firewall tomorrow.
Posted by: kurt95gt Jul 10, 2012 - 12:08 AM
I can't wait to see that wing on it should look sweet
Posted by: BonzaiCelica Jul 11, 2012 - 2:12 AM
now that you picked up all your parts. measure the ss-III hubs like the pm I sent you a while back ago. nice. I hope all your superstrut arms are in good shape.
Posted by: ricochet1490 Jul 15, 2012 - 9:31 PM
I'll just leave this here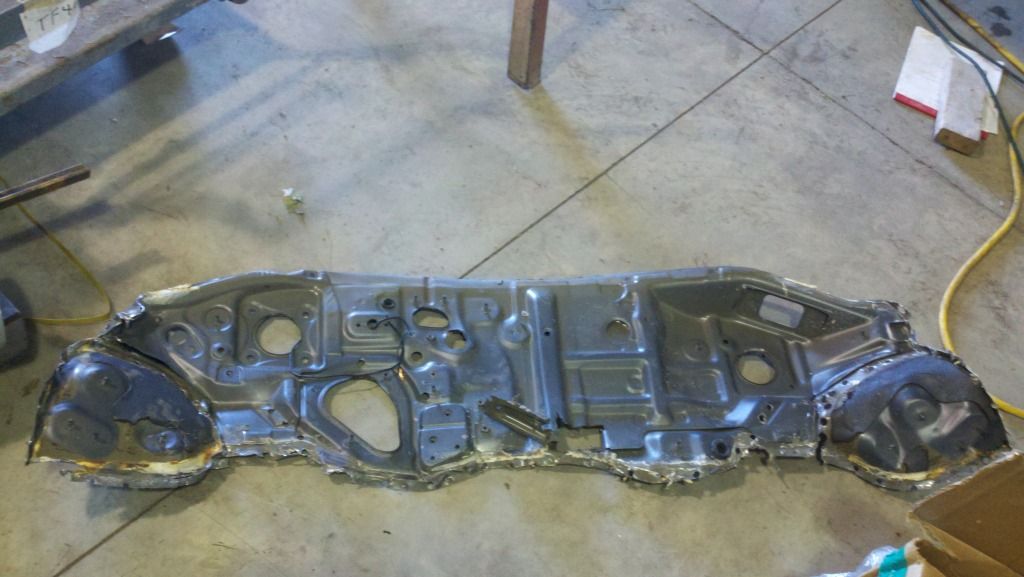
Posted by: enderswift Jul 15, 2012 - 9:38 PM
That picture is a testament to vast amounts of patience. Good work
Posted by: richee3 Jul 15, 2012 - 9:40 PM

Posted by: ricochet1490 Jul 15, 2012 - 9:53 PM
Thanks guys....
Ender - you are exactly correct. days...... days....... and days..... 80-100 spot welds
my step dad said that exact thing...
And Dan - yeah, there will be more, the rhd wall.... it's going to get split in half so it doesn't get all bent and buggered up and re welded in the middle.
It helps to have a registered welder/business owner who has all necessary equipment and know how more pics to follow tomorrow - my phone wasn't working well earlier
Posted by: delusionz Jul 16, 2012 - 1:56 AM
whats different about those ones? my japanese stickers have peeled off my visors, but i remember theres a funny comic on there about the airbags, ur not supposed to be seated with your ass on the airbag facing the seat, it has an X through it lol
Oh yeah, its in your picture lol
Posted by: njccmd2002 Jul 16, 2012 - 2:10 AM
thats actually a child on a car seat, facing to the rear.
Posted by: ricochet1490 Jul 18, 2012 - 9:37 PM
and it continues...
A shot from the inside of the car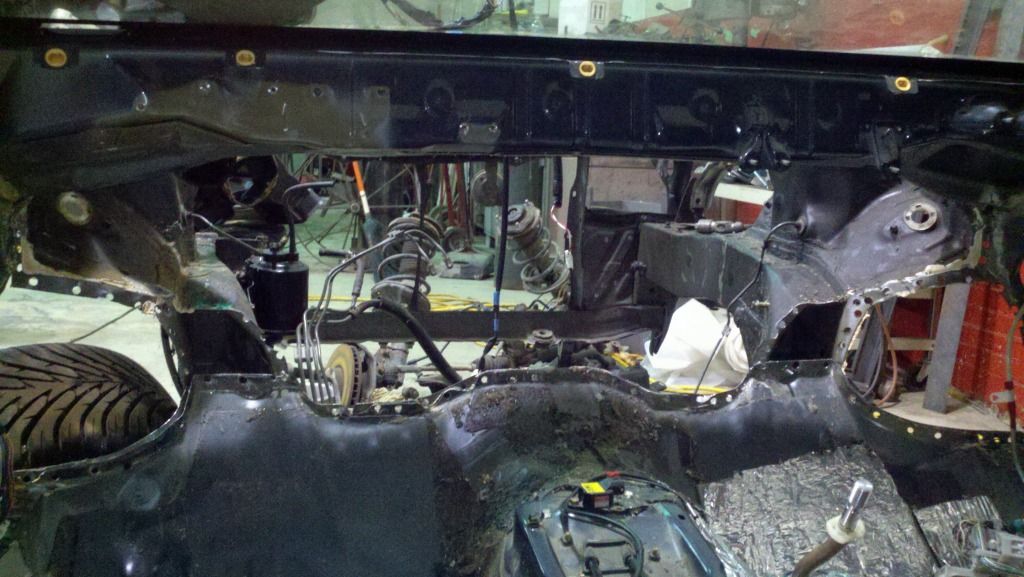
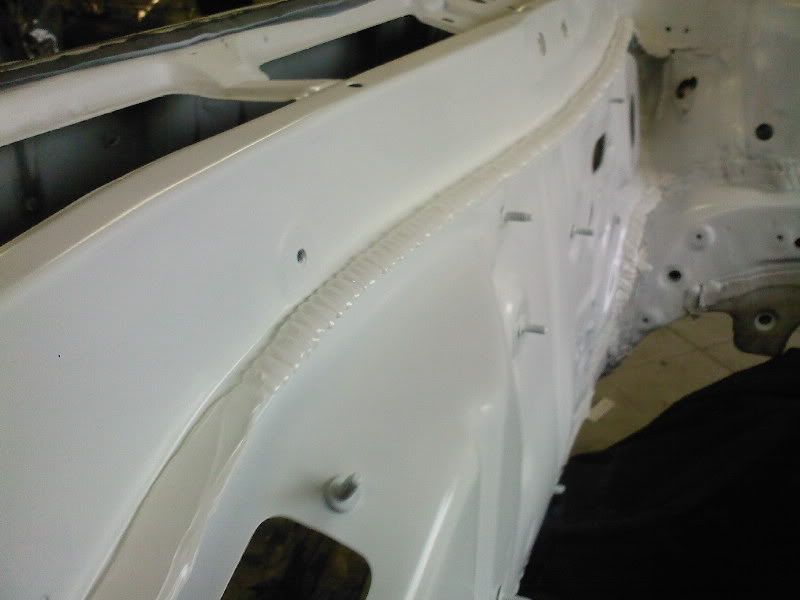
And the rhd firewall started...
Posted by: kurt95gt Jul 18, 2012 - 9:44 PM
FINALLY
thread is now full of win
Posted by: ricochet1490 Jul 25, 2012 - 7:35 PM
12-16 spot welds remain....
Cars were definitely meant to be put together........ not taken apart
Posted by: richee3 Jul 25, 2012 - 7:40 PM
And just what are you doing sitting down at the computer? Get back outside and keep drilling!
Posted by: kurt95gt Jul 25, 2012 - 7:43 PM
this x10000000000000000000000000000000000000000000000000000000000
00000
Posted by: ricochet1490 Jul 25, 2012 - 7:58 PM
surely 6+ hours of frustration is enough for one day?!
Slave drivers....... jeez
I do have a pretty nice view from the garage door though... This is only a small excerpt, the panorma mode on my phone isn't the best lol
Posted by: kurt95gt Jul 25, 2012 - 8:07 PM
Yea yea its pretty
Only 6 hours that's not even a full work day
Posted by: mkernz22 Jul 25, 2012 - 8:23 PM
If you used a step bit, it probably would have gone a lot faster lol
That's what I used for the rad support on my car, worked way better and faster and a regular drill bit
Posted by: ricochet1490 Jul 25, 2012 - 8:45 PM
I have used spot weld drill bits on EVERY spot weld...... I promise.
It's not going any faster.....
If I could make it go faster I would
THis for example
http://www.harborfreight.com/3-8-eighth-inch-double-sided-rotary-spot-weld-cutter-95343.html
Posted by: mkernz22 Jul 25, 2012 - 8:51 PM
I used this:
http://www.homedepot.com/h_d1/N-25ecodZ5yc1v/R-202214138/h_d2/ProductDisplay?catalogId=10053&langId=-1&keyword=unibit&storeId=10051
Took about 30 seconds or less per spot weld.....but that's with a little bit of force.....which made me go through 3 of them, but I just returned it and got a new one since it was less than 14 days from when I bought it lolol and I didn't used and wd-40 when drilling or let it cool off.
Posted by: ricochet1490 Jul 25, 2012 - 9:12 PM
I've gone through 5 bits.... and counting.
The challenge with this is that I've got 80+ spot welds.... for each fire wall .... so x2
I have to center punch each spot weld.... and then drill each weld, which when drilling about 8 inches off the ground, is very uncomfortable
Posted by: ricochet1490 Jul 26, 2012 - 5:39 PM
ok.... whining done
Firewall drilled out totally....
just gotta neatly pull it out without bending anything up lol
Posted by: richee3 Jul 26, 2012 - 5:45 PM
Posted by: ricochet1490 Jul 26, 2012 - 10:38 PM
not much to say dan? lol
firewall almost out....
thanks to the help from the plasma torch, we're cutting the car from around it to help keep it as good as possible.
only seam sealer in the engine bay corners, and the left side top corner metal are keeping it in there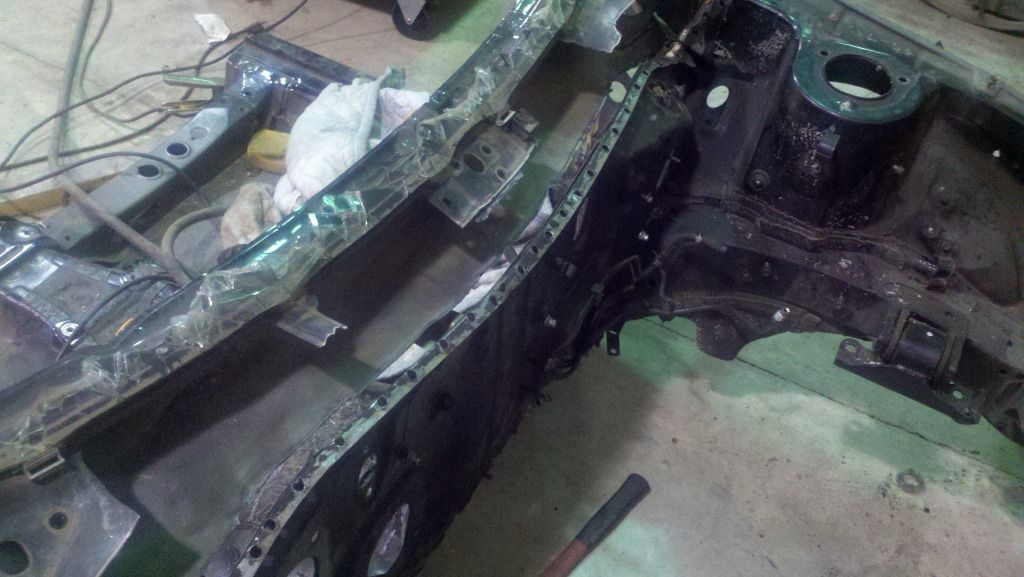
Posted by: njccmd2002 Jul 27, 2012 - 3:26 AM
be interesting challenge to do this ya know!
Posted by: richee3 Jul 27, 2012 - 5:43 AM
I have apparently successfully managed to post nothing. There was originally a humorous demotivational poster there, but it has disappeared. I would edit that post to add that picture back in, but quite frankly I'm proud of myself for successfully tricking 6gc.net and creating a blank post.
Now get back to work!! 
Posted by: ricochet1490 Jul 28, 2012 - 10:21 PM
Like most people..... There might be a problem. What do you think!? lol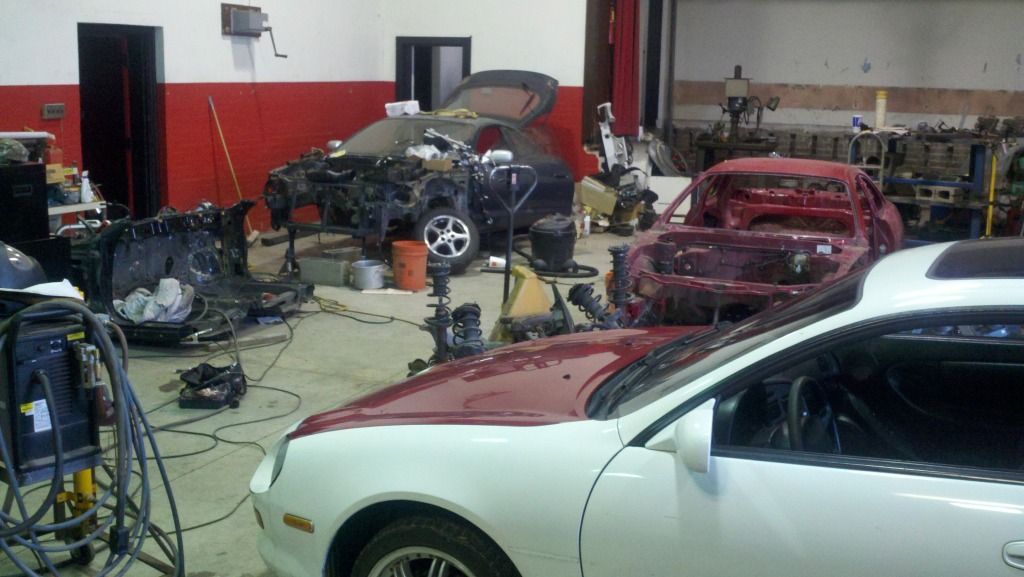
In other news....
I'll leave this here....
Posted by: enderswift Jul 29, 2012 - 10:32 AM
celicas, celicas everywhere
Posted by: ricochet1490 Jul 29, 2012 - 3:52 PM
Posted by: ricochet1490 Jul 29, 2012 - 9:54 PM
Bolting the firewall in through the holes created by the spot welds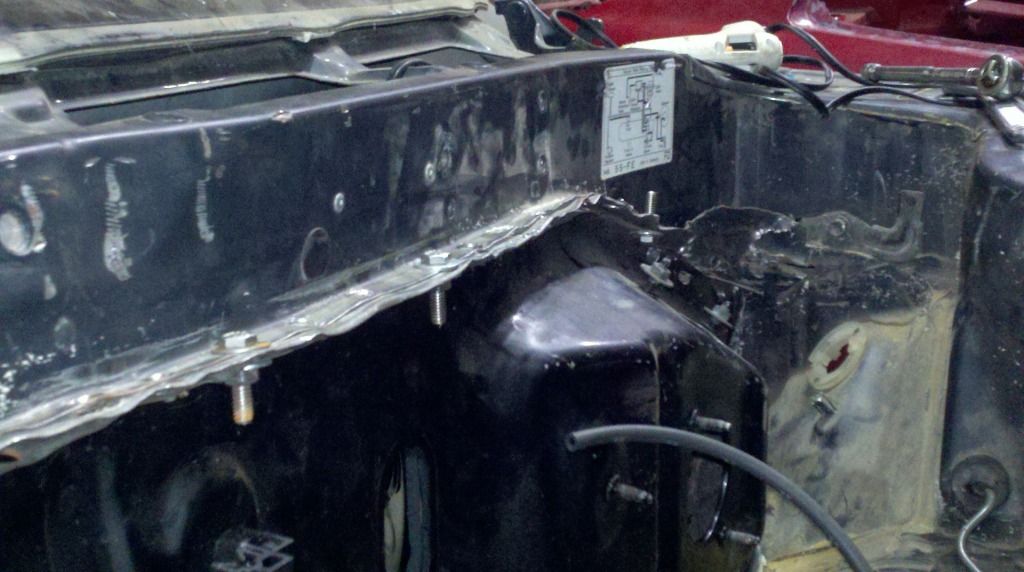
This locates the firewall in there, welding soon.
I'm not putting it in there exactly lie the factory did. The firewall from the factory was put in there in layers. It was sandwhiched between a layer for the floor pan, and the layer for the wheel well.... and then it changes sides and is in the engine bay in the middle.... very complicated, so it's getting welded back in on the inside of everything. I've hammered the inside layers to the outside, and that's why I'm bolting it in through the holes, to pull it up tight and to weld it in there. If it's anything but where it should be, It might be the thickness of the firewall toward to indside..... 0.8mm lol
Posted by: ricochet1490 Aug 1, 2012 - 8:20 PM
Took the firewall back out and cleaned up the old seam sealer so welding would be possible.... then I put it back in, drew it up tight, hammered everything flush with some good old tin work.....
The results: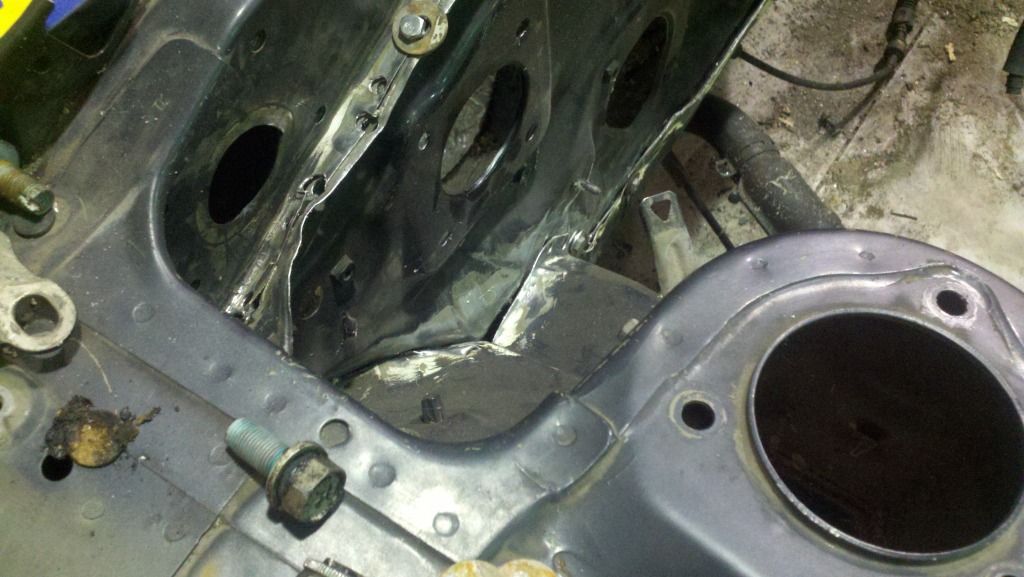
Welding tomorrow!
Posted by: kurt95gt Aug 1, 2012 - 8:33 PM
Looking good buddy
Posted by: richee3 Aug 2, 2012 - 10:50 AM
Nicely done! I can't wait to see it all welded up and finished. What's next? Interior reassembly?
Posted by: ricochet1490 Aug 2, 2012 - 11:04 AM
seam sealer, engine bay wiring, brake/ac/fuel lines, mount parts on firewall, then start dash install with hvac stuff and remaning dash hookup wiring.... mount airbag sensors, radiator, condensor, cram subframe under car, bolt and hook up and attempt to start before totally buttoning the front end back up....
Oh and somewhere in there drill out the RHD hole for the wipers to mount.
Posted by: richee3 Aug 2, 2012 - 11:06 AM
1) finish finals, week of Thanksgiving (Nov 2_th)
2) weekend after deer season begin tear down of shell, complete gutting, interior, carpet, dash, everything (complete by end of first weekend in december)
3) firewall of shell cut out either that weekend or shortly thereafter. Saving all cables for trunk pop/gas etc. - setting aside all usdm parts for later install into my DD, sale on 6gc, give back to Richee3 because of all of his previous kindness.
4) drop motor from clip out of the bottom ( I have a forklift etc.) and begin clip tear down (noting and saving all bolts and wiring locations) Drop motor by christmas.... have clip torn down and parts organized by Jan 15 2012
**Classes start back up and progress will drastically slow so I need to do as MUCH as I possibly can before Jan 3. **
5) reweld clip firewall into shell and begin running chassis wiring. Have wiring run and dash parts more or less installed by Feb7 (my birthday)
6) install interior with EXTRA sound deadening everywhere with legit RHD center console ( from FORGMANN, he's the man) Complete by Feb 22
7) Install engine bay parts and tie up odds and ends like wiper bulkhead. Matching spray paint color to car - paint firewall- Complete by March 12.
8)Install engine subframe into shell by installing from bottom. Hello forklift
- Hook up all engine electronics/fluids/fuel etc - Complete and have running by March 26 (end of spring break)9) Install exterior parts/pieces tails, jdm fenders, bumpers etc. - finish by april 15
10) bleed brakes - bolt on wheels - drive to buereau of motor vehicles and get registered and liscensed - May 5th
11) Run the piss out of the car for a weekend, park it and begin all remaining body work that MIGHT need to be done if I haven't gotten to it yet. - Send to paint and have painted the color she was.... sleight blue gray.
12 Project complete for my College graduation.. Present to myself.
Ahem...... By my count, you're six months behind. No more excuses! I'm tempted to get the ban hammer out. But I decided that's not enough motivation. So I'm jumping straight to... THE BAN WHIP!!!

Posted by: kurt95gt Aug 2, 2012 - 11:25 AM
Ouch breaking out the ban whip
Posted by: rave2n Aug 2, 2012 - 11:37 AM
Posted by: ricochet1490 Aug 2, 2012 - 11:00 PM
welding didn't go as planned. wrong setup on the welder for sheet metal. .045 wire on a 220V machine, not good for firewall. Had some success, but limited.
Trying again tomorrow with a different machine that we ahve set up with .025 wire. Just have to move the gas bottle over as the one currently attached is pure argon instead of the 75/25 argon c02 mix.
Also gotta find some brass or something to help prevent burn through lol
Posted by: richee3 Aug 3, 2012 - 4:30 PM

Any luck on the welds yet?
Posted by: ricochet1490 Aug 3, 2012 - 7:25 PM
They freaking suck.....
It's just too dirty with paint primer, and remnants of seam sealer. I thought I had it pretty clean...
Posted by: ricochet1490 Aug 3, 2012 - 7:42 PM
My usual skill.... Not bad
What this firewall is looking like
I'm gonna turn the heat up and slow the wire feed and go back over them I think
Posted by: kurt95gt Aug 3, 2012 - 8:06 PM
Not lookin so good lol
Keep tryin man you'll get it
Posted by: ricochet1490 Aug 3, 2012 - 8:21 PM
It's just too dirty. I'm just welding the sure **** out of it now to make sure it sticks....
They are looking better after I turned the heat up, but I burn through now if I'm not careful
Posted by: ricochet1490 Aug 3, 2012 - 11:06 PM
Welded it up some more, ground it down, welded it up....
Welded the inside with "tabs" of weld if that makes sense. A bunch of big tack welds basically after I tried doing what I could to seam weld everything together on the inside as well.
Just some pics. I'm sure it's not coming out anytime soon lol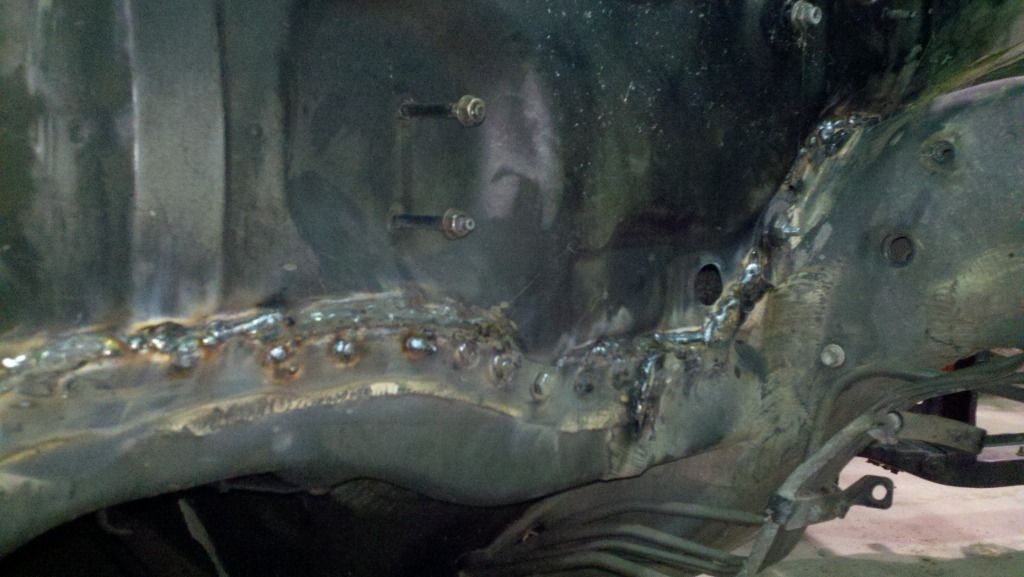
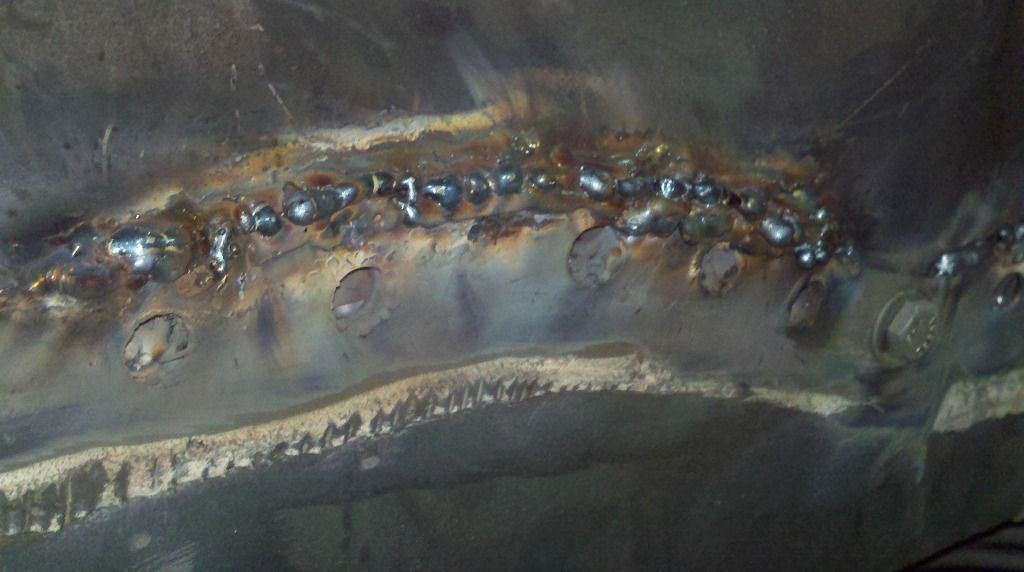
word of advice if ANYONE else decides to do this..... take off all the paint and primer in the area. Even if you think it'll be fine, that was my biggest problem. I had to put those crappy welds in there to get the paint to burn off and give me more metal to flow too. That's all I did for nearly 6 hours was try to weld this thing in..... and the welds suck! but they'll be hidden so no biggie I guess.
Taking out bolts tomorrow and applying seam sealer VERY HEAVILY to cover all holes, cracks, nooks, crannys, and then gotta paint the engine bay cause I dinged it more than once during spot weld removal.
Got a job and start work officially on wednesday, so I gotta hustle lol
Posted by: enderswift Aug 4, 2012 - 7:38 AM
are you doing MIG or TIG?
Posted by: ricochet1490 Aug 4, 2012 - 9:11 AM
Given that I referenced wire feed, def MIG welding.
Posted by: ricochet1490 Aug 4, 2012 - 9:49 AM
If the surfaces were pristine, either welding would work. But it's got more than enough on there. If you knew how hard it was to get out....
It continues 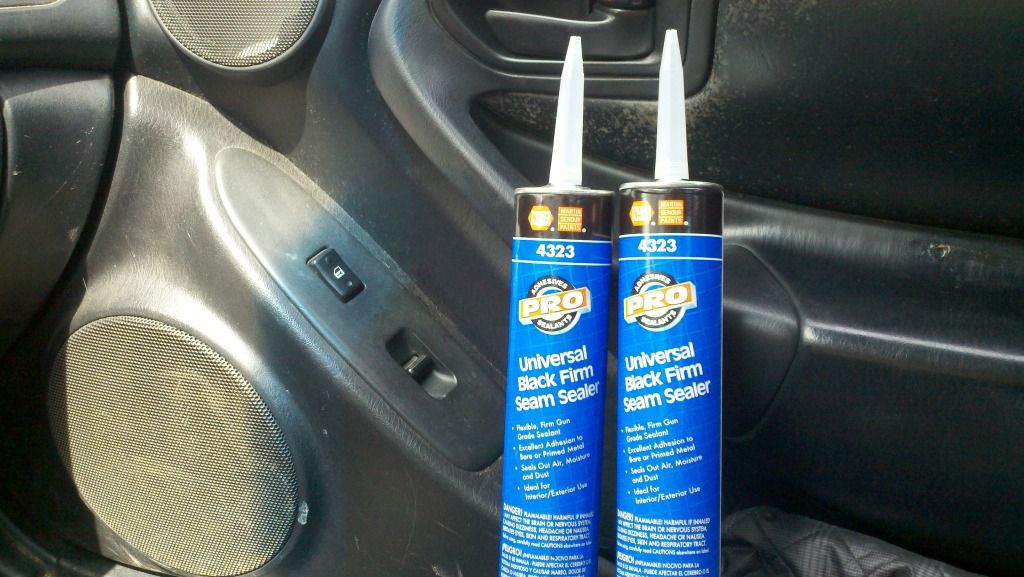
Posted by: jcbass7 Aug 4, 2012 - 11:52 AM
keep up the work, and the pics!
I need to weld some sheet metal to do a repair in the rear quarter on my car, but I'm nervous about welding such thin metal on the skin of the car. Looks like its not too easy. Can't wait to see this coming together though!
Posted by: ricochet1490 Aug 4, 2012 - 12:54 PM
no bigger than .030 size wire.... smaller if you can get it. .023 they make.
The settings on the welder are suggestion only in my opinion. Look at the settings and if they suggest something like 15V and 130in/min of wire feed, set the welder to like 16.4V and 120 in/min.... basically, hotter and slower.
But most importantly make sure you clean the surface good with a wire wheel on a side grinder and then wipe it down with something... acetone is good, gasoline, just make sure you give it time to evaporate... and then weld.....
If it's not going to be seen, I'd actually reccomend poprivet and then do your body work like youd have too anyway.....
but just get it clean.
And I'm trying to keep everything updated... don't wanna make it look easy lol
Gotta keep my threads at the top 
Posted by: ricochet1490 Aug 4, 2012 - 3:57 PM
Sealed
Posted by: ricochet1490 Aug 6, 2012 - 12:13 AM
Today I decided that in the engine bay, with everything on it, and with my time constraints of having MOST everything done by tuesday because I start work on wednesday....
That the blue and the black actually look very very similar and I'm not gonna worry about paint right now. The seam sealer isn't 100% hard so I can't sand it yet, but it could begin the pivotal reassembly.
Moved over the harness that goes on the nose of the car, all appropriate mount points etc.
Moved over the A/C lines that go in the engine bay.
Moved the P/S lines into the car and got them mostly installed
90% installed the brake / ABS stuff into the car, didn't do final hookups incase something had to come out because of poor order
Installed the A/C condensor
90% installed the brake booster - all mounting points for pedal on the inside aren't done yet, so gotta work that out
And pics to make the post useful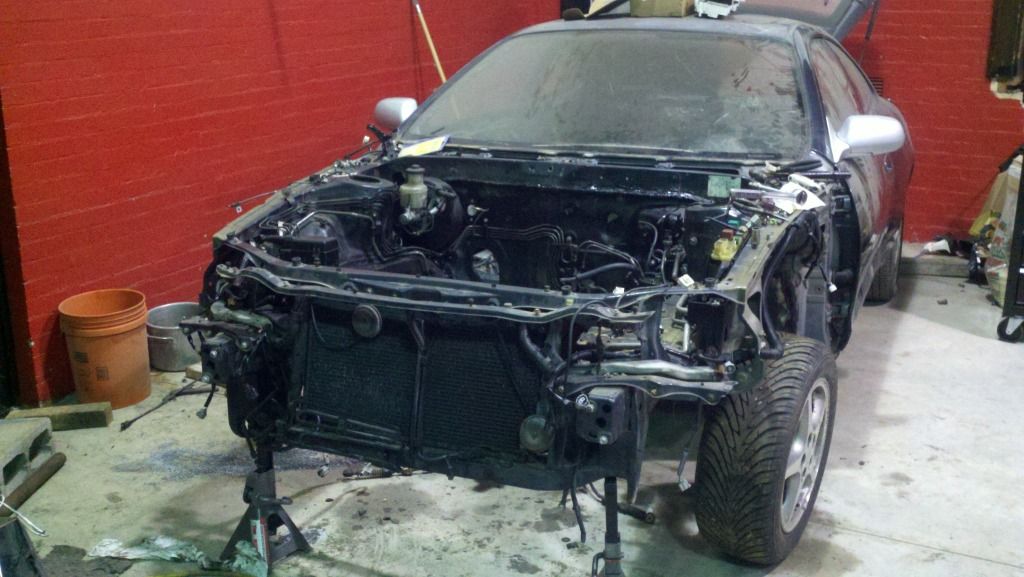

Posted by: ricochet1490 Aug 8, 2012 - 10:28 AM
Little more done on the car. Washer fluid bottle, radiator overflow, removed old shifter cables, drilled off dash mounts, fixed power steering . Some other things
Posted by: ricochet1490 Aug 10, 2012 - 9:44 PM
Got the dash mounts on. All but one.... get that tomorrow. Then interior things like pedals, dash, hvac etc can be installed.....
Home stretch now.
Posted by: richee3 Aug 10, 2012 - 9:57 PM
I'm jelly that you'll have auto climate control.
Posted by: njccmd2002 Aug 10, 2012 - 10:33 PM
what about the windshield wipers, are you turning them around too?
Posted by: ricochet1490 Aug 10, 2012 - 10:40 PM
yep... gotta drill that hole for sure.... wiring harness is on that side, pretty much no choice lol
Posted by: ricochet1490 Aug 11, 2012 - 4:53 PM
Finished up the Hvac/dash/etc mounts today, then painted black to prevent surface rust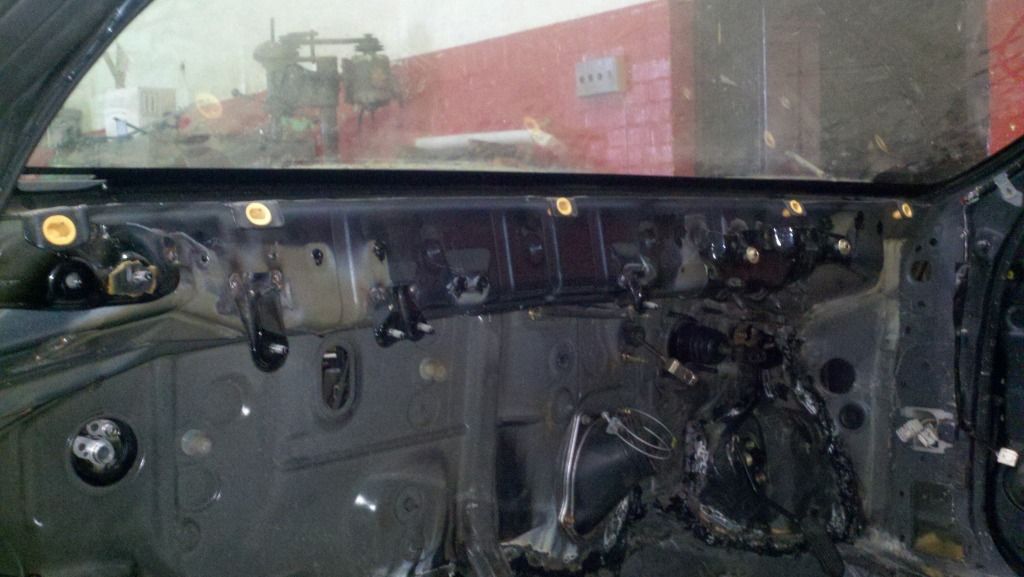
In the st202 body, the sound deadening "wrap" that goes onto the firewall underneath all of the HVAC stuff came off in CHUNKS when I initially took it off. So I have no sound deadening in RHD.... BUT I decided I try to make a frankenstine layer out of a LHD firewall cover. So I folded it in half and began to cut the holes that mirrored one another so that the big stuff like the dash mounts I just welded on and the sttering column and brake pedal assembly etc would go through the sound deadening. After I cut what I could I placed it on the wall and custom cut all the holes, one at a time, in order to access the holes and studs that I needed. So I don't know if this will end up beng a solution, but I'm giving it a shot.
Here I have mounted the gas and brake pedal and was cutting the hole for the clutch cylinder arm...
Started to test fit my HVAC by hooking up the air conditioning stuff, finding I need to weld a stud on the bottom for the evaporator, and that there is a "plate" where the fan gets its "vent" to access outside air that is in the way that also needs moved. So I'll likely have to remove everything you see below to remove the LHD plate and the RHD plate and then weld the RHD plate back in. The hole that the plate covers provides access to the cowel for it's fresh air....just wish I'd seen it before I started mounting everything in... but I needed to start mounting to see what all I had missed I guess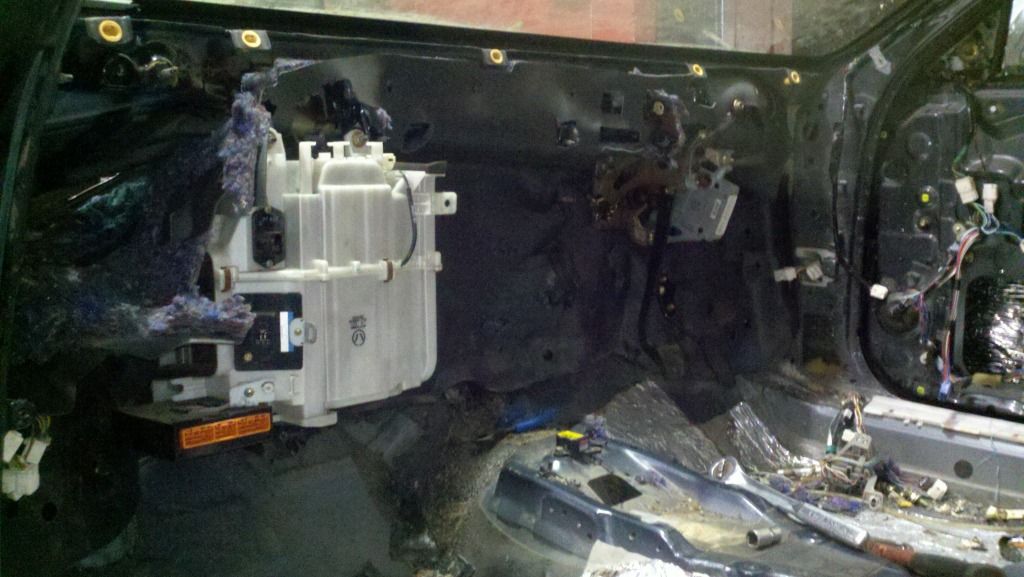
Posted by: delusionz Aug 12, 2012 - 12:31 AM
I bet if you ripped apart your interior and did the conversion you would be very disappoint.
the auto climate control works alot better in my 1988 honda civic than it does in any 6th gen celica or st205 gtfour ive ever driven lol
I'd probably preffer the manual heater dial as the automatic one seems to decide my cabin is up to temp and shut off my heat when im still freezing, or decide its colder than i am and blast me with heat when im on my favourite setting - 26
Posted by: doGGy Aug 12, 2012 - 6:02 PM
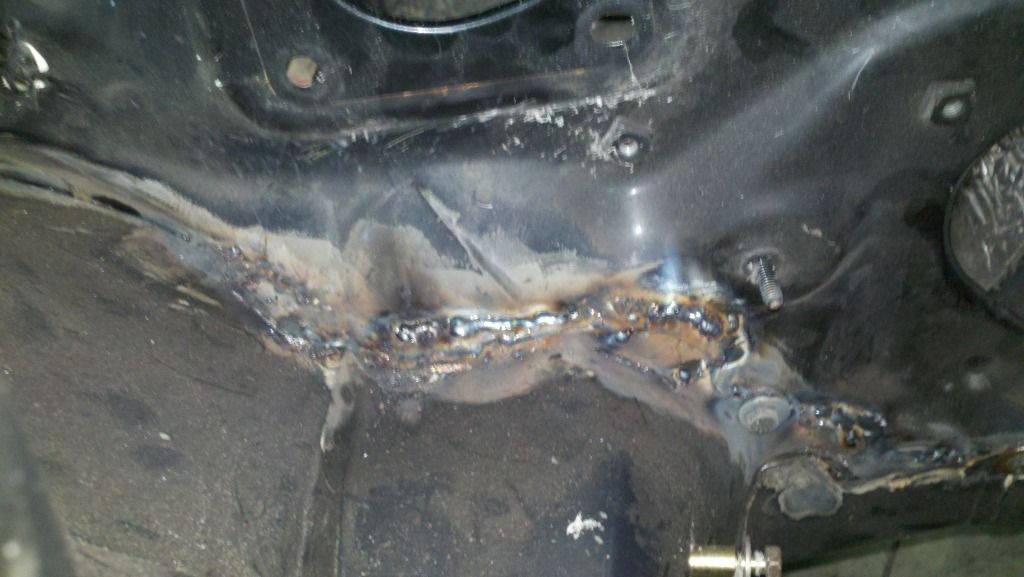
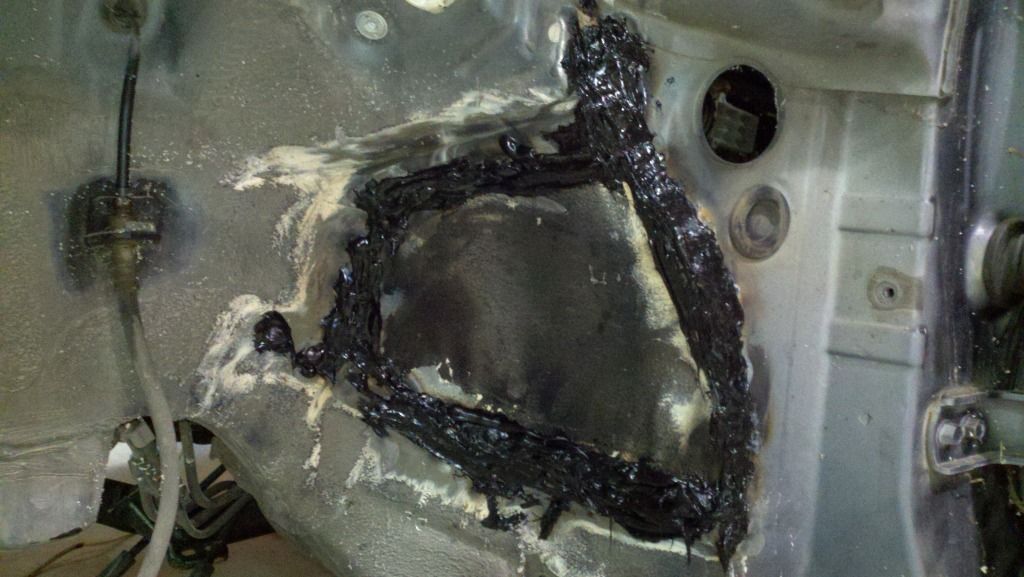
Holy $hit - whats happend here with the sealant???? You could have spent more time - and did it the right way... Atleast on the outside - engine bay.... Hope you do sealed under the welding place, and from inside - sealed the place where firewall meets the top? Cuz if not - you will have lots of water pretty soon....
If done right - here how it should look (This is the oposite swap - RHD to LHD)
Posted by: ricochet1490 Aug 12, 2012 - 6:28 PM
had to do it with a caulking gun and a finger? I promise you I sealed it inside and out..... I don't want any water either.
I had no idea how to get it to look like that. I was having a hard enough time getting it on there even kind of smooth, let alone in all the little cracks and holes without falling through. I know it looks ugly, but in the wheel wells I'll be covering all of that with underbody sealer/spray, so that'll look fine. And I promise I covered all the cracks and seams as well as I could.... but again, I used a caulking gun and a finger because that's all I had.....
In other news...
Started where I left off yesteday, knowing I had to do something with the vent access for the blower motor...
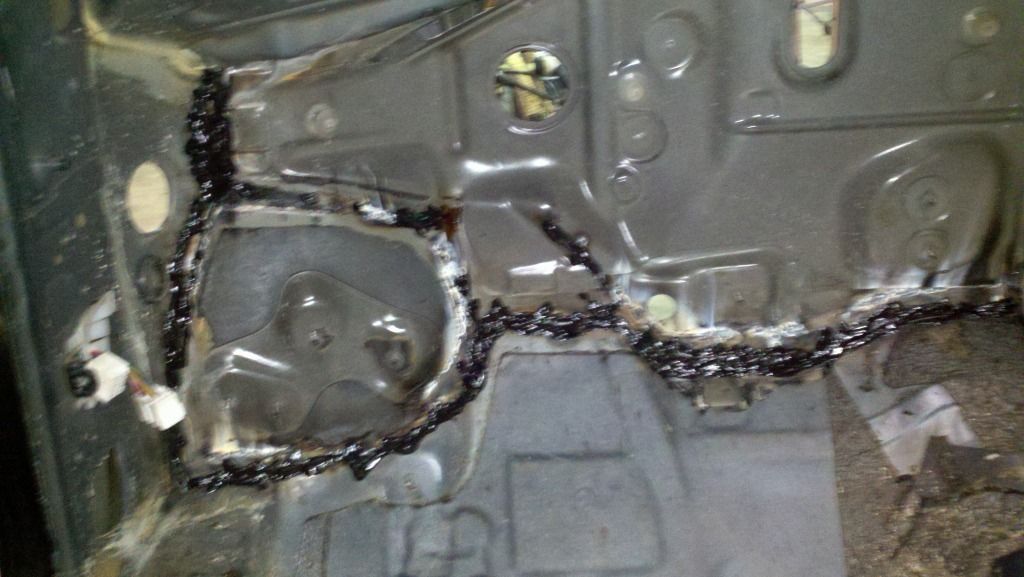
As it turns out, the bulkheads are TOTALLY different. the RHD bulkhead, cut up. notice the hole on the right side, and lack of hole on the left..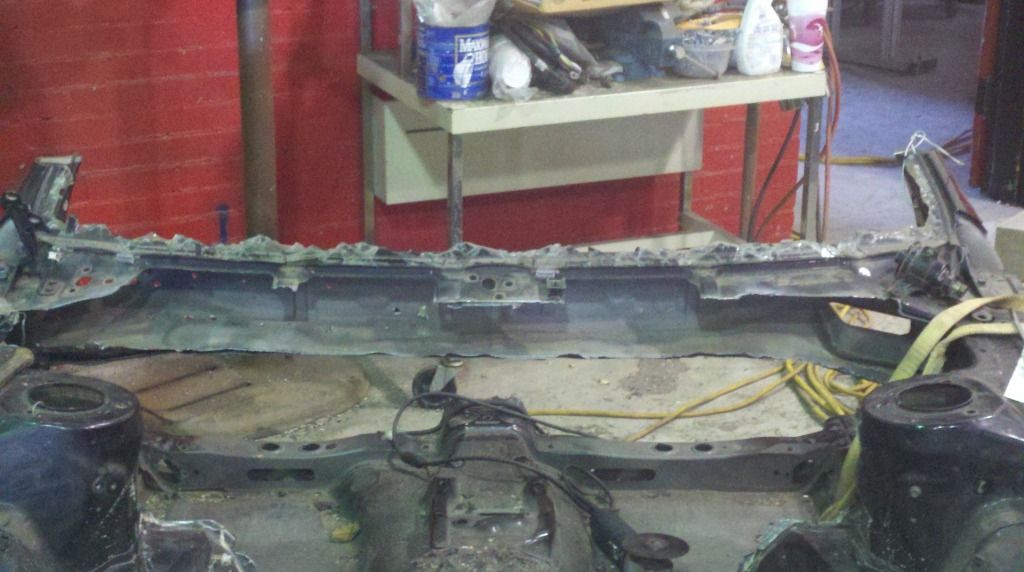
Similarly, on the right side of of the LHD bulkhead, form inside the bulkhead, you'll notice no such hole
So I cut out the walled hole on the RHD...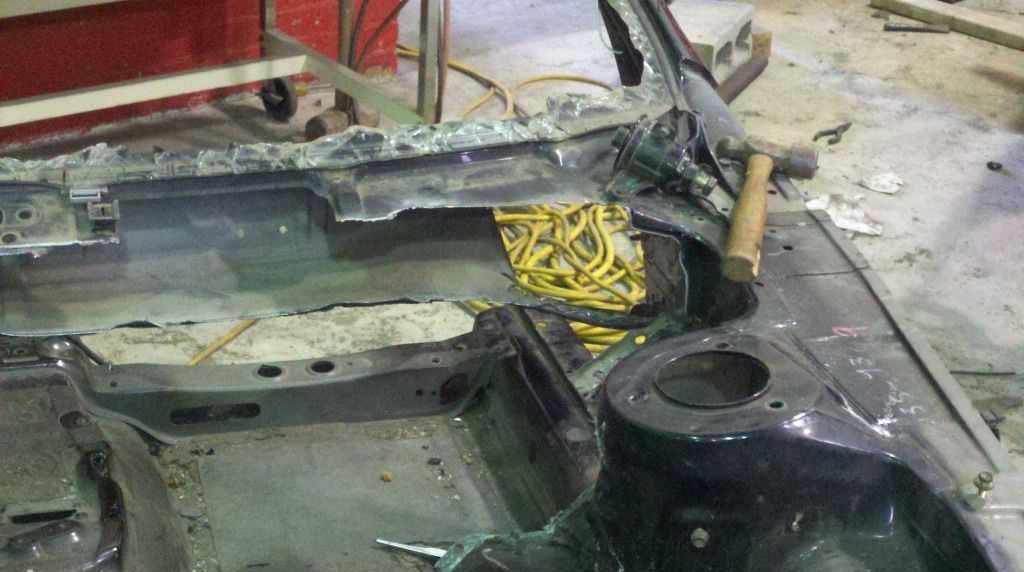
And I cut out a small 2" x 4" hole in that spot with the cutoff wheel on the side grinder.... and I welded and sealed the raised wall hole in with what I had left of my seam sealer
With that done I started to re assemble the HVAC on the inside, quickly noticing I missed a bracket.... So DON'T MISS THESE... you need them - it's different on each side
Also welded some missing studs I needed to mount HVAC stuff while I had the welder out.
Finished for the day...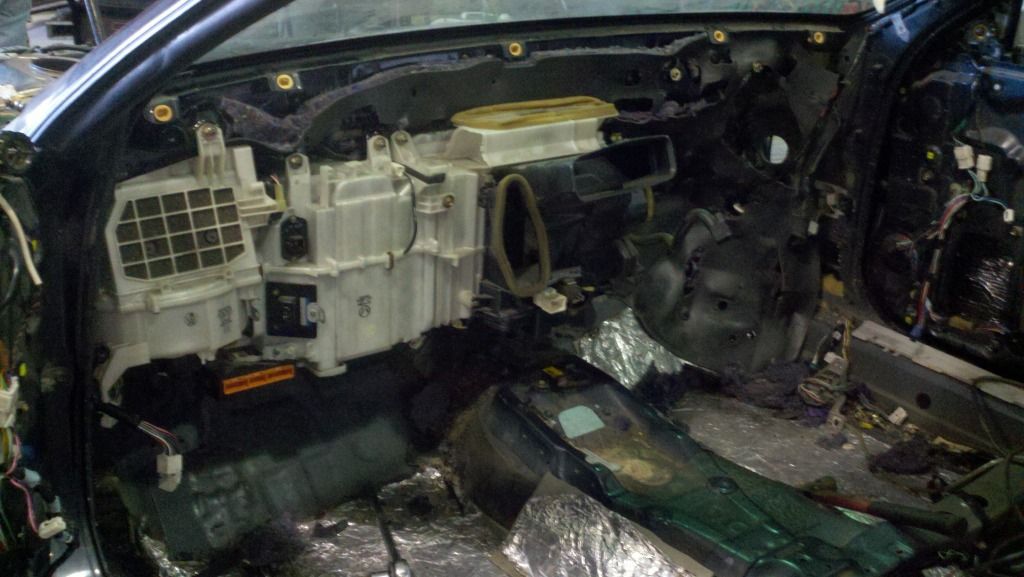
All appropriate lines in the engine bay as you can see.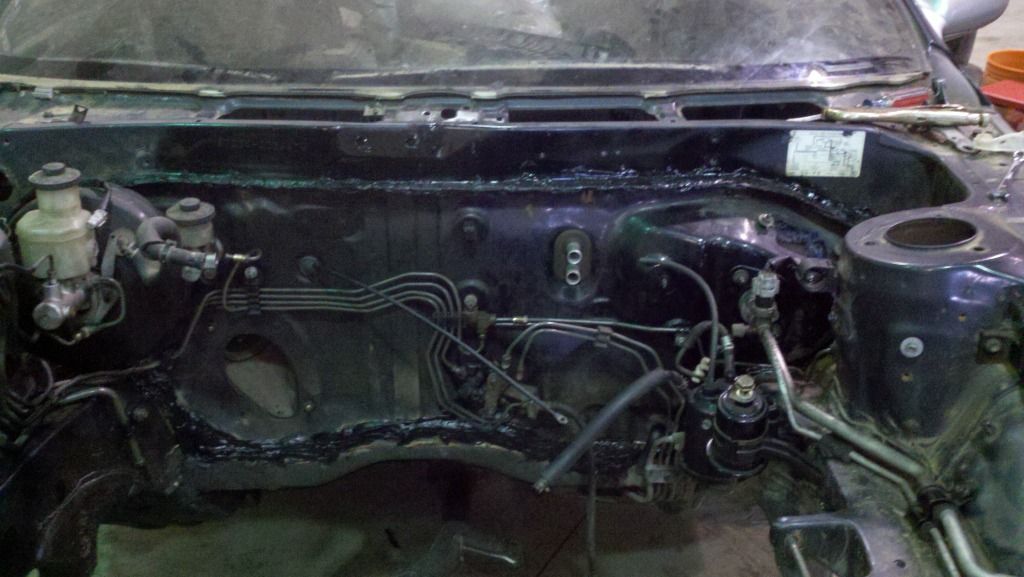
With seam sealer on all the seams....
Only studs I have left to move over are these for the RHD dead pedal.... 
Pedals, steel support crossbar, wiring, dash, and motor remain.
Posted by: doGGy Aug 13, 2012 - 5:57 AM
Heh - im doing all the seals with the same thing - handgun and finger You have to be patient, and wet your finger ALWAYS (glass of water - always helps here - to prevent sticking all the sealant to your fingers!) Also - bulkheads are NOT TOTALLY different. The only difference is the opening for Air pick'up - all you have to do is drill out 4 point welds - cut the opening on the other side - and weld the the metal that you drilled out on the other side Theres no need to hack the way you did
Actually RHD and LHD chasis is exactly the same - there are all the points where to weld on both chases - if you look close you will notice that there are clues all around the chasis left where every bracket / bolts and etc needs to be welded.
Posted by: kevinpetch Aug 13, 2012 - 10:46 PM
Hello from Bangkok, Thailand.
I'm also working on rebuild my ST206. She was a victim from last year Thailand's flooding.
Her engine and all of interior parts were damaged.
I bought celica ST202 with BEAMS A/T front clip for swap, nearly same as yours.
And I have a same trouble as you. I could not remove the sound deadening out of my car in good condition.
But your LHD sound deadening look very good.
Could you teach me the proper method of removing?
Use hot air blow is good?
Thanks.
Posted by: ricochet1490 Aug 14, 2012 - 12:01 PM
The RHD sound deadening on the firewall is a different material...but I do not know what makes it different. My LHD sound deadening just pulled off the firewall, very easily. There is no secret. The rhd beams sound deadening just sucks. You may have to put aftermarket sound insulation on your firewall as a replacement. I would have if I didn't have lhd insulation just laying around that was in good shape.
Posted by: kevinpetch Aug 14, 2012 - 12:10 PM
Oh, your LHD material maybe look like ST185's one that I had ever remove.
Anyway, thank you for your info.
Posted by: doGGy Aug 14, 2012 - 4:05 PM
I'v done around 40 RHD to LHD conversions - and ALL - i mean ALL OF THE RHD sound deadning covers - just tear into pieces if you try to remove it... No matter how gently you do this - they still get off in zilion pieces LHD ones are fine even after almost 20 years! The last conversion that im doing is 99' GT-Four with only 57K km - and STILL firewall cover got broken into 100 pieces
Posted by: ricochet1490 Aug 14, 2012 - 9:15 PM
LHD ones are fine even after almost 20 years! The last conversion that im doing is 99' GT-Four with only 57K km - and STILL firewall cover got broken into 100 pieces This.....
Mine got chisled off and broke into a trashcan full of small pieces.... It's nice to know it wasn't just mine then!
And Doggy, it's not wonder your seam sealer looks better!!!! lol you have me at a 40:1 disadvantage in terms of drive side swaps! lol - nice work. Wish I could have gotten that info somewhere prior to my actions of sunday haha
Posted by: ricochet1490 Aug 20, 2012 - 8:31 PM
all work = no progress
Posted by: delusionz Aug 21, 2012 - 1:23 AM
jdms have tar sh*t u need to dry ice (liquid nitrogen??) it then the tar goop stuff turns solid and u can crack it away. ive removed all mine for a little weight reduction
Posted by: ricochet1490 Aug 21, 2012 - 12:13 PM
We took it all out of the race car. But I'll keep it in the rhd... If I were worried about weight at the moment, it wouldn't get a back seat, or speakers, or ac. But that stuff is in usdm cars too..... Should have used the dry ice method for sure...we chissled our way through that stuff....not fun. But
But it was pretty heavy when all taken out. At least 50 lbs if not more...
Posted by: ricochet1490 Aug 24, 2012 - 6:31 PM
toms lip that needs some fixin - thanks noberto
Posted by: kurt95gt Aug 24, 2012 - 7:35 PM
Your lucky I had somethin else come up or I'd own that right now lol
Posted by: njccmd2002 Aug 25, 2012 - 8:28 PM
hey, eastwood sells a tool to fix plastic, but you can make it easily.
just get some staples and heat them and punch them trough. then use your usual adhesive.
http://www.eastwood.com/eastwood-s-hot-stapler-plastic-repair-system.html
dont have to buy the kit, but you get the idea>>>
i have this at home
http://www.eastwood.com/stud-welder-dent-pulling-system.html
and they sell an attachment that u can use. its the same concept.
get some staples, get them hot red, and pas them through..
Im glad you are happy...
Posted by: Box Aug 25, 2012 - 8:44 PM
What Kurt said.
Posted by: ricochet1490 Aug 25, 2012 - 8:55 PM
i actually have a rivet gun.... so I'll back it with some sheet metal and rivet through the plastic and into the metal backing, then glue it together and bondo it from there.
Posted by: playr158 Aug 26, 2012 - 11:23 AM
Really digging the progress and work hoin on in here. Keep it up!
Posted by: ricochet1490 Aug 26, 2012 - 6:43 PM
Thanks man!
if I can ever find some time when I don't get home at 7 pm and have t be up at 530, I'd be doing more work on it than I am lol
Posted by: playr158 Aug 27, 2012 - 9:02 AM
Yea I totally understand that...why do think mine has been in a garage for like 6 years
If i could find time to go work on mine
Posted by: S8S8 Aug 28, 2012 - 12:13 AM
I bet if you ripped apart your interior and did the conversion you would be very disappoint.
the auto climate control works alot better in my 1988 honda civic than it does in any 6th gen celica or st205 gtfour ive ever driven lol
I'd probably preffer the manual heater dial as the automatic one seems to decide my cabin is up to temp and shut off my heat when im still freezing, or decide its colder than i am and blast me with heat when im on my favourite setting - 26
Maybe you've just experienced some bad ones? I did the auto climate control conversion at the same time as my Beams and it was definitely worthwhile. It's a painful job, but I'm happy with the way mine is working.
ricochet1490 - Nice work so far. Well done for taking on such a big project!
Posted by: ricochet1490 Sep 2, 2012 - 8:01 PM
so today was productive but redundant because I took out the same part at least 5 times, and put it back in again...
began by re mounting the pedals with the exception of the clutch pedal...(mistake number 1), and then I put in the dash support bar. and it looked like this.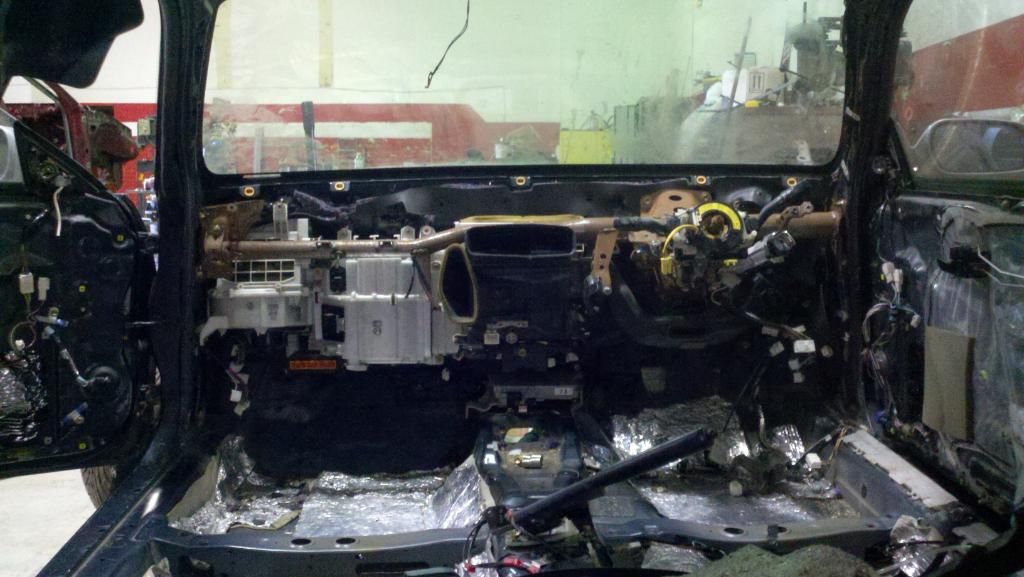
So as I'm bolting it in, I say to myself "hey, you have two bolts left over, where do they go?" Turns out they go here.... in the empty hole where there are no threads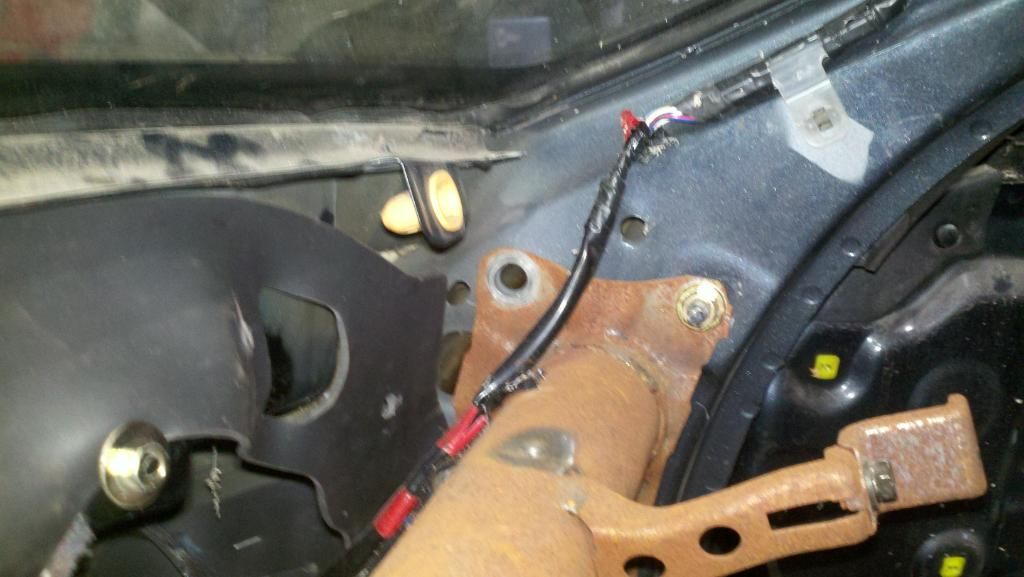
I think to myself again, "hmm, very interesting. Not a big deal though because there are 8 other bolts holding this bar in place. No problem"
Thought that was just a small hiccup, and proceeded to move forward.
Went to mount the clutch pedal, realized it had to go beneath that bar, took the bar back out, mouted clutch pedal, put bar back in
went to get my steering column, mounted the sttering column in, then got the dash/ dash wiring and realized that I couldn't put in the wiring, with the bar, steering colum and everything else installed.
So I took the steering column back out, removed the left side of the bar only, loosened up the blower motor and AC and wiggled the blower motor loose, slid the wiring in behind it, and over it, and then tightened that back up. put the left side of the bar back in, ran the wiring to the right side of the car, went to slide the fuse box behind the bar, no go....
Took the bar all the way back out, ran the wiring to the right side of the car, re installed the bar.
Went to bolt the fuse box in place....
No threads in the holes just like on the top of the bar. So now I'm forced to take a second look.
THIS IS FOR ANYONE WHO TRIES TO DO THIS RHD CONVERSION AND IT'S A STEP I MISSED AND NOONE HAS PREVIOUSLY POSTED ABOUT
remember the brackets on the side of the wall I said I had to move over?
These ones...
And the ones just like it on the other side of the car? Well, don't just move the bracket.
you can move the brackets and the threads for the right holes for the fuse boxes etc all at once.
Where I outlined below, you have a series of spot welds, seam sealer, and spot welds that hold the sheet metal on. The "holes" are the same and in the same location for RHD and LHD, the whole stamped piece of sheet metal is identical, except for the fact that there aren't threads where they need to be. the red "dot areas" in the middle of the outline are where I need threads and don't have them that I know of right now. had I removed this piece of sheet with the rest of it, it wouldn't have been a big deal.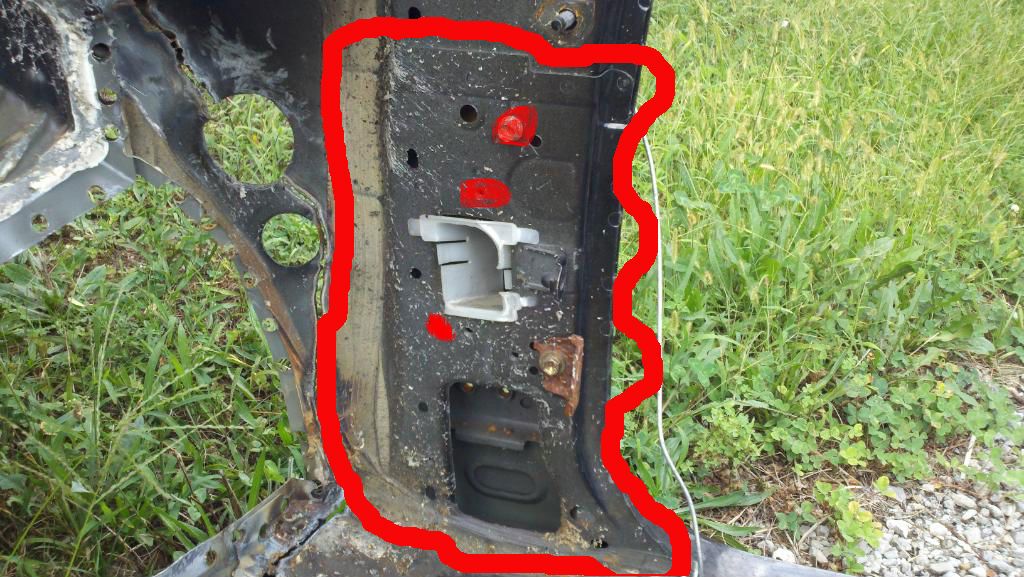
SO, now that I have the car "back together" or at least starting to, I could go through the trouble fo cutting the right side off on both and welding it in (really the only side I would need, but you are missing threads on the left as well... just fyi) OR I could find a way to fix it that doesn't involve me removing half of what I have in there, risking damaging my wiring harness, etc etc.
I'm going to do one of two things.
1) drill the holes wider, tack weld a nut in there good enough it'll hold ( sheet metal welding on heavy metal like a nut is tough) and pray that I got it centered....
2) because I'm only holding a fuse box and not something structural, I could try to find a plastic insert that accepts threads (similar to our speakers in concept) and go that route.
If I go with number two, it's guaranteed to be in the center, and usually rough screw type threads or bolt type threads will both go in there.
So after 5 hours of my d*ick in my hand.... this is where I ended up. Wiring in, cross member in, plugs run, pedals in, front wiring pulled, plugs plugged in, and sttering column mounted (not shown)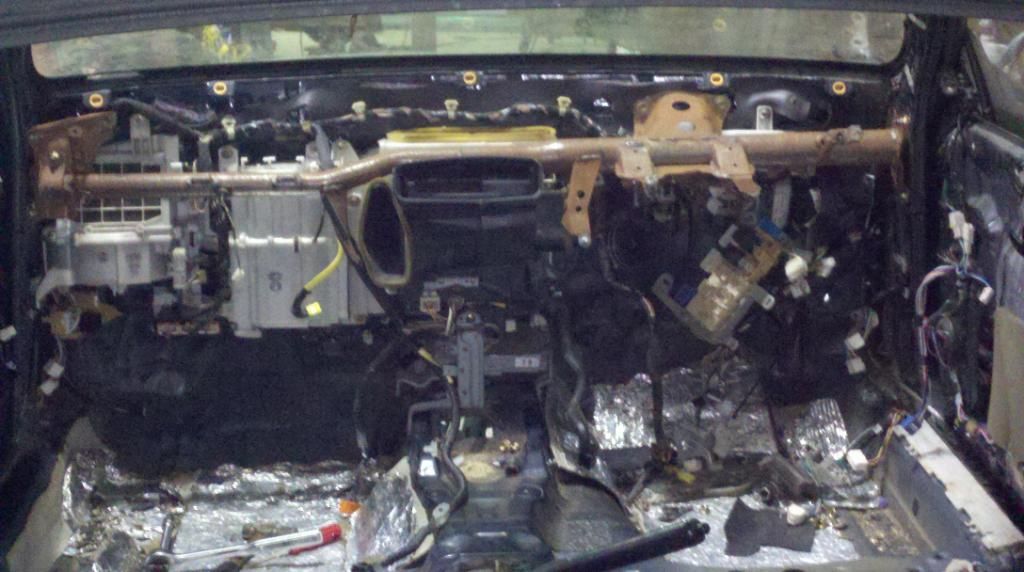
Posted by: ricochet1490 Sep 2, 2012 - 8:05 PM
Sorry those pictures suck... bad lighting and cell phone....but when the lighting is good it takes a great photo!! lol -
Anyone let me know if you need greater detail in any one of these pics
Posted by: njccmd2002 Sep 2, 2012 - 8:18 PM
hmmmm
Posted by: ricochet1490 Sep 2, 2012 - 8:20 PM
because I could also have to paint the steering column and all the pedals if interior rust elimination that NOONE will ever see was a concern of mine.
Not woried about that. Why make it pink, in the case of plyr, and never let anyone see it?
Posted by: ricochet1490 Sep 10, 2012 - 9:43 PM
Posted by: kurt95gt Sep 10, 2012 - 10:29 PM
Who tought you how to put a car back together. You put the pedals on the wrong side
Posted by: enderswift Sep 10, 2012 - 10:43 PM
looking good dude, you're a much braver man than me by diving into all that wiring!
Posted by: njccmd2002 Sep 11, 2012 - 4:34 PM
this thread needs MOAR JDM TORTILLA CHIPS
Posted by: richee3 Sep 11, 2012 - 6:42 PM
1. This garage is awesome. I am jelly.
2. This firewall swap looks great in person- pictures don't do it justice.
3. You're like 97 years behind schedule. Get to work!
4. Is that a JDM school?
Posted by: ricochet1490 Sep 11, 2012 - 6:58 PM
JDM tortilla chips, fresh from cali and JohanFer with a power steering cooler line in it.
JDM school it is indeed. Garage in the gymnasium.
I'm working on it.... 97 years might be a small overstatement lol
As far as the wiring is concerned... it really WASN'T that bad. I have 98% of the interior wiring knocked out. All the wires are certain lengths, have locking press tabs that tell you how to run the wiring.... all the plugs are specific to their corresponding hole. So it's basically impossible to plug the wrong plug into the wrong hole. And if you've taken apart 3 LHD dashes like I have, putting this RHD dash together isn't really all that difficult.
As far as not having the fuse box threads installed, I used some plastic receivers that you would use for license plate holder or something, drilled the holes out larger to accept the plastic tabs and hammered them in.... voilà! threads!!!
But thanks for the good words there Dan, I'm glad you thought it looked ok. Nice to have another set of eyes on it finally.
Posted by: ricochet1490 Sep 24, 2012 - 9:13 PM
This weekend...
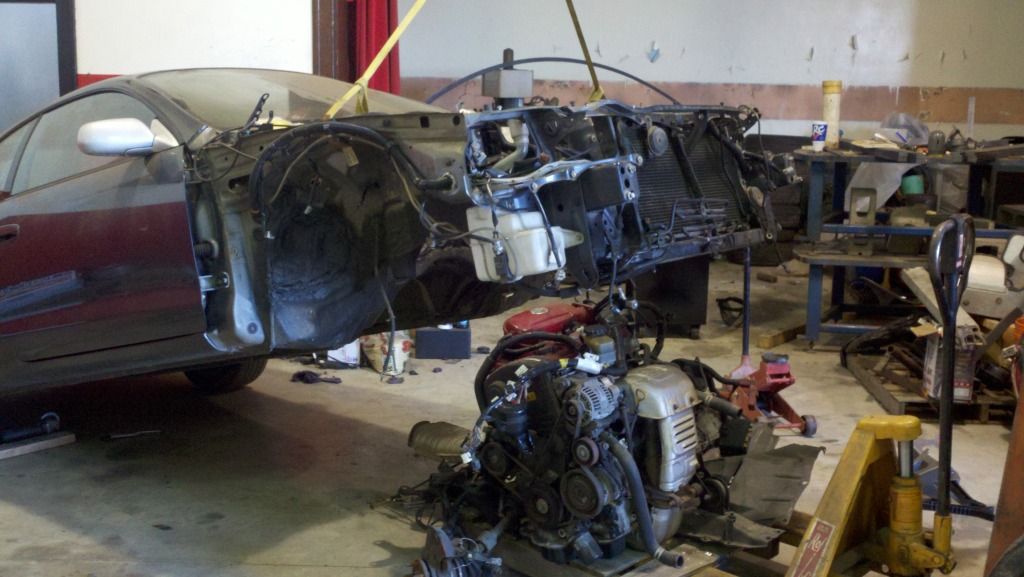
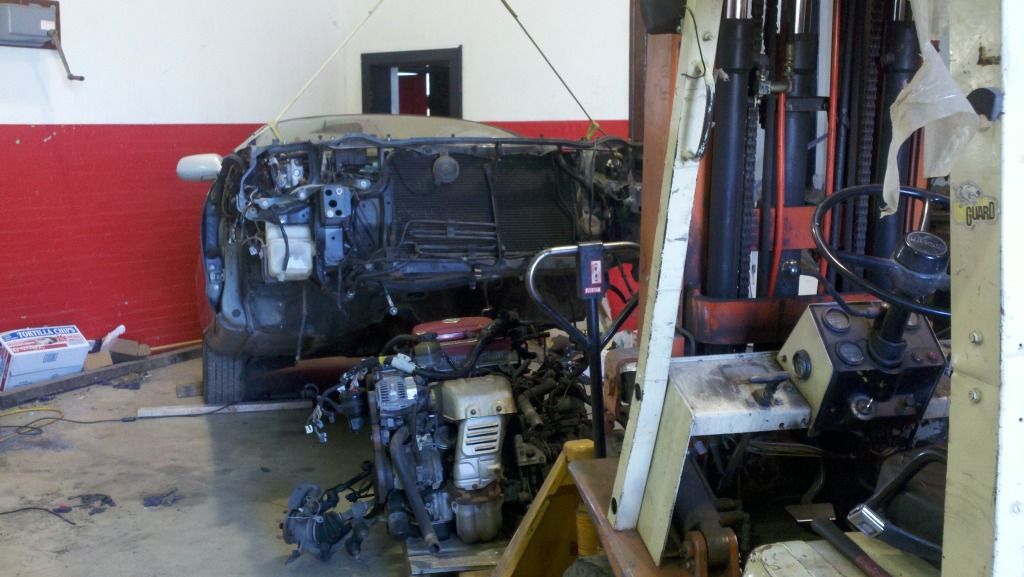
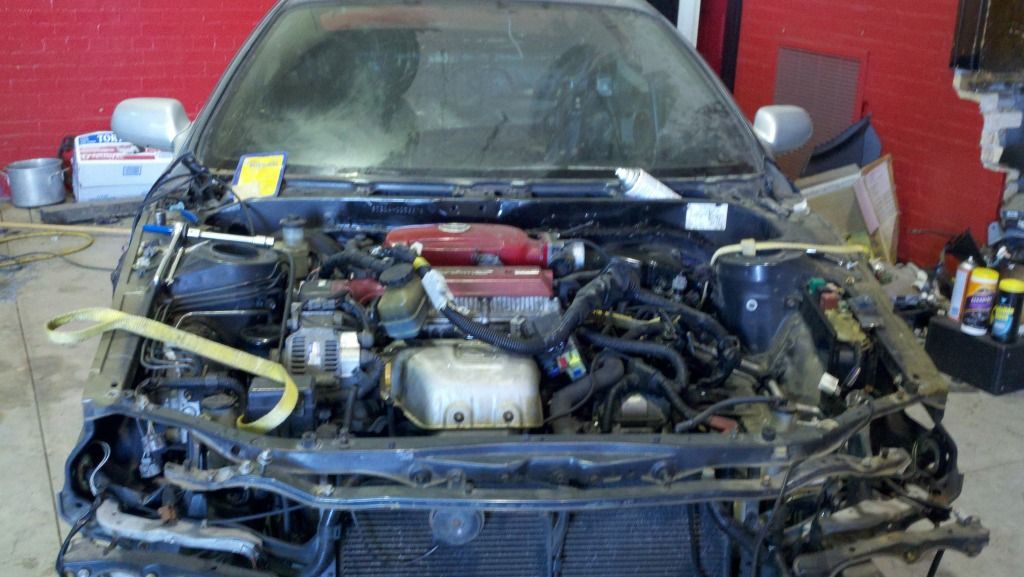
Posted by: richee3 Sep 24, 2012 - 9:33 PM
That lookes completely appropriate. It's a perfect fit.
Posted by: kurt95gt Sep 24, 2012 - 9:50 PM
FINALLY !!!
Posted by: Ted95 Sep 25, 2012 - 11:25 AM
getting closer my dudee keep it up!
Posted by: enderswift Sep 25, 2012 - 5:17 PM
looks awesome dude I love the forklift/pallet jack combo, looks waaay easier than the way everyone else does it
Posted by: ricochet1490 Sep 28, 2012 - 11:40 PM
dropped the broken toms lip off with my neighbor earlier in the week. he took it to work with him and plastic welded it up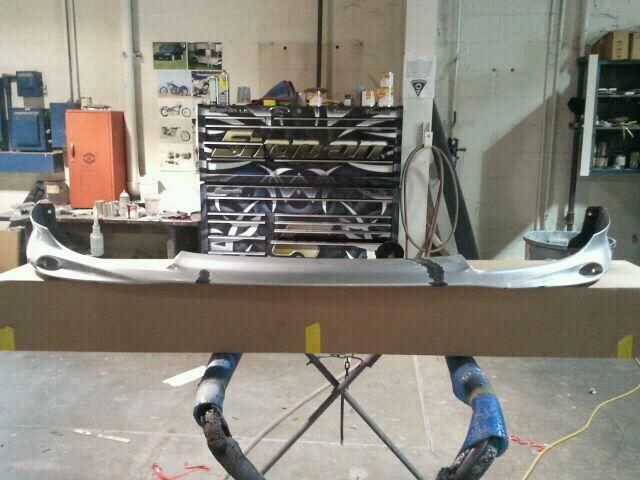
I changed out the broken power steering cooler with a good one, and hooked my steering rack return line to the power steering.
Also took the jdm negative battery terminal off and replaced it with a good usdm wire and terminal
What kind of baby batteries do they have over there anyway?!?
the negative battery terminal beside a 10mm wrench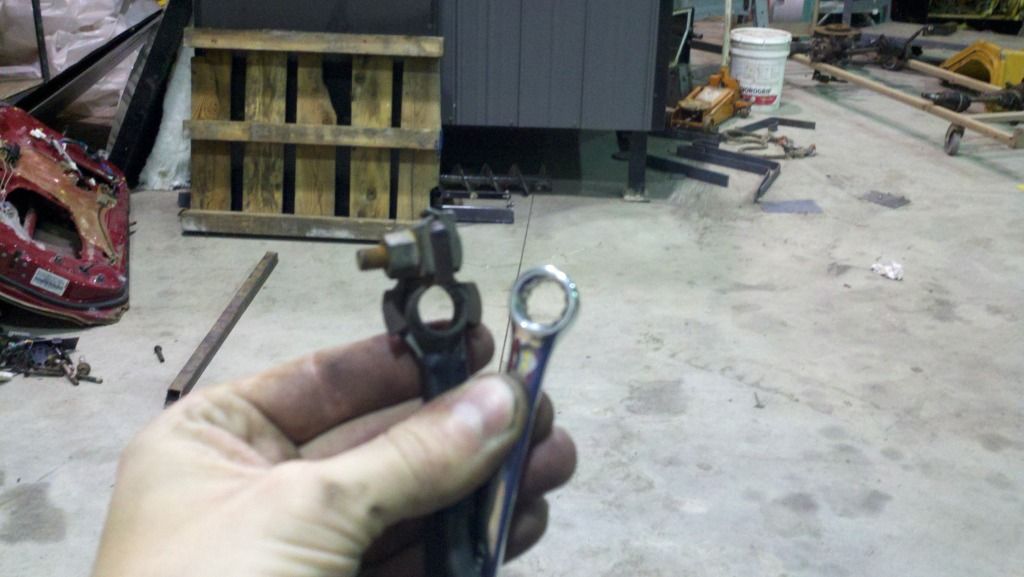
Posted by: kurt95gt Sep 28, 2012 - 11:52 PM
the negative battery terminal beside a 10mm wrench
Insert stereotypical small body part joke here lol
Posted by: Box Sep 29, 2012 - 1:15 AM
It's not the size, it's how you use it.
Posted by: richee3 Sep 29, 2012 - 5:37 AM
I had the same thing on both of my Redtops, but it was a dinky positive terminal and they were both nightmares to remove from my harnesses.
Posted by: ricochet1490 Sep 29, 2012 - 7:30 AM
don't Get me wrong. The positive terminal was just as small.... Both huge pains in the ass. Vice grips required on neg terminal. Vice grips, 12mm end wrench and a 12" crescent wrench cheater bar on the end wrench finally got the positive terminal
Posted by: njccmd2002 Sep 29, 2012 - 9:25 AM
wow, thats good work on the lip, dd he charge u?
Posted by: ricochet1490 Sep 29, 2012 - 2:58 PM
he would have done it for free, but I told him I'd pay him.
I asked him what his time was worth, he said 50$. I'll prolly give him more than that. 75 or so.
Posted by: ricochet1490 Oct 4, 2012 - 6:44 PM
Noberto..... gonna need that hks maf adapter.
So here's the story, shop was broken into on monday and they stole and bunch of stuff. Aluminum primarily, sockets, drills, welder. Tried to steal my cat. left my metric stuff sitting on my car though... weird. But took my tool box top and my two stock front wheels that were beside the car, a set of aluminum wheels we had in 4 lug in the hallway, ***my aluminum maf adapter that is maybe worth 30 cents in scrap at 80 cents per pound... prolly not even that. so long story short, shoot them all. Thieves have no place in this world and if I ever catch anyone doing it, me and my .45auto are going to be doing some talking..... but I digress....
In lew of my new found motive for getting the car out of the garage where all my expensive parts lay..... I worked on the car. Small, but getting there. big ball joint nut is holding me back right now. I can't find one anywhere.
one of the ball joints ON the superstrut is the same as the USDM celica ball joint and so I had some castle nuts to work there. but the lower superstrut ball joint that's on the subframe is like an m14 or something. local hardware stores dont even carry a nut in that size, let alone a castle nut. So the search continues. If anyone has one they dont need..... HIT MY ASSSSS UP!!!
IN OTHER NEWS: the car with the battery in it (but no fluids because they also stole my motor oil, brake fluid, and radiator coolant) started bonging at me. . Turned the key to the ACC position and the sunroof went back!! which is good because that was a custom wiring harness there. the ss3 clip I had didn't have sunroof on it.
Here she be: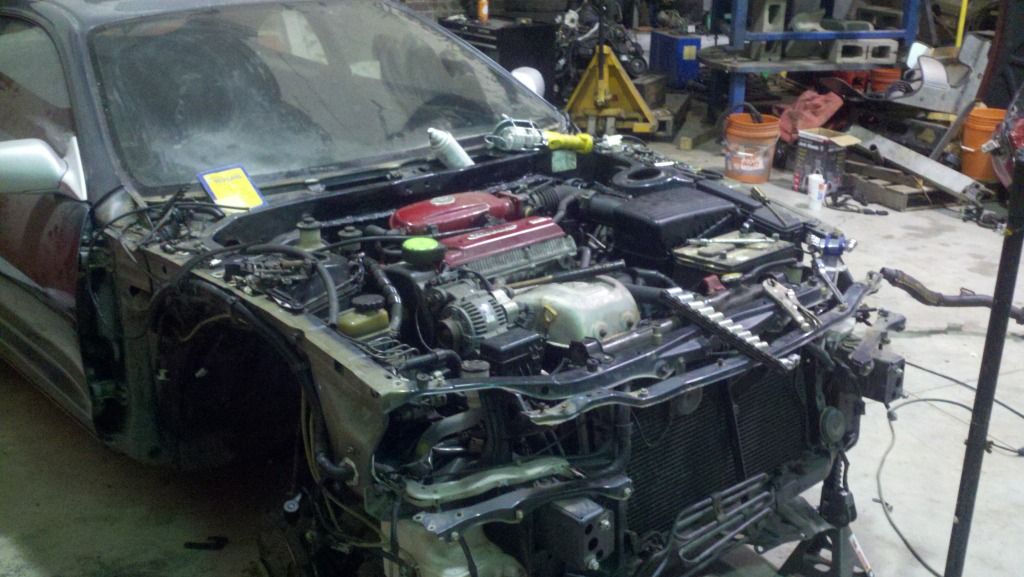
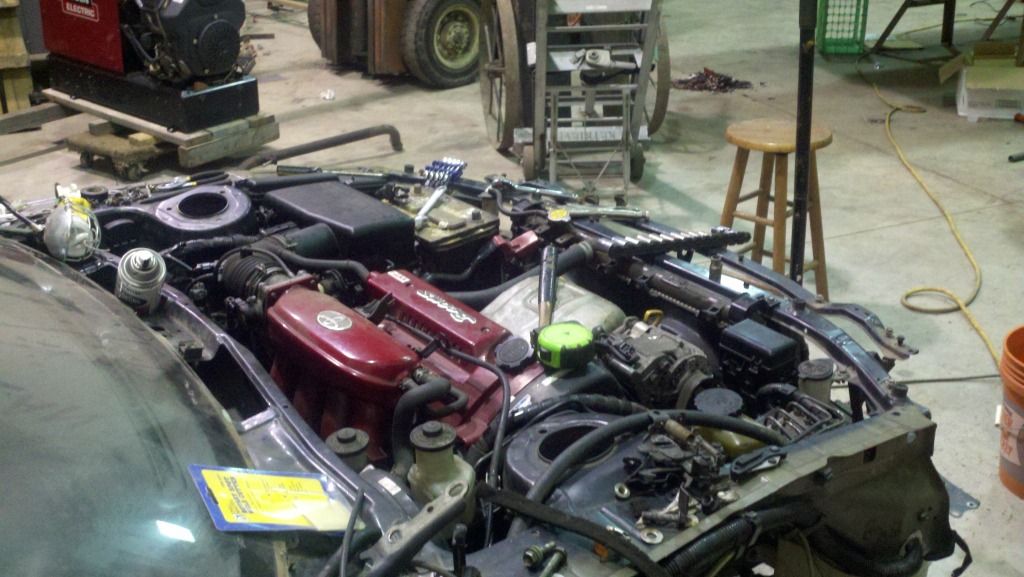
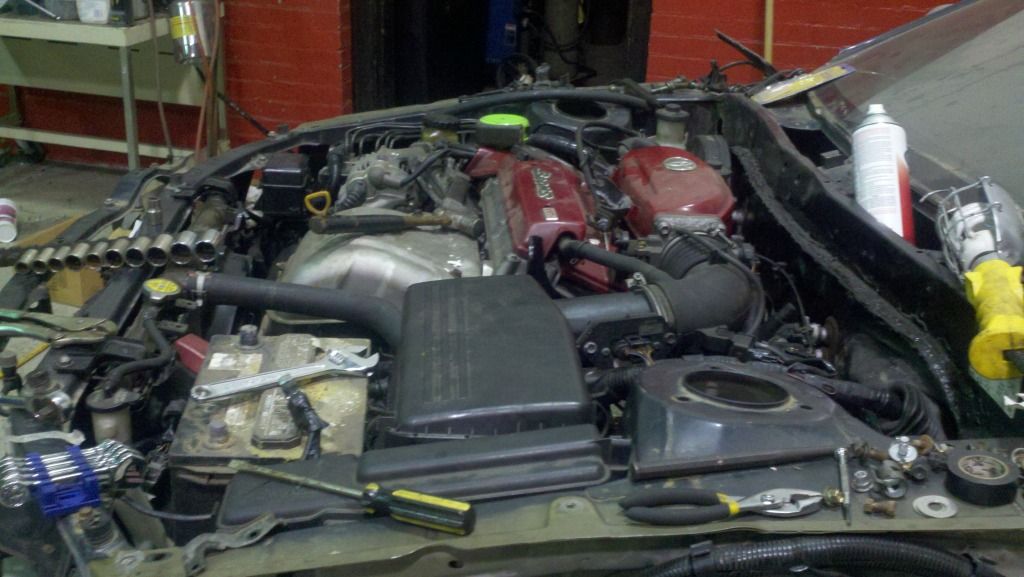
Everything will be coming back out after a while when I FINALLY get my new timing belts from lithia..... bastards were out of "that part number" when I ordered them, so they are on back order. Killing me smalls!!!
Posted by: enderswift Oct 4, 2012 - 7:01 PM
Hoooly crap dude that blows . Been there before so I know the feeling. At least you still have your metric tools...
...How do you know they tried to steal the cat?
Posted by: ricochet1490 Oct 4, 2012 - 7:12 PM
. Been there before so I know the feeling. At least you still have your metric tools......How do you know they tried to steal the cat?
The cat that was on the 5sfe exhaust .... i removed the exhaust obviously and had it laying on the floor. They took the exhaust pipe, and crammed it underneath the fork truck, wedging it on the steering tie rod, exposing the cat out the back of the fork truck by about 2 inches. the other end of the pipe that was greasy had smear marks from hands trying to lift up and break the pipe off at the cat..... dunno why the idiots who obviously had a truck didn't just take the whole pipe and cut the cat off later.... stupid crooks for sure.
Posted by: richee3 Oct 4, 2012 - 7:18 PM
Seriously, who breaks into creepy old haunted schools and steals anything? You've got my number if you ever need to be bailed out. for progress and a working moon roof!
Posted by: njccmd2002 Oct 4, 2012 - 8:06 PM
i dont have a cat in mine....
sorry to hear that..
http://www.rhdjapan.com/hks-fine-tune-timing-belt-toyota-3s-ge-11401
Posted by: ricochet1490 Oct 4, 2012 - 8:12 PM
for progress and a working moon roof!In the state of ohio, we have something called the castle rule.
incase you want to read - > state legislature http://www.legislature.state.oh.us/bills.cfm?ID=127_SB_184
general wikipedia info > http://en.wikipedia.org/wiki/Castle_doctrine
noberto.... didn't ask for the cat....
YOUR HKS MAF ADAPTER YOU HAVE FOR SALE!!!! LOL
Posted by: Box Oct 4, 2012 - 8:18 PM
That sucks horrendously... May those worthless pieces of **** be struck by lightning.
Posted by: mkernz22 Oct 4, 2012 - 8:33 PM
So basically you can shoot him (or them) if they ever come back and you can't get in trouble for it?
Posted by: ricochet1490 Oct 4, 2012 - 8:36 PM
The burden of proof lies with the prosecutors to prove that the shooter/owner was not acting in self defense. But when they have already robbed us once, it's on record, if we caught them and instructed them to leave and they didn't.... we have the right to yes.
Obviously you never want to actually shoot someone, but I take my CCW out there with me all the time. they break in while I'm there, I know i'd feel threatened because that's really really brazen to do it while you're there.
Posted by: ricochet1490 Oct 5, 2012 - 11:39 PM
special thanks to death2009 the other night for the help.
Tonight I found out the drain plug in the rad doesn't seal. Found out my motor holds 4 qts of oil LOL. concluded that the 5s air filter fits perfectly in the BEAMS box. Also found out my starter works, but battery too dead to do too much.
Found out that SuperStrut fits perfectly.
The MISSING NUT for the big ball joint in the bottom of the super strut is an M16x1.5 16 mm with 1.5mm pitch. Just fyi.
Also found out 5sfe brake rotors are perfectly centered in the caliber.... but surprisingly, they are a bit BIG???
I wouldn't have believed it myself, but the rotors are a touch big.
Evidence below.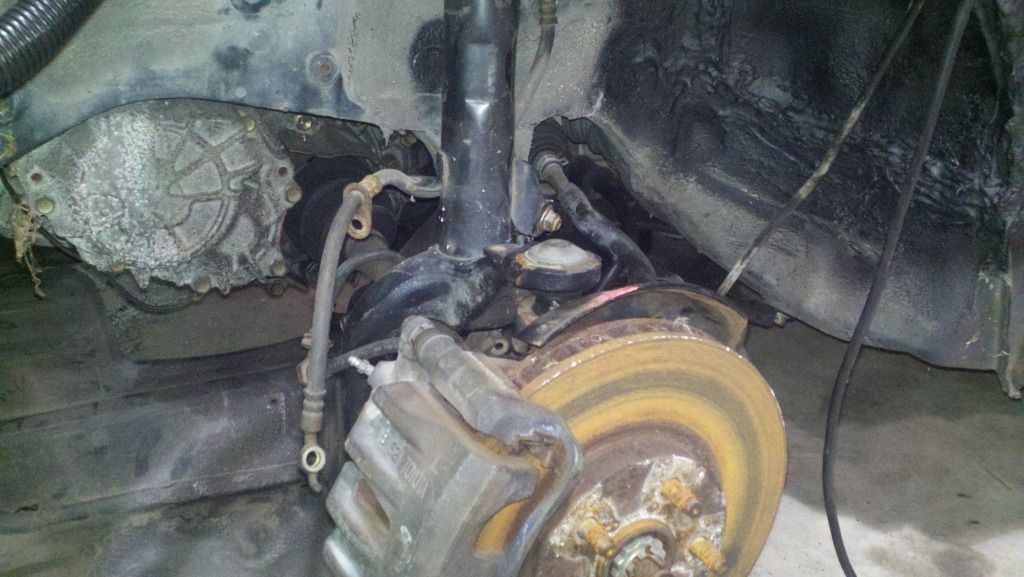
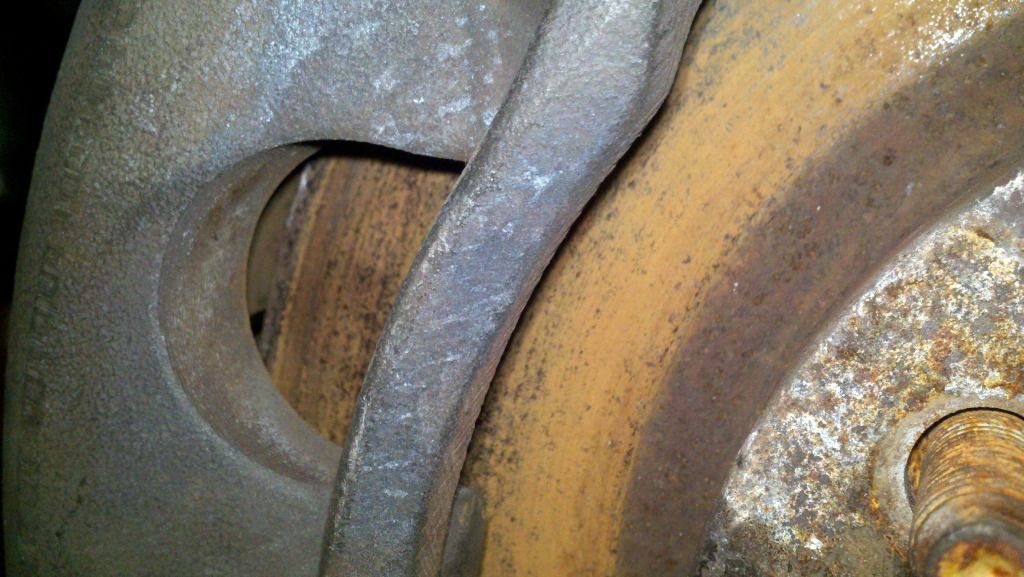
From underneath: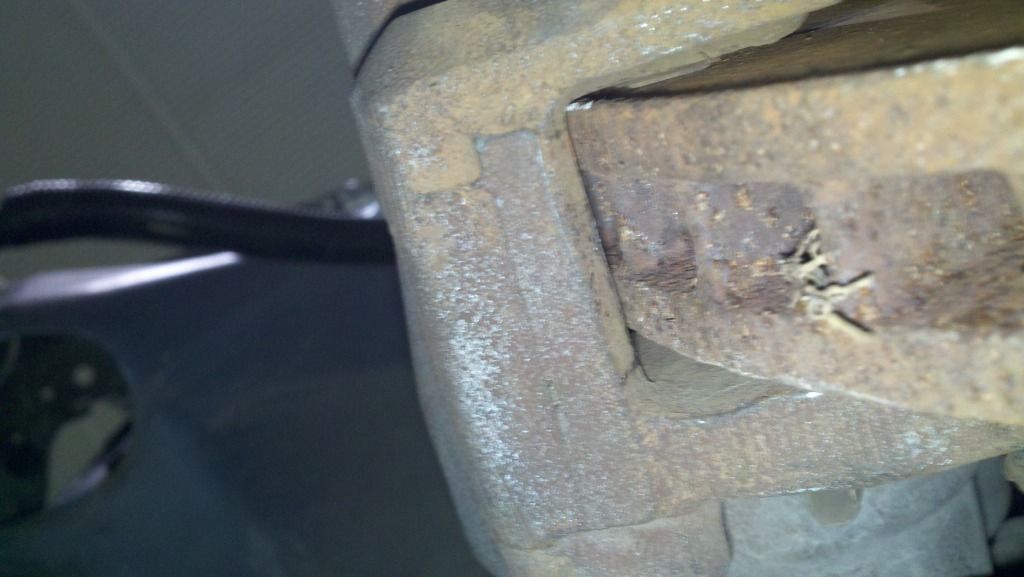
From the top: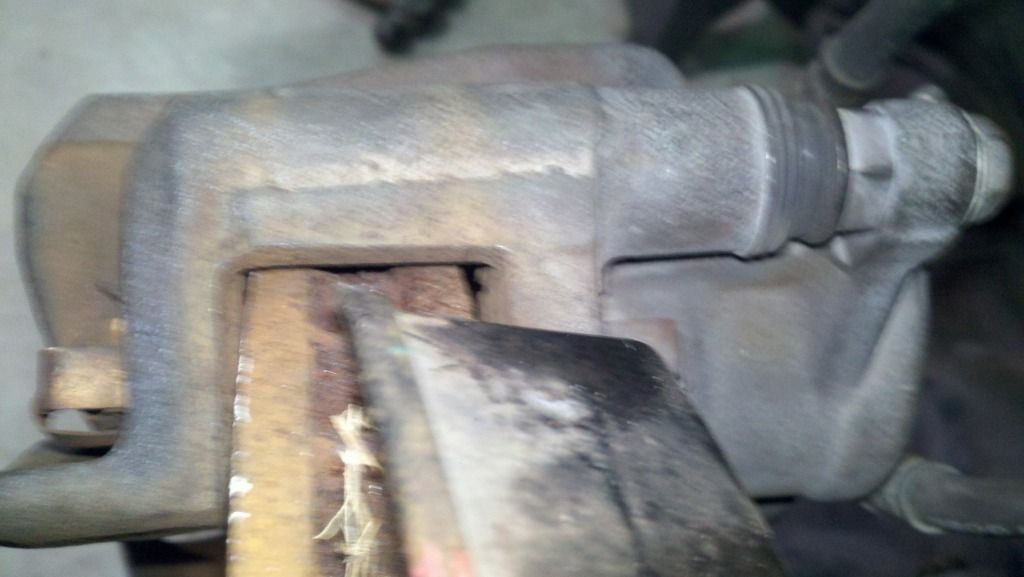
The rotor spins, but man is it ever close.
Prolly have them turned down 2-5 mm. I just worry about the pad springs rubbing... We'll see though
Posted by: ricochet1490 Oct 6, 2012 - 11:54 PM
brake rotors are gonna work just fine.
video:
http://s1237.photobucket.com/albums/ff473/ricochet1490/BEAMS%20Build%20Progress/?action=view¤t=2012-10-06_20-08-56_718.mp4
Posted by: BonzaiCelica Oct 7, 2012 - 12:05 AM
the caliper design is rounder on stock gt vs the twin piston caliper. you can obviously tell also because of the brake pad.
nice to see you got all superstrut parts fixed.
Posted by: BonzaiCelica Oct 8, 2012 - 5:10 PM

he also bolted superstrut brakes onto his mcpherson suspension on stock rotors... i pmed him to make sure of it too.
Posted by: ricochet1490 Oct 8, 2012 - 5:43 PM
bolt pattern is the same, but he had to have had either a superstrut hub with mcphearson front, or he modified the caliper. If you look at Nobertos thread, he compares the ss3 brakes to the stock gt brakes and they are about .75" different where the caliper mounts to the bracket or something. I'd have to look it back up, but I know I saw it.
Posted by: BonzaiCelica Oct 8, 2012 - 5:56 PM
all 94-99 celica front hubs are the same. the twin pistons should make complete contact with the rotors. it seems very odd in your pic... compare stock gt mounting caliper bracket vs superstrut.
he as in NJCMD2002 (convertible Norberto) installed mr2 twin piston calipers. If you look at the thread he created you can even see he says they are harder to find then a roosters teeth. then he has the pic of the cow and rooster from cartoon network. twin piston calipers are as hard to come by as the oem air box is.
Posted by: ricochet1490 Oct 8, 2012 - 5:58 PM
Are you talking about whoever owns the car above^?
Or are you talking about Noberto?
If you are referencing Noberto, I know he ended up using Mr2 twin piston brakes.
He FIRST purchased ss3 brakes and they were in fact different. That difference is what I'm talking about.
EDIT: Nevermind. I stand corrected. They were lexus brakes. Not ss3 brakes. My bad.
Posted by: ricochet1490 Oct 13, 2012 - 3:49 PM
Posted by: kurt95gt Oct 13, 2012 - 6:14 PM
Nice!!
But it'll work alot better in the car
Posted by: ricochet1490 Oct 19, 2012 - 10:15 PM
can't get power to the fuel pump. Unsure as to why.
Every fuse on the car seems to be good. Everything else has power on the whole car electrically speaking. Anyone have any experience with this?
Posted by: kurt95gt Oct 19, 2012 - 10:23 PM
Got the relay by the ecu plugged in l?
Posted by: ricochet1490 Oct 20, 2012 - 12:41 PM
It was order of operations. Fuel pump doesn't kick on until after the starter is tripped! LOL. Such a relief!
Posted by: richee3 Oct 20, 2012 - 1:43 PM
That's still strange to me... I know the fuel pump does a two second pump when the key is turned on. Maybe the JDM Celicas or just the BEAMS specifically doesn't do that.
Posted by: ricochet1490 Oct 20, 2012 - 2:18 PM
yeah who knows.... we're in uncharted territory here as far as documentation is concerned.
Posted by: ricochet1490 Oct 20, 2012 - 3:03 PM
oh yeah....
http://s1237.photobucket.com/albums/ff473/ricochet1490/BEAMS%20Build%20Progress/?action=view¤t=2012-10-20_12-06-21_89.mp4
http://s1237.photobucket.com/albums/ff473/ricochet1490/BEAMS%20Build%20Progress/?action=view¤t=2012-10-20_12-30-31_204.mp4
Posted by: SwissFerdi Oct 20, 2012 - 3:38 PM
Congratulations.
Posted by: enderswift Oct 20, 2012 - 4:18 PM
fantastic work bud. Don't you love the suspense before first crank?
Posted by: richee3 Oct 20, 2012 - 4:45 PM
Congrats again Trace! I'll bet your garage smelled awesome after that startup.
Posted by: ricochet1490 Oct 21, 2012 - 11:41 AM
It smelled like burnt paint chips that had fallen on the motor and were under the heat shield lol.
The tone of this motor is just so...... unique?!
Posted by: ricochet1490 Oct 21, 2012 - 8:48 PM
Interior getting reassembled enough to drive it to get it licensed. Leaving rear speakers exposed so that they can be upgraded. Don't have RHD audio amplifier aparently... wasn't in the clip, so I need that if anyone has one.... LOL
Gonna put the trunk back together, lay the carpet in, put in the front seats only at this time.
also just using the LHD ebrake at the moment with the LHD center console until I can source a RHD ebrake. I'll change it over then to RHD center console.
Finish the center console with respect to the hvac stuff and I'll bleed the clutch, finalize my brakes and bleed those, put on some fenders and the headlights and bumpers/hood and It'll at least drive at that point.
Once it drives, 2.5 exhaust all the way back, leaving stock cat. - unsure how I want to finish it... twin tip, angled, center, LFA style, up for suggestions here
Licensing.
Body work and paint.
Keeping awesome color,
Adding oem skirts, toms lip, maybe something on the rear so it helps tie in the exhaust better.
Wheels. Chrome maybe - 5 spoke OR an MSR wheel .
Haven't decided on 17" or 18" yet. 18's would be DIRTY but would have to run a 35 series tire to keep the speedo close.
pretty sure 235/35-R18 fit perfect with the right offset. Don't want them too big though and hurt performance.
Also might have some SUPER RARE (lol) parts going into and on the car. Just have to figure it out.
Think I might go spoilerless for a while too, try it out. Get a window visor in place of it. Then I'll finish off the ss3 spec stuff to make it legit
Posted by: Red123 Oct 30, 2012 - 3:50 PM
nice.
Front mount IC right?
how much $ did u spend and where u get it?
thanks
Posted by: mkernz22 Oct 30, 2012 - 5:51 PM
nice.
Front mount IC right?
how much $ did u spend and where u get it?
thanks
That, sir, is a radiator
Posted by: Red123 Oct 30, 2012 - 7:24 PM
nice.
Front mount IC right?
how much $ did u spend and where u get it?
thanks
That, sir, is a radiator
haha
sorry. my bad.
not for me so.
Posted by: ricochet1490 Oct 30, 2012 - 9:14 PM
HAHAHA! definitely a radiator. Very fat. As wide as my hand.
Posted by: BonzaiCelica Nov 5, 2012 - 2:15 AM
get 17's bro with 215/45R17. getting 225/45 will be to large and gears will be to long. 18 not even. thin sidewall equals harsh ride and you'll lose power to the wheels with heavy rims
any updates??
Posted by: ricochet1490 Dec 2, 2012 - 10:43 PM
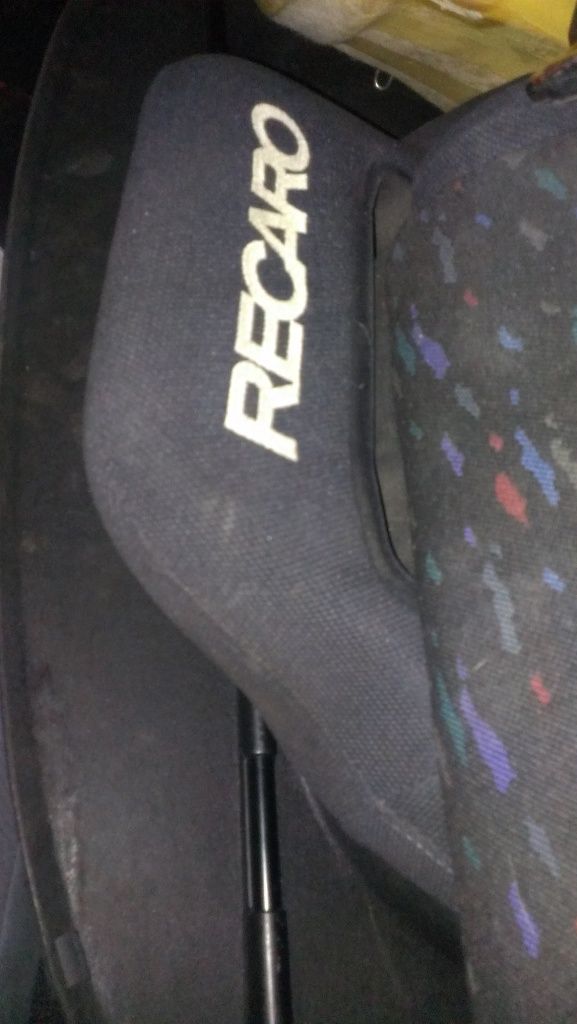
Posted by: richee3 Dec 3, 2012 - 6:40 AM
Winrar!
Posted by: njccmd2002 Dec 4, 2012 - 10:26 AM
nice, how much, i just bought the celica rails from ebay!!
Posted by: ricochet1490 Dec 4, 2012 - 9:40 PM
Got em off FORGMANN. but I should probably illustrate the extent of the purchases made....
Posted by: ricochet1490 Dec 5, 2012 - 10:27 PM
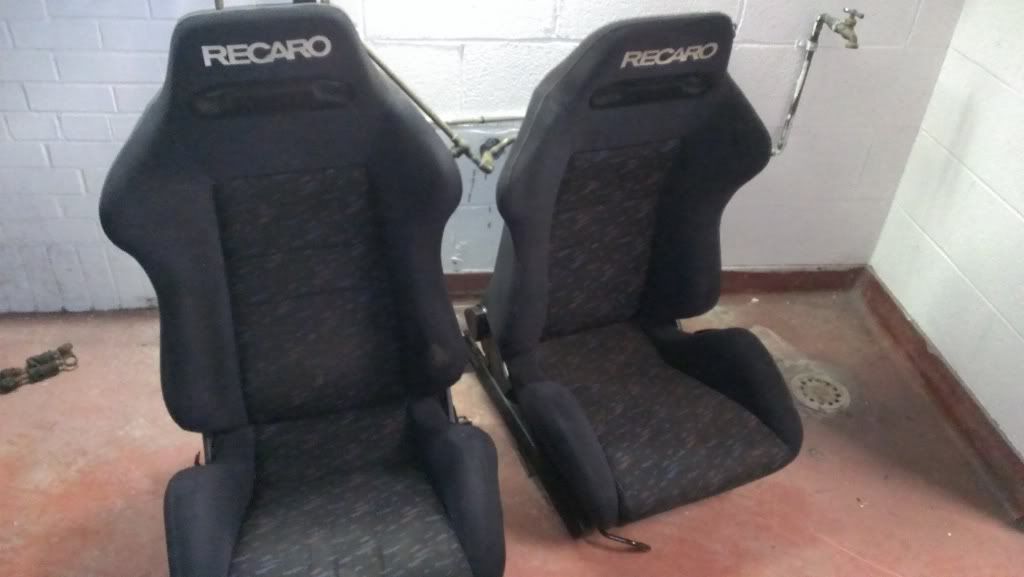
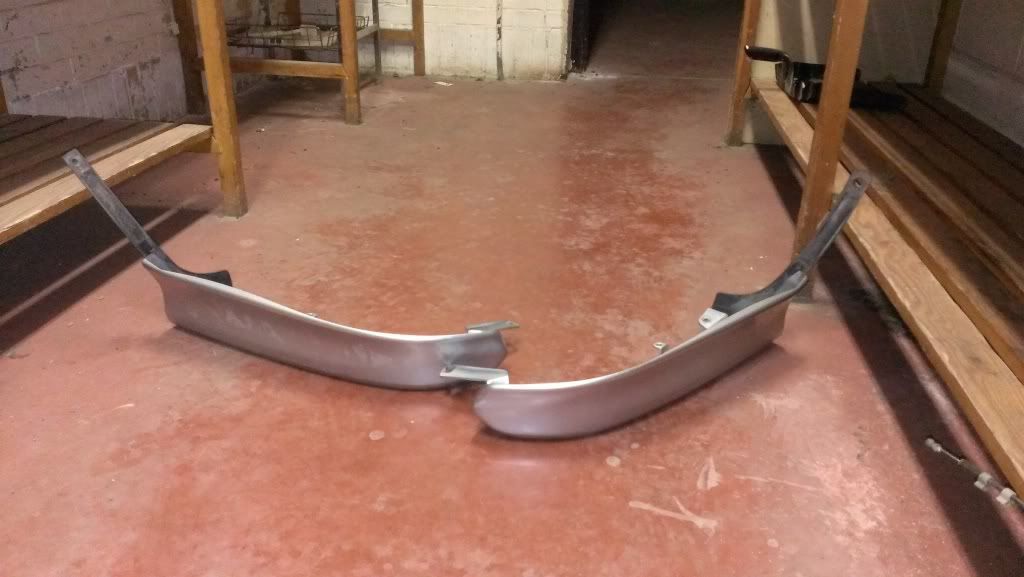
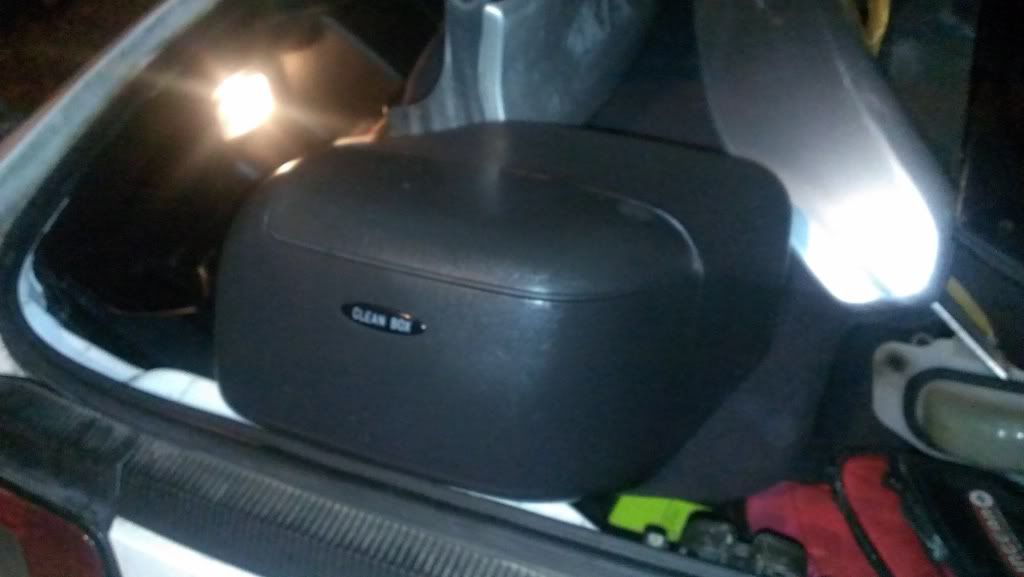
.
Posted by: jcbass7 Dec 6, 2012 - 11:10 AM
nice stuff! looks like you scored a few rare ones, can't wait to see them on the car!
Posted by: richee3 Dec 6, 2012 - 11:52 AM
I think at this point it's easier to list the rare parts you don't have than the ones that you do.
Posted by: Tigawoods Dec 6, 2012 - 6:31 PM
so THATs why he never responded to my PMs. Looks like youll be selling them to me now
Posted by: ricochet1490 Dec 6, 2012 - 10:26 PM
Dan, hilarious! Its the truth. Flare is on the way.
Haha tiger, what I don't need ill gladly sell.
Y'all see, the Jdm seat belt there that seats 5 in the rear!?
Posted by: mkernz22 Dec 6, 2012 - 10:58 PM
Clearly not for our car lol
Edit: And 5 people in the rear? That's a lot of people in such a small car
Posted by: ricochet1490 Dec 6, 2012 - 11:12 PM
Incorrect mike.
Factory option.
There are some rare pics on here that show them.
Posted by: Box Dec 7, 2012 - 2:34 AM
But, you can't even fit two people back there...

Posted by: mkernz22 Dec 7, 2012 - 2:43 AM
Factory option.
There are some rare pics on here that show them.
Are you serious?........
Posted by: ricochet1490 Dec 7, 2012 - 7:32 PM
http://www.6gc.net/forums/index.php?showtopic=80649&hl=middle++rear++seat
Posted by: Rusty Dec 7, 2012 - 11:21 PM
Clearly not for our car lol
Edit: And 5 people in the rear? That's a lot of people in such a small car
Factory option.
There are some rare pics on here that show them.
seats 3* in the rear I think you'll find
Posted by: ricochet1490 Dec 8, 2012 - 9:51 PM
Clearly not for our car lol
Edit: And 5 people in the rear? That's a lot of people in such a small car
Factory option.
There are some rare pics on here that show them.
seats 3* in the rear I think you'll findHAHA! nice call there Rusty lol
I also have breaking news after more than a year.....
IT'S ON ALL 4 WHEELS!!!
Posted by: ricochet1490 Dec 8, 2012 - 11:31 PM
http://i1237.photobucket.com/albums/ff473/ricochet1490/BEAMS%20Build%20Progress/9FFB7195-CC8F-4E48-AE5F-55D69092C0AF-121-00000000CA7D4A22.mp4
Posted by: Batman722 Dec 8, 2012 - 11:52 PM
Yaaaahh !
It's moving.
Sounds good, I like it
Posted by: kurt95gt Dec 9, 2012 - 12:45 AM
Sweet!!
Hopefully after winter we can meet up in our swapped cars an finally meet in person lol
Posted by: richee3 Dec 9, 2012 - 9:24 AM
Finally! You're almost there.
Posted by: ricochet1490 Dec 9, 2012 - 7:24 PM
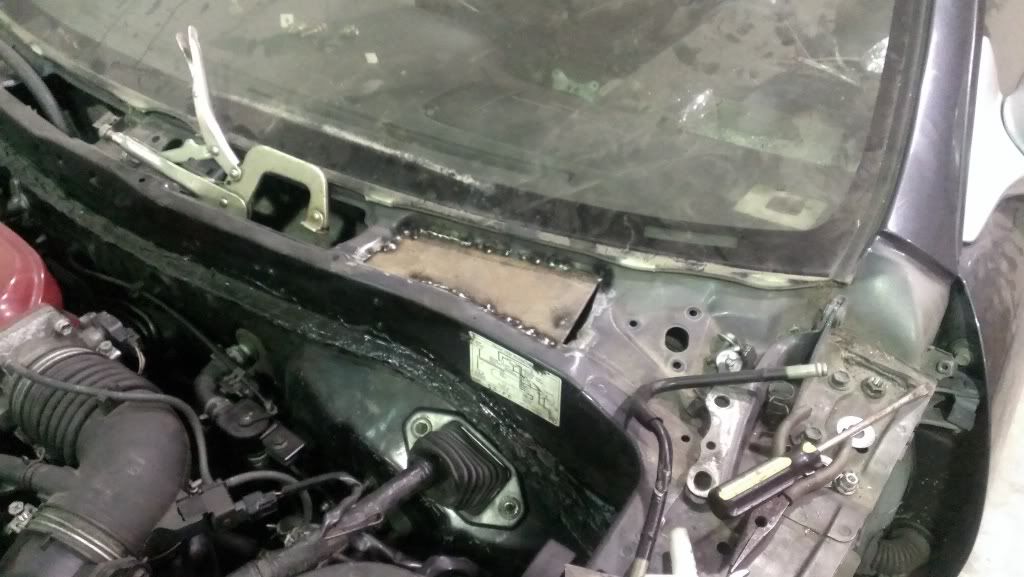
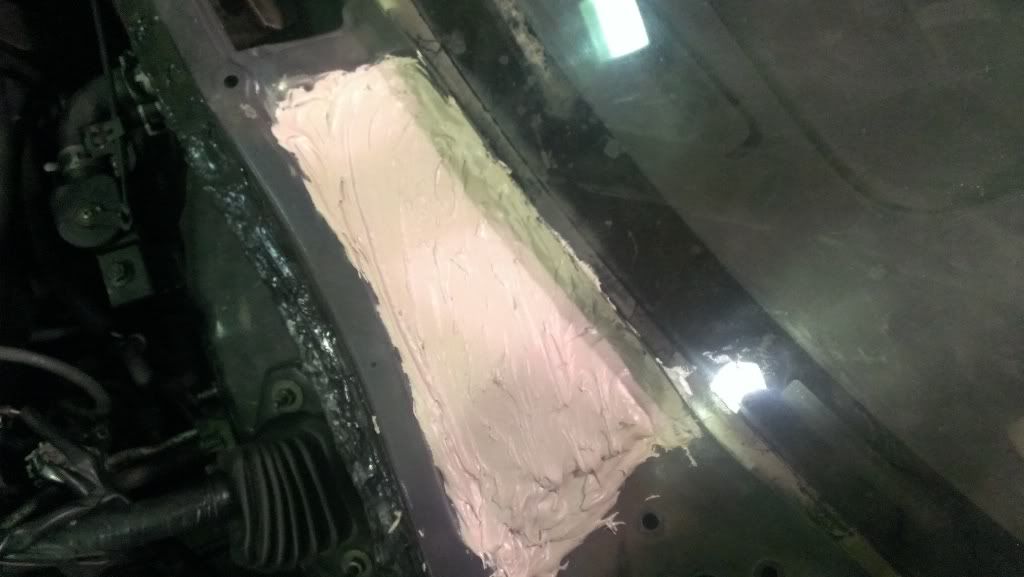
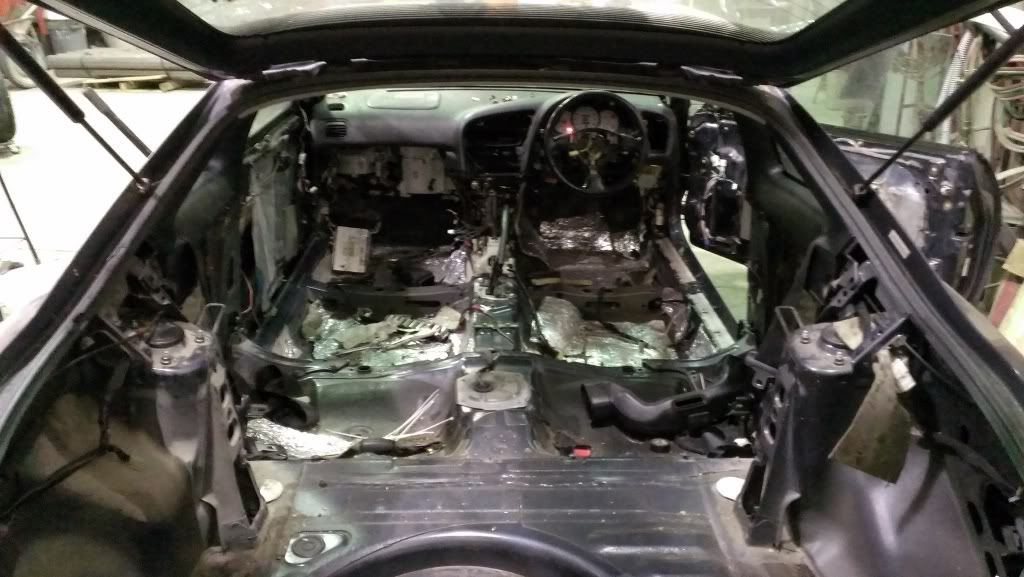
Posted by: richee3 Dec 9, 2012 - 7:28 PM
Finally tackling the windshield wiper motor? After that, it's a matter of nuts and bolts then this car is reassembled.
Posted by: ricochet1490 Dec 9, 2012 - 7:57 PM
Yeah. That plate I welded in is an effort to cover the hole that goes through the bulk head. The "old" passenger side bulkhead covers the hole and this side would have been almost a straight shot into the blower motor. So I'm putting that plate in, bondo over it to seal it. Paint it and boom, it'll work like I need it to. Of course because it's hidden under the plastic cowel fascia, I'm not really worried about "finish" ya know?
Also put in the RHD ebrake. That was a challenge to say the very least. finally got the old one unhooked. put in the RHD handle and found I no holes. I didn't realize that the threads also flipped even on something as mundane as the brake handle. Bastards. Holes were drilled through and it was nutted and bolted on for now. I'll eventually weld the nuts to the bottom but it'll suffice for the time being.
Had to pull the steering column back off as I forgot to put it on the shaft. Found the rubber boot in disrepair, so I had to fix that. Put the red stitch 202 steering wheel on part of the way so I could steer it around the shop. After work this week I hope to get my hole saw figured out and get the wiper motor hole drilled so I can then drill the nut holes and tack weld the nuts to the bulkhead and get the wipers finally finished.
It sounds soooo good coming right off the cat header. maybe I'll just run one resonator and split the pipes at the rear subframe and have twin 2.5" chrome tips just inside the ss3 rear splitters?
Posted by: njccmd2002 Dec 11, 2012 - 10:37 PM
hey what part number did u use for water pump and idler?
Posted by: ricochet1490 Dec 12, 2012 - 12:54 PM
I didn't. There was so much extra work to do, I didn't bother because I knew how old the motor was from the clip odo. I'll get to it eventually, but all I have is timing belt for it. All will come in spring .
Posted by: richee3 Dec 12, 2012 - 2:53 PM
Water pump: 16100‑79225
Idler: 13505‑88560
Posted by: njccmd2002 Dec 12, 2012 - 9:37 PM
Water pump: 16100‑79225
Idler: 13505‑88560
one idler or two?
available here?
Posted by: ricochet1490 Dec 15, 2012 - 10:05 PM
Started in on the wipers tonight.... The bane of my existence.
But I first got these in the mail today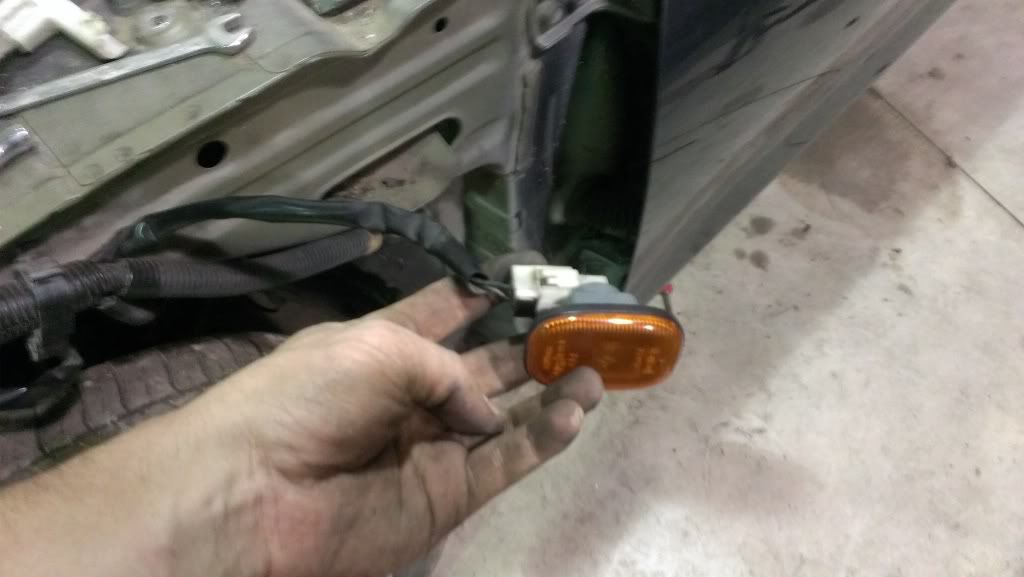
Just don't know if I'll be getting the JDM fenders done and on the car right now. One of them needs some work, it's pretty rough.
Got the right side redrilled and wiper arm bolted in. 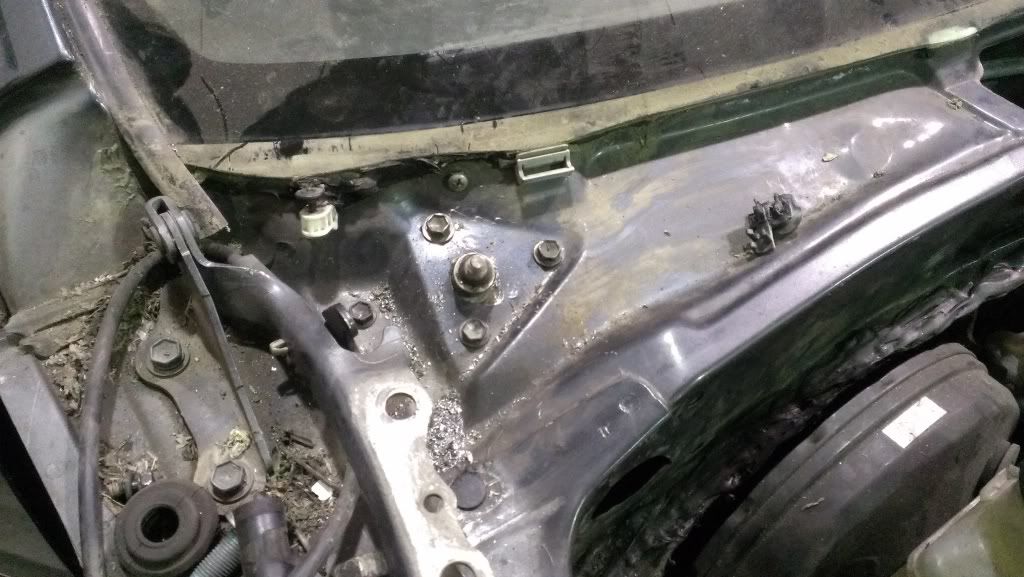
Gotta flip the middle yet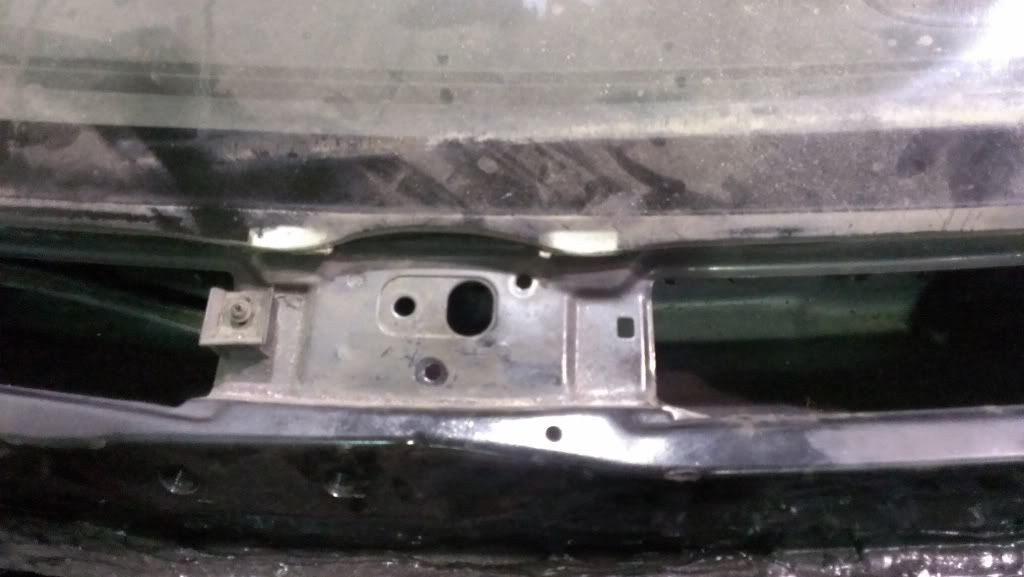
Gotta seal up the left side too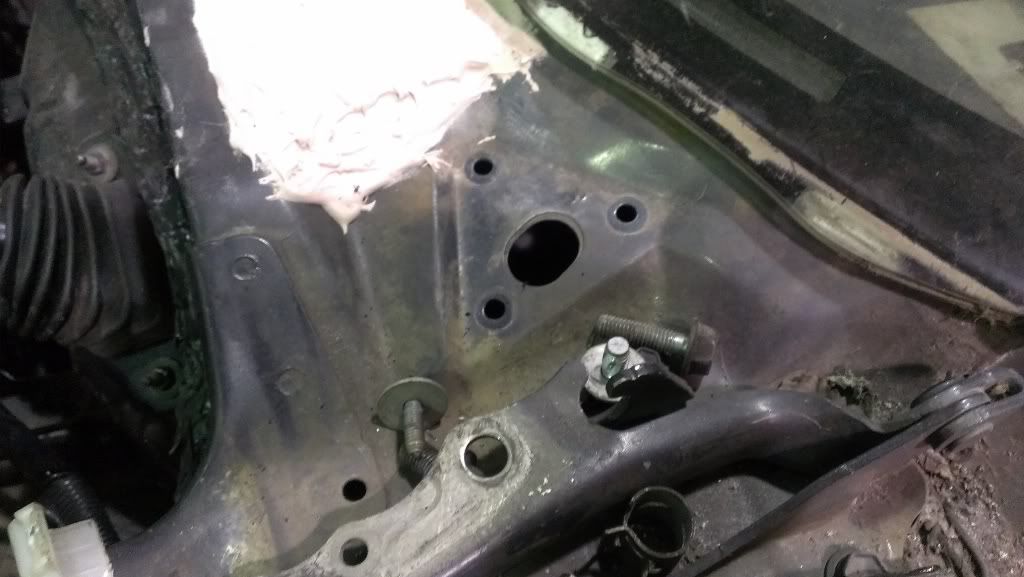
I do have the motor hole drilled, but the bolt holes for the motor are not. Not sure yet how I want to solve that either. Most likely going to be forced to weld. 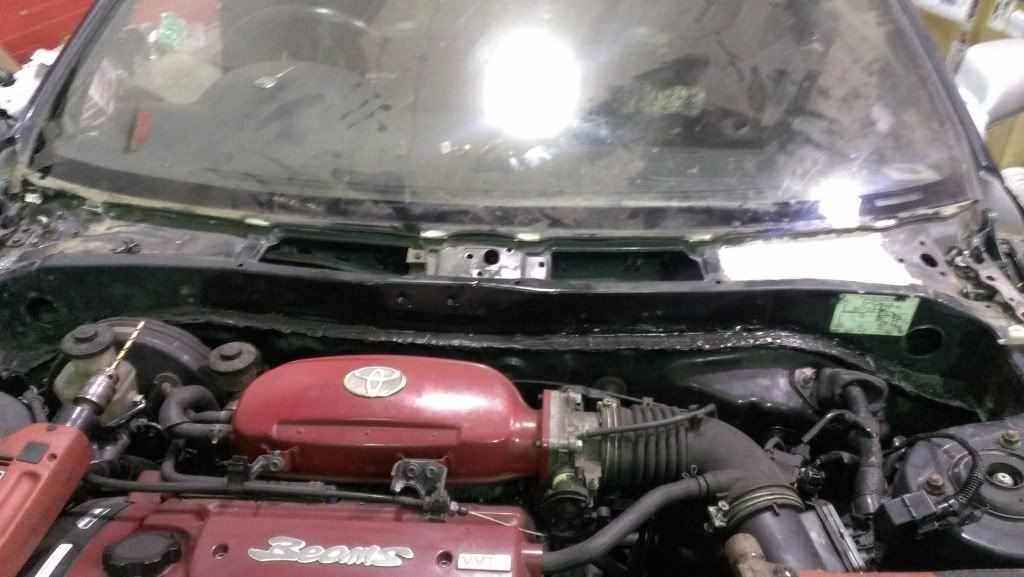
Posted by: ricochet1490 Jan 20, 2013 - 2:24 PM
Front end together. Hood shocks on. Carpet installed. Interior remains. 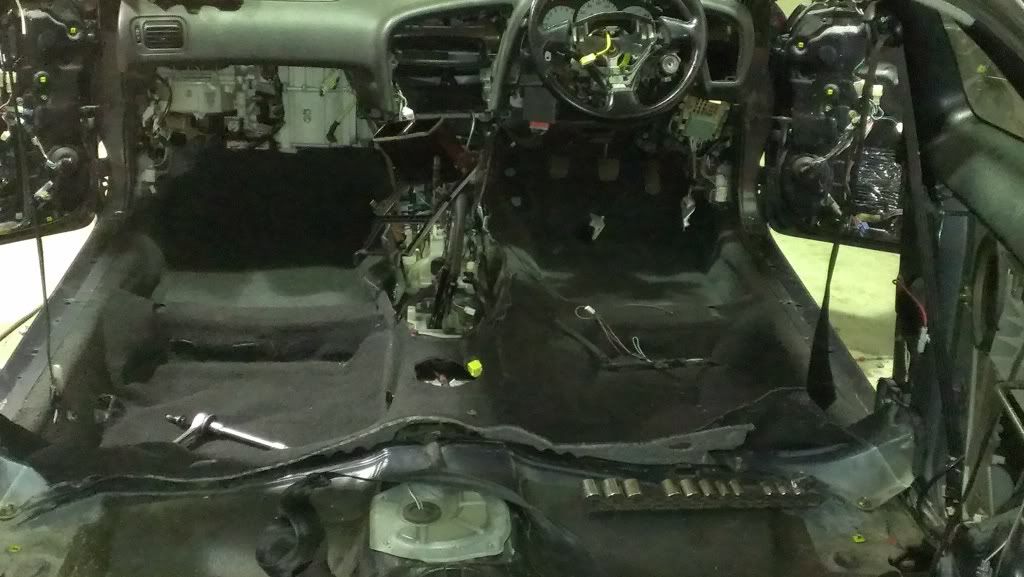
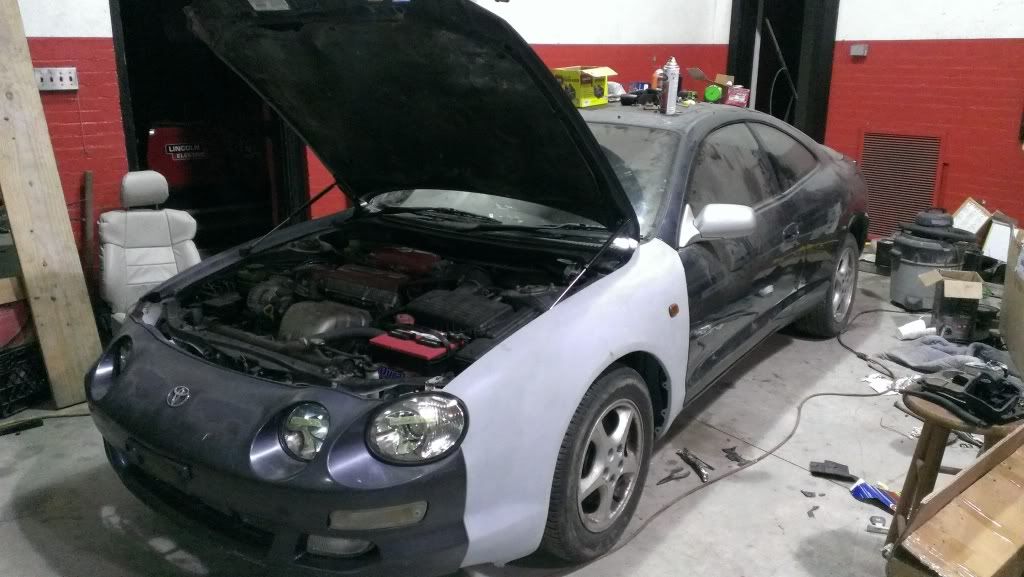
Posted by: enderswift Jan 20, 2013 - 3:17 PM
that looks awesome bud, great work. Can we expect to see you at a midwest meet this spring?
Posted by: richee3 Jan 20, 2013 - 6:31 PM
I meant to ask, is that fender a real JDM fender or is this the one you had to convert?
Posted by: ricochet1490 Jan 20, 2013 - 8:28 PM
Real Jdm. But still needs work, they are kinda beat Up.
In other news my rhd center console is from an st205 with No airbags.... The center pocket is deeper. Good except that now the airbag comport doesn't fit under it. Blows .... Kinda pissed. 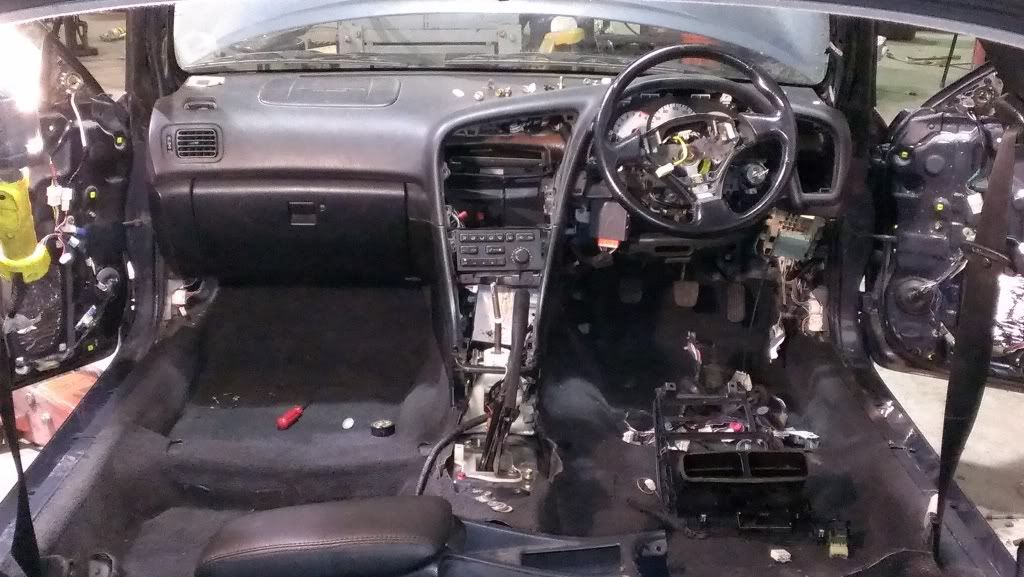
Posted by: ricochet1490 Jan 20, 2013 - 8:38 PM
I might make a Midwest meet. It'd be nice to see everyone and the uniqueness of cars
Posted by: BonzaiCelica Jan 22, 2013 - 3:41 PM
do you happen to have a superstrut sway bar and stock front gt sway bar lying around??
i would like so see comparison between the two.
Posted by: ricochet1490 Jan 22, 2013 - 4:20 PM
i would like so see comparison between the two.
No. Maybe a gt bar, but idol use that for racing ....
Posted by: Smaay Jan 22, 2013 - 4:25 PM
thats the same MAF on the 1MZ
Posted by: ricochet1490 Jan 22, 2013 - 4:27 PM
So I'm told lol.
What about it? That one actually works great. No issues so far with running.
Posted by: BonzaiCelica Jan 22, 2013 - 4:33 PM
i would like so see comparison between the two.
No. Maybe a gt bar, but idol use that for racing ....
if i ever install the superstrut suspension on my lhd car. i plan on using the stock 20mm gt sway bar and remounting the tabs on the ss shock. with different end links of course or maybe the stock ones.
whatever happend to the brake info??
http://www.6gc.net/forums/index.php?showtopic=87642
The MISSING NUT for the big ball joint in the bottom of the super strut is an M16x1.5 16 mm with 1.5mm pitch. Just fyi.
Also found out 5sfe brake rotors are perfectly centered in the caliber.... but surprisingly, they are a bit BIG???
I wouldn't have believed it myself, but the rotors are a touch big.
Evidence below.
From underneath:
From the top:
The rotor spins, but man is it ever close.
Prolly have them turned down 2-5 mm. I just worry about the pad springs rubbing... We'll see though
also why don't you try and fit stock gt single piston calipers. they should fit just fine. pics would be cool!?
Posted by: ricochet1490 Jan 22, 2013 - 7:06 PM
Brakes are fine! Mr2 turbo front pads are perfect. Those are gt rotors. As soon as everything got bolted up, the dimensions worked out . The gt calipers are a no go! Impossible without mods. They'll bolt to the bracket, yes , but how far off the bracket they go is the problem. The gt bracket won't bolt to superstrut but has the right "offset". Without mods to something, no gt caliper.
Posted by: ricochet1490 Jan 22, 2013 - 9:53 PM
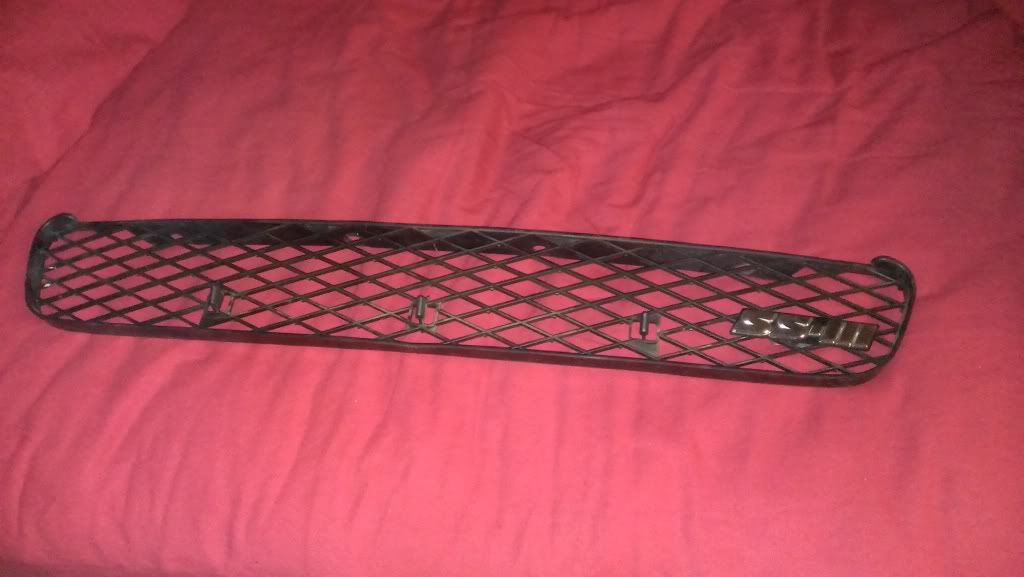
Posted by: ricochet1490 Feb 16, 2013 - 10:40 AM
Was going to get it liscensed today..... bad master cylinder was found as I kept trying to bleed the brakes...don't really want to chance rear-ending someone through town from soft pedal when I haven't even driven the car for more than 18km yet..... that's what the odo says, haven't done the mile conversion in my head yet LOL
Posted by: ricochet1490 Feb 23, 2013 - 12:59 AM
master cylinder stopping the show. I have the interior more put together.... whooptie freaking doo....
Doesn't mean crap if you can't drive it.
Posted by: ricochet1490 Feb 23, 2013 - 3:21 PM
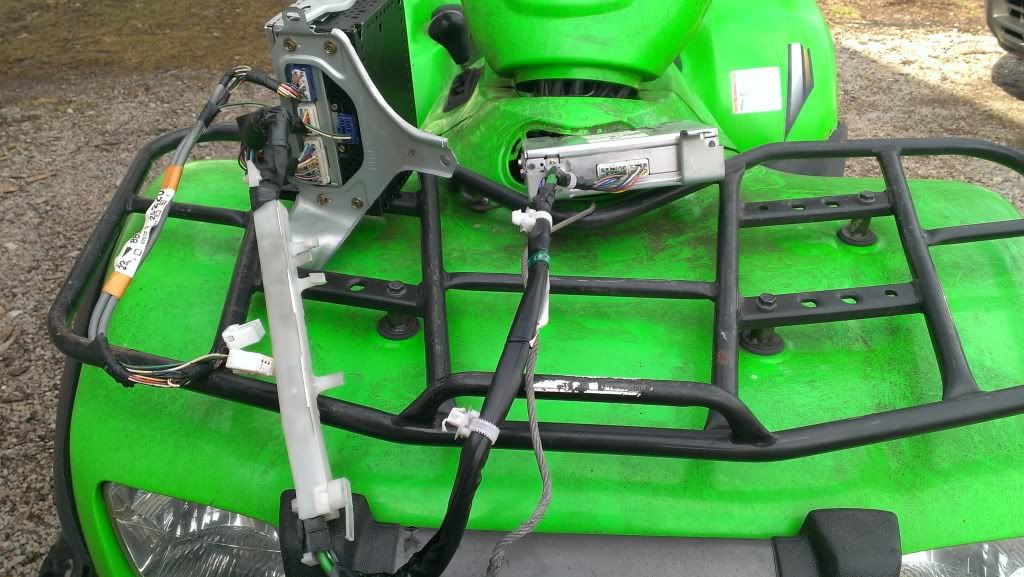
Anyone ever seen an amp set like this?
Posted by: njccmd2002 Feb 23, 2013 - 3:24 PM
thats the 8 speaker system. hear about it never seen it ..
Posted by: ricochet1490 Feb 23, 2013 - 4:12 PM
Well ****, I only wanted the six speaker. That makes two of my cars that have it lol
Posted by: enderswift Feb 23, 2013 - 6:00 PM
Found the brake master cylinder from my clip. It's equipped with abs. I'll pm some photos
Posted by: ricochet1490 Mar 3, 2013 - 9:25 PM
I now have brake pedal..... enough to drive it anyway.
Made some calls to a body shop because I'm tired of working on it. Don't really feel like learning body work on this thing either.
In other news, the TRD short shifter feels great. I recommend it to anyone
Posted by: SwissFerdi Mar 3, 2013 - 10:21 PM
18km equals to a bit over 11 miles. Congratulations for having the stones to take on this project.
Posted by: ricochet1490 Mar 3, 2013 - 10:25 PM
Thank you. That actually means a lot. It's been a long row to hoe.
I hope I've shed some light on what it takes to actually do it. I know I haven't done the exciting part of the engine building etc etc. But I promise. That will come.
To me there was no sense in building the motor without being able to at least drive the car.
Posted by: Ted95 Mar 3, 2013 - 11:12 PM
one of the more complete builds on this site. you've done a lot of work so far and it has really come along way, thing will look sick once the body work is complete! keep it up man!
Posted by: kurt95gt Mar 3, 2013 - 11:17 PM
Think once we both got our cars going good forsure we need to meet in the middle somewhere man
Posted by: ricochet1490 Mar 4, 2013 - 12:25 PM
Yeah and I can finally give you that scrap seat I have. Lol.
Posted by: kurt95gt Mar 4, 2013 - 1:14 PM
Lol I forgot all about that
Powered by Invision Power Board (http://www.invisionboard.com)
© Invision Power Services (http://www.invisionpower.com)