Printable Version of Topic
Click here to view this topic in its original format
6G Celicas Forums _ Off Topic _ Finally tore the Supra engine out
Posted by: Smaay Aug 26, 2012 - 11:59 PM


Posted by: Smaay Aug 27, 2012 - 12:05 AM
ill post more when get back to it tomorrow
Posted by: Bitter Aug 27, 2012 - 12:34 AM
Stuffing it in your 7th Gen Celica like that one guy just got done with?
Posted by: Smaay Aug 27, 2012 - 8:51 AM
no thats just retarted IMO. i blew the engine racing last year so im rebuilding it now.... finally
Posted by: richee3 Aug 27, 2012 - 10:35 AM
 Subscribed!
Posted by: Smaay Aug 27, 2012 - 11:40 PM
updated with more pics and i found the problem. Melted a hole right through piston 6
Posted by: Box Aug 28, 2012 - 12:07 AM
Ouch. So are you going to just do a rebuild, or do some upgrades while you're at it?
Posted by: njccmd2002 Aug 28, 2012 - 12:29 AM
looks like the head is cracked. ouch
Posted by: Smaay Aug 28, 2012 - 11:43 AM
the head is fine, thats just the black crap coming off the head gasket
@ Box, you know me better, i never do a simple rebuild, im going for 1000HP. full built engine
http://www.6gc.net/forums/index.php?showtopic=81249
Posted by: SupraKid Aug 28, 2012 - 12:19 PM
Gonna need a new snail, ECM and fuel to reach 4 digits 
Posted by: Box Aug 28, 2012 - 1:22 PM
Oooh the four digits club, nice.
Posted by: Smaay Aug 29, 2012 - 12:55 AM

im already running an AEM, and i have plenty of fuel, snail maybe
Posted by: SupraKid Aug 29, 2012 - 11:13 AM
v2? The infinity is coming out soon .... And your on e85 or race?
Posted by: Smaay Aug 30, 2012 - 11:15 AM
nope on a V1 i have no reason to go to a V2, i was running VP100
Posted by: PhoenixTech Sep 7, 2012 - 2:48 PM
Josh's car has been done for over a year, it's just been back on the publicity stand lately since his Soarer is in the shop getting a full Vertex widebody kit.
Posted by: Smaay Sep 14, 2012 - 1:33 AM
going to pick up my block form the machine shop tomorrow. im taking suggestions to paint the block. Black is out of the question
Posted by: Box Sep 14, 2012 - 2:27 AM
Ehh, dark blue!
Posted by: Neon90424 Sep 14, 2012 - 8:06 AM
rising sun for jdm win?
Posted by: cjh4l22 Sep 14, 2012 - 6:21 PM
omg jealous
Posted by: NgoFcukinWay Sep 15, 2012 - 1:55 AM
Looks like it'll be a fun build!
I tore mine out too in prep for a GTE VVTi that should be here pretty soon. I'm excited.
Posted by: Smaay Sep 17, 2012 - 5:28 PM
painted the block over the weekend
Posted by: Box Sep 17, 2012 - 5:53 PM
Now it looks like it belongs in an old Ford. 
Posted by: Special_Edy Sep 17, 2012 - 7:48 PM
I like it, Might I suggest Black Highlights-
My 4.0L I6 from my '64 Chevy Pickup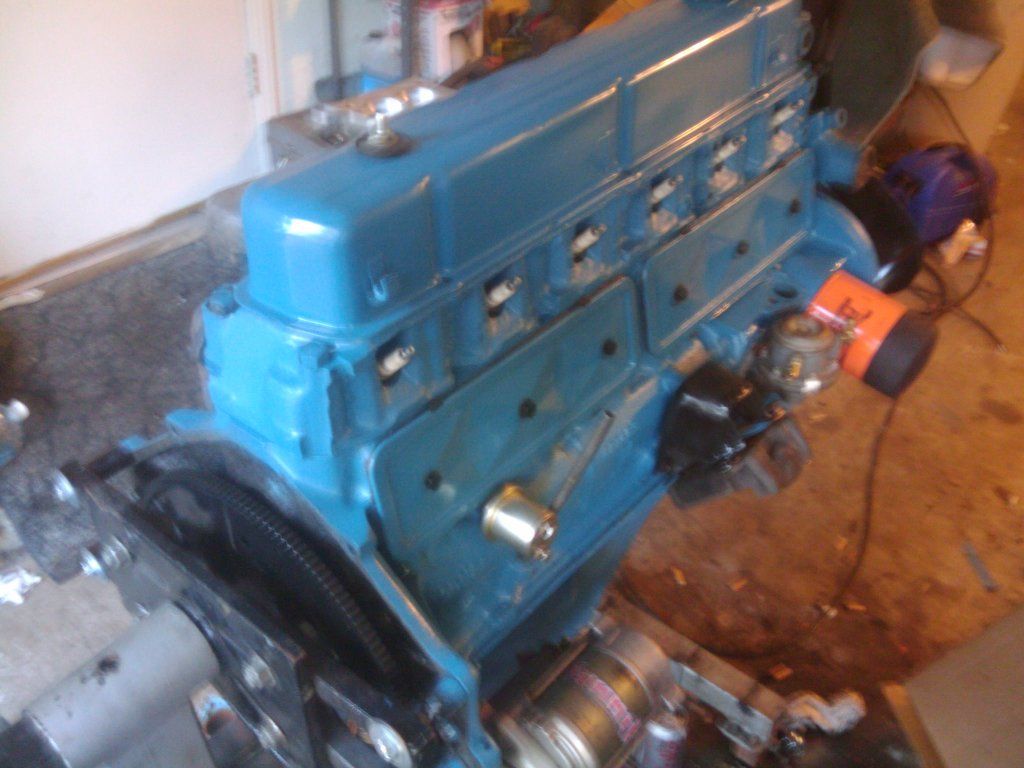
Posted by: anonymous Sep 17, 2012 - 9:32 PM
All the pistons look like they have seen their fair share of detonation. Who tuned it?
Posted by: Smaay Nov 6, 2012 - 10:14 AM
ok lets get started with the assembly
here is the block, all nice a clean.
This is where the oil squirters go. they spray under the piston to help cool them when the engine is generating phenomenal power!
Squirters installed

Main bearings installed

Lay the crankshaft in the block, going to check clearances
Lay a strip of plastigauge on the journals

Install the main caps in the proper locations, apply the proper torque and check the clearance

Remove the caps and check the plastigauge. it spreads out and get measured for clearance


This shows .002 clearance = perfect!
Remove plastigauge from surfaces and then apply generous amounts of assembly lube and re-install the main caps to the proper torque
Check the ring gap. use a piston upside down and slide the ring down into the cylinder. i go the length of the piston. using feeler gauges check the gap of the rings. the piston paperwork will give you the proper gaps on a spec sheet.

looking at front of block, install new O-rings for oil pump and water pump
Apply a small bead of FIPG for around the oil pump to seal it. This is the first Toyota engine that doesn't have a gasket that I have come across. 
Install oil pump
Install new rear main seal in the housing assembly
This is the #1 oil pan. 
Apply FIPG around the pan to bond it to the block. dont forget to install the O-ring on the block.
Install Windage tray
Using new gasket install oil pickup


I didnt get a picture but install the #2 oil pan the same way with a bead of FIPG around the boarder.
Flip engine over and install the head studs

Lay head gasket on the deck

Oops, at this point I realized that the washers that get used with the ARP studs will not fit through the head and around the stud like this. What I ended up doing is removing the studs, applying the ARP moly lube to the nut end of the threads and the washers, then lowered the stud through the head and hand tightened them to the block. This way everything was properly lubed all around.
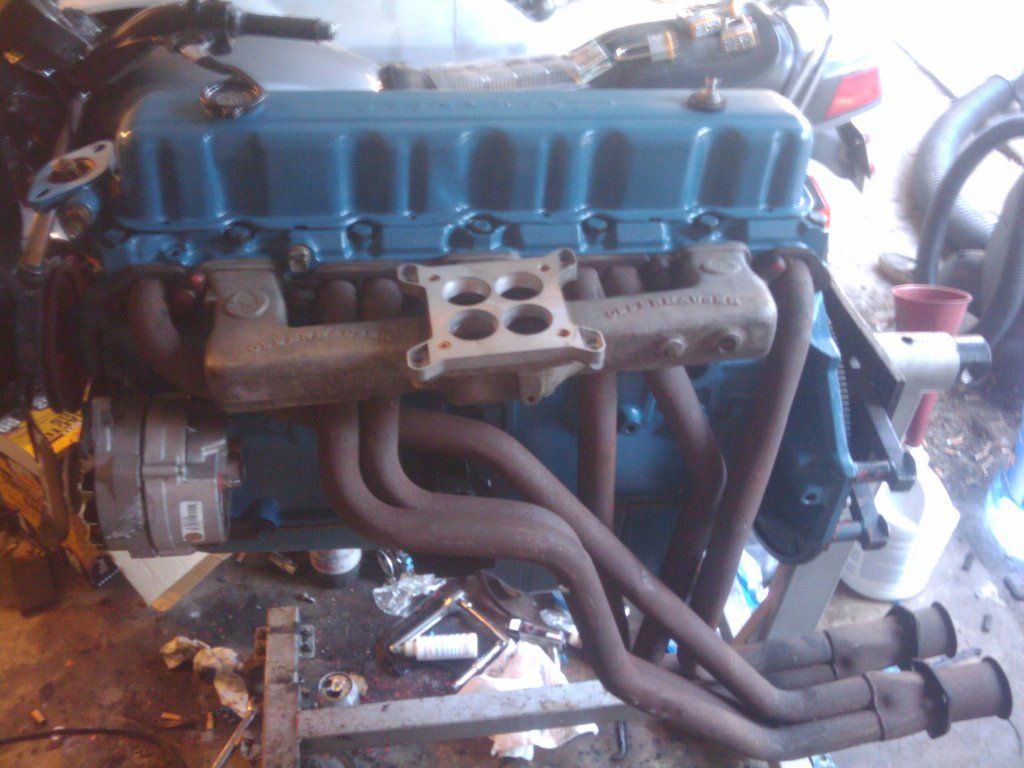
Another shot of the head with 1ZZ-FE shimless buckets.


GSC Stage 2 cams installed.


Looks like i missed a few steps, got the valve covers on, water pump is on and the water line.

Installed Billet timing belt tensioner pulley
Installed timing belt

Install lower belt cover, and accessory belt tensioner

Install upper belt cover
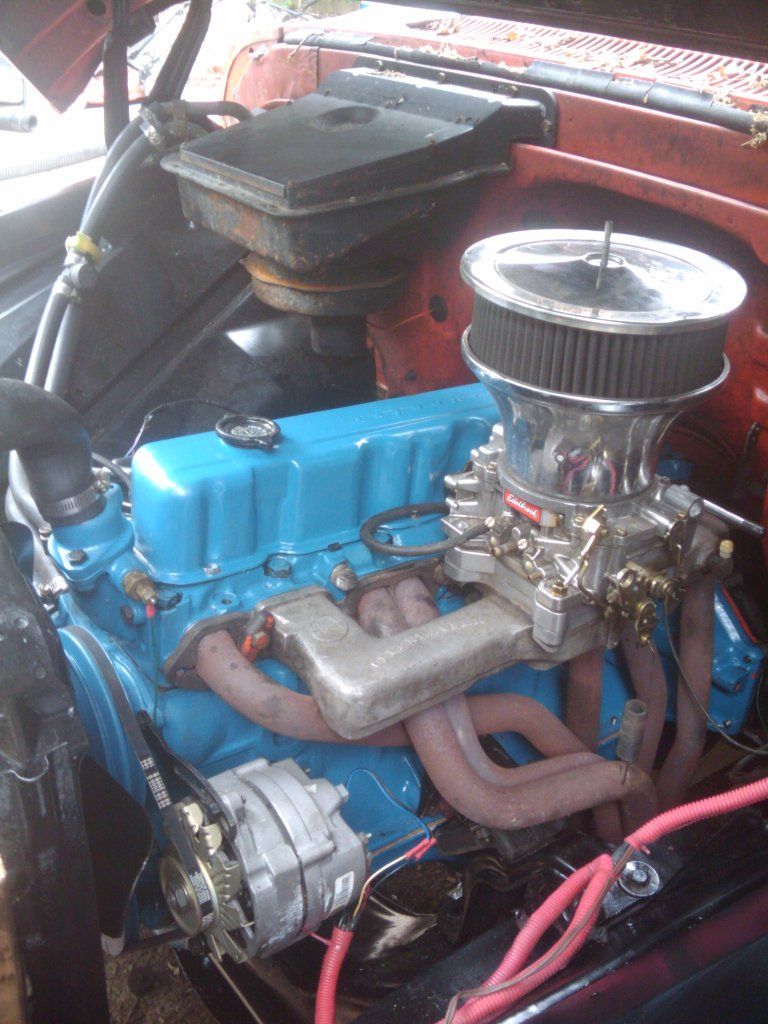
Posted by: Xander_X Nov 6, 2012 - 10:51 AM
I like how there's a Traction Control label on the TB ... it's like ... "Just reminding you, this car has TC. As you were."
Posted by: Smaay Nov 8, 2012 - 6:12 PM
yeah, thats all gone, i have the fogger for my nitrous in there now
Posted by: rave2n Nov 8, 2012 - 6:20 PM
I enjoy threads like this that you put together.
Always a excellent amount of pictures and description 
Posted by: Syaoran Nov 11, 2012 - 2:16 AM
I would take a metal polisher to those 2JZ letters to make them shiny and stand out

Posted by: enderswift Nov 11, 2012 - 9:31 AM
HOW did I miss this thread???
The build looks great, and I like your attention to detail. Please keep posting picture laden updates
Posted by: richee3 Nov 11, 2012 - 3:40 PM
This thread delivers. I can't wait for dyno results and track times. 
Posted by: Smaay Nov 14, 2012 - 1:56 PM
i should turn the key tonight
Posted by: 95CelicaST Nov 15, 2012 - 12:07 AM
waiting.
Posted by: Smaay Nov 15, 2012 - 11:06 AM
key was turned, started right up. It smoked like crazy from all the residual oil in the turbo and exhaust. sounds awesome. i cant wait to do the final install parts. i didnt have the cooling stuff hooked up. i just wanted to make sure it runs.
Posted by: Box Nov 15, 2012 - 2:50 PM
Huzzah! Now we wait for videos.
Posted by: navseal345 Nov 16, 2012 - 6:37 PM

Posted by: cardshark525 Dec 11, 2013 - 12:51 AM
How did this finish up since it looks like the thread hasn't been touched in a year? Did we hit 1000?
Posted by: Smaay Dec 11, 2013 - 12:10 PM
Well....Here is the latest.
On the dyno, oil started puking out of the front behind the crank pulley. After tearing down the engine, i discovered that the machine shop did not clean the block very well and metal shavings went through the engine. it destroyed all the bearings, the oil pump, and my cams. Luckily i was able to salvage the cams with a polish and Polydyne coating. I took the block back to the shop and hand them pull the oil passage plugs (steel balls) clean the block again, and then tap the holes for a real threaded plug.
I replaced the front seal, and all the bearings. Put it all back together and it is now back on the road. I did get a good base tune in the AEM before it died so now i just need some final tuning.
Posted by: cardshark525 Dec 11, 2013 - 10:19 PM
Well that's disappointing. Hopefully things will go smoothly from here. Keep us posted.
Posted by: 95CelicaST Dec 24, 2013 - 12:37 AM
2JZ - as unreliable as the 3VZE....
Good luck. Want to see some official numbers when you're finished.
Powered by Invision Power Board (http://www.invisionboard.com)
© Invision Power Services (http://www.invisionpower.com)