
 Mar 24, 2015 - 2:07 AM Mar 24, 2015 - 2:07 AM
|
 
|
 Enthusiast  Joined May 13, '06 From Kaimuki, HI Currently Offline Reputation: 10 (100%) |
Applicable engine: Gen II and Gen III 3sgte
Parts in the pictures: timing tensioner and timing pulley Time: 1 hour if you know what you're doing. Just so you guys know how to do it. I did it today in about an hour, to include removing the timing pulley and tensioner, applying tension and putting them back with the new pulley. I figured I would post the pictures that I took of how to apply tension to the tensioner again, and what I used to hold in it place. Before anyone asks why I'm not replacing the tensioner, belt, or anything else...those parts only have 10k miles on them. ---or you can follow the same steps and install new parts A word of warning, if you don't know what you're doing you can set the timing belt back wrong, let someone do this that has done it before, unless you don't mind learning by "repetition" Step 1) set your engine at TDC (make sure both the cams and crank are set, not just one of them) Step 2) remove the timing cover Step 3) loosen the timing pulley bolt (one reason is so you can reuse the shoulder bolt since it's easier to remove from the bracket while bolted to the engine, the other reason is because this is the only bolt that threads into steel, the others thread into aluminum, there is a chance the beginning threads on the head will rip out from the tension of the tensioner if you loosen the tensioner pulley bracket or the tensioner since they both bolt directly into the head) Step 4) when the pulley is loose move the belt out of the way, be careful not to move it too much so it doesn't slip a tooth on the crank gear. This is all easier if it doesn't slip a tooth on the crank side. You can mark where it lines up on the gears with a paint pen or permanent marker. Step 5) unbolt the 14mm bolt that goes through the pulley bracket (DO NOT LET THE WASHER FALL OFF OF THE BACK OF THE PULLEY BRACKET BOLT!!! IT WILL FALL INTO YOUR LOWER TIMING COVER!!!) Step 6) unbolt the two 12mm bolts that hold in the tensioner (on the bottom) Step 7) Install the new pulley (if needed), and tighten to torque specs Step 8) buy a HARDENED STEEL 1.5mm hex key, usually black color, not the cheap silver ones. you'll need it as a pin to hold the tensioner. It needs to be at least 1 inch long, but not longer than 2 inches or it will be in the way of the motor mount Step 9) put tension on the tensioner with a c-clamp, make sure to keep the shaft straight so the hole in it will line up with the hole in the tensioner assembly 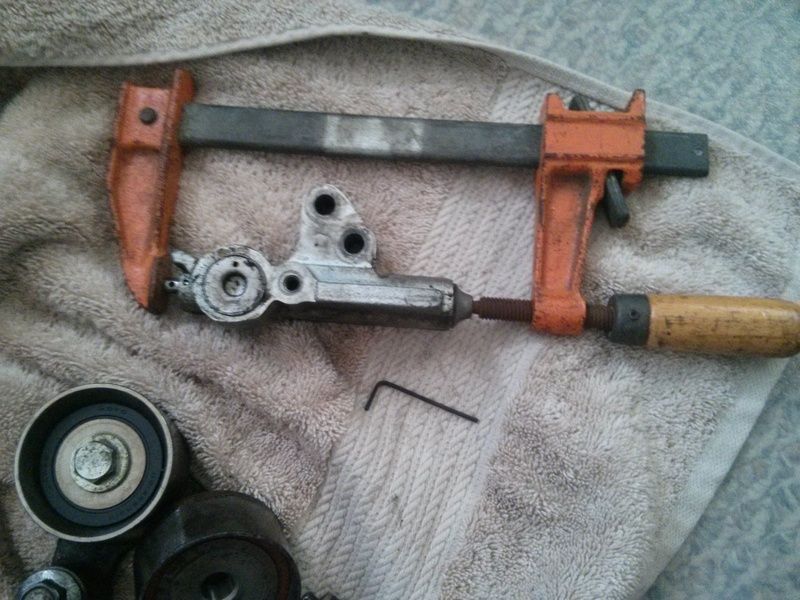 Step 10) slide the 1.5mm hex key in and slowly release tension. The hex key shouldn't bend, if it does it is too weak. It should be still usable after this. If id doesn't go all the way through the tensioner this will still work 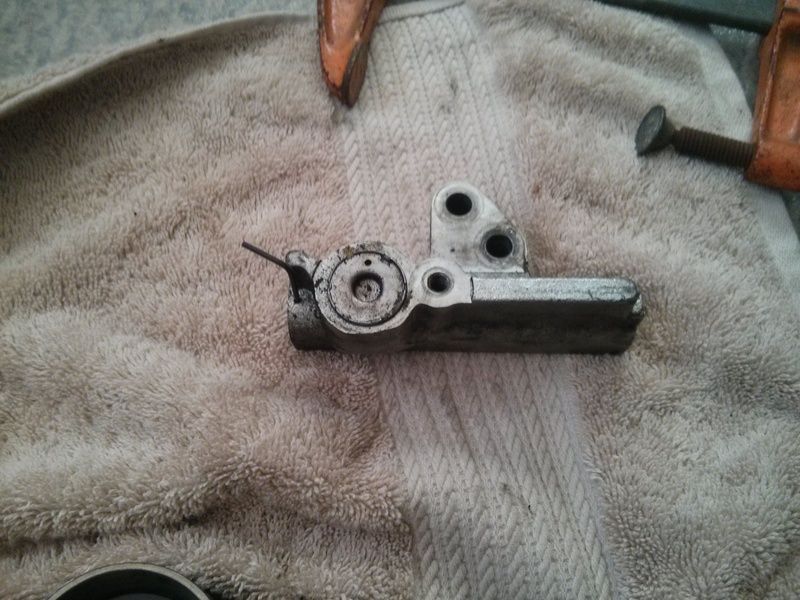 Step 11) put in the tensioner pulley (and don't drop the washer off of the back that sits flush against the head Step 12) put the tensioner on Step 13) slip the belt back on, making sure you had the tension you did before Step 14) make sure everything is in place, and remove the hex key from the tensioner with a pair of pliers. Step 15) Check the tightness of the bolts that you touched, then put your cover back on. The car should start right back up like normal. Other pictures: these are of the Gen II and Gen III timing tensioner pulleys, a gen II can be used on the gen III engine, not sure if the opposite is true. Only noticed differences, the gen III has an extra lip on the side that the tensioner pushes, and the gen III also has a nub hanging off the side that doesn't seem to be used for anything Gen II (left) and Gen III (right) tensioner pulleys side-by-side comparison 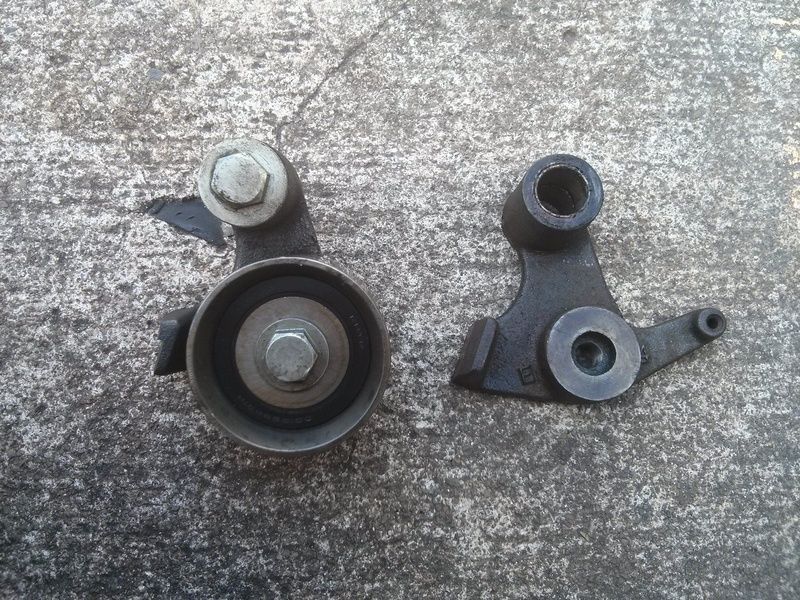 Gen III is on top this time 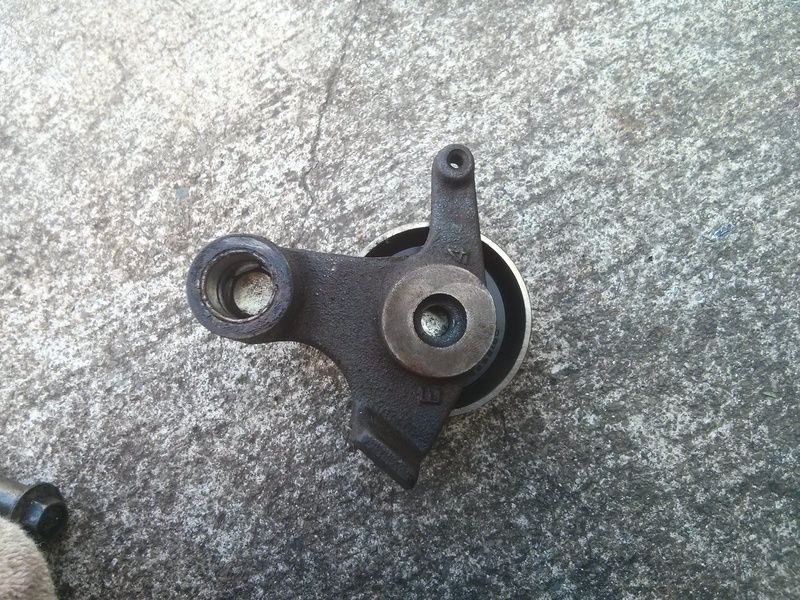 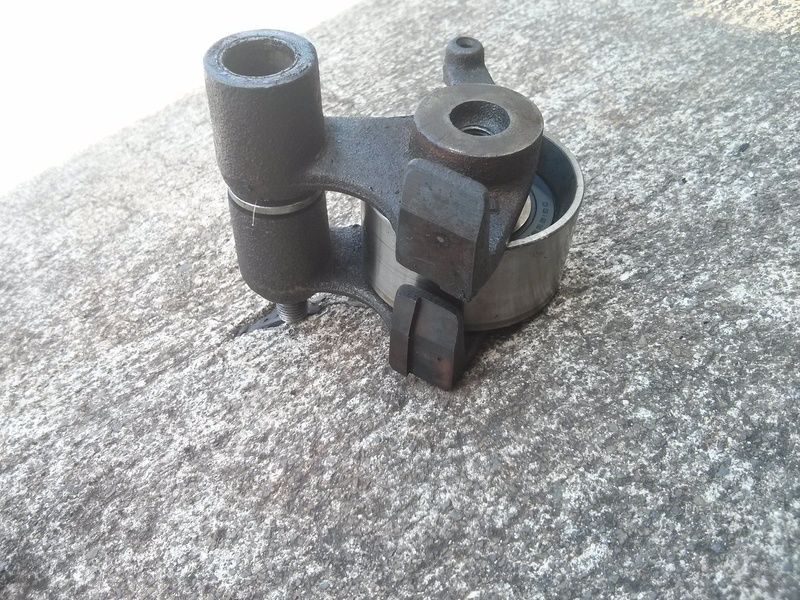 Gen II is on top 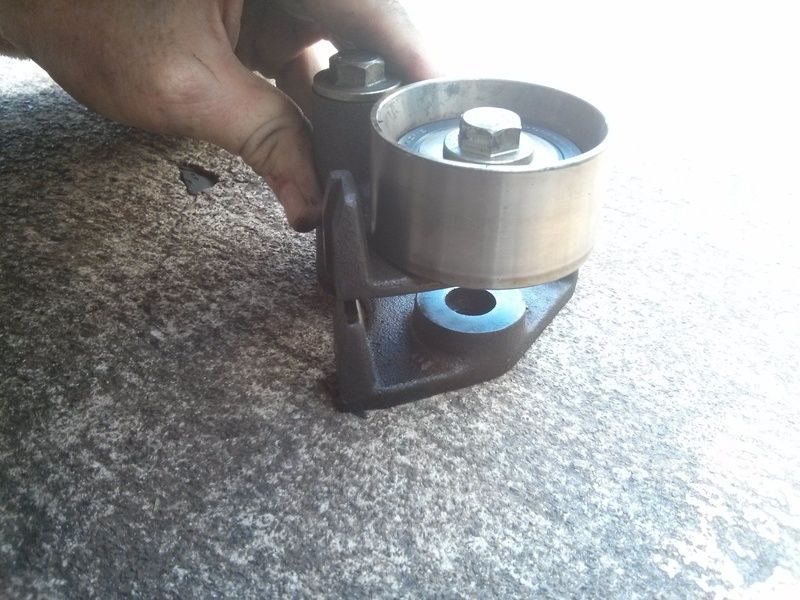
This post has been edited by match220: Mar 24, 2015 - 2:23 AM -------------------- -Jay
95 GT conv. project car: Manual, Gen III 3sgte, JN pisons, Eagle rods, overbore, crank knife-edged, crank scraper, ARP head/main/flywheel, Autronic EMS, Haltech Dual Wideband O2 controller, Audi 1.8T individual coils, FMIC and SSQV BOV, 3" downpipe, 3" ultra-high-flow cat, 2.5" Borla muffler, +other 01 S2000: FMIC, Haltech EMS, Haltech wideband, 570cc inj, forged pistons/rods, sleeved block, 5 angle valve job, ported and polished 02 R6, all stock, except for braided stainless brake lines, frame sliders, and adjustable brake/clutch leve |

Posts in this topic
 match220 Reusing the timing tensioner after replacing the pulley (how to) Mar 24, 2015 - 2:07 AM
 Bitter I really advise against reusing any hydraulic tens... Mar 24, 2015 - 7:57 AM
 match220 QUOTE (Bitter @ Mar 24, 2015 - 2:57 ... Mar 24, 2015 - 8:20 AM Smaay I have re-used those tensioners for years. If you ... Mar 24, 2015 - 8:24 AM
  |
1 User(s) are reading this topic (1 Guests and 0 Anonymous Users)
0 Members:
| Lo-Fi Version | Time is now: May 24th, 2026 - 8:10 PM |