  |

 May 10, 2008 - 6:26 PM May 10, 2008 - 6:26 PM
|
 
|
 Enthusiast  Joined Dec 22, '06 From Columbia, MD Currently Offline Reputation: 13 (100%) |
basically the crossmember does not have enough room to slide under the motor mount bolts
art u can use this to see what i am running into i tried to move the engine up but due to the due to the 5s being positioned at an angle. it does not really move as high as i want it to suggestions would be great 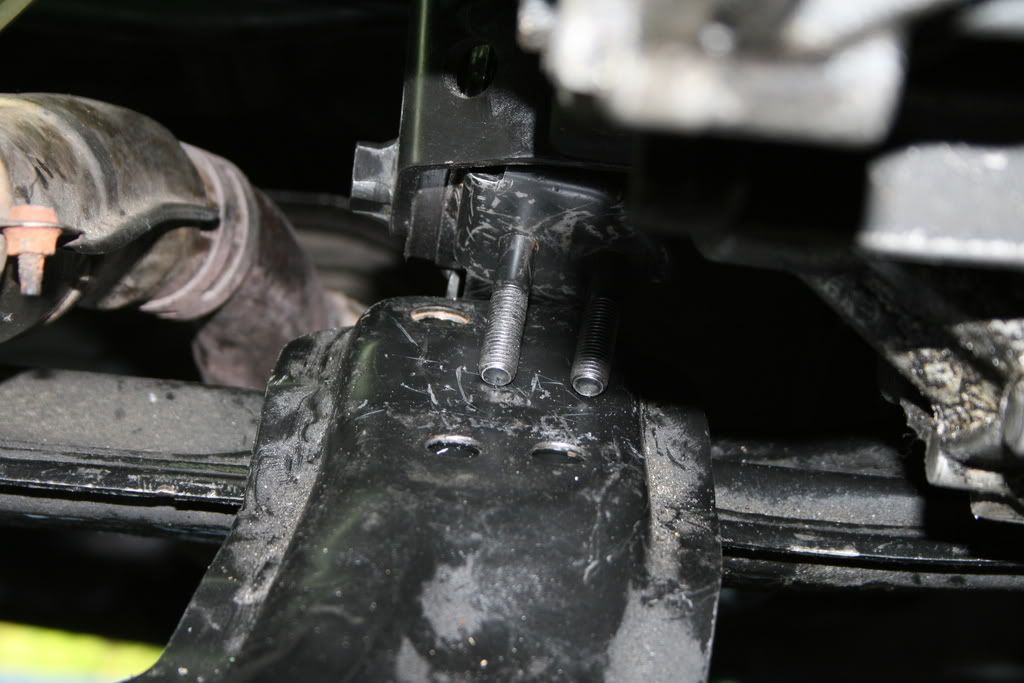 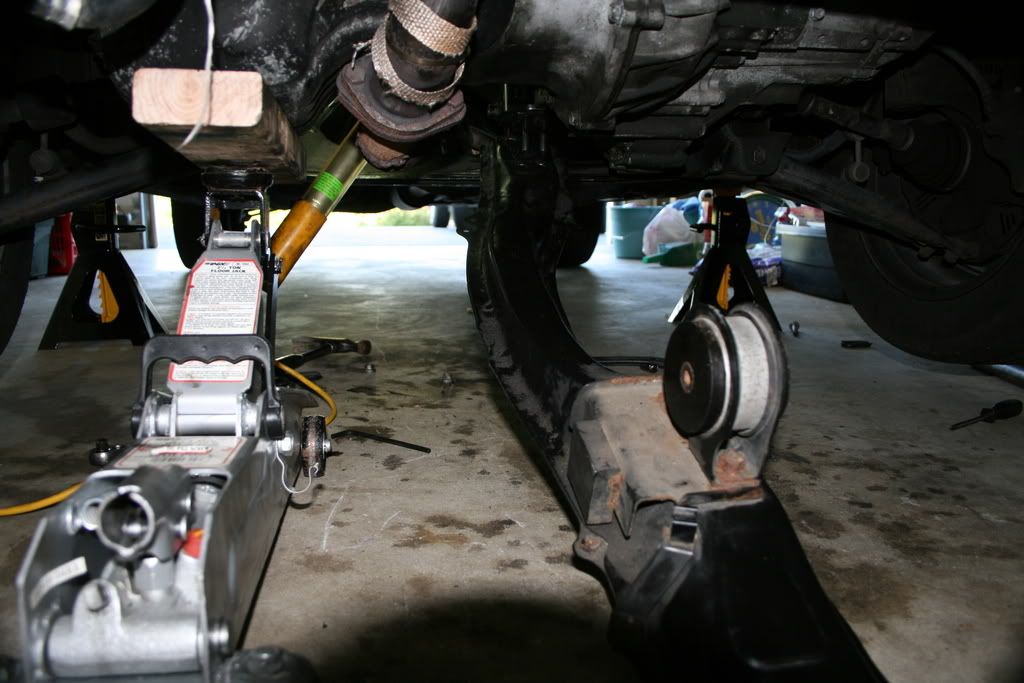 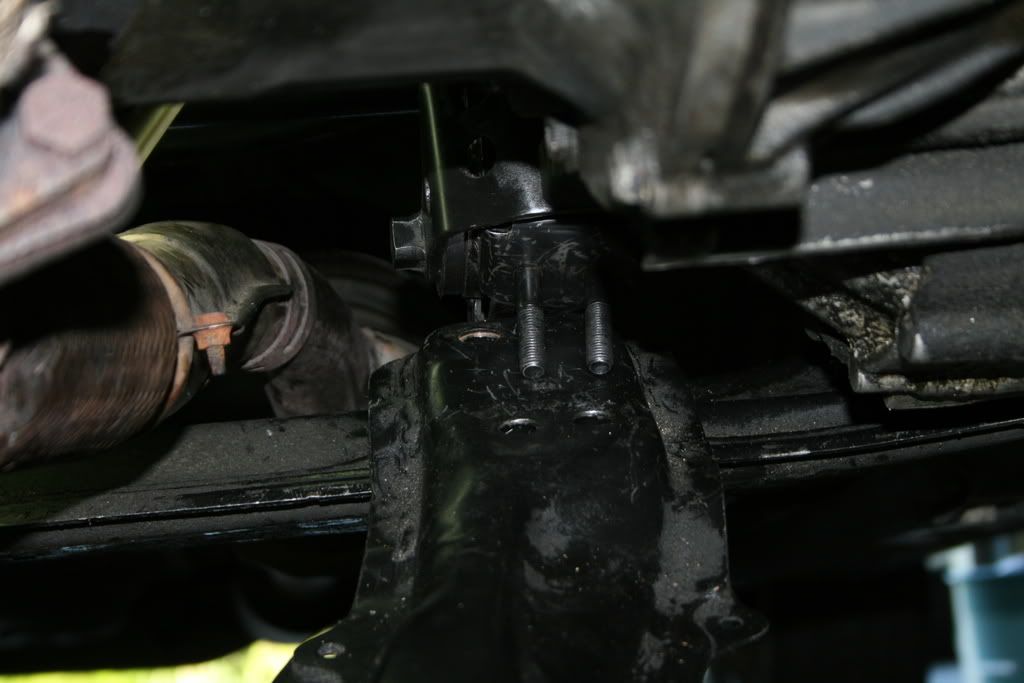 --------------------  1995 GT::::Diffusing the Situation エキサイティングカーレーシングチーム! march 2010 COTM : 6GC feature 2014 : january 2015-2016-2018 COTM |

|
May 10, 2008 - 6:34 PM
|
|
|
Enthusiast Joined Mar 11, '06 From Way South Chicago Currently Offline Reputation: 0 (0%) |
pry the cross member down a little
-------------------- |
|
May 10, 2008 - 6:42 PM
|
|
|
Enthusiast Joined Jan 25, '06 From MN Currently Offline Reputation: 19 (100%) |
I had the same problem when I was putting in my poly mounts too what I did was put the cross member on first and make sure you align it with the holes then maneuver the rear mount from where the exhaust pipping is on to the cross member it'll take awhile but worked for me.

-------------------- "To Protect And To Serve The Wealthy" -POLICE
|
|
May 10, 2008 - 7:44 PM
|
|
 Enthusiast Joined Nov 23, '07 From Houston TX Currently Offline Reputation: 0 (0%) |
Dude. this took me, DEATH and his girl 2 days to do this thing. Same problem.
Solution? Unbolt the Left side Motor mount by the Timing belt. The motor will move up higher then and you can slip it in with no problems. DO NOT TAKE OF ALL 4 MOUNTS! Not only will the engine fall on you, but you will have no help lining everything back up when you get the mount in. On the Left side mount, it should be 4 nuts to remove. Don't remove the mount from the engine, just disconnect it from the frame. Now we lifted it off the bolts that hold it in place. I'm not sure that you really need the engine that high though. But we where tired of messing with it and just said screw it and gave ourselves more room then we might have needed. But it has to be done. Once you disconnect the mount the engine will lift higher and you can slide the mount in smoothly. Also, make sure your Jack is on the Oil Pan like you have it in the pictures. Otherwise the engine will not life in the right way to slide the mount in. This post has been edited by Havok1997GT: May 10, 2008 - 7:46 PM |
|
May 10, 2008 - 8:55 PM
|
|
|
Enthusiast Joined Dec 22, '06 From Columbia, MD Currently Offline Reputation: 13 (100%) |
haha yeah same i started friday
i will try a few more time to put in the cross member and then the mount. if that fails then i will go with havoks way -------------------- 1995 GT::::Diffusing the Situation エキサイティングカーレーシングチーム! march 2010 COTM : 6GC feature 2014 : january 2015-2016-2018 COTM |
|
May 11, 2008 - 3:47 AM
|
|
|
Enthusiast Joined Jul 22, '07 From alexandria, VA Currently Offline Reputation: 0 (0%) |
That crossmember is a pain!
A trick i used when getting mine back in: those bolts on the rear mount are just pressed into their holes, if you set it against the ground and tap the bolts with a hammer they will pop up out of position so you have more room to work with. They will set back in just fine when you tighten everything down. Also, be sure to lube up the outer surfaces of the poly inserts with some axle grease so you can maneuver the mount easily in the bracket. -------------------- OBD-II makes me a sad panda
|
|
May 11, 2008 - 7:16 PM
|
|
|
Enthusiast Joined May 30, '05 From MN Currently Offline Reputation: 8 (100%) |
If you are still having issues, here is a little trick I use. I have done this about 5 or 6 times: There are two long bolts with special nuts that hold the power steering rack to the chasis. Remove one and loosen the other, this enables you to raise the rack up a bit and gives you the neccessary room to remove and replace your rear mount. If you want you can remove both bolts but I find removing just one to be sufficient.
Please report back it it works, only because I have done this several times on a 3s but I want to see if it works on the 5s and others. Good luck. -------------------- 3sgteing.
..burns twice as bright, lasts half as long. "The weight of the world is love. Under the burden of solitude, under the burden of dissatisfaction." -Allen Ginsberg- |
|
May 11, 2008 - 10:23 PM
|
|
|
Enthusiast Joined Dec 22, '06 From Columbia, MD Currently Offline Reputation: 13 (100%) |
i will try a few of these out tomorrow morning
thanks guys -------------------- 1995 GT::::Diffusing the Situation エキサイティングカーレーシングチーム! march 2010 COTM : 6GC feature 2014 : january 2015-2016-2018 COTM |
|
May 14, 2008 - 2:09 AM
|
|
|
Enthusiast Joined Nov 23, '07 From Houston TX Currently Offline Reputation: 0 (0%) |
Up date?
|
|
May 14, 2008 - 7:21 PM
|
|
|
Enthusiast Joined Dec 22, '06 From Columbia, MD Currently Offline Reputation: 13 (100%) |
haha sorry. art(lagos) came over on monday to help me out with it. we dropped one side of the subframe to give us a little more room, and after that it was just a matter of tweaking the position of the motor to be able to fit everything in. the one thing i left out though was the connection for the exhaust hanger behind the mount, didnt really need it (aka couldnt get it in)
it was SOOOOOOOO worth the $50. and quite possibly all the pain and suffering it took to get it in there thanks for your help guys -------------------- 1995 GT::::Diffusing the Situation エキサイティングカーレーシングチーム! march 2010 COTM : 6GC feature 2014 : january 2015-2016-2018 COTM |
|
May 18, 2008 - 9:59 PM
|
|
|
Enthusiast Joined Nov 23, '07 From Houston TX Currently Offline Reputation: 0 (0%) |
damn dude. thats seems like a lot more work then it really needed. would have been a lot easier if you had done what i said. But hey. whatever dude. as long as you did it and it went in fine, thats all that matters
|
|
May 18, 2008 - 10:20 PM
|
|
 Enthusiast Joined Jan 10, '04 From Shoreline, WA Currently Offline Reputation: 4 (100%) |
yup went though that last weekend, misserable design. I had my nabor and my g/f help to get mine it, we put all 3 of the other mounts in and with my g/f holding a 3 foot pri bar to twist the motor forward we slid it in, took a lot of tweeking and shoving but fit in without too much trouble, considering I was fighting it by myself for a good few hours. Also I took off the exhaust mount from the back of it for mor hand room.
This post has been edited by creis: May 18, 2008 - 10:25 PM --------------------  |
|
May 18, 2008 - 10:30 PM
|
|
|
Enthusiast Joined Dec 22, '06 From Columbia, MD Currently Offline Reputation: 13 (100%) |
yeah i took mine off and left it off
-------------------- 1995 GT::::Diffusing the Situation エキサイティングカーレーシングチーム! march 2010 COTM : 6GC feature 2014 : january 2015-2016-2018 COTM |
|
Jun 6, 2008 - 9:37 AM
|
|
|
Enthusiast Joined Oct 28, '06 From Orlando, FL Currently Offline Reputation: 0 (0%) |
sup ppl. just a quick question. i'm having this exact problem on my girls ST. is it possible to do this w/o unbolting the one side of the sub frame? i tried the left (timing belt side) mount thing but that didn't seem to work. also, is it possible to do this alone? i've been struggling with it for an hour and a half now and it seems nigh impossible to do one man style. if i do have to go sub frame route can anyone direct me to which bolts need to be removed? my lighting is limited and i can't see too well down there.
btw i'm trying to remove this one, got the new shiny sitting there waiting to be installed. This post has been edited by CelicaGTWolf: Jun 6, 2008 - 9:40 AM |
|
Jun 6, 2008 - 9:58 AM
|
|
|
Enthusiast Joined Dec 22, '06 From Columbia, MD Currently Offline Reputation: 13 (100%) |
YAAAAAY MY 1000th POST
it was a pain to put it in for mine. Lagos came over and helped. removed the exhaust hanger jig that lays behind the mount. basically what you have to do is to adjust the motor. jack it up under the oil pan and on the trans. you will see how the motor moves and if you either get more room when you jack it up or let it down. there are 4 bolts on either side of the subframe that we took out. 3 are in plain sight and the other is up high where the suspension is. we put the mount piece in place and then tried to slide the crossmember under it. and then align the bolts through the holes. oh and for a little more space, you can knock the bolts on the mount loose so they can move back a little, so u have that extra 1/4 inch of room now get a light. really. you will need one patience and help from a friend is highly advised. -------------------- 1995 GT::::Diffusing the Situation エキサイティングカーレーシングチーム! march 2010 COTM : 6GC feature 2014 : january 2015-2016-2018 COTM |
|
Jun 6, 2008 - 10:29 AM
|
|
|
Enthusiast Joined Oct 28, '06 From Orlando, FL Currently Offline Reputation: 0 (0%) |
ty much for the fast response. yea, i just tried again and i'm def gonna need an xtra pair of hands. moved the car into the light so i can see now....i know this will be worth it when all is said and done, but this rear mount has to be the most retarded design from toyota since the crappy cup holder placement.
|
|
Jun 6, 2008 - 10:41 AM
|
|
|
Enthusiast Joined Dec 22, '06 From Columbia, MD Currently Offline Reputation: 13 (100%) |
so you didnt get Kirk's inserts? those are what i have.
im off to work so i will get back to u later -------------------- 1995 GT::::Diffusing the Situation エキサイティングカーレーシングチーム! march 2010 COTM : 6GC feature 2014 : january 2015-2016-2018 COTM |
|
Jun 6, 2008 - 11:10 AM
|
|
|
Enthusiast Joined Aug 31, '02 From Philadelphia, PA Currently Offline Reputation: 8 (100%) |
Just unbolt the drivers side of the sub frame (huge metal section that goes from left to right). There are about 3-4 19mm bolts that hold it in place. Then just loosen the passengers side about half way. This should let the sub frame drop about a 1/2in or so and give you enough room. Label the bolts as you take them out too. This is all very simple, and it can be done as a one man job.
Once you drop the sub frame a little bit, put a jack under your trans or oil pan (with some wood on it for the oil pan) and jack the motor up/down to change the angle of the motor as you try to slide the mount in, on top of that crossmember. It IS possible to do this without dropping the sub frame, if you mange to find exactly the right angle. At least I was able to on my 3s. But with Tiga's 5s, it seemed next to impossible, without lowering the sub frame a bit. Once you get everything in, torque the subframe bolts to about 109tq with a torque wrench, and be really careful not to cross thread the bolts. If something is going in tight, stop. This post has been edited by lagos: Jun 6, 2008 - 11:11 AM -------------------- 15PSI - 30MPG - Megasquirt Tuned
|
|
Jun 6, 2008 - 3:50 PM
|
|
|
Enthusiast Joined Mar 22, '07 From Houston, TX Currently Offline Reputation: 4 (100%) |
what i did was kept the engine on the lift and got the rear mount on FIRST with the cross member loosely bolted to the front. it still took some maneuvering though. but i assume the ST engine is easier to work with.
-------------------- QUOTE "And, as always, your friendship, help, and dedication to the advancement of Texas Celica dominance is GREATLY appreciated. Thanks bro." -DEATH 1994 GT: V6 swap, 5speed E53 W/ LSD, All Power, now RED 1995 ST: SOLD @273k miles, Auto, all power, CarPC, White 1994 ST: Totaled, 5spd, all power, Red RIP 07/09/09 @ 241,810 1994 Lexus LS400: This is my new DD |
|
Jun 6, 2008 - 4:27 PM
|
|
|
Enthusiast Joined Oct 28, '06 From Orlando, FL Currently Offline Reputation: 0 (0%) |
thx for the help guys. finally got it completed. i ended up removing the the center crossmember completely thru some xtreme wiggling action. then it just became a trial and error game of raising and lowering the motor just enough to slide the crossmember back in with the mount already in place at a wierd angle. all in all completely worth the agony as the mount i removed was completely busted. it has so much more kick and pep now....well, for an ST anyway. thx to you all again for the help and kudos to tiga for the great pics to help me figure out how i was gonna tackle this. cheers!
|
|
1 User(s) are reading this topic (1 Guests and 0 Anonymous Users)
0 Members:
| Lo-Fi Version | Time is now: June 24th, 2026 - 8:36 AM |