![]() |
![]() ![]() |
![]() |
![]() |
|
![]() Enthusiast ![]() ![]() Joined Aug 12, '09 From Orange Beach, Alabama Currently Offline Reputation: 6 (100%) ![]() |
OK, so like it says I have put a lot of money into her and I have only had her a short time, so I will try to update you with what I have done already before I get to the good stuff....
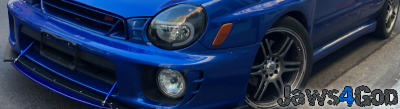
So the first thing was my stereo out of my old car... Alpine deck ![]() Memphis marine 8's in the doors ![]() Some MB Quart 6.5's in the rear, no pics... A Rockford Fosgate P3 12 in a custom box ![]() And everything was powered by a Earthquake 900 watt 5 channel amp with a Coustic XM3 crossover and 2, 1 farad Stinger caps, sorry for the ****ty pic, the bright blue LED's were messing with my camera... ![]() And a bad ass alarm which shall remain nameless, but I will say that it has keyless entry, a 2 way pager, remote start, and remote trunk ... Then a cold air intake... ![]() Then the header... ![]() Then full custom exhaust... ![]() ![]() ![]() ![]() ![]() Then TRD quick shift kit and Vincent Doggy arm rest cover, e-brake boot, and shift boot... ![]() Then blue gauges and clock... ![]() Then a new windshield, but I don't have any pics for that... Then tint... ![]() Rear disc conversion (not installed yet)... ![]() Then a new deck, the top of the line JVC KW-NX7000BT, it has everything, DVD, SD, HD radio, GPS, Bluetooth and Ipod, and you can program it to say whatever you want... ![]() ![]() And today we started on the fun stuff! First had to run 0 gauge wire to the back, the old 4 gauge wasn't going to do!!! ![]() Then Stinger roadkill sound deadening material all over... ![]() We are making a custom fiberglass enclosure to fit in the spare tire well... ![]() ![]() And it is going to house the new Memphis CM 12, which is the replacement for the Mojo 12... ![]() Its on the right, next to a normal sub... ![]() And the new Memphis Hybrid amp, the replacement for the big Memphis Belle... ![]() ![]() ![]() ![]() I can't wait!! This is top of the line equipment in a car that is done right by a Master Installer at my local car audio shop: Vibez performance and car audio! I will keep updating this as my car gets more and more s**t!!! This post has been edited by ChfNix: Nov 12, 2010 - 12:35 PM -------------------- Failing to prepare is preparing to fail!
|
![]() |
|
![]() Enthusiast ![]() ![]() ![]() Joined Jan 8, '09 From Netherlands Currently Offline Reputation: 54 (100%) ![]() |
You've done some really nice upgrades!
Were have you bought the header? |
![]() |
|
![]() Enthusiast ![]() ![]() Joined Aug 12, '09 From Orange Beach, Alabama Currently Offline Reputation: 6 (100%) ![]() |
You've done some really nice upgrades! Were have you bought the header? Thanks! I got it from 2Kracing.com... -------------------- Failing to prepare is preparing to fail!
|
![]() |
|
![]() Enthusiast ![]() ![]() ![]() ![]() ![]() Joined Mar 27, '04 Currently Offline Reputation: 14 (100%) ![]() |
sweet!
-------------------- ~Daniel~ No Longer Celica Owner.. moved on to a 03 WRX-EJ207
![]() |
![]() |
|
![]() Enthusiast ![]() ![]() Joined Aug 12, '09 From Orange Beach, Alabama Currently Offline Reputation: 6 (100%) ![]() |
Ok, so I got some more updates!!
First here is the box with the top being installed... ![]() Side view, check out the fiberglass! ![]() Before anyone asks, yes it is strong, my installer was jumping up and down on the fiberglass the other day!! ![]() Here is the crazy ass port that is 25" long in a box that is only 10" deep with 2.5 cubic feet of airspace!! ![]() ![]() Next test fitting the sub, notice the second battery on the side!! ![]() ![]() Next we coated the whole thing inside and out with rubberized undercoating to help with the sound... ![]() ![]() I mounted a voltage gauge that keeps track of the primary battery, and a bass control knob for the amp in the pocket... ![]() Excuse the dust, its been in the car audio shop for almost a week now... So right now I have the amp and sub hooked up with out the secondary battery or the capacitors and I have severe voltage issues!!! This is just temporary to see if the box sounds good, everything will be flush mounted and wrapped in black vinyl to make it look good!! ![]() More to come on Monday, along with more parts from fanboy95!! -------------------- Failing to prepare is preparing to fail!
|
![]() |
|
![]() Enthusiast ![]() ![]() ![]() ![]() ![]() Joined May 6, '05 From PA Currently Offline Reputation: 4 (100%) ![]() |
wow great project... spared no expense
-------------------- |
![]() |
|
![]() Enthusiast ![]() ![]() ![]() Joined Nov 18, '08 From Idaho Currently Offline Reputation: 1 (100%) ![]() |
wow man! awesome stuff! makes me pretty jealous! i wish i had some money ha
-------------------- A work in (extremely slow) progress
|
![]() |
|
![]() Enthusiast ![]() ![]() Joined Aug 12, '09 From Orange Beach, Alabama Currently Offline Reputation: 6 (100%) ![]() |
Ok, so the only thing I have gotten done was the pieces from Fanboy95, Rims and tires, front and rear Cusco strut braces, JDM tails, Wolfie308 third brake light, and 5th gen mirrors...
First the JDM tails, they are even more sexy in person!! ![]() Next the clear third brake light... ![]() Here are the rims, not my first choice, but they look better than the stock ones, and I got a good deal!!! ![]() ![]() And the Cusco front strut brace... ![]() ![]() More to come shortly, gotta get the mirrors painted, the rear disc conversion installed, and the vinyl flush panels installed in the rear... -------------------- Failing to prepare is preparing to fail!
|
![]() |
|
![]() Enthusiast ![]() ![]() ![]() ![]() ![]() Joined May 6, '05 From PA Currently Offline Reputation: 4 (100%) ![]() |
we have the same rims... ASA... and JDM tails
-------------------- |
![]() |
|
![]() Enthusiast ![]() ![]() Joined Jan 16, '09 From Cyprus Currently Offline Reputation: 10 (100%) ![]() |
you are crazy man!
will wait for more from you ![]() cheers -------------------- ![]() |
![]() |
|
![]() Enthusiast ![]() ![]() Joined Aug 12, '09 From Orange Beach, Alabama Currently Offline Reputation: 6 (100%) ![]() |
Well it's the slow season at work right now so I don't have any extra money to spend, hopefully more to come soon...
-------------------- Failing to prepare is preparing to fail!
|
![]() |
|
![]() Enthusiast ![]() ![]() Joined Aug 12, '09 From Orange Beach, Alabama Currently Offline Reputation: 6 (100%) ![]() |
Just got the custom blue and white climate control module from Pittfirefighter, can't wait to install it!!
-------------------- Failing to prepare is preparing to fail!
|
![]() |
|
![]() Enthusiast ![]() ![]() Joined Aug 12, '09 From Orange Beach, Alabama Currently Offline Reputation: 6 (100%) ![]() |
Ok, it's been a while but I got a lot of new stuff to add!
First the blue with white indicators CC unit from pittfirefighter. ![]() Then a dragon CC panel from bmj67. ![]() ![]() So now all my lights are blue: ![]() Next was a bunch of leds from superbrightleds.com. Gauge LED: ![]() Dome light: ![]() ![]() ![]() ![]() Glove box light: ![]() ![]() ![]() Hatch light: ![]() ![]() ![]() Reverse lights: ![]() ![]() ![]() License plate light: ![]() ![]() Third brake light: ![]() ![]() ![]() Removed amber lens from JDM tails: ![]() ![]() Sylvania Silverstar signals: ![]() Now for the rest of the stereo install. With the yellow top and capacitors hooked up: ![]() Now with flush panel wrapped in black vinyl to maintain the "stock" look: ![]() I'm really happy with it, all the corners and curves came out good! ![]() ![]() This post has been edited by ChfNix: Aug 19, 2010 - 10:06 PM -------------------- Failing to prepare is preparing to fail!
|
![]() |
|
![]() Enthusiast ![]() ![]() ![]() ![]() ![]() Joined Oct 7, '09 From Northern kentucky Currently Offline Reputation: 8 (90%) ![]() |
Holy **** that looks awesome
-------------------- 1996 Toyota Celica Project Mean Green
3RD Gen 3SGTE WRC Edition W/LSD E153 - Love BOOST <3 2001 Solar yellow Lexus IS300 2001 Dodge ram 1500 Off-road edition |
![]() |
|
![]() Enthusiast ![]() ![]() Joined Aug 12, '09 From Orange Beach, Alabama Currently Offline Reputation: 6 (100%) ![]() |
Holy **** that looks awesome Thanks! I actually like your car a lot also! I want to go for the GT-Four look with this car but your car inspired to do a white SS-III vert for my next project! -------------------- Failing to prepare is preparing to fail!
|
![]() |
|
![]() Enthusiast ![]() ![]() ![]() ![]() ![]() Joined Dec 26, '09 From Albuquerque, NM Currently Offline Reputation: 19 (100%) ![]() |
How did you install the 3rd brake light? I'm thinking of doing the same soon
-------------------- taking too long to mod since '09
June '12 COTM '95 AT200 |
![]() |
|
![]() Enthusiast ![]() ![]() Joined Aug 12, '09 From Orange Beach, Alabama Currently Offline Reputation: 6 (100%) ![]() |
How did you install the 3rd brake light? I'm thinking of doing the same soon Do you mean the led or the whole light assembly? -------------------- Failing to prepare is preparing to fail!
|
![]() |
|
![]() Enthusiast ![]() ![]() ![]() ![]() ![]() Joined Dec 26, '09 From Albuquerque, NM Currently Offline Reputation: 19 (100%) ![]() |
How did you install the 3rd brake light? I'm thinking of doing the same soon Do you mean the led or the whole light assembly? The whole light assembly. I'd like to do LED as well, but I'm not too experienced with electronics so I can't handle a whole lot. -------------------- taking too long to mod since '09
June '12 COTM '95 AT200 |
![]() |
|
![]() Enthusiast ![]() ![]() Joined Aug 12, '09 From Orange Beach, Alabama Currently Offline Reputation: 6 (100%) ![]() |
Its not hard, but I honestly don't remember, I got it about a year ago. I know you have to pop the plastic off from the underside of the hatch and remove some bolts or nuts. It's easy! As far as the led its just plug and play!
-------------------- Failing to prepare is preparing to fail!
|
![]() |
|
![]() Enthusiast ![]() ![]() ![]() ![]() ![]() Joined Dec 26, '09 From Albuquerque, NM Currently Offline Reputation: 19 (100%) ![]() |
Its not hard, but I honestly don't remember, I got it about a year ago. I know you have to pop the plastic off from the underside of the hatch and remove some bolts or nuts. It's easy! As far as the led its just plug and play! Sweet, thanks! -------------------- taking too long to mod since '09
June '12 COTM '95 AT200 |
![]() |
|
![]() Enthusiast ![]() ![]() Joined Aug 12, '09 From Orange Beach, Alabama Currently Offline Reputation: 6 (100%) ![]() |
How did you install the 3rd brake light? I'm thinking of doing the same soon Here, I took it out the other day so I took some pics, When I got my clear third brake lens it came from another members car so it was already installed onto the housing. First pull off the black plastic cover on the hatch. Next remove these bolts, I think they were 12mm. ![]() Here you can see the bolts, and the LED I used for my light. Once again it's just plug and play! ![]() Here you can see the other two bolts that were hiding behind the Roadkill. ![]() Take off the plate and you can see the two nuts holding the light assembly in place, I used a deep 10mm socket to get these off. ![]() Here is the lens assembly. ![]() It's really easy to do! -------------------- Failing to prepare is preparing to fail!
|
![]() |
|
![]() Enthusiast ![]() ![]() Joined Aug 12, '09 From Orange Beach, Alabama Currently Offline Reputation: 6 (100%) ![]() |
Ok, another update....
Fifth gen mirrors, JDM vent visors, moon roof visor, and Vince's hatch visor ![]() ![]() I had to paint the vent visors because I broke one when I was scraping the old tape off.... ![]() ![]() ![]() ![]() ![]() GT-Four rear strut brace ![]() ![]() TRD front strut brace ![]() Clear "puddle light" covers ![]() ![]() ![]() GT-Four floor mats This was when I first got them, I shampooed them and they look like new now! ![]() ![]() Found some black carpet at the junk yard! ![]() It was kinda faded so I bought some dye and made it black again! ![]() ![]() ![]() ![]() I guess I didn't take a pic of it completely finished.... ![]() I got some carpet padding to help cut down on road noise, I also got a bulk pack of Stinger Roadkill I'm putting down on the floor first... ![]() ![]() This post has been edited by ChfNix: Sep 12, 2010 - 1:52 PM -------------------- Failing to prepare is preparing to fail!
|
![]() |
|
![]() Enthusiast ![]() ![]() ![]() ![]() ![]() Joined Dec 26, '09 From Albuquerque, NM Currently Offline Reputation: 19 (100%) ![]() |
I love the clear courtesy lights, but they're just not that high on my list right now lol
-------------------- taking too long to mod since '09
June '12 COTM '95 AT200 |
![]() |
|
![]() Enthusiast ![]() ![]() Joined Aug 12, '09 From Orange Beach, Alabama Currently Offline Reputation: 6 (100%) ![]() |
I love the clear courtesy lights, but they're just not that high on my list right now lol I really like them, at night with the LEDs in there they are really bright! -------------------- Failing to prepare is preparing to fail!
|
![]() |
|
Enthusiast ![]() ![]() ![]() ![]() ![]() Joined Jun 18, '09 From Orlando Currently Offline Reputation: 8 (100%) ![]() |
You do AWESOME mods. Good for you guy. Clean, sleek, OEM. Drop that sucker and the car won't need anything else except some ground effects.
-------------------- '97 ST \ Eibach \ KYB \ Kenwood \ Alpine \ Cusco \ OEM+ [sold 10/18]
'93 MX-5 LE |
![]() |
|
![]() Enthusiast ![]() ![]() Joined Aug 12, '09 From Orange Beach, Alabama Currently Offline Reputation: 6 (100%) ![]() |
You do AWESOME mods. Good for you guy. Clean, sleek, OEM. Drop that sucker and the car won't need anything else except some ground effects. Thanks! Both of those are on my list and Upscale just got some more of the Meagans in so hopefully that will be happening in the near future! -------------------- Failing to prepare is preparing to fail!
|
![]() |
|
![]() Enthusiast ![]() ![]() ![]() Joined Dec 9, '08 From Blainville Currently Offline Reputation: 4 (100%) ![]() |
Where did you get all those LED lights for your license plate, cluster and dash controls?
|
![]() |
|
![]() Enthusiast ![]() ![]() Joined Aug 12, '09 From Orange Beach, Alabama Currently Offline Reputation: 6 (100%) ![]() |
Where did you get all those LED lights for your license plate, cluster and dash controls? Superbrightleds.com -------------------- Failing to prepare is preparing to fail!
|
![]() |
|
![]() Enthusiast ![]() ![]() ![]() Joined Dec 9, '08 From Blainville Currently Offline Reputation: 4 (100%) ![]() |
Where did you get all those LED lights for your license plate, cluster and dash controls? Superbrightleds.com Thanks! Will surely think about getting some! Btw, where did you get your hand brake boot? This post has been edited by dudeofchaos: Sep 15, 2010 - 10:08 PM |
![]() |
|
![]() Enthusiast ![]() ![]() ![]() Joined May 29, '09 From Lake Ariel, PA Currently Offline Reputation: 4 (100%) ![]() |
you should do a write up on how you did your speaker box and how you got everything to fit so well
-------------------- ![]() Representing the Convertible Crew since 2008 |
![]() |
|
![]() Enthusiast ![]() ![]() Joined Aug 12, '09 From Orange Beach, Alabama Currently Offline Reputation: 6 (100%) ![]() |
Thanks! Will surely think about getting some! Btw, where did you get your hand brake boot? I got it from vincent_doggy he is a member on here who sells great products for our cars!! you should do a write up on how you did your speaker box and how you got everything to fit so well It was pretty complicated, it took me and a whole shop of master installers a month to get it just right! (Of course mine wasn't the only project going on at the time.) Basically we cut out the mount for the spare tire and pounded it flat, lined the whole area with foil so the fiberglass wouldn't stick to the car but would allow us to get the most of the air space, lay down the glass, then attach the rest of the box to the top of the glass, then built places to mount the amp, battery, and capacitors, then built a false floor to hide the wires, battery and capacitors, first we used cardboard to make a mock up of the flush panel, then used that to make one out of Masonite, wrapped it in black vinyl, and installed the flush panel, the end! (Not as easy as this sounds!!!) This post has been edited by ChfNix: Sep 19, 2010 - 3:40 PM -------------------- Failing to prepare is preparing to fail!
|
![]() |
|
![]() Enthusiast ![]() ![]() Joined Aug 12, '09 From Orange Beach, Alabama Currently Offline Reputation: 6 (100%) ![]() |
Ok, so the week of October second I had 3 days off and I was ready to Install the parts I have accumulated over the past few months.
First a new fender... ![]() ![]() ![]() ![]() Much Better! Next the sound deadening project! This was a lot of fun, I have never stripped a car of the whole interior and actually put it back in, a great learning experience! First pulling everything out. ![]() ![]() ![]() ![]() ![]() Getting rid of the rattle around the license plate bezel. ![]() ![]() Laying down the Stinger Roadkill first. ![]() ![]() ![]() ![]() ![]() ![]() ![]() I didn't get many pics of putting the carpet pad down under the black carpet, but I cut it to size and used 3M spray adhesive to hold it in place. ![]() Then came the black carpet and putting it all back together. ![]() ![]() ![]() ![]() ![]() ![]() ![]() ![]() I also added some Varad HLWX LED color changing tubes, under the dash, under the seats, next to the moon roof, and in the hatch. ![]() ![]() ![]() ![]() ![]() I also added the light up ring around the ignition, here is the plug that was under the dash that you plug it into.Its the one on the right, the one on the left is for the factory security system. ![]() ![]() I took out the Cusco strut braces and added the TRD front strut brace and a GT-Four rear strut brace. ![]() The emblem that was on it was trashed so I ordered a new one from E-bay... ![]() ![]() ![]() I got the clear parking lights and side markers from E-Bay, this is what you get, new housings, bulbs, sockets, seals for the side markers, and screws. ![]() Next, pics with the lights off, in the daytime. ![]() ![]() Daytime, lights on. ![]() ![]() ![]() Night time, lights on, flash on. ![]() Night time, lights on, flash off. ![]() ![]() ![]() I think their totally worth the $85 for the side markers and turn signals!!! I think that's all for now...... This post has been edited by ChfNix: Nov 7, 2010 - 3:45 PM -------------------- Failing to prepare is preparing to fail!
|
![]() |
|
![]() Enthusiast ![]() ![]() ![]() ![]() ![]() Joined Dec 26, '09 From Albuquerque, NM Currently Offline Reputation: 19 (100%) ![]() |
Definitely worth the money!! I love the look of them. Great job on the sound deadening!
-------------------- taking too long to mod since '09
June '12 COTM '95 AT200 |
![]() |
|
![]() Enthusiast ![]() ![]() Joined Aug 12, '09 From Orange Beach, Alabama Currently Offline Reputation: 6 (100%) ![]() |
Definitely worth the money!! I love the look of them. Great job on the sound deadening! Thanks! I wish they were just clear and not the "diamond cut" but they look so much better than the amber ones! -------------------- Failing to prepare is preparing to fail!
|
![]() |
|
Enthusiast ![]() Joined Jun 23, '10 From Pawtucket, RI Currently Offline Reputation: 2 (100%) ![]() |
damn man, that trunk is pure sex!
-------------------- I only want to be faster than the guy next to me.
|
![]() |
|
![]() Enthusiast ![]() ![]() Joined Jan 16, '09 From Cyprus Currently Offline Reputation: 10 (100%) ![]() |
Definitely worth the money!! I love the look of them. Great job on the sound deadening! Thanks! I wish they were just clear and not the "diamond cut" but they look so much better than the amber ones! Mate,the fron markers look so nice but also go for the philips sylver vision chrome bulbs for the blinkers and you will have totaly clear view from them! they are a little expensive but the bright is the same like original amber one but with chrome look ![]() cheers Dimitri -------------------- ![]() |
![]() |
|
![]() Enthusiast ![]() ![]() Joined Aug 12, '09 From Orange Beach, Alabama Currently Offline Reputation: 6 (100%) ![]() |
Ya, I think I'm gonna do that but the closest parts store is on the mainland and its like 30 miles away so I haven't gotten around to it yet.....
Edit: Also do they make a Silverstar in a 194 bulb for the side marker or did you guys use something else? This post has been edited by ChfNix: Nov 10, 2010 - 10:15 AM -------------------- Failing to prepare is preparing to fail!
|
![]() |
|
![]() Enthusiast ![]() ![]() Joined Jan 16, '09 From Cyprus Currently Offline Reputation: 10 (100%) ![]() |
Ya, I think I'm gonna do that but the closest parts store is on the mainland and its like 30 miles away so I haven't gotten around to it yet..... Edit: Also do they make a Silverstar in a 194 bulb for the side marker or did you guys use something else? I don't know about philips but these guys make ![]() http://www.stealthauto.com/Products/Stealt...BS-BY-PART.aspx cheers Dimitri p.s. also there are many on e-bay but the quality is...i mean the bulbs are chrome but when the bulb blink the light is so limited...so find the quality one ![]() -------------------- ![]() |
![]() |
|
![]() Enthusiast ![]() ![]() Joined Aug 12, '09 From Orange Beach, Alabama Currently Offline Reputation: 6 (100%) ![]() |
http://www.stealthauto.com/Products/Stealt...BS-BY-PART.aspx cheers Dimitri p.s. also there are many on e-bay but the quality is...i mean the bulbs are chrome but when the bulb blink the light is so limited...so find the quality one ![]() Ya, I've heard mixed reviews about those, plus their really expensive! $26 for a pair! And the 194 bulbs are the same price as the 1157&1156 bulbs, and I like to have a back-up set in case they burn out so that means I would have to spend over $100 to get what I want, pretty pricey!!! -------------------- Failing to prepare is preparing to fail!
|
![]() ![]() |
Lo-Fi Version | Time is now: August 20th, 2025 - 8:09 AM |