  |

 Jun 30, 2013 - 9:46 PM Jun 30, 2013 - 9:46 PM
|
 
|
|
Enthusiast  Joined Sep 23, '12 From Australia Currently Offline Reputation: 4 (100%) |
Okay so I bought a spree complete dash kit, and it finally arrived and I am attempting to install it.
I have got the climate control out, sort of... The two control wires are connected at the rear but not to the car allowing me to slide the unit out. I can only see one of the light bulbs which I assume is the top row buttons on the unit. I wasn't given any instructions for this kit, despite clearly being told that I was going to. I also do not know which LED goes where... Any help would be appreciated 
--------------------  ------------------------------| White '94 Celica | Bought 11/05/12 | Sold 12/05/15 |------------------------------ |

|
Jun 30, 2013 - 9:55 PM
|
|
|
Enthusiast Joined Mar 8, '12 From Hanford/Fresno, Ca Currently Offline Reputation: 20 (100%) |
What's funny was I bought the complete kit. Attempted to replace it all but ended up only replacing the gauge lights because everything else was a pain in the ass. The clock was weird, the climate wouldn't come out, ignitor plug light didn't want to come out, and the key ring was hard to get to. Lol.
-------------------- |
|
Jun 30, 2013 - 9:59 PM
|
|
|
Enthusiast Joined Sep 23, '12 From Australia Currently Offline Reputation: 4 (100%) |
QUOTE (ILoveMySilly97 @ Jun 30, 2013 - 9:55 PM)  What's funny was I bought the complete kit. Attempted to replace it all but ended up only replacing the gauge lights because everything else was a pain in the ass. The clock was weird, the climate wouldn't come out, ignitor plug light didn't want to come out, and the key ring was hard to get to. Lol. Haha Well I have unscrewed the climate control and have it inside now, found the other two lights... But now to try and get them in >.< -------------------- ------------------------------| White '94 Celica | Bought 11/05/12 | Sold 12/05/15 |------------------------------ |
|
Jun 30, 2013 - 10:23 PM
|
|
|
Enthusiast Joined Mar 6, '12 From Brisbane, Australia Currently Offline Reputation: 6 (100%) |
Yeah, you need to unclip the cables in the drivers side footwell (RHD) to pull it out. Then it is still a bit of a pin and fiddling around with some long nose pliers but I am thinking about changing colour scheme again and wouldn't hesitate to pull it out again.... It isn't that hard 
--------------------  SOLD :( 1997 ST204 Celica ZR -----> See it here on 6GC! 2013 October Celica of the Month XD Now: '00 NB8B Mazda MX5 -----> See it here in off topic! |
|
Jun 30, 2013 - 10:51 PM
|
|
|
Enthusiast Joined Sep 23, '12 From Australia Currently Offline Reputation: 4 (100%) |
QUOTE (JoshuaM @ Jun 30, 2013 - 10:23 PM) Yeah, you need to unclip the cables in the drivers side footwell (RHD) to pull it out. Then it is still a bit of a pin and fiddling around with some long nose pliers but I am thinking about changing colour scheme again and wouldn't hesitate to pull it out again.... It isn't that hard I got it out And have all the LEDs in place and working  Next to try and fix my Cigarette Lighter Ring and then the Ignition Ring 
-------------------- ------------------------------| White '94 Celica | Bought 11/05/12 | Sold 12/05/15 |------------------------------ |
|
Jul 1, 2013 - 1:10 AM
|
|
 Enthusiast Joined Apr 12, '13 Currently Offline Reputation: 53 (100%) |
Hey, can you post pictures(the kit and the process as a whole), if you don't mind. Or it's too late?

|
|
Jul 1, 2013 - 1:14 AM
|
|
|
Enthusiast Joined Sep 23, '12 From Australia Currently Offline Reputation: 4 (100%) |
QUOTE (The_enD @ Jul 1, 2013 - 1:10 AM) Hey, can you post pictures(the kit and the process as a whole), if you don't mind. Or it's too late? I already finished, but I can easily get some photos when I get a chance if you want... This is just for the Climate Control Back-lighting not the button lights... -------------------- ------------------------------| White '94 Celica | Bought 11/05/12 | Sold 12/05/15 |------------------------------ |
|
Jul 1, 2013 - 1:26 AM
|
|
|
Enthusiast Joined Apr 12, '13 Currently Offline Reputation: 53 (100%) |
I'll be doing to whole process myself soon and I am sure there are other threads with info, but some more is never bad.
|
|
Jul 1, 2013 - 1:44 AM
|
|
|
Enthusiast Joined Sep 23, '12 From Australia Currently Offline Reputation: 4 (100%) |
QUOTE (The_enD @ Jul 1, 2013 - 1:26 AM) I'll be doing to whole process myself soon and I am sure there are other threads with info, but some more is never bad. I'll walk you through the process now, and add some photos later (If I get a chance) Basically I followed this: Tools Used: Long Nose Pliers Flat Head Jewelers Screwdriver Phillips Head Screwdriver to remove Trim Screws. Panel Removal Tools (Optional) LEDs Used: x3 8mm Neo Wedge (I THINK these are what they are, I may be wrong) Method: 1) Pop the hood and unclip the CC Control Wire from the firewall and then push the hook out of the pin. (Use long nose pliers) 2) In the drivers side near your feet (For me it was on the left hand side), there is another control wire, detach it. (Everyone was posting photos of a black and blue control wire, but I had black and white >.<) 3) Get to work removing the centre panel, easy to do this. Unclip the shift surround, unscrew the screws and remove the large centre panel. 4) Unscrew the CC unit, and slowly bring it forward. Remove the two Wire Harnesses from the rear. 5) Unscrew gold/copper coloured screws: 3 screws on top and 3 on the bottom and then remove the heat knob and detach the rear part (this will allow you to have the CC out of the car, and the Contol Wires still in the car. 6) On the rear of the CC unit, there are 3 twist sockets with little bulbs with green condoms. Untwist ONE using long nose pliers. It is very important you do one at a time or you may get confused about which has been done, and how to get them back in. 7) using a flat head jewelers screwdriver (or any small flat head) unclip the feet of the bulb from the twist socket, and then pull the bulb up (It may be easier to remove the condom fist) 8) Remove the SMD LED from its plastic surround and feed the feet through the twist socket following the same pattern as the OEM bulbs, leave a bit of slack in the top of the SMD feet so that you can angle it into the socket, the SMD I had was slightly too large, but angling it in worked 9) Re-twist in the new SMD socket, and then go to the car, plug the Harnesses Back in and make sure the LED works. If not, untwist it and reverse the polarity. If it still doesn't work, you may have damaged the LED (Very Easy to do by accident). 10) Repeat for the other two lights and viola! It is now LED back lit. 11) Re-insert the CC unit and make sure the Control Wires are alright and still in the correct place. Then attach them. 12) Screw the CC unit back in and then TEST the heat knob and fan speed knob, if they are hard to turn or impossible to turn, you have to redo the Control Wires as they are not in the correct place. To replace the Green Coloured Button LEDs I believe that you have to further disasemble the CC unit and actually solder on new LEDs... I didn't attempt this yet, but I may soon since I have the LEDs laying around from my Window Switch Blue LED Conversion. EDIT: Also give yourself around 2-4 hours to do this. Even though it is very simple, it is daunting the first time and you must be very patient when reinserting the new LED twist socket. Removing the trim and the CC unit took me 30mins; fitting the LEDs too me 5mins each socket; but, reinserting them took a good 30mins for the first one and around 20mins each for the other two If you run into problems this time may be blown out. I also too a lot of breaks as I am generally an impatient person and get pissed at the car very easily; when that happened I walked away and got a coffee inside, then came back when calm. Including the breaks, the whole process took me 4 hours total. This post has been edited by rentaspace: Jul 1, 2013 - 1:50 AM -------------------- ------------------------------| White '94 Celica | Bought 11/05/12 | Sold 12/05/15 |------------------------------ |
|
Jul 1, 2013 - 1:55 AM
|
|
|
Enthusiast Joined Apr 12, '13 Currently Offline Reputation: 53 (100%) |
Thanks you!
I'll be doing the speedo and the whole dash, every single light will be changed to white. But first I have to order all the different bulbs and LEDs. I'll start lurking around to see in which place goes what type of bulb socket. |
|
Jul 1, 2013 - 2:02 AM
|
|
|
Enthusiast Joined Sep 23, '12 From Australia Currently Offline Reputation: 4 (100%) |
QUOTE (The_enD @ Jul 1, 2013 - 1:55 AM) Thanks you! I'll be doing the speedo and the whole dash, every single light will be changed to white. But first I have to order all the different bulbs and LEDs. I'll start lurking around to see in which place goes what type of bulb socket. Well behind the dash there is 3 T10 bulbs for the main Back lighting. And then all the little lights for the Check Engine/Oil/Fuel ETC are T5 The Passenger Luggage Compartment and the Asktray are also both T5 LEDs, I got the kind where there are 3 small LEDs that can be split, this allows you to disperse the light in the direction needed for the Asktray and Luggage Compartment. Here is a guide I made when I first Joined: 7-Step LED Guage Conversion I have also done the Power Window Switch to blue, that involves removing the switch, cutting the Green LED and then all I did was solder on a blue LED Easy Stuff
This post has been edited by rentaspace: Jul 1, 2013 - 2:07 AM -------------------- ------------------------------| White '94 Celica | Bought 11/05/12 | Sold 12/05/15 |------------------------------ |
|
Jul 1, 2013 - 2:16 AM
|
|
|
Enthusiast Joined Apr 12, '13 Currently Offline Reputation: 53 (100%) |
Hijacked your thread lol
Power window switch is not that noticeable for me to switch up. Maybe in the future tho. What type of bulbs did you exactly use on your gauges and is the light evenly spaced out with no low/high spots? http://www.ebay.co.uk/sch/i.html?_trksid=p...0&_from=R40 |
|
Jul 1, 2013 - 2:25 AM
|
|
|
Enthusiast Joined Sep 23, '12 From Australia Currently Offline Reputation: 4 (100%) |
QUOTE (The_enD @ Jul 1, 2013 - 3:16 AM) Hijacked your thread lol Power window switch is not that noticeable for me to switch up. Maybe in the future tho. What type of bulbs did you exactly use on your gauges and is the light evenly spaced out with no low/high spots? http://www.ebay.co.uk/sch/i.html?_trksid=p...0&_from=R40 I have used both: 5SMD 4SMD Flat The flat ones had a dark bit in the top of the cluster. The 5SMD linked ones are hard to fit properly, and I actually broke one of the clear plastic light guides inside the cluster inserting the LED... I have also had a few LEDs of each die on me... They really do not like any Voltage Fluctuation, so once in, start the car before turning the lights on and turn lights off before turning car off. If I had to choose, I would say use the 5SMD style (That's what Spree Uses). Look around and you can get them really cheap; the guy trying to get £52.99 is just ripping people off... -------------------- ------------------------------| White '94 Celica | Bought 11/05/12 | Sold 12/05/15 |------------------------------ |
|
Jul 1, 2013 - 2:40 AM
|
|
|
Enthusiast Joined Apr 12, '13 Currently Offline Reputation: 53 (100%) |
Yeah, it makes sense what you are saying, the flat ones look to have a direction they lit up and the 5SMD ones seem to disperse it all around them.
Would you say it was poor quality build that was the cause of breaking and lights burning off? I have this idea in my head to black out the gauge's glass so when the car is turned off you can't see a thing. Let's hope the white ones will be strong enough to see through once lit up. I'll look locally or within my country. |
|
Jul 1, 2013 - 2:52 AM
|
|
|
Enthusiast Joined Sep 23, '12 From Australia Currently Offline Reputation: 4 (100%) |
QUOTE (The_enD @ Jul 1, 2013 - 3:40 AM) Yeah, it makes sense what you are saying, the flat ones look to have a direction they lit up and the 5SMD ones seem to disperse it all around them. Would you say it was poor quality build that was the cause of breaking and lights burning off? I have this idea in my head to black out the gauge's glass so when the car is turned off you can't see a thing. Let's hope the white ones will be strong enough to see through once lit up. I'll look locally or within my country. Honestly I think it is voltage fluctuations that cause the issue with them... But back to my install: the LEDs light up the two control knobs very well, but the AC/ECON switch is almost invisible, and the air selection buttons are also very dim
-------------------- ------------------------------| White '94 Celica | Bought 11/05/12 | Sold 12/05/15 |------------------------------ |
|
Jul 1, 2013 - 3:02 AM
|
|
|
Enthusiast Joined Sep 23, '12 From Australia Currently Offline Reputation: 4 (100%) |
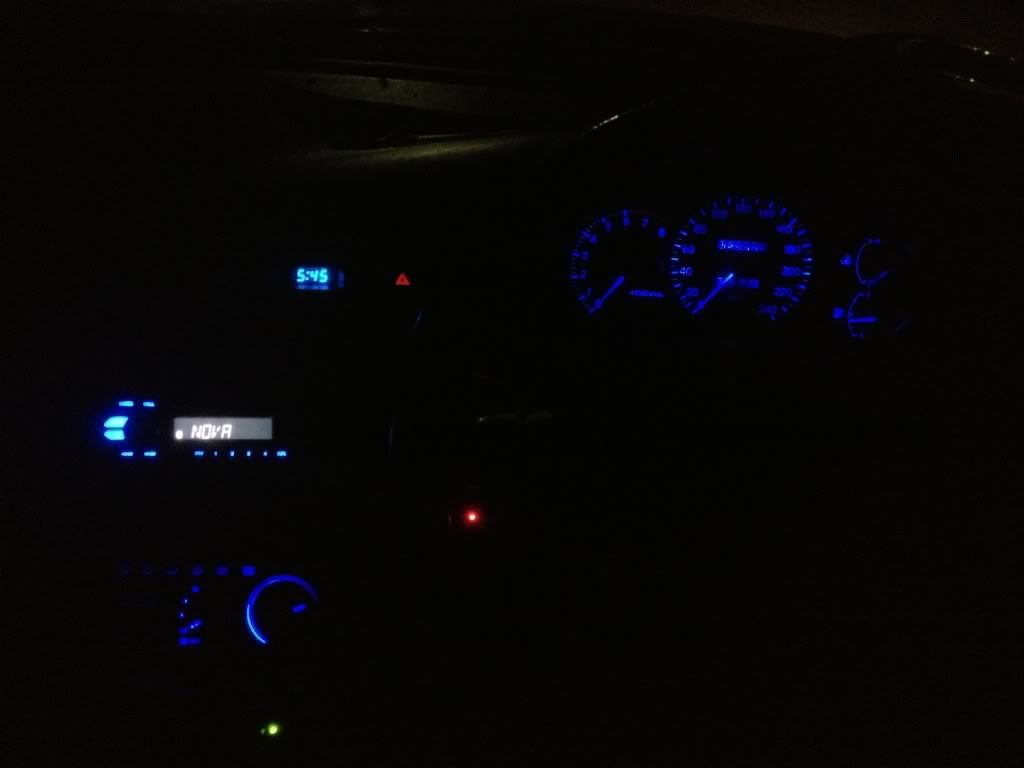 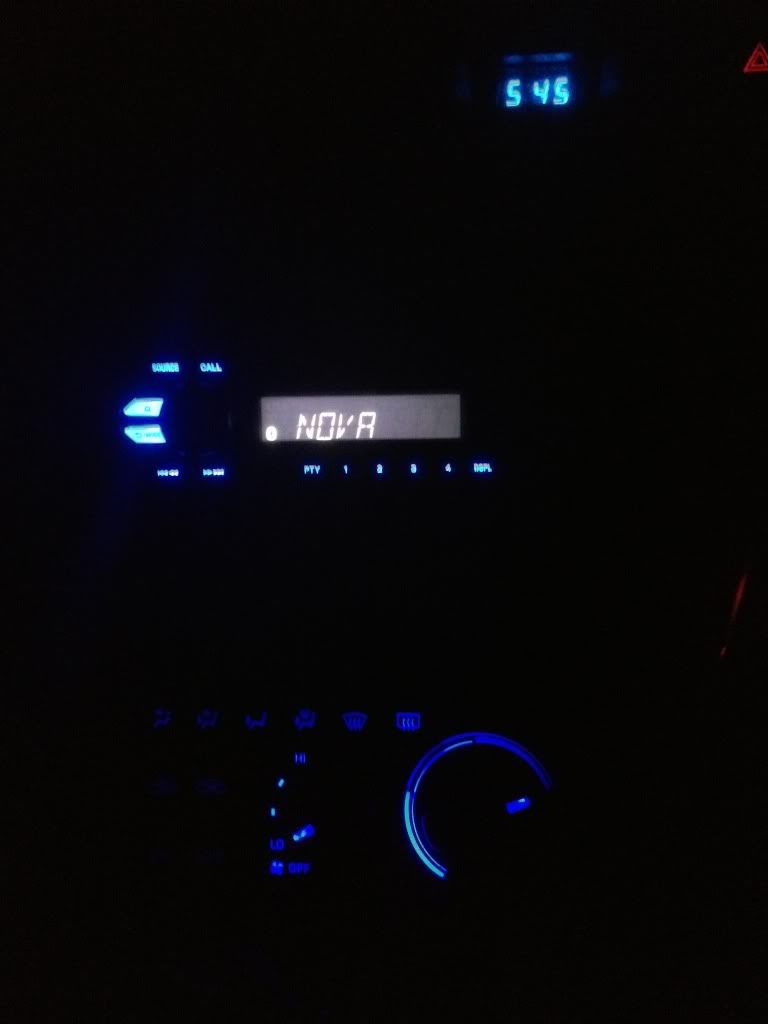 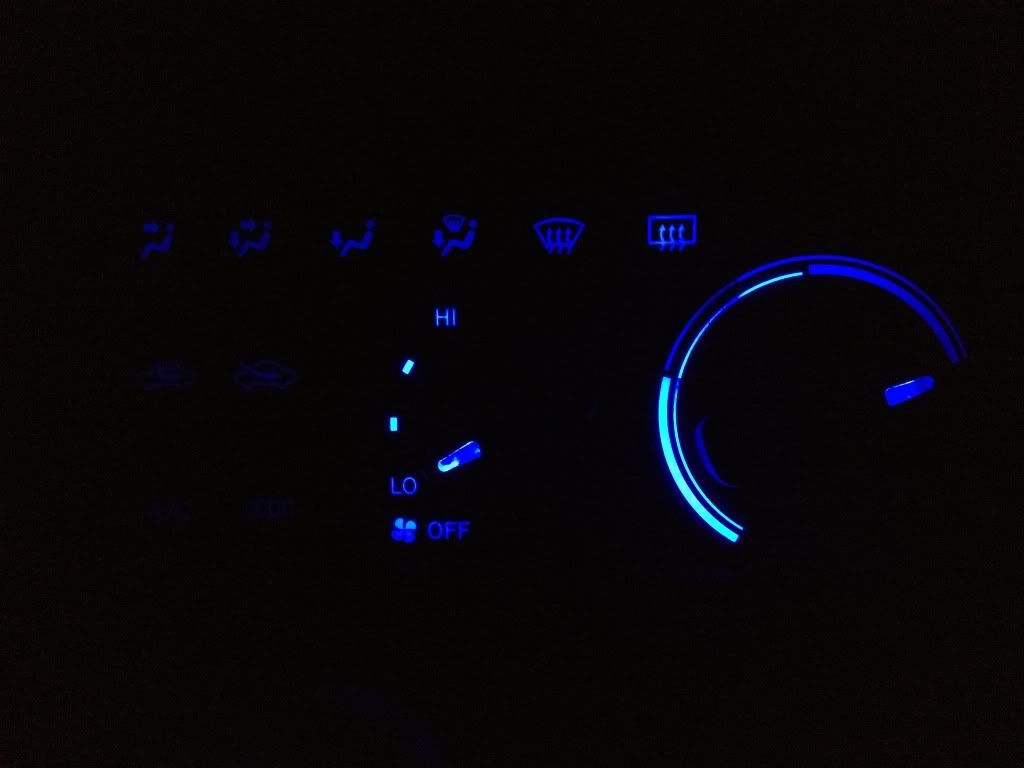 As you can see the light isn't being dispersed well don't know what to do about this
This post has been edited by rentaspace: Jul 1, 2013 - 3:22 AM -------------------- ------------------------------| White '94 Celica | Bought 11/05/12 | Sold 12/05/15 |------------------------------ |
|
Jul 1, 2013 - 3:14 AM
|
|
|
Enthusiast Joined Apr 12, '13 Currently Offline Reputation: 53 (100%) |
Isn't there an individual LED for each button that needs to be changed?
Seems like the button's light is "left over" from the rotating switches LEDs. What happens when you click on the buttons, originally it will lit up green/yellow only when pressed? |
|
Jul 1, 2013 - 3:22 AM
|
|
|
Enthusiast Joined Sep 23, '12 From Australia Currently Offline Reputation: 4 (100%) |
QUOTE (The_enD @ Jul 1, 2013 - 3:14 AM) Isn't there an individual LED for each button that needs to be changed? Seems like the button's light is "left over" from the rotating switches LEDs. What happens when you click on the buttons, originally it will lit up green/yellow only when pressed? The individual LED in each light is a green or orange LED, and that only indicates whether that selection is selected or not I might have to go back in and adjust the angle on the LED closest to that side
-------------------- ------------------------------| White '94 Celica | Bought 11/05/12 | Sold 12/05/15 |------------------------------ |
|
Jul 1, 2013 - 8:29 AM
|
|
|
Enthusiast Joined Mar 15, '07 From Tennessee Currently Offline Reputation: 52 (100%) |
it wont disperse well, trust me.. ive tried, leave it like that... the plastic gadget inside wont disperse led light
-------------------- Learned a lot in 10 years... I hardly log in anymore, last login Today Sept 6 2019, and I was forced just to clarify a post. LOL
If you PM me and I dont respond, dont fret or cry. Im alive, better post your questions in the thread below, maybe I log back in 2grfe Swapped... Why I chose the 2GR, before you ask read here... A great civilization is not conquered from without until it has destroyed itself from within. @llamaraxing in Instagram is the best way to find me. I hardly log here anymore. |
|
Jul 1, 2013 - 6:24 PM
|
|
|
Enthusiast Joined Sep 23, '12 From Australia Currently Offline Reputation: 4 (100%) |
QUOTE (njccmd2002 @ Jul 1, 2013 - 9:29 AM) it wont disperse well, trust me.. ive tried, leave it like that... the plastic gadget inside wont disperse led light Damn that's disappointing
-------------------- ------------------------------| White '94 Celica | Bought 11/05/12 | Sold 12/05/15 |------------------------------ |
|
Jul 1, 2013 - 8:01 PM
|
|
|
Enthusiast Joined Aug 2, '05 From Guam Currently Offline Reputation: 15 (100%) |
ive never done it the way everyone does it here, i just remove some screws in the panels around the CC, then remove the cables from the inside (never at firewall), thats it.
-------------------- 94 Celica GT
|Toyota OEM Japan|Toyota Racing Development|Tom's|Competition Clutch|5Zigen|Apexi| |Laille/Beatrush|Magnecor|Denso|Royal Purple|Optima|PIAA|PW JDM|Megan Racing|Nitto| |Work|Greddy|Samco|Project Mu|H&R|Gates|Moog|Rota|Yokohama|Epman|1320|Upgr8 04 Celica GT |Toyota OEM Japan|Toyota Racing Development|Tein|BC Racing|Greddy| |
|
Jul 1, 2013 - 9:16 PM
|
|
 Moderator Joined Nov 5, '07 From New Zealand Currently Offline Reputation: 3 (100%) |
it gets trickier with the actual climate control aswell as requires more coverage.
-------------------- |
|
Jul 1, 2013 - 10:21 PM
|
|
|
Enthusiast Joined Sep 23, '12 From Australia Currently Offline Reputation: 4 (100%) |
QUOTE (Rusty @ Jul 1, 2013 - 10:16 PM) it gets trickier with the actual climate control aswell as requires more coverage. Yeah, I don't know how to make more spread Maybe the three prong LEDs will be more directional -------------------- ------------------------------| White '94 Celica | Bought 11/05/12 | Sold 12/05/15 |------------------------------ |
|
Jul 2, 2013 - 5:15 AM
|
|
|
Enthusiast Joined Apr 12, '13 Currently Offline Reputation: 53 (100%) |
Renta/Rusty, what luminous flux are your LED bulbs? And are you happy with the how bright it is under the specific knob they are under(direct, not dispersed light)?
I am looking at different ones and they start from 8 and go to 50lm, wondering which will suffice. Edit : also, which T5 bulb type did you choose, single LED, single SMD LED, multiple SMD, etc? This post has been edited by The_enD: Jul 2, 2013 - 6:17 AM |
|
Jul 2, 2013 - 9:00 PM
|
|
|
Enthusiast Joined Sep 23, '12 From Australia Currently Offline Reputation: 4 (100%) |
QUOTE (The_enD @ Jul 2, 2013 - 6:15 AM) Renta/Rusty, what luminous flux are your LED bulbs? And are you happy with the how bright it is under the specific knob they are under(direct, not dispersed light)? I am looking at different ones and they start from 8 and go to 50lm, wondering which will suffice. Edit : also, which T5 bulb type did you choose, single LED, single SMD LED, multiple SMD, etc? For the AC unit I used the single SMD LED type, which is what Spree sent me... In my guage I originally I used the Dome type single LED bulb... But they quickly burnt out and started flickering... I have no idea on their luminous flux though... I went back to incandescent bulbs for the majority of gauge since they failed, but in my turn indicator lights I have 3LED split type bulbs which are pink, the pink and green together make a blue for the turn signals. -------------------- ------------------------------| White '94 Celica | Bought 11/05/12 | Sold 12/05/15 |------------------------------ |
|
Jul 3, 2013 - 12:30 AM
|
|
|
Enthusiast Joined Oct 23, '08 Currently Offline Reputation: 24 (100%) |
Only way to get it bright and even is to solder individual leds under each button like I and others have done in the past. It's also the only way to change the indicator colors.
|
|
Jul 3, 2013 - 1:05 AM
|
|
|
Enthusiast Joined Apr 12, '13 Currently Offline Reputation: 53 (100%) |
QUOTE (bmj67 @ Jul 3, 2013 - 8:30 AM) Only way to get it bright and even is to solder individual leds under each button like I and others have done in the past. It's also the only way to change the indicator colors. I don't know if this was a reply on my question, but sorry for not being clear. My question was towards the three T5 bulbs that don't need soldering, under the temperature and fan speed knobs/rotating switches. |
|
Jul 3, 2013 - 2:50 AM
|
|
|
Enthusiast Joined Sep 23, '12 From Australia Currently Offline Reputation: 4 (100%) |
QUOTE (The_enD @ Jul 3, 2013 - 2:05 AM) QUOTE (bmj67 @ Jul 3, 2013 - 8:30 AM) Only way to get it bright and even is to solder individual leds under each button like I and others have done in the past. It's also the only way to change the indicator colors. I don't know if this was a reply on my question, but sorry for not being clear. My question was towards the three T5 bulbs that don't need soldering, under the temperature and fan speed knobs/rotating switches. Mine are all single SMD LED, I'll post a photo soon. Try the split type one: Split T5 LED Not sure how they will be, but they should have a lot more spread than a single LED -------------------- ------------------------------| White '94 Celica | Bought 11/05/12 | Sold 12/05/15 |------------------------------ |
|
Jul 3, 2013 - 4:24 AM
|
|
|
Enthusiast Joined Apr 12, '13 Currently Offline Reputation: 53 (100%) |
|
|
Jul 3, 2013 - 5:12 AM
|
|
|
Moderator Joined Nov 5, '07 From New Zealand Currently Offline Reputation: 3 (100%) |
I'm using the Spree kit aswell, I'm happy with the brightness. However it is tricky to get them lined up to get the coverage, and also limited by space and movement.
-------------------- |
|
Jul 4, 2013 - 11:01 PM
|
|
|
Enthusiast Joined Aug 2, '05 From Guam Currently Offline Reputation: 15 (100%) |
I had pitfire solder them all in from the inside, and coverage is awesome, very even
-------------------- 94 Celica GT
|Toyota OEM Japan|Toyota Racing Development|Tom's|Competition Clutch|5Zigen|Apexi| |Laille/Beatrush|Magnecor|Denso|Royal Purple|Optima|PIAA|PW JDM|Megan Racing|Nitto| |Work|Greddy|Samco|Project Mu|H&R|Gates|Moog|Rota|Yokohama|Epman|1320|Upgr8 04 Celica GT |Toyota OEM Japan|Toyota Racing Development|Tein|BC Racing|Greddy| |
|
Jul 5, 2013 - 12:11 AM
|
|
|
Enthusiast Joined Oct 23, '08 Currently Offline Reputation: 24 (100%) |
QUOTE (trdproven @ Jul 5, 2013 - 12:01 AM) I had pitfire solder them all in from the inside, and coverage is awesome, very even I did them the same way myself. And I made an array of red and blue for under the temp knob so that the color shifts when I turn the knob. |
|
Jul 6, 2013 - 2:28 AM
|
|
|
Enthusiast Joined Sep 23, '12 From Australia Currently Offline Reputation: 4 (100%) |
QUOTE (bmj67 @ Jul 5, 2013 - 12:11 AM) QUOTE (trdproven @ Jul 5, 2013 - 12:01 AM) I had pitfire solder them all in from the inside, and coverage is awesome, very even I did them the same way myself. And I made an array of red and blue for under the temp knob so that the color shifts when I turn the knob. I wouldn't be able to do it, I am terrible at electrical work
-------------------- ------------------------------| White '94 Celica | Bought 11/05/12 | Sold 12/05/15 |------------------------------ |
|
1 User(s) are reading this topic (1 Guests and 0 Anonymous Users)
0 Members:
| Lo-Fi Version | Time is now: May 16th, 2026 - 8:58 AM |