
 Oct 27, 2009 - 4:28 AM Oct 27, 2009 - 4:28 AM
|
 
|
 Enthusiast  Joined May 25, '06 From Hong Kong Currently Offline Reputation: 256 (100%) |
Check out the pics, due to some technical issue, the 2 "HALF MOON" Vent don't have screws underneath, but simply stick on it with whatever reliable glues or double side adhersive tape is fine, since those are light in weight.
Not cover, direct replacement, need to remove your stocked one. Robby test fit already and don't have problem so far. 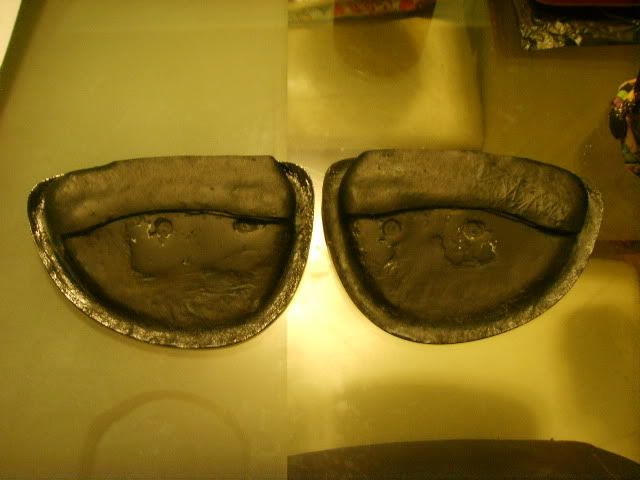 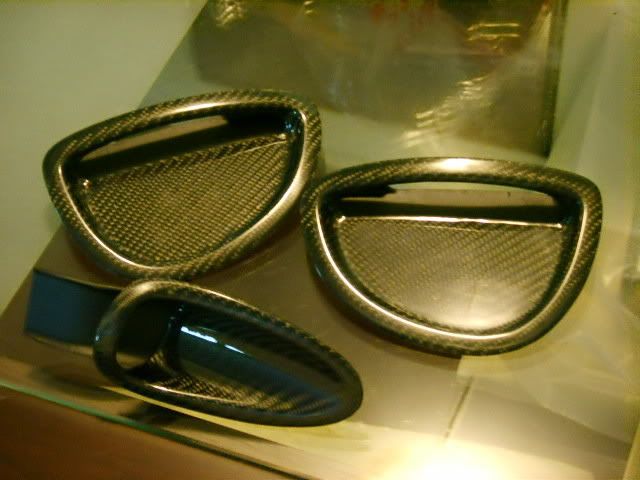 USD$150 for all 3 vents, shipping should be around usd$20 more or less for all 3. 6 Colors to choose from Most popular would be: Black CF Silver Kevlar Yellow Black Red Black Blue Black Mat Black Eurou Raiser Blocks 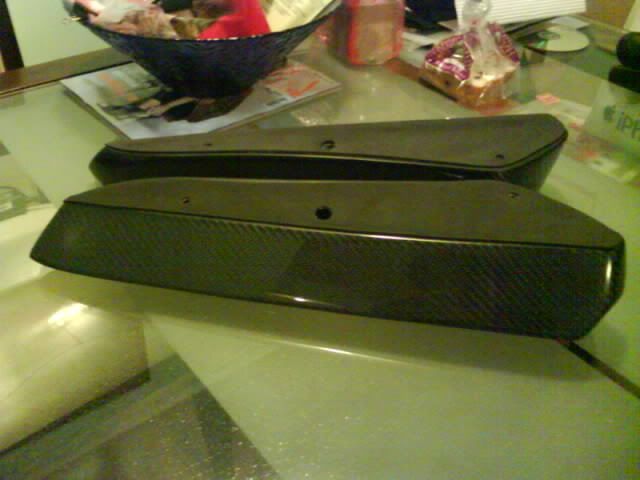 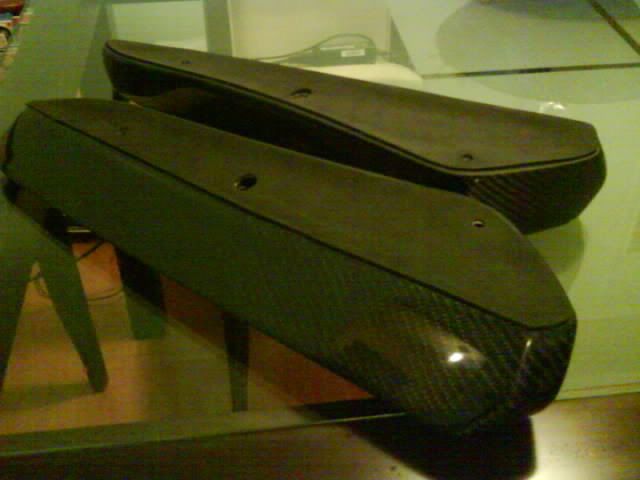   FG USD$100 + Shipping CF/Kevlar USD$160 + Shipping This post has been edited by vincent_doggy: May 14, 2010 - 10:41 PM -------------------- |

 |
Replies
|
Jan 1, 2010 - 1:12 PM
|
|
|
Enthusiast Joined Sep 17, '05 From Newcastle / UK Currently Offline Reputation: 4 (100%) |
Thanks to Vincent I now have my CF bonnet vents
 I know a few people were worried that the rear vents had no fixings fitted and were dubious of using sticky tape / glue to secure them so heres a quick how to for a more oem fitting. You will need; Suitable long enough bolts with nuts and washers, a spanner or ratchet and socket combo to remove the old vents and secure the new ones. A suitable two pack epoxy or glue combo. Id say it would have to be a two pack variety as they cure quicker and are generally much more secure than standard type glues. I used JB Quick Weld as I cant rate this stuff highly enough. Remove the standard vents by loosening the nuts that secure them. 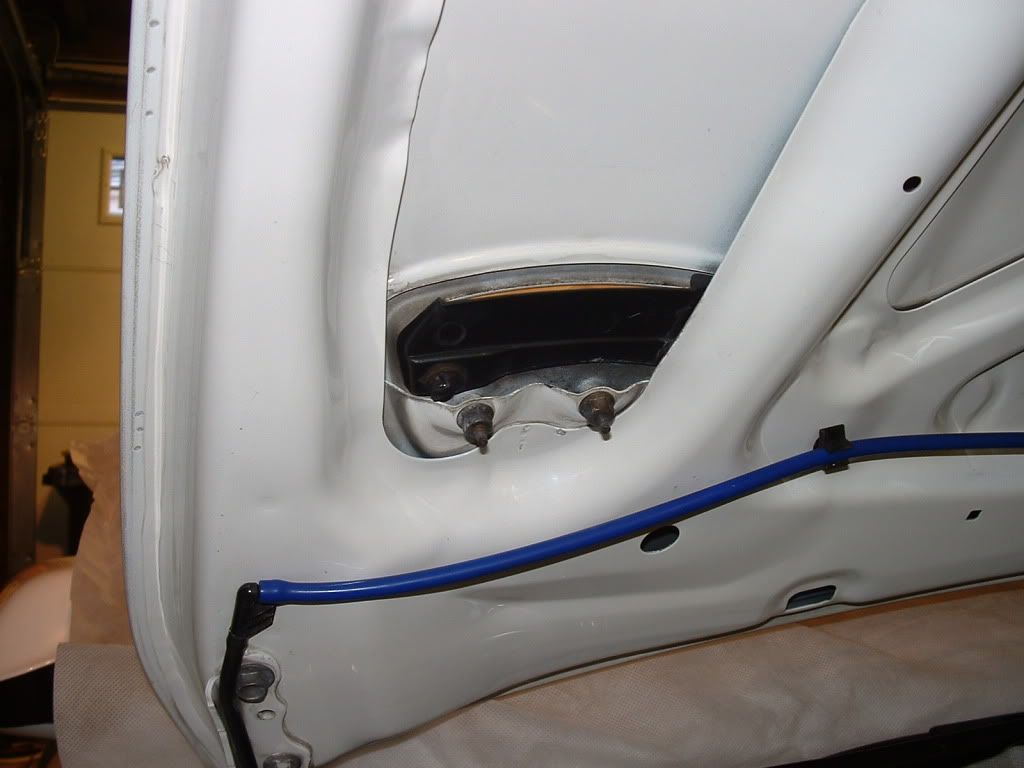 Next place the new vent onto the bonnet (yeah you call it a hood  ) some tape may come in helpful to secure it as your going to mark the bottom of the vent for where we're going to secure the bolts. ) some tape may come in helpful to secure it as your going to mark the bottom of the vent for where we're going to secure the bolts. 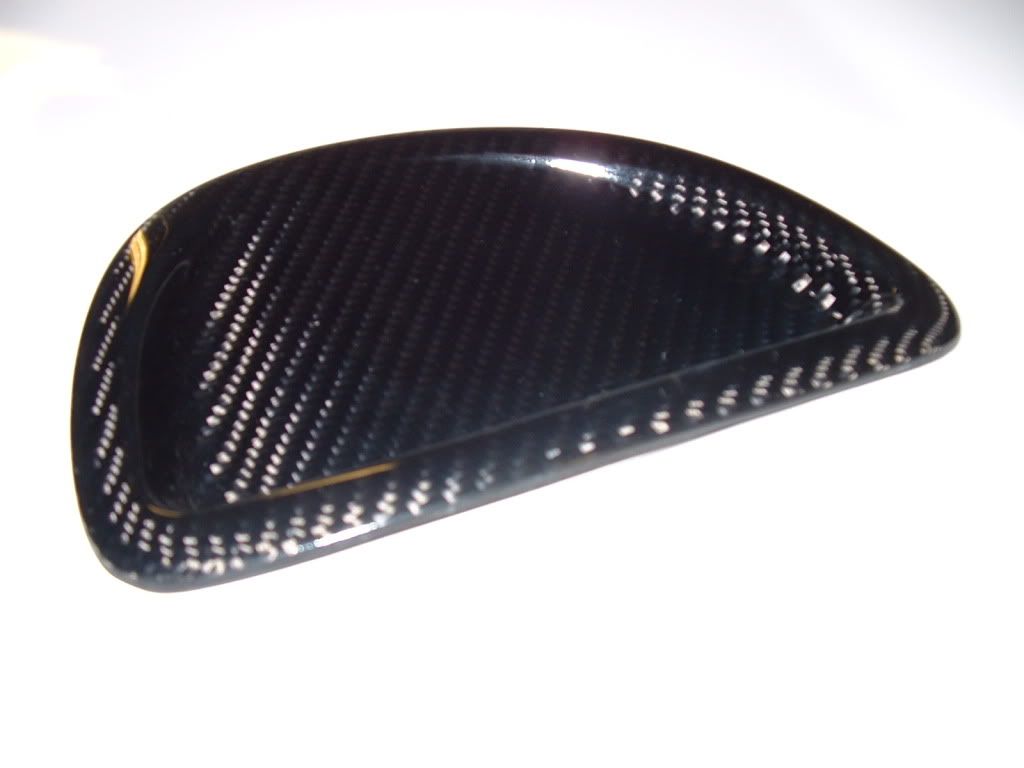 With the vent in place, raise the bonnet, and through the oem fixing holes mark the underside of the new vent. The hole is quite small, I used a welding rod to scratch the underside. It doesnt have to be exact as this is only a guide for where we're going to put our first blob of two pack adhesive. Remove the vent, now put your new bolts through the fixing holes in the bonnet from the top, down over. Next mix a little two pack adhesive and put a small blob - enough for the head of the bolt to squash into, it doesnt need to be any bigger at this stage - on each of the two marks that you made earlier on the back of your vent, do the vents one at a time due to the curing time of the adhesive. Next carefully refit the vent to the bonnet being very careful of the adhesive on the back, at this point tape the vent down to stop it moving around as the adhesive is still quite pliable. With the vent in place, open bonnet and push the bolts gently up into the adhesive, twist them gently back and fort to seat them securely. Most two pack adhesives cure pretty quick - about 15 minutes depending on temperatureand quantity with full hardness in a couple of hours. At this point you have two choices, let the small blob cure fully or if your confident of your skills and steady hand, removed the vent very carefully after about 10 minutes making sure you dont move or misalign the bolts. If you misalign them at this stage your vents wont line up and will look crap. Once the vents are removed, mix up a bigger quantity of adhesive and apply around the head of the bolt to secure it fully. Dont refit the vent until the glue has cured completely or youll risk pulling the bolt out when you tighten the nuts. 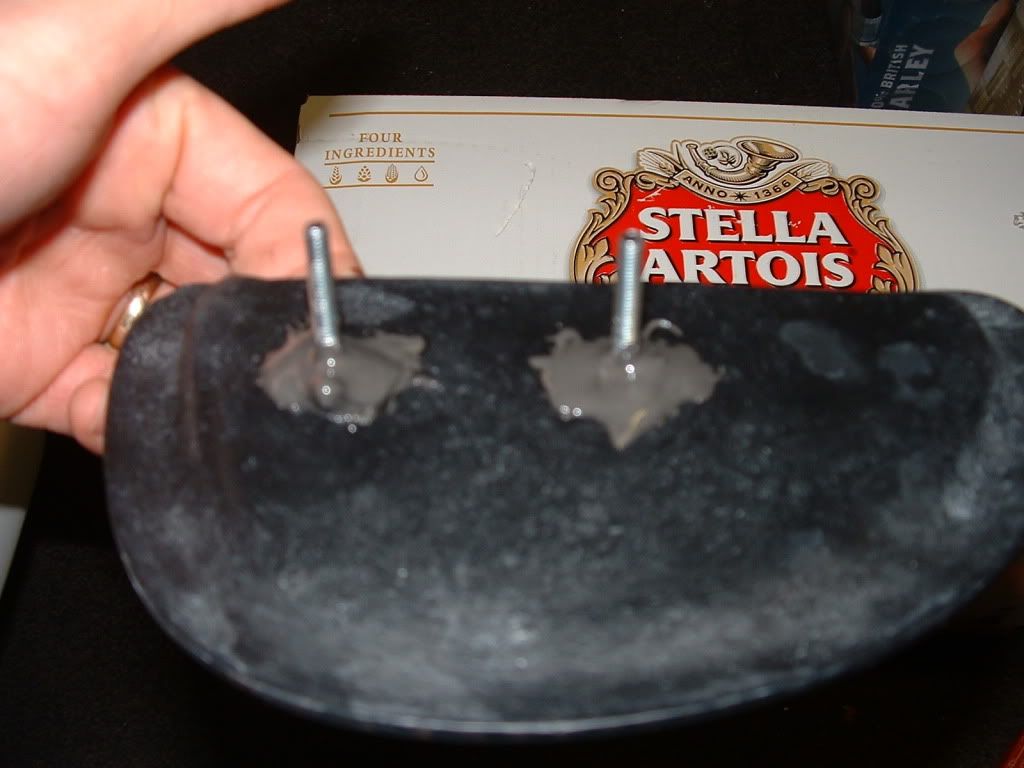 Once fully cured you can fit your vents and secure them with the nuts and washers, take care when tightening the nuts and dont over tighten them. 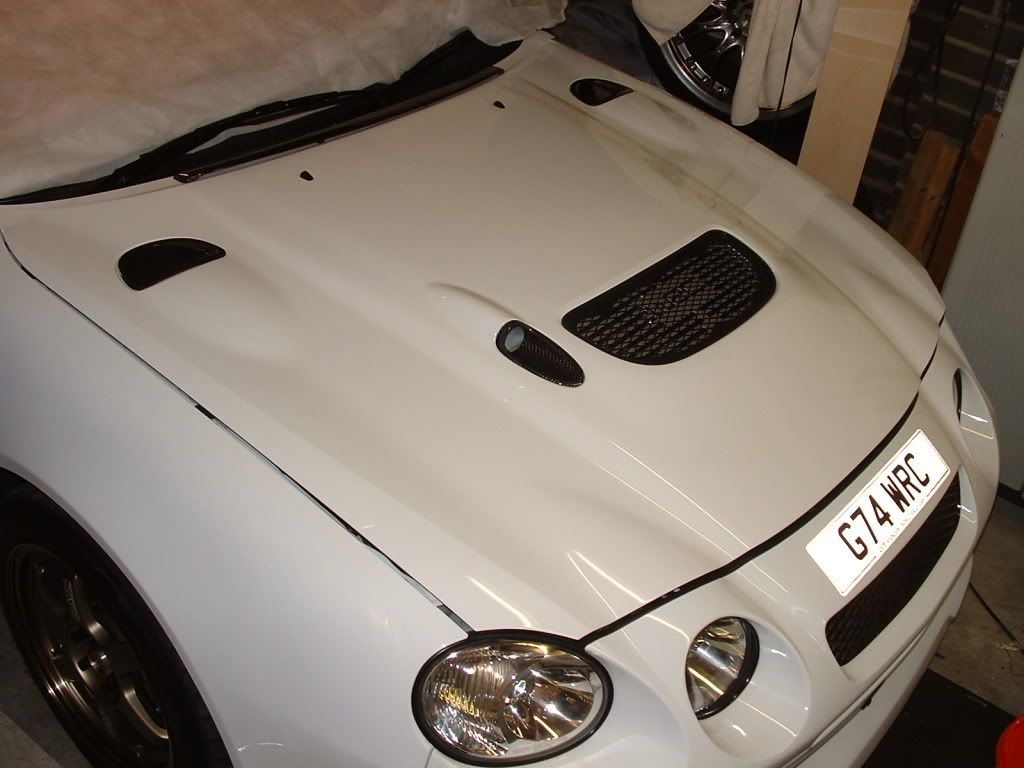 The snorkel vent comes with fixings already fitted so is just a straight swap out. 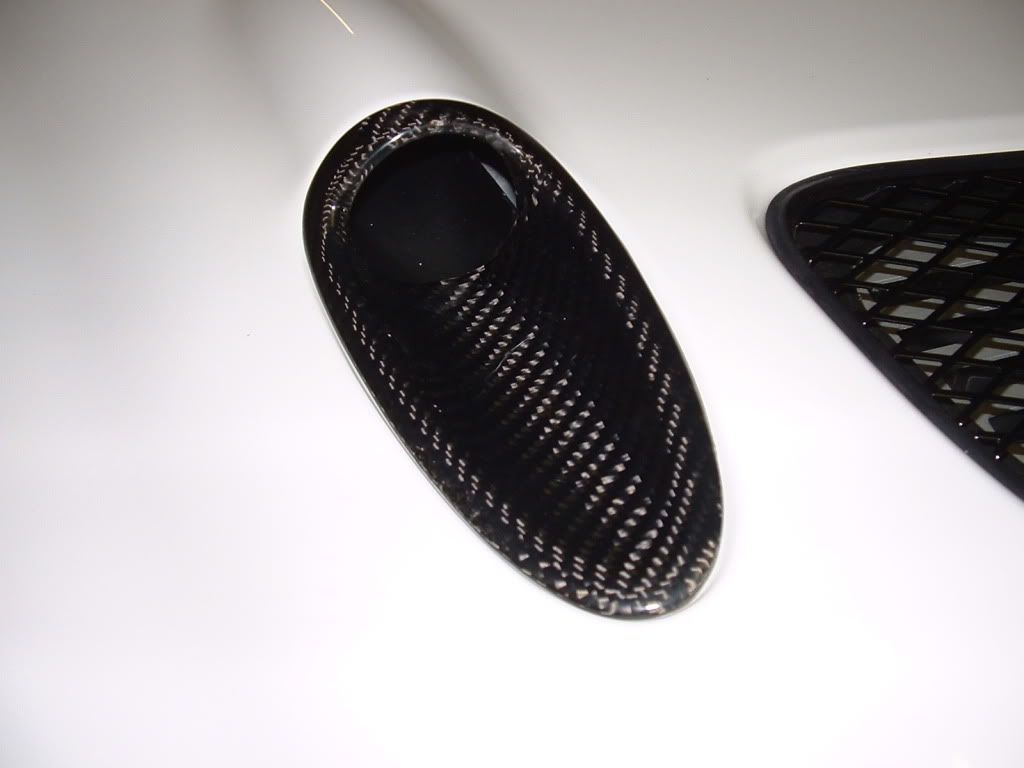 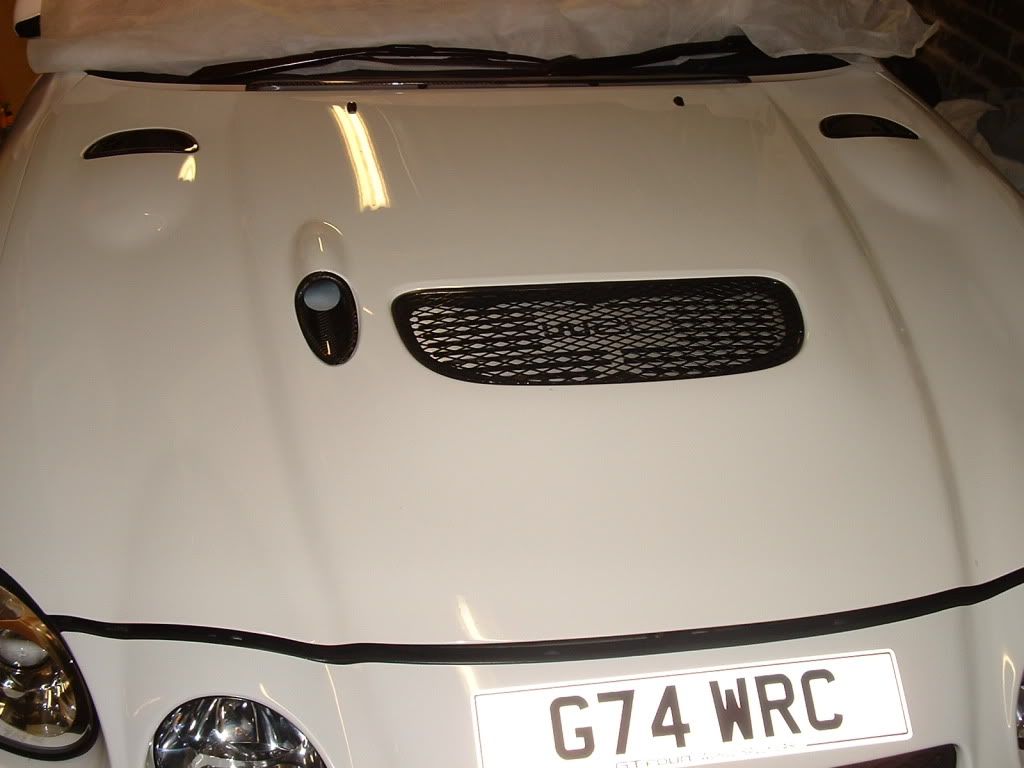 Pretty straight forward job to do, should only take an hour to do depending on the speed that your glue cures and how brave you are. Id advise the final cure is left over night so as not to risk pulling the bolts out. -------------------- 1994 JDM GT4 WRC
 |
|
Jan 2, 2010 - 12:11 AM
|
|
|
Enthusiast Joined Oct 29, '04 From Hong Kong Currently Offline Reputation: 5 (100%) |
QUOTE (Driveby @ Jan 1, 2010 - 6:12 PM)  Thanks to Vincent I now have my CF bonnet vents I know a few people were worried that the rear vents had no fixings fitted and were dubious of using sticky tape / glue to secure them so heres a quick how to for a more oem fitting. You will need; Suitable long enough bolts with nuts and washers, a spanner or ratchet and socket combo to remove the old vents and secure the new ones. A suitable two pack epoxy or glue combo. Id say it would have to be a two pack variety as they cure quicker and are generally much more secure than standard type glues. I used JB Quick Weld as I cant rate this stuff highly enough. Remove the standard vents by loosening the nuts that secure them. Next place the new vent onto the bonnet (yeah you call it a hood ) some tape may come in helpful to secure it as your going to mark the bottom of the vent for where we're going to secure the bolts. With the vent in place, raise the bonnet, and through the oem fixing holes mark the underside of the new vent. The hole is quite small, I used a welding rod to scratch the underside. It doesnt have to be exact as this is only a guide for where we're going to put our first blob of two pack adhesive. Remove the vent, now put your new bolts through the fixing holes in the bonnet from the top, down over. Next mix a little two pack adhesive and put a small blob - enough for the head of the bolt to squash into, it doesnt need to be any bigger at this stage - on each of the two marks that you made earlier on the back of your vent, do the vents one at a time due to the curing time of the adhesive. Next carefully refit the vent to the bonnet being very careful of the adhesive on the back, at this point tape the vent down to stop it moving around as the adhesive is still quite pliable. With the vent in place, open bonnet and push the bolts gently up into the adhesive, twist them gently back and fort to seat them securely. Most two pack adhesives cure pretty quick - about 15 minutes depending on temperatureand quantity with full hardness in a couple of hours. At this point you have two choices, let the small blob cure fully or if your confident of your skills and steady hand, removed the vent very carefully after about 10 minutes making sure you dont move or misalign the bolts. If you misalign them at this stage your vents wont line up and will look crap. Once the vents are removed, mix up a bigger quantity of adhesive and apply around the head of the bolt to secure it fully. Dont refit the vent until the glue has cured completely or youll risk pulling the bolt out when you tighten the nuts. Once fully cured you can fit your vents and secure them with the nuts and washers, take care when tightening the nuts and dont over tighten them. The snorkel vent comes with fixings already fitted so is just a straight swap out. Pretty straight forward job to do, should only take an hour to do depending on the speed that your glue cures and how brave you are. Id advise the final cure is left over night so as not to risk pulling the bolts out. very good job......and professional to fix up .. I need follow you. hehe --------------------  |
Posts in this topic
 vincent_doggy FS: Eurou Raiser Blocks & CF Vent for GT4 Hood Oct 27, 2009 - 4:28 AM
 Driveby Put me down for the bonnet vents in black CF shipp... Oct 28, 2009 - 1:43 PM vincent_doggy Anyone? Oct 31, 2009 - 8:59 AM 2bcelica The half moon cannot be screwed down? Thats a bit... Oct 31, 2009 - 9:17 AM
 vincent_doggy QUOTE (2bcelica @ Oct 31, 2009 - 10... Oct 31, 2009 - 12:04 PM Driveby Ill be using epoxy and some ground down bolts to a... Oct 31, 2009 - 11:41 AM Driveby I cant belive there isnt more interest on these???... Nov 2, 2009 - 9:14 AM 99GT I'm too poor to get the gt4 hood. Lol Nov 2, 2009 - 10:32 AM OOBE Euro raiser blocks will be mine finally, buahaha. Nov 6, 2009 - 12:42 AM diegohiga QUOTE (vincent_doggy @ Oct 27, 2009 - 4... Nov 6, 2009 - 12:05 PM vincent_doggy QUOTE (diegohiga @ Nov 7, 2009 - 1:0... Nov 6, 2009 - 12:19 PM Driveby Do we need a list then?
Carbon Vents
1. Driveby -... Nov 10, 2009 - 1:17 PM robby QUOTE (Driveby @ Nov 10, 2009 - 7:17... Nov 12, 2009 - 5:14 AM windowlicker you have any half moon vents with defects that i c... Nov 13, 2009 - 2:13 AM OOBE Eurou Raiser Blocks:
1) OOBE - CF Nov 13, 2009 - 8:55 AM CelicaGTSboy23 QUOTE (OOBE @ Nov 13, 2009 - 8:55 AM... Nov 28, 2009 - 9:33 AM OOBE Nobody else wants in? Come on, guys. Nov 24, 2009 - 5:58 PM Fate QUOTE (CelicaGTSboy23 @ Nov 28, 2009 - 9... Nov 28, 2009 - 11:42 PM smirnoff Is this still ongoing? I would be interested in th... Dec 15, 2009 - 8:31 AM vincent_doggy QUOTE (smirnoff @ Dec 15, 2009 - 9:3... Dec 15, 2009 - 8:34 AM smirnoff Eurou Raiser Blocks:
1) OOBE - CF
2) CelicaGTSboy... Dec 15, 2009 - 10:53 AM OOBE Eurou Raiser Blocks:
1) OOBE - CF
2) CelicaGTSboy... Dec 30, 2009 - 12:56 AM 6gcnoob QUOTE (OOBE @ Dec 30, 2009 - 1:56 AM... Jan 2, 2010 - 12:25 AM OOBE You have one of the sexiest GT-4s and now it has b... Jan 1, 2010 - 1:18 PM 6gcnoob what is does the FG mean for the raiser blocks? Jan 1, 2010 - 3:50 PM OOBE FG means the raiser blocks are made of fiberglass ... Jan 1, 2010 - 5:22 PM 6gcnoob how much shipped to 06331? Jan 1, 2010 - 6:24 PM vincent_doggy QUOTE (6gcnoob @ Jan 2, 2010 - 7:24 ... Jan 1, 2010 - 6:34 PM MrAyasli I'd buy the raiser blocks, but I need a 2-post... Jan 2, 2010 - 4:32 AM vincent_doggy Placed order already!!
Pls ready for your ... Jan 5, 2010 - 12:32 PM OOBE Woo-hoo! Jan 5, 2010 - 3:42 PM Fate so the euro blocks are ready for payment? Jan 5, 2010 - 8:13 PM vincent_doggy QUOTE (Fate @ Jan 6, 2010 - 9:13 AM)... Jan 6, 2010 - 12:00 AM OOBE Can you save me my raisers and hood vents until th... Jan 7, 2010 - 1:49 AM vincent_doggy QUOTE (OOBE @ Jan 7, 2010 - 2:49 PM)... Jan 7, 2010 - 3:33 AM Fate FG. Jan 8, 2010 - 10:44 PM vincent_doggy QUOTE (Fate @ Jan 9, 2010 - 11:44 AM... Mar 16, 2010 - 11:33 PM Driveby The quality of these vents is superb and they look... Jan 9, 2010 - 11:27 AM smirnoff Vincent I'm delighted these eurou raisers are ... Jan 19, 2010 - 7:17 PM vincent_doggy RE: FS: Eurou Raiser Blocks & CF Vent for GT4 Hood Jan 21, 2010 - 12:44 AM smirnoff Payment sent Vincent for the Eurou Raiser blocks, ... Jan 27, 2010 - 1:59 AM vincent_doggy QUOTE (smirnoff @ Jan 27, 2010 - 2:5... Feb 12, 2010 - 11:07 AM ZGear What's the inventory count for the euro raiser... Feb 14, 2010 - 4:27 AM vincent_doggy QUOTE (ZGear @ Feb 14, 2010 - 5:27 P... Feb 18, 2010 - 9:23 AM OOBE I ran out of money, bro, but I get paid this week.... Feb 19, 2010 - 4:32 PM flyinglizard Any more Euro raiser blocks available? Apr 15, 2010 - 1:02 AM vincent_doggy QUOTE (flyinglizard @ Apr 15, 2010 - 2... Apr 15, 2010 - 7:11 PM flyinglizard I just want the fiberglass ones since I'm goin... Apr 15, 2010 - 7:24 PM vincent_doggy QUOTE (flyinglizard @ Apr 16, 2010 - 8... Apr 15, 2010 - 8:02 PM flyinglizard QUOTE (vincent_doggy @ Apr 15, 2010 - 8... Apr 15, 2010 - 10:02 PM OOBE I received my raisers and vents last week, Vince. ... Apr 20, 2010 - 2:46 AM vincent_doggy Eurou Raiser Blocks
1 Pair of Fiber Glass and 1 p... May 14, 2010 - 10:32 PM diegohiga [/quote]
i want the euro raiser blocks.. how much ... Jun 2, 2010 - 9:52 PM vincent_doggy QUOTE (diegohiga @ Jun 3, 2010 - 10... Jun 2, 2010 - 10:38 PM LAMBOZ hi can i have a price for the CF bonnet vents ship... Jun 3, 2010 - 4:04 AM vincent_doggy QUOTE (LAMBOZ @ Jun 3, 2010 - 5:04 P... Jun 3, 2010 - 5:33 AM
vincent_doggy QUOTE (2bcelica @ Oct 31, 2009 - 10... Oct 31, 2009 - 12:04 PM Driveby Ill be using epoxy and some ground down bolts to a... Oct 31, 2009 - 11:41 AM Driveby I cant belive there isnt more interest on these???... Nov 2, 2009 - 9:14 AM 99GT I'm too poor to get the gt4 hood. Lol Nov 2, 2009 - 10:32 AM OOBE Euro raiser blocks will be mine finally, buahaha. Nov 6, 2009 - 12:42 AM diegohiga QUOTE (vincent_doggy @ Oct 27, 2009 - 4... Nov 6, 2009 - 12:05 PM vincent_doggy QUOTE (diegohiga @ Nov 7, 2009 - 1:0... Nov 6, 2009 - 12:19 PM Driveby Do we need a list then?
Carbon Vents
1. Driveby -... Nov 10, 2009 - 1:17 PM robby QUOTE (Driveby @ Nov 10, 2009 - 7:17... Nov 12, 2009 - 5:14 AM windowlicker you have any half moon vents with defects that i c... Nov 13, 2009 - 2:13 AM OOBE Eurou Raiser Blocks:
1) OOBE - CF Nov 13, 2009 - 8:55 AM CelicaGTSboy23 QUOTE (OOBE @ Nov 13, 2009 - 8:55 AM... Nov 28, 2009 - 9:33 AM OOBE Nobody else wants in? Come on, guys. Nov 24, 2009 - 5:58 PM Fate QUOTE (CelicaGTSboy23 @ Nov 28, 2009 - 9... Nov 28, 2009 - 11:42 PM smirnoff Is this still ongoing? I would be interested in th... Dec 15, 2009 - 8:31 AM vincent_doggy QUOTE (smirnoff @ Dec 15, 2009 - 9:3... Dec 15, 2009 - 8:34 AM smirnoff Eurou Raiser Blocks:
1) OOBE - CF
2) CelicaGTSboy... Dec 15, 2009 - 10:53 AM OOBE Eurou Raiser Blocks:
1) OOBE - CF
2) CelicaGTSboy... Dec 30, 2009 - 12:56 AM 6gcnoob QUOTE (OOBE @ Dec 30, 2009 - 1:56 AM... Jan 2, 2010 - 12:25 AM OOBE You have one of the sexiest GT-4s and now it has b... Jan 1, 2010 - 1:18 PM 6gcnoob what is does the FG mean for the raiser blocks? Jan 1, 2010 - 3:50 PM OOBE FG means the raiser blocks are made of fiberglass ... Jan 1, 2010 - 5:22 PM 6gcnoob how much shipped to 06331? Jan 1, 2010 - 6:24 PM vincent_doggy QUOTE (6gcnoob @ Jan 2, 2010 - 7:24 ... Jan 1, 2010 - 6:34 PM MrAyasli I'd buy the raiser blocks, but I need a 2-post... Jan 2, 2010 - 4:32 AM vincent_doggy Placed order already!!
Pls ready for your ... Jan 5, 2010 - 12:32 PM OOBE Woo-hoo! Jan 5, 2010 - 3:42 PM Fate so the euro blocks are ready for payment? Jan 5, 2010 - 8:13 PM vincent_doggy QUOTE (Fate @ Jan 6, 2010 - 9:13 AM)... Jan 6, 2010 - 12:00 AM OOBE Can you save me my raisers and hood vents until th... Jan 7, 2010 - 1:49 AM vincent_doggy QUOTE (OOBE @ Jan 7, 2010 - 2:49 PM)... Jan 7, 2010 - 3:33 AM Fate FG. Jan 8, 2010 - 10:44 PM vincent_doggy QUOTE (Fate @ Jan 9, 2010 - 11:44 AM... Mar 16, 2010 - 11:33 PM Driveby The quality of these vents is superb and they look... Jan 9, 2010 - 11:27 AM smirnoff Vincent I'm delighted these eurou raisers are ... Jan 19, 2010 - 7:17 PM vincent_doggy RE: FS: Eurou Raiser Blocks & CF Vent for GT4 Hood Jan 21, 2010 - 12:44 AM smirnoff Payment sent Vincent for the Eurou Raiser blocks, ... Jan 27, 2010 - 1:59 AM vincent_doggy QUOTE (smirnoff @ Jan 27, 2010 - 2:5... Feb 12, 2010 - 11:07 AM ZGear What's the inventory count for the euro raiser... Feb 14, 2010 - 4:27 AM vincent_doggy QUOTE (ZGear @ Feb 14, 2010 - 5:27 P... Feb 18, 2010 - 9:23 AM OOBE I ran out of money, bro, but I get paid this week.... Feb 19, 2010 - 4:32 PM flyinglizard Any more Euro raiser blocks available? Apr 15, 2010 - 1:02 AM vincent_doggy QUOTE (flyinglizard @ Apr 15, 2010 - 2... Apr 15, 2010 - 7:11 PM flyinglizard I just want the fiberglass ones since I'm goin... Apr 15, 2010 - 7:24 PM vincent_doggy QUOTE (flyinglizard @ Apr 16, 2010 - 8... Apr 15, 2010 - 8:02 PM flyinglizard QUOTE (vincent_doggy @ Apr 15, 2010 - 8... Apr 15, 2010 - 10:02 PM OOBE I received my raisers and vents last week, Vince. ... Apr 20, 2010 - 2:46 AM vincent_doggy Eurou Raiser Blocks
1 Pair of Fiber Glass and 1 p... May 14, 2010 - 10:32 PM diegohiga [/quote]
i want the euro raiser blocks.. how much ... Jun 2, 2010 - 9:52 PM vincent_doggy QUOTE (diegohiga @ Jun 3, 2010 - 10... Jun 2, 2010 - 10:38 PM LAMBOZ hi can i have a price for the CF bonnet vents ship... Jun 3, 2010 - 4:04 AM vincent_doggy QUOTE (LAMBOZ @ Jun 3, 2010 - 5:04 P... Jun 3, 2010 - 5:33 AM |
1 User(s) are reading this topic (1 Guests and 0 Anonymous Users)
0 Members:
| Lo-Fi Version | Time is now: July 19th, 2026 - 10:23 AM |