
 Jun 14, 2009 - 1:10 PM Jun 14, 2009 - 1:10 PM
|
 
|
|
Enthusiast  Joined May 29, '09 From Gainesville, FL Currently Offline Reputation: 17 (100%) |
Reconsolidating Thread!
Pics from beginning to present When purchased 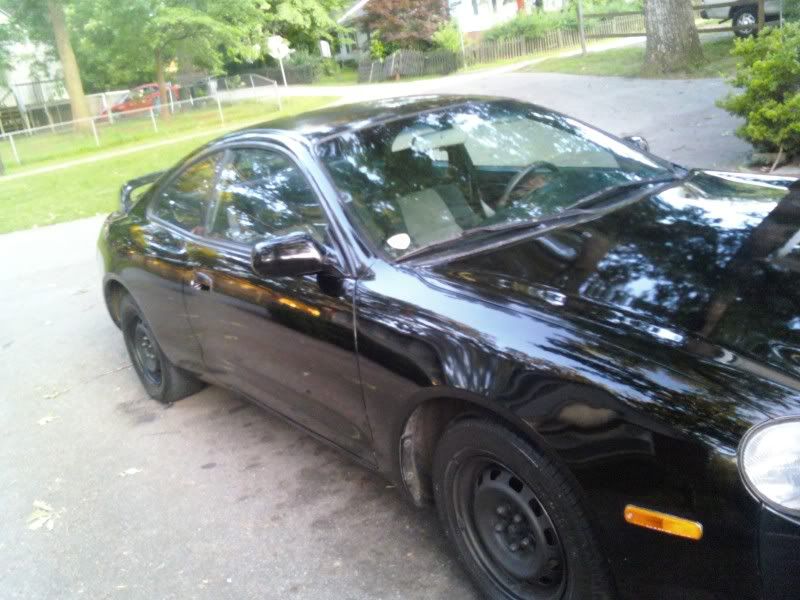 First Mod - Feels like yesterday 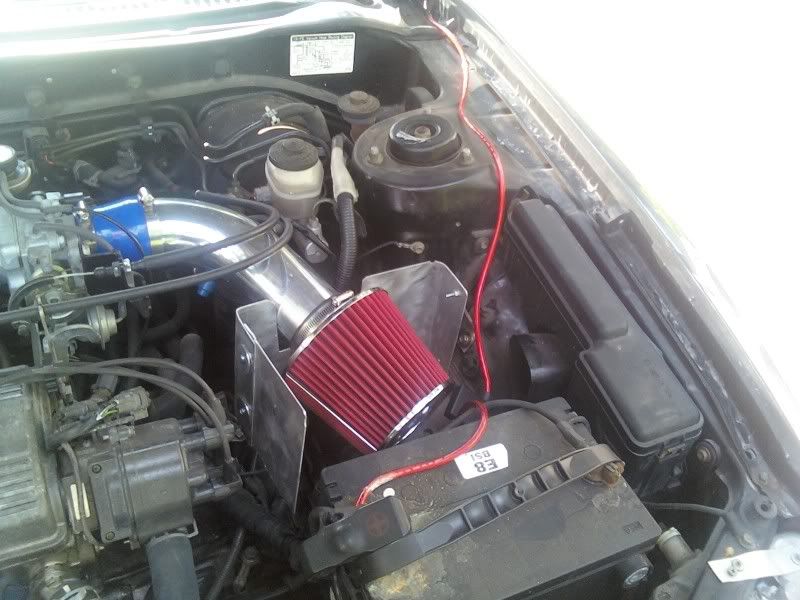 Cleaning and Painting engine bay 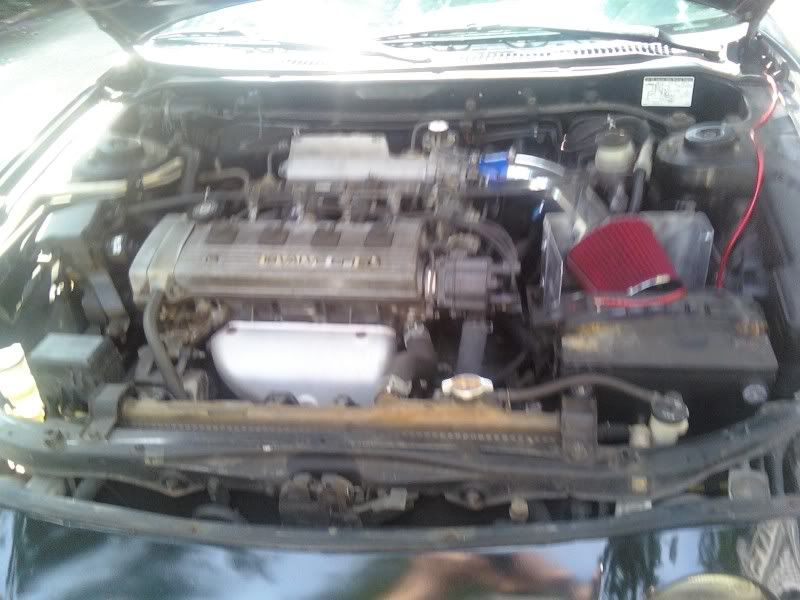 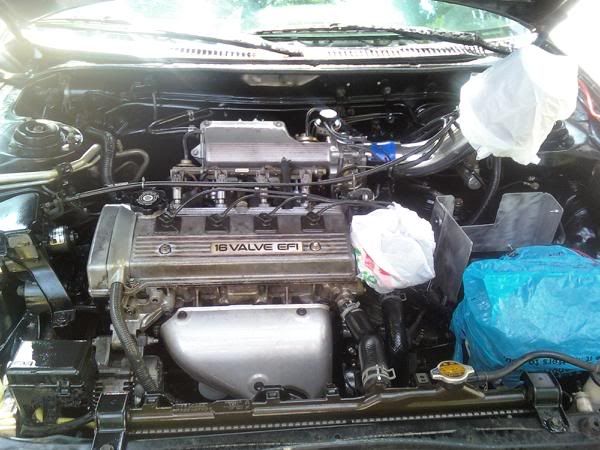 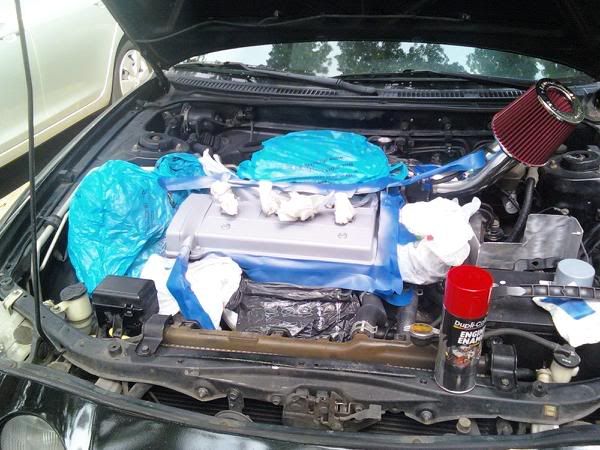 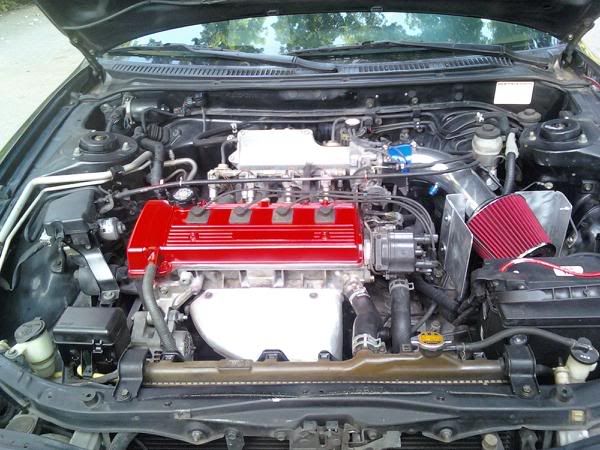 Battery Tie down 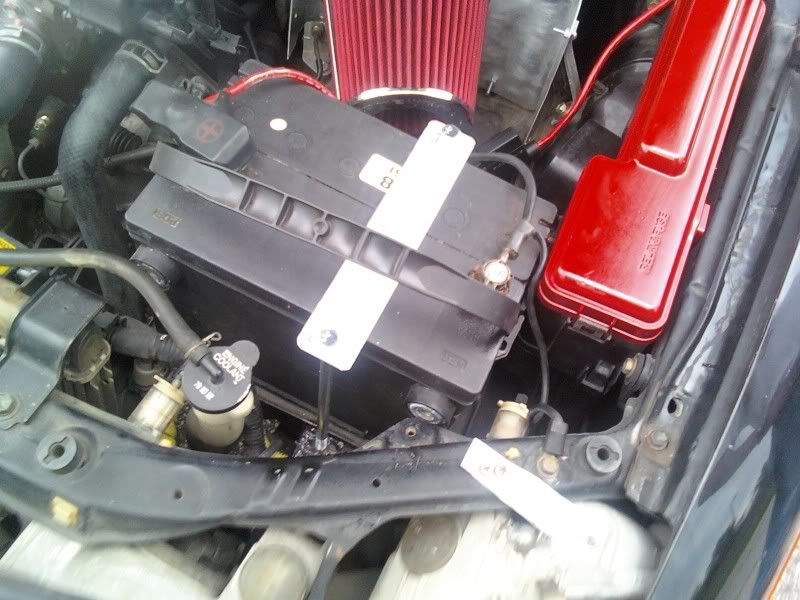 Wheels & Springs Before: 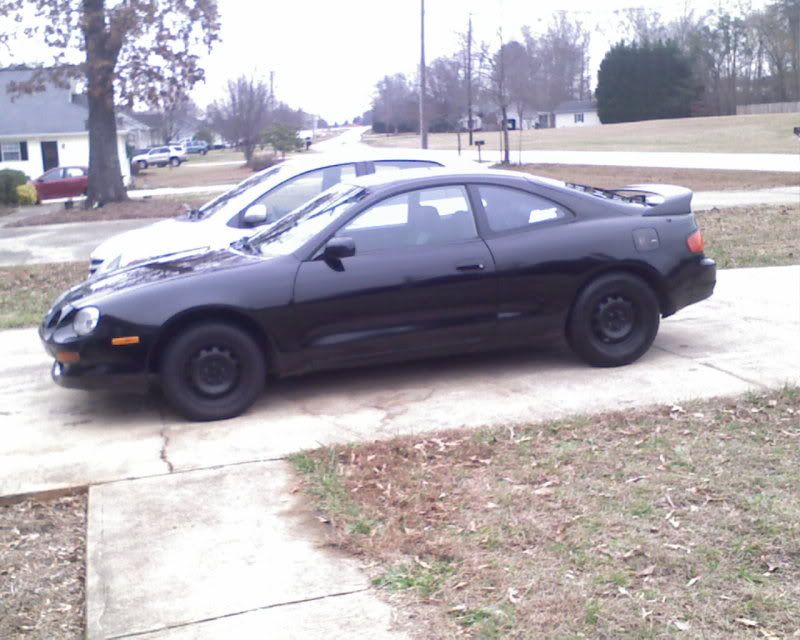 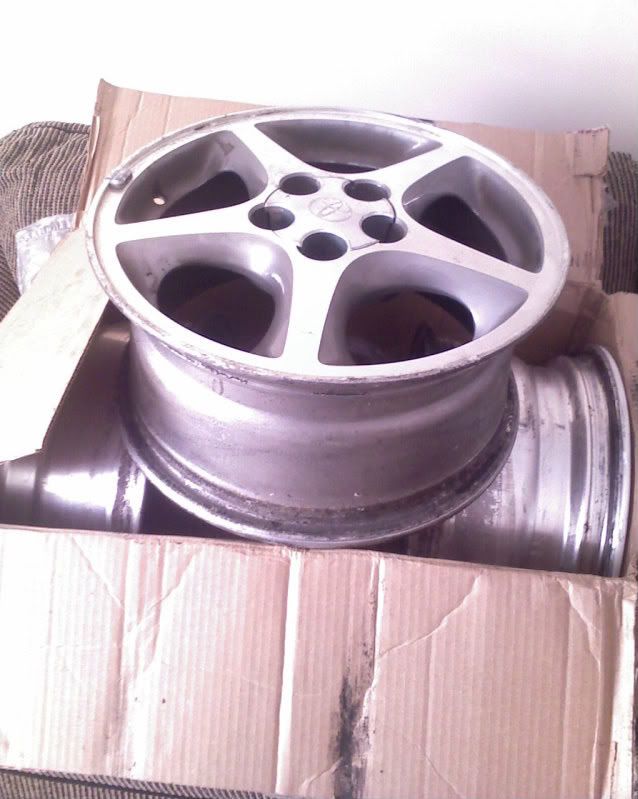 After: 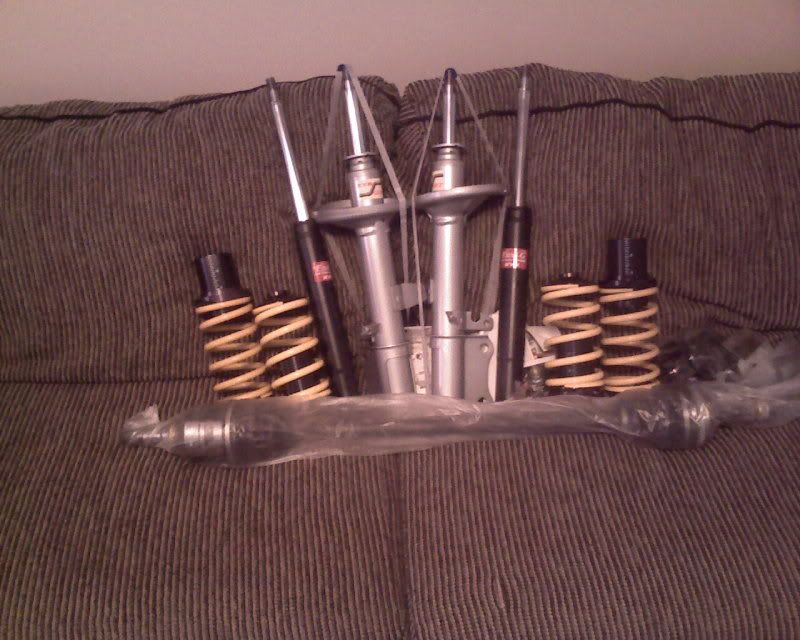 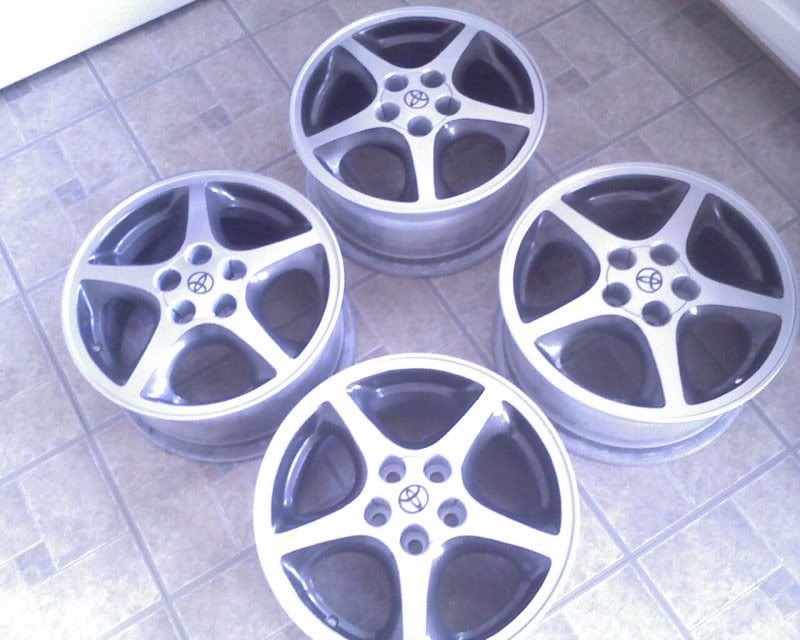 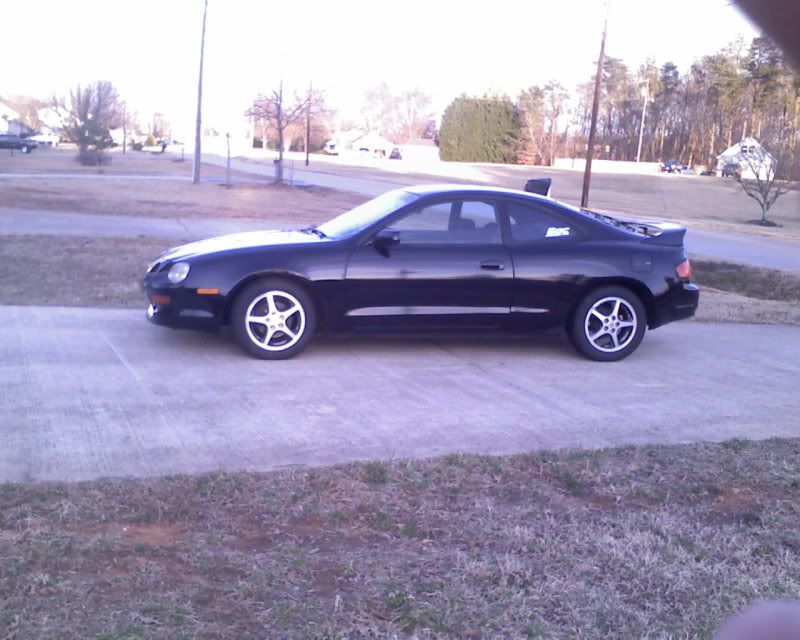 Rainguards: 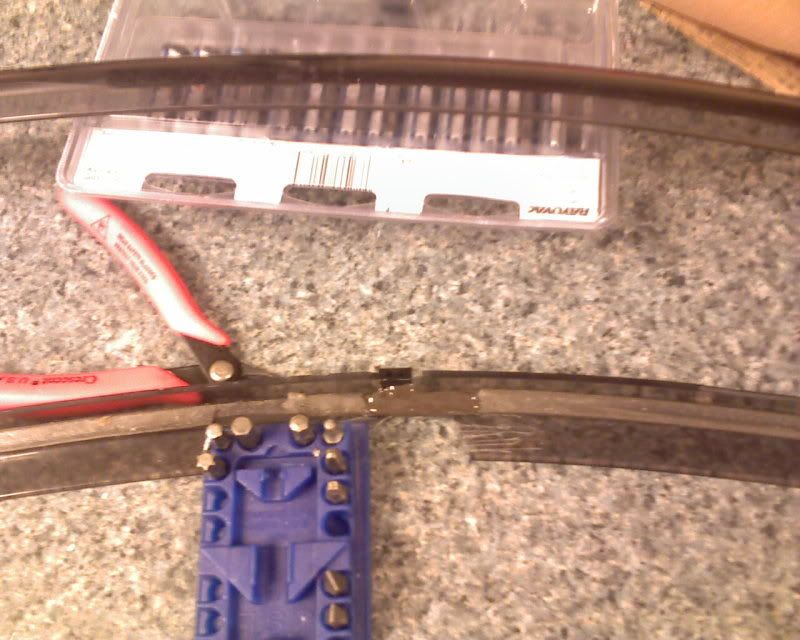 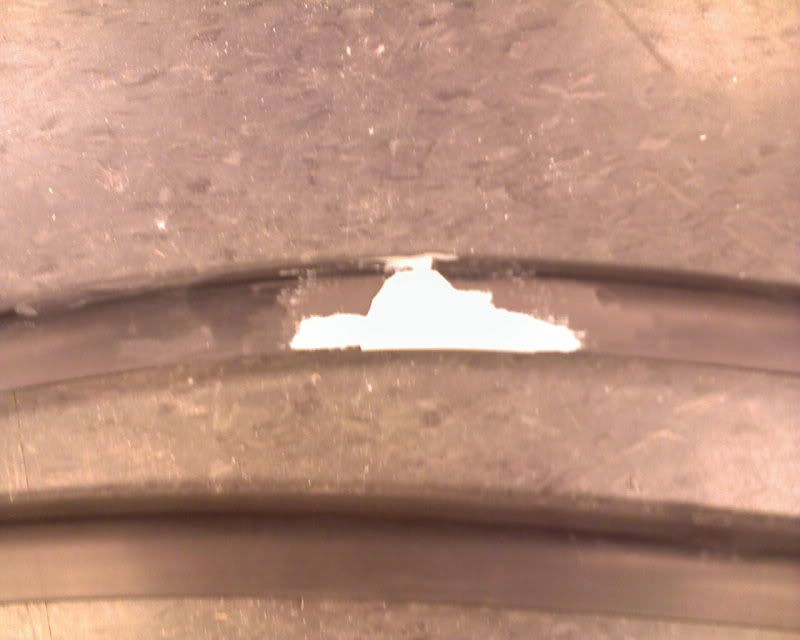 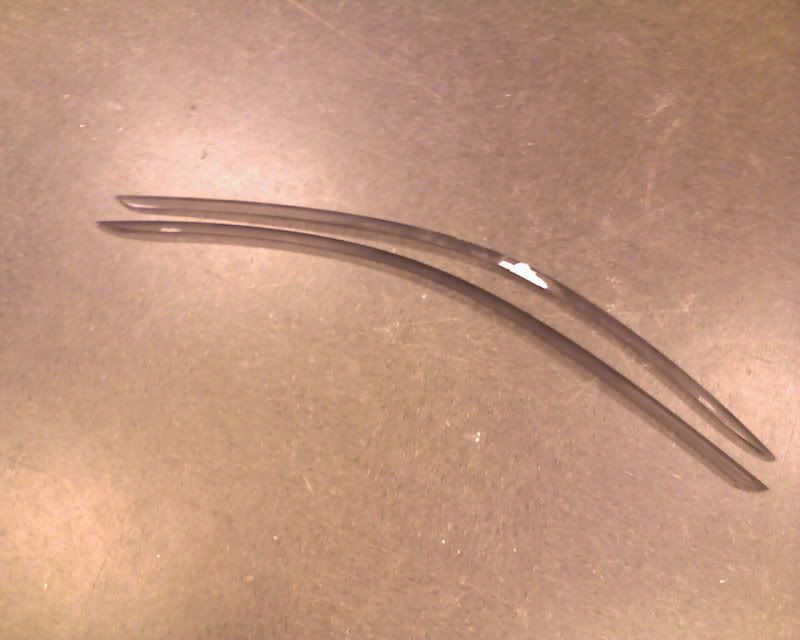 Facelift & Projector/Clear Highs:   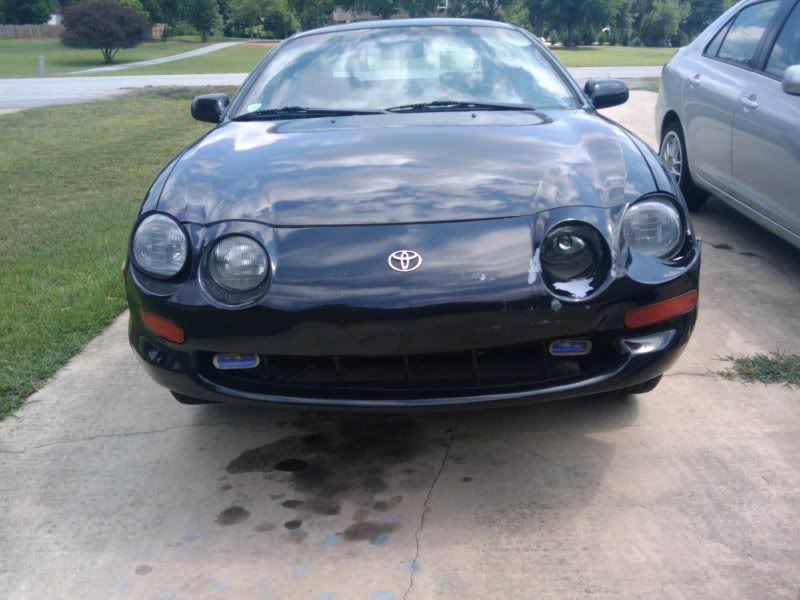 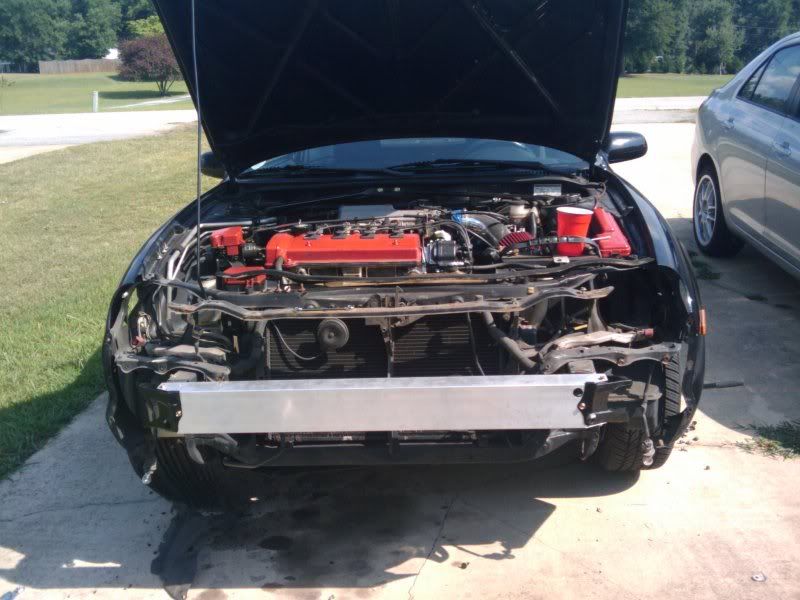  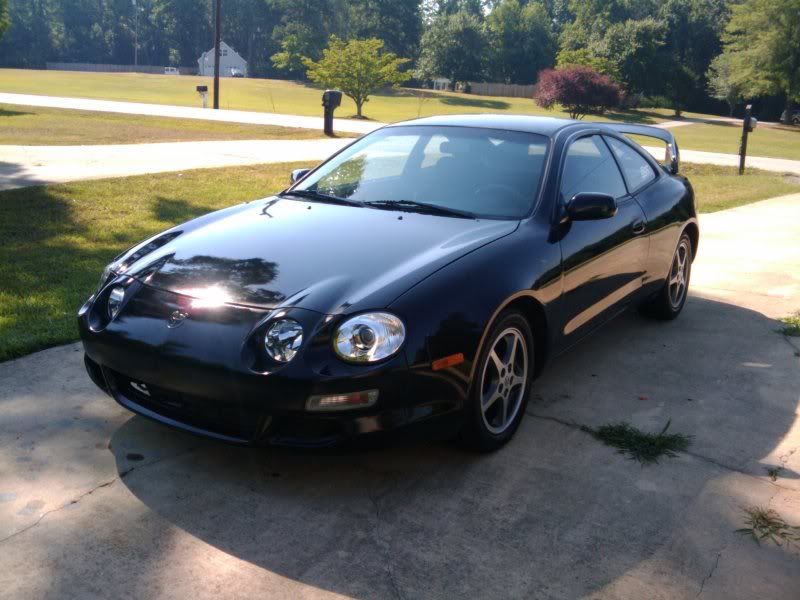  Well all in all, to this point i think progress is great. I've learned alot, spent tons of money I didn't think I had. Purchased many tools never expected needing, and of course, recieved tons of help and goodies from 6gc.net. My thanks to the community once agian, I couldn't have come this far without ya guys! This post has been edited by rave2n: Nov 22, 2011 - 1:38 PM |

 |
Replies
|
Jul 4, 2010 - 6:26 AM
|
|
|
Enthusiast Joined May 29, '09 From Gainesville, FL Currently Offline Reputation: 17 (100%) |
You will a need socket wrench, 2 long extensions, and a 10mm socket.
Remove your wheel well plastics. They'll attach all the way back to under the beginning of the door, all the way to the front bumper bottom. Be careful with the tabs, as they tend to break. Once you get those off, look straight in forward into your fender, and you will see 3 nuts...and why you need those extensions =) |
Posts in this topic
 rave2n Rave's Progress Thread Jun 14, 2009 - 1:10 PM
 rave2n RE: Rave's Progress Thread Jun 15, 2009 - 7:11 PM njccmd2002 that is awesome work, do like the shield. Jun 15, 2009 - 9:21 PM Salica Looking good man keep up the good work. Jun 15, 2009 - 9:43 PM rave2n Well I won't be purchasing from Streesideauto.... Jun 16, 2009 - 4:08 PM GriffGirl 10.8 mm spark plug wires? WHY? It's not an upg... Jun 16, 2009 - 4:21 PM rave2n Don't really care for the size, just want the ... Jun 16, 2009 - 4:24 PM rave2n Old plugs out! Wire plans changed due to cost ... Jun 16, 2009 - 7:45 PM
 razor7 QUOTE (rave2n @ Jun 16, 2009 - 5:45 ... Jun 17, 2009 - 4:13 AM rave2n Yea i've noticed that too myself. Smells like ... Jun 17, 2009 - 8:36 AM rave2n Some cleaning begun, will finish shining up after ... Jun 19, 2009 - 10:30 AM rave2n First Thread! Jun 19, 2009 - 5:24 PM Sinyk Is that how it really looks? Damn I thought that w... Jun 19, 2009 - 5:46 PM rave2n Yeaaa, I just checked on it probally a hour later ... Jun 19, 2009 - 6:09 PM GriffGirl heh... looks a lot like my engine bay... well, col... Jun 19, 2009 - 6:37 PM rave2n Hah, yeap same red - Hopefully mine will darken... Jun 19, 2009 - 6:59 PM rave2n After a morning drive, probally less bright now th... Jun 20, 2009 - 11:40 AM Sinyk I notice you painted over the nuts on the top as w... Jun 22, 2009 - 10:43 AM GriffGirl How'd ya get your heat shield so clean? Did yo... Jun 22, 2009 - 11:49 AM rave2n Wire wheel, then used a bunch of diffrent sand pap... Jun 22, 2009 - 1:03 PM rave2n Made a battery harness today. Noticed I did not ha... Jun 22, 2009 - 5:59 PM rave2n More stuff has come in. Thank you to both the sell... Mar 24, 2010 - 2:24 PM rave2n Renamed the thread - Mainly because I have a hard ... Oct 5, 2009 - 11:30 AM rave2n Got some new parts in, time to get to work! Th... Feb 20, 2010 - 5:12 PM johnnehh Good progress Feb 20, 2010 - 5:38 PM rave2n Everything installed shown above. Will post pics o... Mar 7, 2010 - 5:12 PM SwissFerdi Oooooh, coilover sleeves. NICE!
One word of w... Mar 7, 2010 - 5:30 PM rave2n How she used to sit.
and how she is today, with... Mar 7, 2010 - 6:14 PM rave2n Goodies have arrived, the painting process begins ... Mar 9, 2010 - 9:33 PM johnnehh Lookin' good! Mar 9, 2010 - 10:05 PM rave2n Work on the rainguards.
They all repaired now, ju... Mar 30, 2010 - 1:14 PM rave2n Well, this long weekend the cellie gets a makeover... Jul 1, 2010 - 6:35 PM rave2n Lots of a progress today, woke up early and spent ... Jul 3, 2010 - 6:24 PM mkernz22 So i have one question for you, how did you get th... Jul 3, 2010 - 9:50 PM mkernz22 So just a regular 10mm socket or an extended 10mm ... Jul 4, 2010 - 9:53 AM rave2n I just used a regular 10mm socket, didn't have... Jul 4, 2010 - 10:34 AM mkernz22 actually mine were in good shape still, but they w... Jul 4, 2010 - 11:32 AM rave2n QUOTE (mkernz22 @ Jul 4, 2010 - 12:3... Jul 4, 2010 - 11:50 AM chacha what did you use to cover up broken rain guard? Jul 4, 2010 - 9:17 PM rave2n QUOTE (chacha @ Jul 4, 2010 - 10:17 ... Jul 5, 2010 - 8:52 AM rave2n Lots of work done today and yesterday...
SSIII Fr... Jul 18, 2010 - 6:27 PM TEAMFaint Car looks amazing Rave, so clean.
Just need some n... Jul 19, 2010 - 3:13 PM rave2n QUOTE (TEAMFaint @ Jul 19, 2010 - 3... Jul 19, 2010 - 4:00 PM SwissFerdi ^ I like them, especially when they have the inner... Jul 19, 2010 - 4:14 PM Tony-B x 2.
20mm spacers and a healthy drop.
Looks grea... Jul 19, 2010 - 4:27 PM cheela makes me want a black car... AND PROJECTORS!... Jul 19, 2010 - 4:48 PM rave2n Thanks guys! Its been one hell of a road, and ... Jul 19, 2010 - 6:27 PM Tom88 Ive got the same problem jacking the car up. Its o... Jul 20, 2010 - 5:16 AM rave2n QUOTE (Tom88 @ Jul 20, 2010 - 6:16 A... Jul 20, 2010 - 11:49 AM Tom88 Ahh ok. It looks very similar to the liqwid art ba... Jul 20, 2010 - 12:31 PM rave2n Damn, that liqwid art badge is bad ass...If i fail... Jul 20, 2010 - 12:44 PM vincent_doggy QUOTE (rave2n @ Jul 21, 2010 - 1:44 ... Jul 20, 2010 - 2:26 PM rave2n QUOTE (vincent_doggy @ Jul 20, 2010 - 2... Jul 20, 2010 - 2:46 PM SleekCelica You make me very jealous, good sir! Jul 20, 2010 - 1:27 PM rave2n Reworked the intake a bit.
Few other not photo wo... Aug 10, 2010 - 4:09 PM rave2n Did all the suspension over this past weekend.
In... Jan 18, 2011 - 9:49 AM SwissFerdi ^ The Sportline springs are awesome eh? You might ... Jan 18, 2011 - 9:59 AM Keiri QUOTE (SwissFerdi @ Jan 18, 2011 - 9... Jan 18, 2011 - 10:36 AM rave2n Yea loving the springs, feels great going over rai... Jan 18, 2011 - 10:45 AM delusionz you turned an ugly car into a good looking car
h... Jan 19, 2011 - 10:48 AM rave2n QUOTE (delusionz @ Jan 19, 2011 - 10... Jan 20, 2011 - 11:10 AM rave2n Project on hold......
Pending my transfer to Fl... Feb 1, 2011 - 9:13 PM rave2n While project is on hold...
3rd Gen 3sgte paymen... Mar 4, 2011 - 3:13 PM SwissFerdi Cool. Can't say I'm a fan of the dark tai... Mar 4, 2011 - 5:45 PM CoreyST I like the rear window wing/visor where did you ge... Mar 4, 2011 - 8:36 PM Needles nice ride ! im gonna paint mine in black 100 %... Mar 7, 2011 - 12:41 AM rave2n The tails i'm not to hot on. Temp either way, ... Mar 8, 2011 - 8:43 AM SleekCelica I love the tails. looks nice! Mar 9, 2011 - 2:17 PM cheela you gotta get rid of that gold emblem on the back ... Mar 9, 2011 - 2:29 PM rave2n Lol yea I certainly do need to get rid of those ba... Apr 14, 2011 - 7:37 AM Mycurse180 Good looking ride man Apr 14, 2011 - 10:31 PM rave2n Final Payment made on 3sgte
Shall arrive in 4-6 w... Aug 5, 2011 - 1:54 PM rave2n 3sgte came in today.
Was quite amusing as the del... Nov 22, 2011 - 1:39 PM rave2n Oh while we are on the topic...
Can anyone tell m... Nov 23, 2011 - 9:15 AM Ted95 glad to see the motor came in, looks clean!
... Nov 23, 2011 - 12:19 PM rave2n QUOTE (Ted95 @ Nov 23, 2011 - 1:19 P... Nov 25, 2011 - 8:48 AM rave2n Started tearing the 3s down during my lunch break.... Dec 12, 2011 - 1:09 PM ricochet1490 I have no answers for you, but I'll be watchin... Dec 13, 2011 - 10:50 PM rave2n Todays activities included...getting that wiring h... Dec 14, 2011 - 1:42 PM rave2n Primed!
No idea on accent color I want. Alw... Dec 15, 2011 - 2:49 PM Grega QUOTE (rave2n @ Dec 15, 2011 - 8:49 ... Dec 15, 2011 - 3:04 PM Ted95 lookin good man! i was in the same boat about ... Dec 15, 2011 - 3:21 PM rave2n Ah thanks for that info Ted, but of course I get t... Dec 16, 2011 - 10:23 AM PhoenixTech WHOA! 33" extension??? Are you mounting... Dec 21, 2011 - 9:39 AM rave2n QUOTE (PhoenixTech @ Dec 21, 2011 - 10... Dec 21, 2011 - 9:50 AM PhoenixTech We'll be here when you're ready! Dec 21, 2011 - 11:44 AM TRD11 nice work on every thing ..... looks good Jan 7, 2012 - 3:38 PM rave2n QUOTE (TRD11 @ Jan 7, 2012 - 4:38 PM... Jan 8, 2012 - 11:24 AM TRD11 QUOTE (rave2n @ Jan 8, 2012 - 11:24 ... Jan 9, 2012 - 7:39 PM kurt95gt Good luck man
Glad to see this story getting a ha... Jan 8, 2012 - 12:05 PM
razor7 QUOTE (rave2n @ Jun 16, 2009 - 5:45 ... Jun 17, 2009 - 4:13 AM rave2n Yea i've noticed that too myself. Smells like ... Jun 17, 2009 - 8:36 AM rave2n Some cleaning begun, will finish shining up after ... Jun 19, 2009 - 10:30 AM rave2n First Thread! Jun 19, 2009 - 5:24 PM Sinyk Is that how it really looks? Damn I thought that w... Jun 19, 2009 - 5:46 PM rave2n Yeaaa, I just checked on it probally a hour later ... Jun 19, 2009 - 6:09 PM GriffGirl heh... looks a lot like my engine bay... well, col... Jun 19, 2009 - 6:37 PM rave2n Hah, yeap same red - Hopefully mine will darken... Jun 19, 2009 - 6:59 PM rave2n After a morning drive, probally less bright now th... Jun 20, 2009 - 11:40 AM Sinyk I notice you painted over the nuts on the top as w... Jun 22, 2009 - 10:43 AM GriffGirl How'd ya get your heat shield so clean? Did yo... Jun 22, 2009 - 11:49 AM rave2n Wire wheel, then used a bunch of diffrent sand pap... Jun 22, 2009 - 1:03 PM rave2n Made a battery harness today. Noticed I did not ha... Jun 22, 2009 - 5:59 PM rave2n More stuff has come in. Thank you to both the sell... Mar 24, 2010 - 2:24 PM rave2n Renamed the thread - Mainly because I have a hard ... Oct 5, 2009 - 11:30 AM rave2n Got some new parts in, time to get to work! Th... Feb 20, 2010 - 5:12 PM johnnehh Good progress Feb 20, 2010 - 5:38 PM rave2n Everything installed shown above. Will post pics o... Mar 7, 2010 - 5:12 PM SwissFerdi Oooooh, coilover sleeves. NICE!
One word of w... Mar 7, 2010 - 5:30 PM rave2n How she used to sit.
and how she is today, with... Mar 7, 2010 - 6:14 PM rave2n Goodies have arrived, the painting process begins ... Mar 9, 2010 - 9:33 PM johnnehh Lookin' good! Mar 9, 2010 - 10:05 PM rave2n Work on the rainguards.
They all repaired now, ju... Mar 30, 2010 - 1:14 PM rave2n Well, this long weekend the cellie gets a makeover... Jul 1, 2010 - 6:35 PM rave2n Lots of a progress today, woke up early and spent ... Jul 3, 2010 - 6:24 PM mkernz22 So i have one question for you, how did you get th... Jul 3, 2010 - 9:50 PM mkernz22 So just a regular 10mm socket or an extended 10mm ... Jul 4, 2010 - 9:53 AM rave2n I just used a regular 10mm socket, didn't have... Jul 4, 2010 - 10:34 AM mkernz22 actually mine were in good shape still, but they w... Jul 4, 2010 - 11:32 AM rave2n QUOTE (mkernz22 @ Jul 4, 2010 - 12:3... Jul 4, 2010 - 11:50 AM chacha what did you use to cover up broken rain guard? Jul 4, 2010 - 9:17 PM rave2n QUOTE (chacha @ Jul 4, 2010 - 10:17 ... Jul 5, 2010 - 8:52 AM rave2n Lots of work done today and yesterday...
SSIII Fr... Jul 18, 2010 - 6:27 PM TEAMFaint Car looks amazing Rave, so clean.
Just need some n... Jul 19, 2010 - 3:13 PM rave2n QUOTE (TEAMFaint @ Jul 19, 2010 - 3... Jul 19, 2010 - 4:00 PM SwissFerdi ^ I like them, especially when they have the inner... Jul 19, 2010 - 4:14 PM Tony-B x 2.
20mm spacers and a healthy drop.
Looks grea... Jul 19, 2010 - 4:27 PM cheela makes me want a black car... AND PROJECTORS!... Jul 19, 2010 - 4:48 PM rave2n Thanks guys! Its been one hell of a road, and ... Jul 19, 2010 - 6:27 PM Tom88 Ive got the same problem jacking the car up. Its o... Jul 20, 2010 - 5:16 AM rave2n QUOTE (Tom88 @ Jul 20, 2010 - 6:16 A... Jul 20, 2010 - 11:49 AM Tom88 Ahh ok. It looks very similar to the liqwid art ba... Jul 20, 2010 - 12:31 PM rave2n Damn, that liqwid art badge is bad ass...If i fail... Jul 20, 2010 - 12:44 PM vincent_doggy QUOTE (rave2n @ Jul 21, 2010 - 1:44 ... Jul 20, 2010 - 2:26 PM rave2n QUOTE (vincent_doggy @ Jul 20, 2010 - 2... Jul 20, 2010 - 2:46 PM SleekCelica You make me very jealous, good sir! Jul 20, 2010 - 1:27 PM rave2n Reworked the intake a bit.
Few other not photo wo... Aug 10, 2010 - 4:09 PM rave2n Did all the suspension over this past weekend.
In... Jan 18, 2011 - 9:49 AM SwissFerdi ^ The Sportline springs are awesome eh? You might ... Jan 18, 2011 - 9:59 AM Keiri QUOTE (SwissFerdi @ Jan 18, 2011 - 9... Jan 18, 2011 - 10:36 AM rave2n Yea loving the springs, feels great going over rai... Jan 18, 2011 - 10:45 AM delusionz you turned an ugly car into a good looking car
h... Jan 19, 2011 - 10:48 AM rave2n QUOTE (delusionz @ Jan 19, 2011 - 10... Jan 20, 2011 - 11:10 AM rave2n Project on hold......
Pending my transfer to Fl... Feb 1, 2011 - 9:13 PM rave2n While project is on hold...
3rd Gen 3sgte paymen... Mar 4, 2011 - 3:13 PM SwissFerdi Cool. Can't say I'm a fan of the dark tai... Mar 4, 2011 - 5:45 PM CoreyST I like the rear window wing/visor where did you ge... Mar 4, 2011 - 8:36 PM Needles nice ride ! im gonna paint mine in black 100 %... Mar 7, 2011 - 12:41 AM rave2n The tails i'm not to hot on. Temp either way, ... Mar 8, 2011 - 8:43 AM SleekCelica I love the tails. looks nice! Mar 9, 2011 - 2:17 PM cheela you gotta get rid of that gold emblem on the back ... Mar 9, 2011 - 2:29 PM rave2n Lol yea I certainly do need to get rid of those ba... Apr 14, 2011 - 7:37 AM Mycurse180 Good looking ride man Apr 14, 2011 - 10:31 PM rave2n Final Payment made on 3sgte
Shall arrive in 4-6 w... Aug 5, 2011 - 1:54 PM rave2n 3sgte came in today.
Was quite amusing as the del... Nov 22, 2011 - 1:39 PM rave2n Oh while we are on the topic...
Can anyone tell m... Nov 23, 2011 - 9:15 AM Ted95 glad to see the motor came in, looks clean!
... Nov 23, 2011 - 12:19 PM rave2n QUOTE (Ted95 @ Nov 23, 2011 - 1:19 P... Nov 25, 2011 - 8:48 AM rave2n Started tearing the 3s down during my lunch break.... Dec 12, 2011 - 1:09 PM ricochet1490 I have no answers for you, but I'll be watchin... Dec 13, 2011 - 10:50 PM rave2n Todays activities included...getting that wiring h... Dec 14, 2011 - 1:42 PM rave2n Primed!
No idea on accent color I want. Alw... Dec 15, 2011 - 2:49 PM Grega QUOTE (rave2n @ Dec 15, 2011 - 8:49 ... Dec 15, 2011 - 3:04 PM Ted95 lookin good man! i was in the same boat about ... Dec 15, 2011 - 3:21 PM rave2n Ah thanks for that info Ted, but of course I get t... Dec 16, 2011 - 10:23 AM PhoenixTech WHOA! 33" extension??? Are you mounting... Dec 21, 2011 - 9:39 AM rave2n QUOTE (PhoenixTech @ Dec 21, 2011 - 10... Dec 21, 2011 - 9:50 AM PhoenixTech We'll be here when you're ready! Dec 21, 2011 - 11:44 AM TRD11 nice work on every thing ..... looks good Jan 7, 2012 - 3:38 PM rave2n QUOTE (TRD11 @ Jan 7, 2012 - 4:38 PM... Jan 8, 2012 - 11:24 AM TRD11 QUOTE (rave2n @ Jan 8, 2012 - 11:24 ... Jan 9, 2012 - 7:39 PM kurt95gt Good luck man
Glad to see this story getting a ha... Jan 8, 2012 - 12:05 PM |
1 User(s) are reading this topic (1 Guests and 0 Anonymous Users)
0 Members:
| Lo-Fi Version | Time is now: July 29th, 2026 - 11:06 PM |