
 Sep 28, 2010 - 9:23 AM Sep 28, 2010 - 9:23 AM
|
 
|
|
Enthusiast  Joined Sep 24, '10 From Maryland Currently Offline Reputation: 0 (0%) |
trying to start a thread on painting (all inclusive) and bodywork (removing dents, etc.) because, well I want to learn it and im sure there are tons of viewers wondering/wishing the same thing.
If you have bodywork/Paint know-how, share here! -------------------- same skidpad grip as a 2006 M3....stock. 'nuff said
|

 |
Replies
|
Oct 20, 2010 - 7:55 AM
|
|
|
Enthusiast Joined Aug 15, '10 From UK Currently Offline Reputation: 0 (0%) |
Here is the basic process of removing small dents and dings in your bodywork. Please excuse the photos...I have taken them from a couple of jobs I have done on my car. The first few are from my "deleting radio aerial hole" and progresses to some side shots of the car being sanded...but it shows you the process.
Basically it runs like this: 1. Use a de-greaser and remove surface contaminants....sand area down with 80 grit sandpaper. This creates the perfect key for bodyfiller. 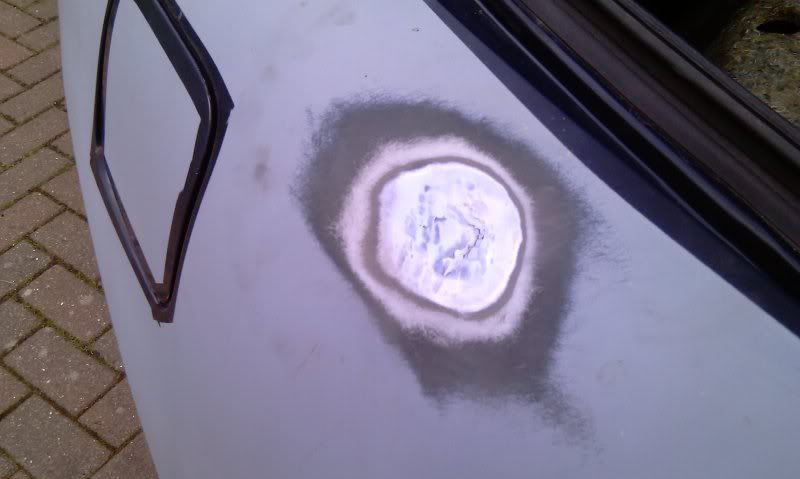 2. Again use a de-greaser to remove sanding dust. Apply bodyfiller over area and beyond the repair area to help feather it into body. 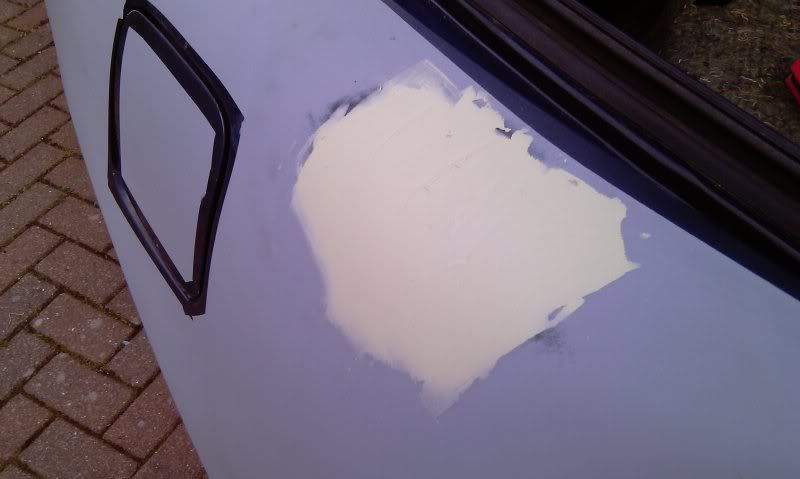 3. Start sanding with 80 Grit sandpaper to get bodyfiller roughly flat then progress into 120 sandpaper to feather out edges of bodyfiller. 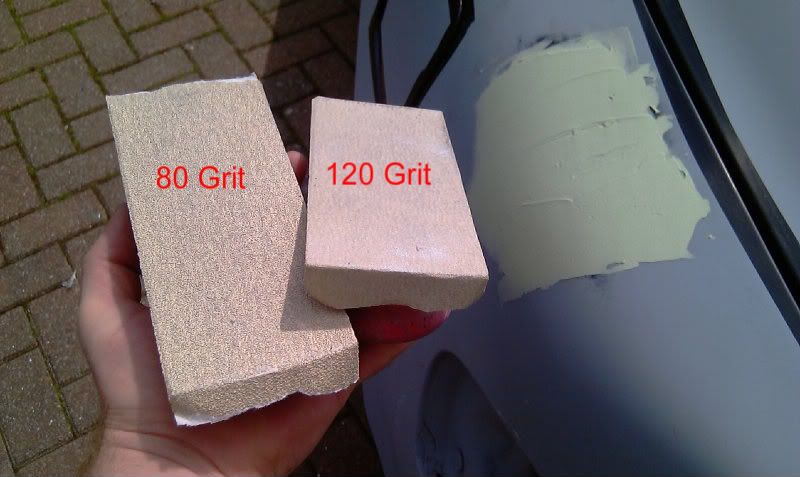 4. Here you can see the edges are feathered out nicely...the edges start to turn milky (you can see the underneath colour coming through). You can also see the slightly darker colour of the bodyfiller in the middle...this is a low spot in the repair area. 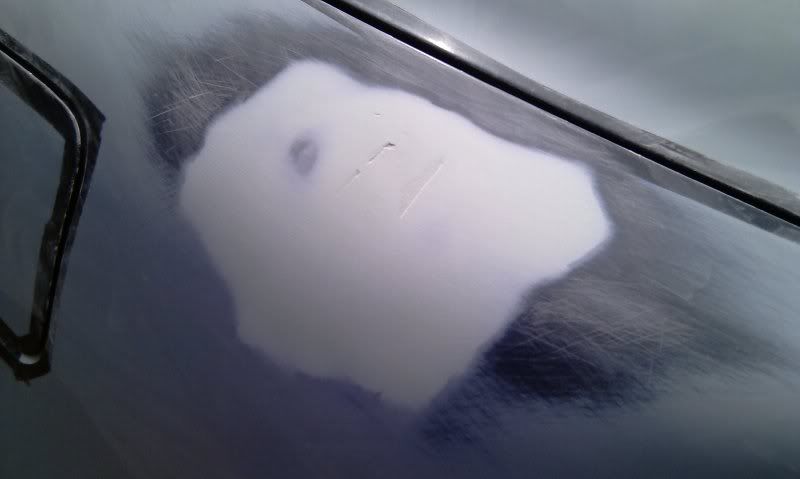 5. The low spot areas need another coat of bodyfiller.  6. Repeat sanding with 80 grit then 120 grit as previous. 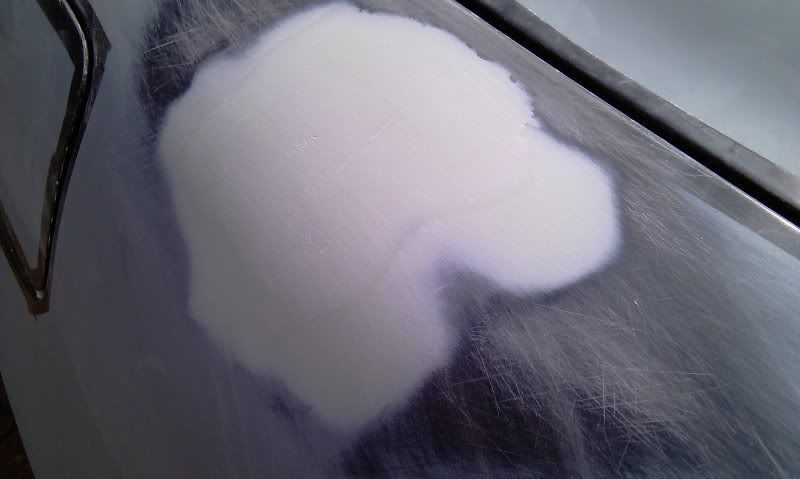 7. Next is to use a spot putty or pin hole bodyfiller...this is to fill in tiny little holes in the bodyfiller. These are caused by tiny pockets of air in the bodyfiller, which when sanded through leaves tiny holes. Normal bodyfiller would be too thick to fill without creating alot more sanding work. 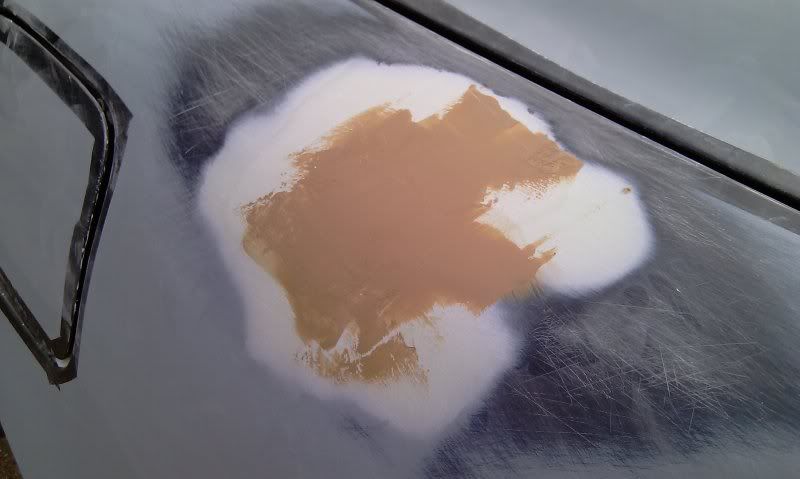 8. Progress with some more sanding...this time use 240 to 320 grit sandpaper which is perfect to get bodywork ready for spraying primer. Make sure the edges again turn milky to help blend repair area into existing body. 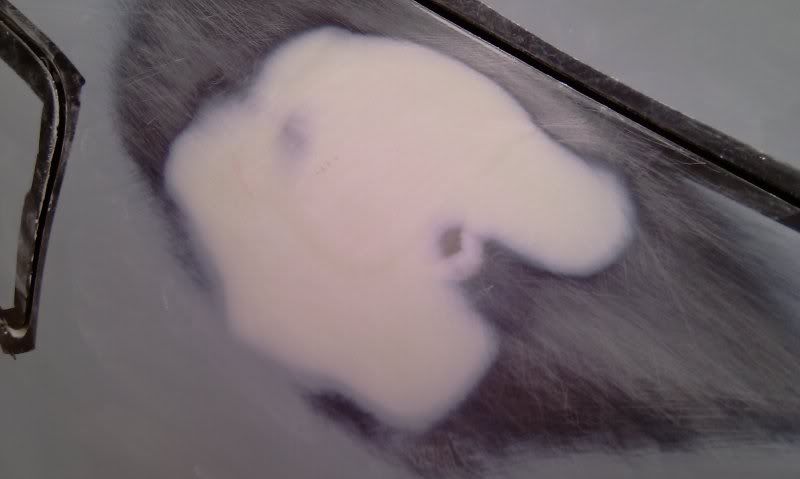 9. Here you can see the sanding to the surrounding area as well...this is done using 320 grit sandpaper. 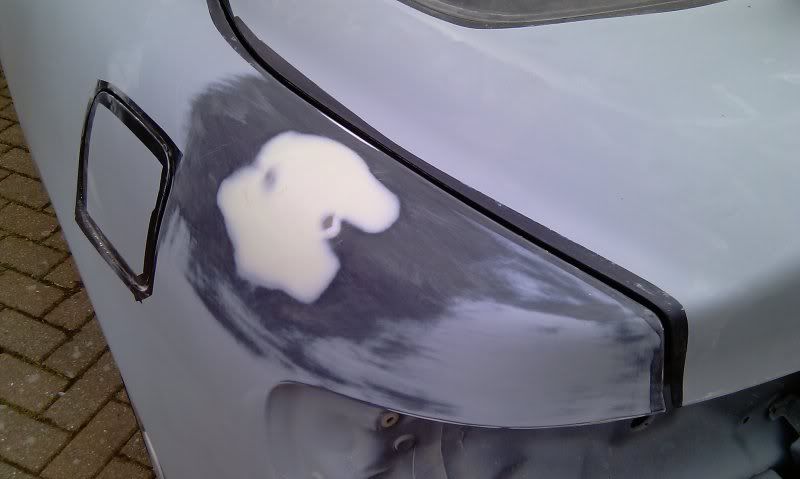 10. Tape off the area to be sprayed in primer.  11. Take your time and spray 3 coats of primer...with about 10 mins in between to allow the solvents to flash off (evaporate off). Here you can see the bodywork is still seen under the first coat of primer. 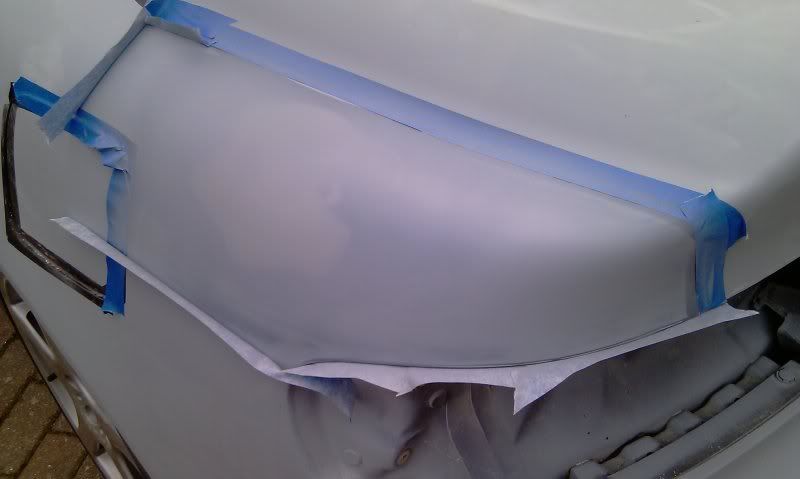 12. Here is the final area in full primer ready for next step. 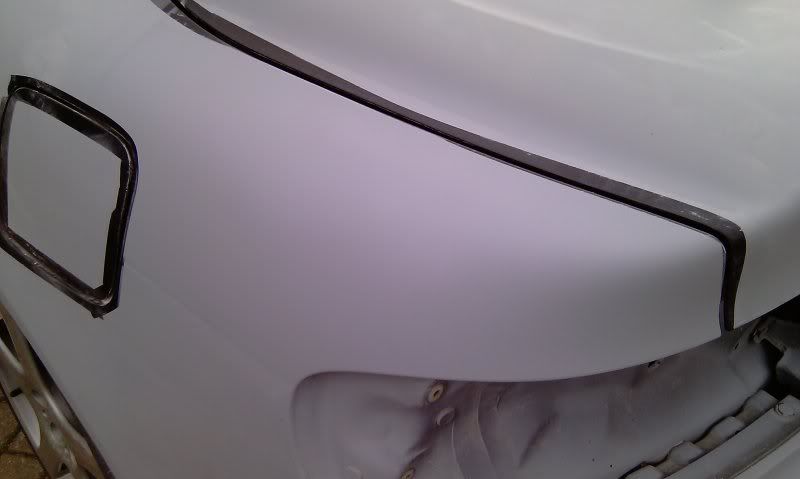 13. Right so the bodywork looks good and perfectly flat...but your eyes can lie. The next step is to use a "guide coat"...I use 3m guide coat but a light coat of black paint can be also used. Here is the guide coat applied to the area. 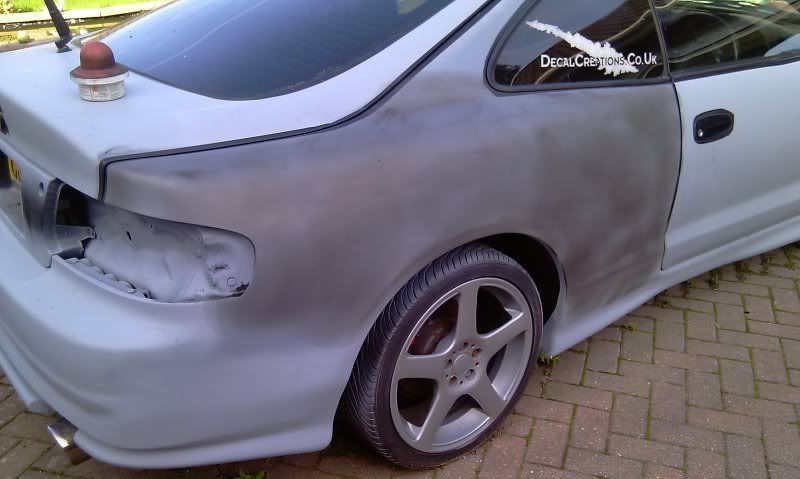 14. You need to use a sanding block to sand perfectly flat...sanding in an X pattern will help highlight any low spot. 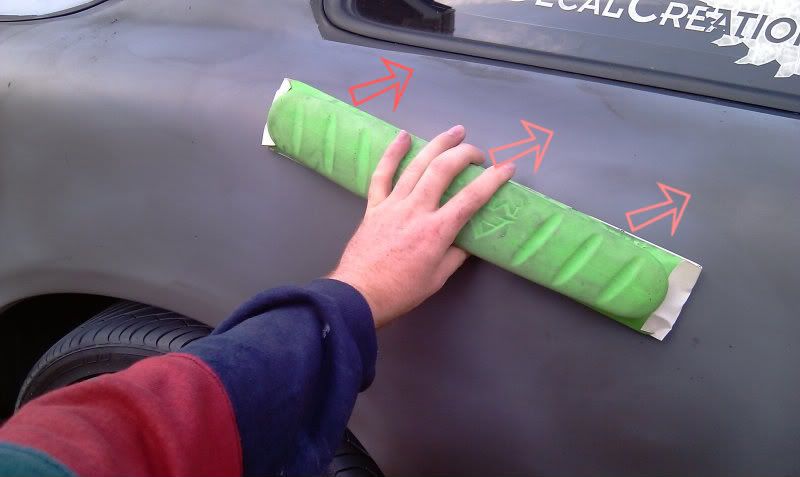 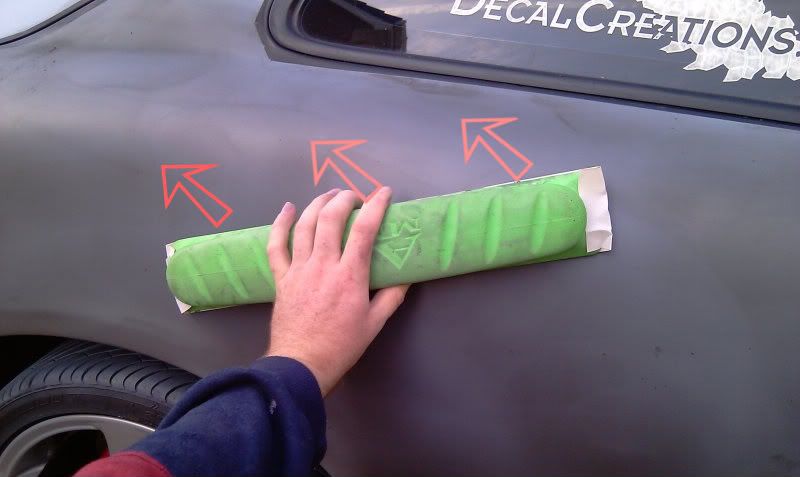 15. The guide coat is sanded off and you can just make out a low spot in the bodywork where the guide coat remains. 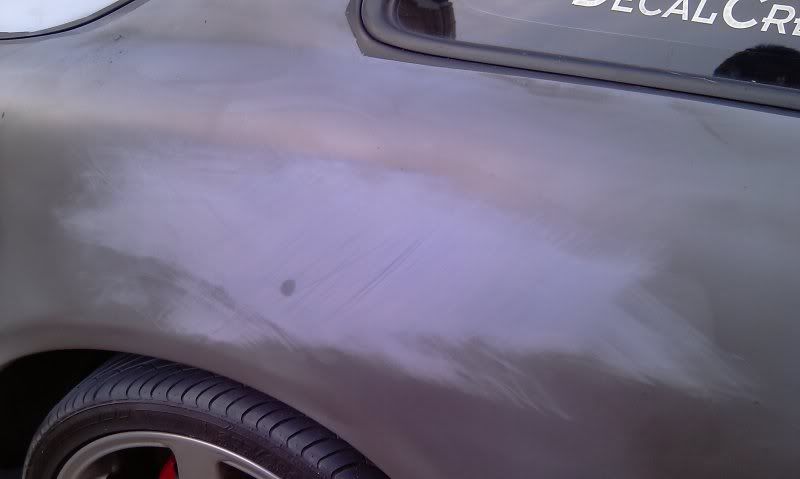 16. Another shot of the missed low spot in the bodywork. To repair this...you can apply a thin layer of spot putty, re-sand and re-prime it. 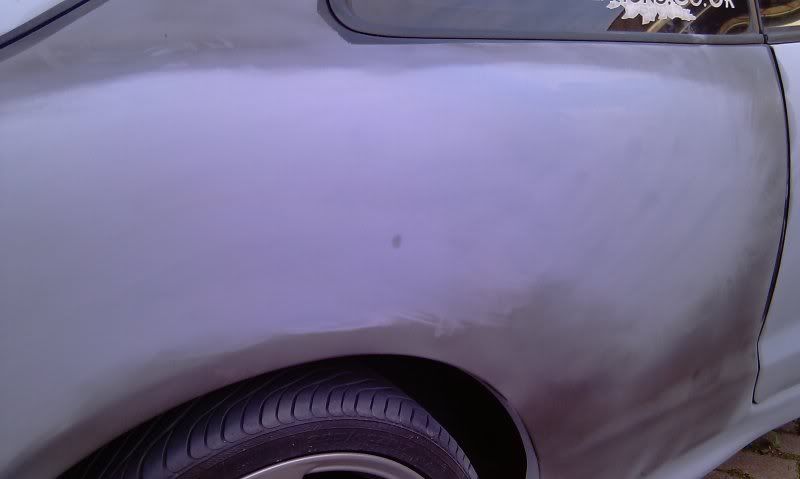
|
Posts in this topic
e30og Bodywork Thread Sep 28, 2010 - 9:23 AM mkernz22 to just add onto this thread;
does anyone know wh... Sep 28, 2010 - 10:03 AM Badkarma im going to be molding my duckbill spoiiler to my ... Sep 28, 2010 - 7:57 PM Bigblock The thought has come up lately--I think I will **t... Sep 28, 2010 - 9:40 PM Badkarma if the rust hasn't yet eaten through the metal... Sep 29, 2010 - 6:57 PM mkernz22 I need to fix up the rust on my drivers quarter pa... Sep 29, 2010 - 7:40 PM mgnt232 I agree with everything badkarma said, I recently ... Sep 30, 2010 - 1:39 AM
mkernz22 to just add onto this thread;
does anyone know wh... Sep 28, 2010 - 10:03 AM Badkarma im going to be molding my duckbill spoiiler to my ... Sep 28, 2010 - 7:57 PM Bigblock The thought has come up lately--I think I will **t... Sep 28, 2010 - 9:40 PM Badkarma if the rust hasn't yet eaten through the metal... Sep 29, 2010 - 6:57 PM mkernz22 I need to fix up the rust on my drivers quarter pa... Sep 29, 2010 - 7:40 PM mgnt232 I agree with everything badkarma said, I recently ... Sep 30, 2010 - 1:39 AM
 e30og QUOTE (mgnt232 @ Sep 30, 2010 - 1:39... Sep 30, 2010 - 7:59 AM 96stgreendemon as far as body work goes never ever use more than ... Sep 30, 2010 - 6:55 AM 96stgreendemon as far as larger dents go you will need basic auto... Sep 30, 2010 - 8:59 AM CelicaHD2 I think this should be relevant...I have got a qui... Oct 12, 2010 - 11:34 AM easternpiro1 callmejb has some body work experience went to sch... Oct 14, 2010 - 1:29 AM CelicaHD2 I have alot of experience in terms of bodywork, sp... Oct 14, 2010 - 8:07 PM mkernz22 QUOTE (CelicaHD2 @ Oct 14, 2010 - 9... Oct 14, 2010 - 8:14 PM 96stgreendemon im actually going to do some fitting work on my fr... Oct 15, 2010 - 10:06 AM 96stgreendemon So the Splitters have been fixed, only had real pr... Oct 18, 2010 - 4:29 PM mkernz22 So I do have a question, where is the best place t... Oct 18, 2010 - 4:43 PM 96stgreendemon well you can buy it anywhere, i have seen it at ho... Oct 18, 2010 - 4:50 PM mkernz22 ohh alrightt
what i'm thinking about doing is ... Oct 18, 2010 - 5:11 PM 96stgreendemon as long as it is not over a 1/4 in gap you should ... Oct 18, 2010 - 5:30 PM mkernz22 could i use bondo to fill the small gaps, then fib... Oct 18, 2010 - 5:37 PM 96stgreendemon what gaps are you talking about Oct 18, 2010 - 5:47 PM mkernz22 on the passenger side SS there's about a 1/4 t... Oct 18, 2010 - 5:52 PM 96stgreendemon Try and use a heat gun first to fit it better, or ... Oct 18, 2010 - 6:01 PM mkernz22 my holes that i drilled were a tad bit off i took... Oct 18, 2010 - 6:11 PM 96stgreendemon it will be easier to fix the holes, like i said yo... Oct 18, 2010 - 9:59 PM CelicaHD2 Having looked at the waffle pads on your EBay link... Oct 19, 2010 - 6:10 AM CelicaHD2 Just another quick note...unless you are in the de... Oct 19, 2010 - 7:01 AM bccentaur3 What do you guys do about them small dings then? J... Oct 19, 2010 - 10:34 PM 96stgreendemon just all depends on how bad they are, small dings ... Oct 19, 2010 - 10:53 PM CelicaHD2 Small Dings...tell me about them! lol
Here is... Oct 20, 2010 - 7:16 AM jcbass7 AWESOME^ write up and pics, I learned a few new tr... Oct 20, 2010 - 7:43 PM CelicaHD2 You are very welcome...I can put a number of DIY a... Oct 20, 2010 - 9:19 PM 96stgreendemon just go ahead and add it, we will just get it all ... Oct 21, 2010 - 8:33 AM mkernz22 would you be able to make a writeup on molding the... Oct 21, 2010 - 8:46 AM CelicaHD2 QUOTE (mkernz22 @ Oct 21, 2010 - 2:4... Oct 21, 2010 - 5:18 PM CelicaHD2 Additional photos for antenna hole smoothing....
... Oct 21, 2010 - 5:46 PM CelicaHD2 Sorry but I couldn't find any photos of the pr... Oct 21, 2010 - 6:31 PM jcbass7 Again Awesome write ups and pictures, very helpful... Oct 21, 2010 - 8:43 PM 96stgreendemon Late addition to the thread but here is some help ... Nov 3, 2010 - 8:31 PM
e30og QUOTE (mgnt232 @ Sep 30, 2010 - 1:39... Sep 30, 2010 - 7:59 AM 96stgreendemon as far as body work goes never ever use more than ... Sep 30, 2010 - 6:55 AM 96stgreendemon as far as larger dents go you will need basic auto... Sep 30, 2010 - 8:59 AM CelicaHD2 I think this should be relevant...I have got a qui... Oct 12, 2010 - 11:34 AM easternpiro1 callmejb has some body work experience went to sch... Oct 14, 2010 - 1:29 AM CelicaHD2 I have alot of experience in terms of bodywork, sp... Oct 14, 2010 - 8:07 PM mkernz22 QUOTE (CelicaHD2 @ Oct 14, 2010 - 9... Oct 14, 2010 - 8:14 PM 96stgreendemon im actually going to do some fitting work on my fr... Oct 15, 2010 - 10:06 AM 96stgreendemon So the Splitters have been fixed, only had real pr... Oct 18, 2010 - 4:29 PM mkernz22 So I do have a question, where is the best place t... Oct 18, 2010 - 4:43 PM 96stgreendemon well you can buy it anywhere, i have seen it at ho... Oct 18, 2010 - 4:50 PM mkernz22 ohh alrightt
what i'm thinking about doing is ... Oct 18, 2010 - 5:11 PM 96stgreendemon as long as it is not over a 1/4 in gap you should ... Oct 18, 2010 - 5:30 PM mkernz22 could i use bondo to fill the small gaps, then fib... Oct 18, 2010 - 5:37 PM 96stgreendemon what gaps are you talking about Oct 18, 2010 - 5:47 PM mkernz22 on the passenger side SS there's about a 1/4 t... Oct 18, 2010 - 5:52 PM 96stgreendemon Try and use a heat gun first to fit it better, or ... Oct 18, 2010 - 6:01 PM mkernz22 my holes that i drilled were a tad bit off i took... Oct 18, 2010 - 6:11 PM 96stgreendemon it will be easier to fix the holes, like i said yo... Oct 18, 2010 - 9:59 PM CelicaHD2 Having looked at the waffle pads on your EBay link... Oct 19, 2010 - 6:10 AM CelicaHD2 Just another quick note...unless you are in the de... Oct 19, 2010 - 7:01 AM bccentaur3 What do you guys do about them small dings then? J... Oct 19, 2010 - 10:34 PM 96stgreendemon just all depends on how bad they are, small dings ... Oct 19, 2010 - 10:53 PM CelicaHD2 Small Dings...tell me about them! lol
Here is... Oct 20, 2010 - 7:16 AM jcbass7 AWESOME^ write up and pics, I learned a few new tr... Oct 20, 2010 - 7:43 PM CelicaHD2 You are very welcome...I can put a number of DIY a... Oct 20, 2010 - 9:19 PM 96stgreendemon just go ahead and add it, we will just get it all ... Oct 21, 2010 - 8:33 AM mkernz22 would you be able to make a writeup on molding the... Oct 21, 2010 - 8:46 AM CelicaHD2 QUOTE (mkernz22 @ Oct 21, 2010 - 2:4... Oct 21, 2010 - 5:18 PM CelicaHD2 Additional photos for antenna hole smoothing....
... Oct 21, 2010 - 5:46 PM CelicaHD2 Sorry but I couldn't find any photos of the pr... Oct 21, 2010 - 6:31 PM jcbass7 Again Awesome write ups and pictures, very helpful... Oct 21, 2010 - 8:43 PM 96stgreendemon Late addition to the thread but here is some help ... Nov 3, 2010 - 8:31 PM |
1 User(s) are reading this topic (1 Guests and 0 Anonymous Users)
0 Members:
| Lo-Fi Version | Time is now: June 22nd, 2026 - 11:16 PM |