
 Oct 4, 2010 - 10:51 AM Oct 4, 2010 - 10:51 AM
|
 
|
 Enthusiast  Joined Apr 20, '06 From Florida Currently Offline Reputation: 44 (100%) |
Well you've got to start somewhere and this is my second time starting. Nonetheless, the celica's from my past are all part of the story that has led me to this one and finally being able to complete the project I have been dreaming of. They are also contributing a lot of parts and lessons learned to get this car how I want it. I bought this car in September 2010 and will be marking my progress routinely with many pictures.
Here is the baseline. The starting point. The blank Canvas. I'm giving you a full snapshot into its original condition from when I bought it. Flaws and all. This way the you can see the progress it makes as I fix the little details and add the JDM/TRD goodies. 94' Celica GT Hatchback -Stock 5SFE -Stock ABS Brakes -Stock Premium Sound -Stock Suspension -Stock Exterior -Stock Interior EXTERIOR: 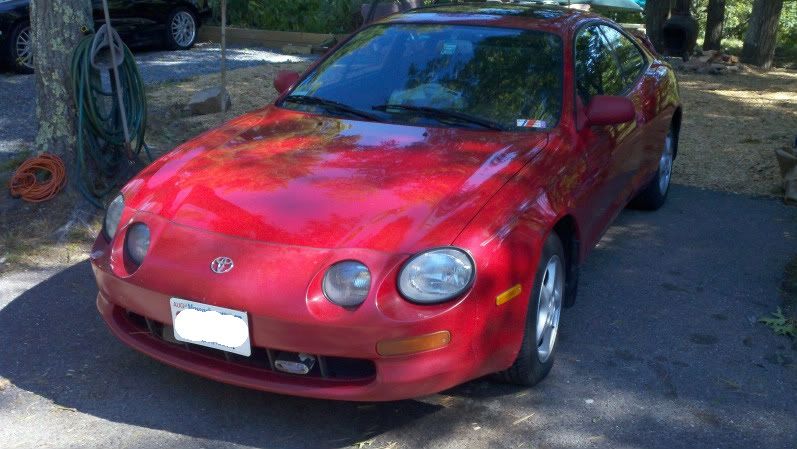 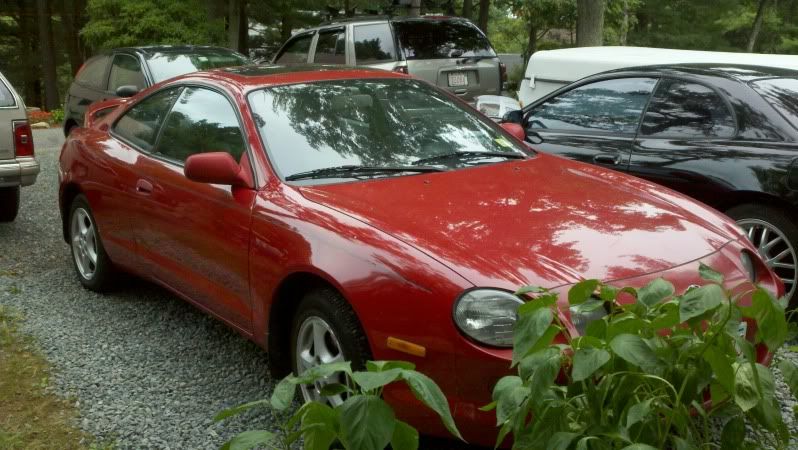   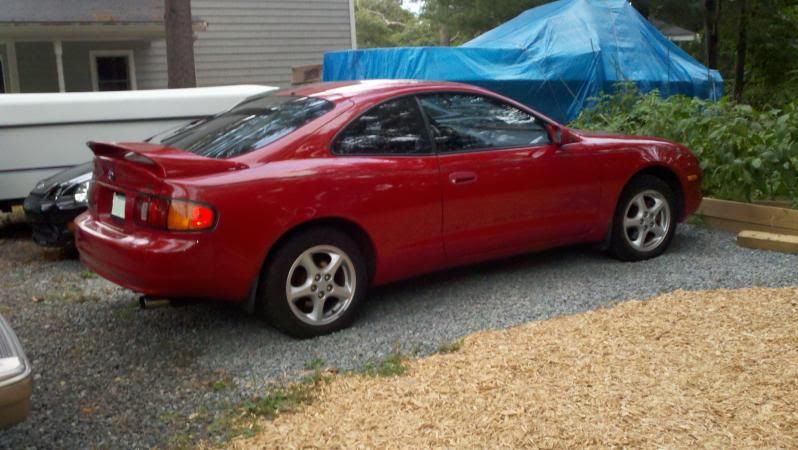 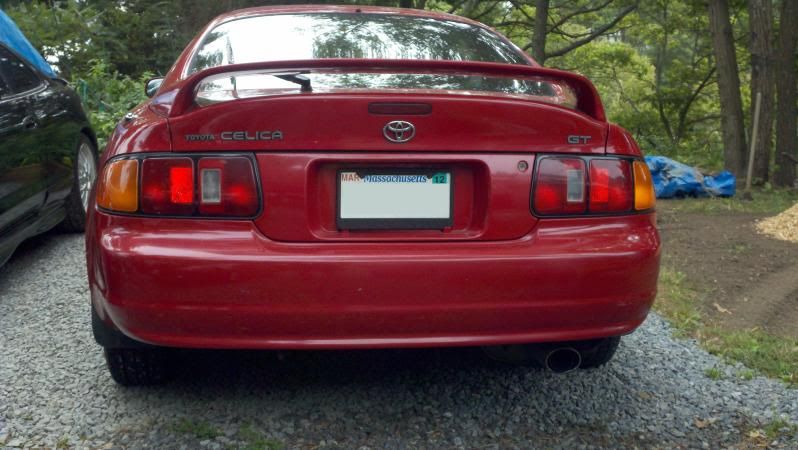 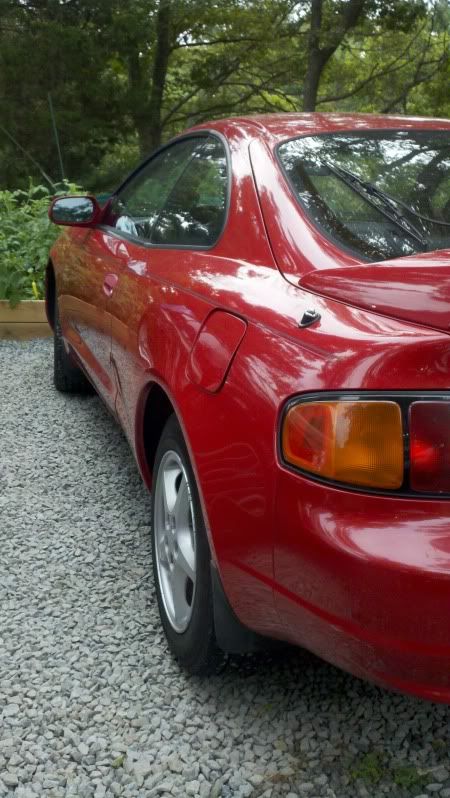 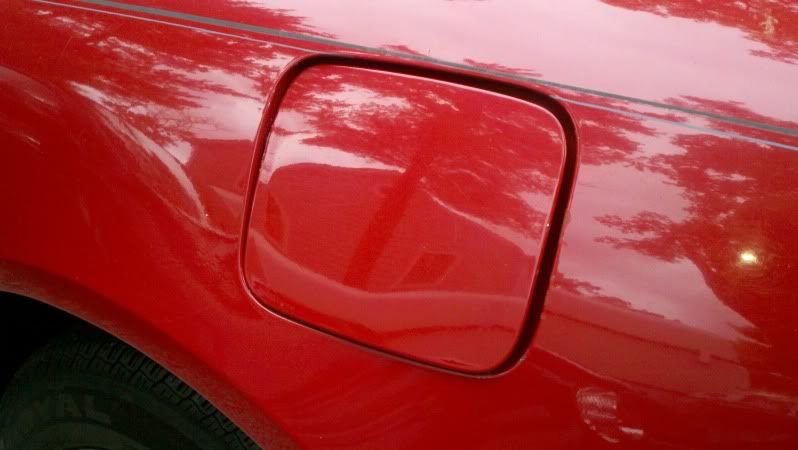 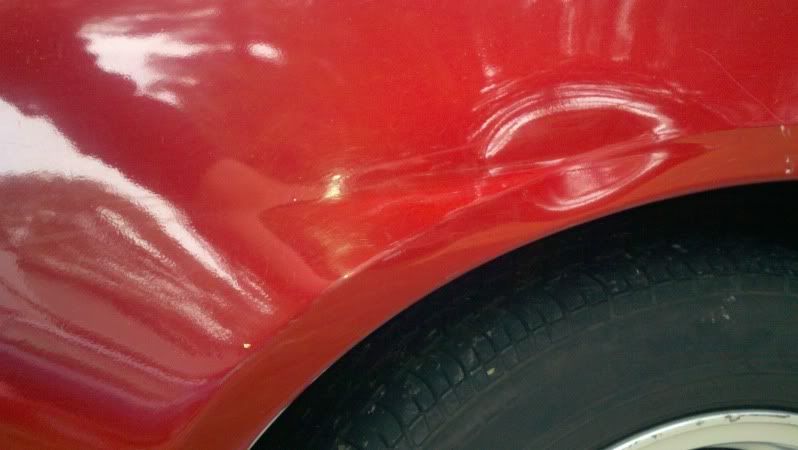 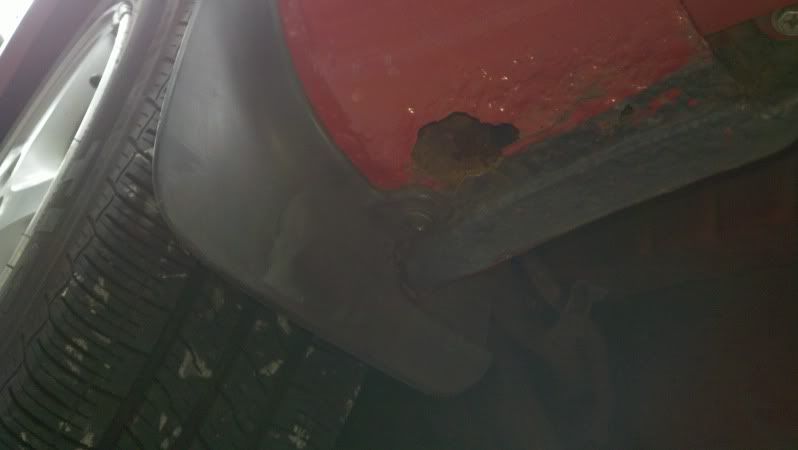 INTERIOR: 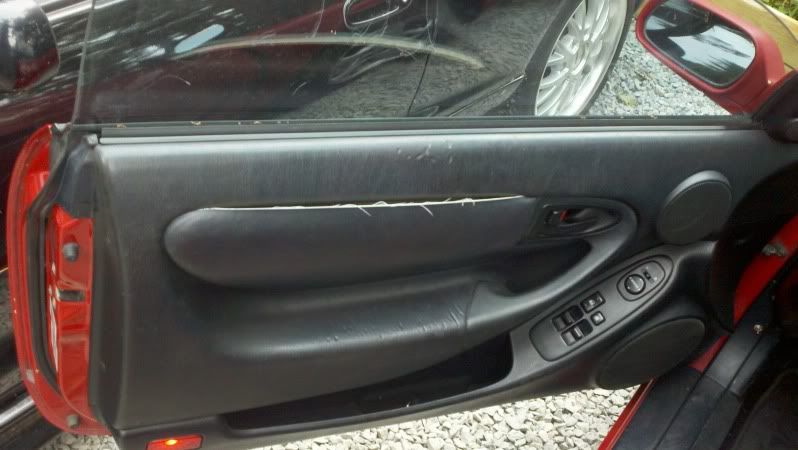 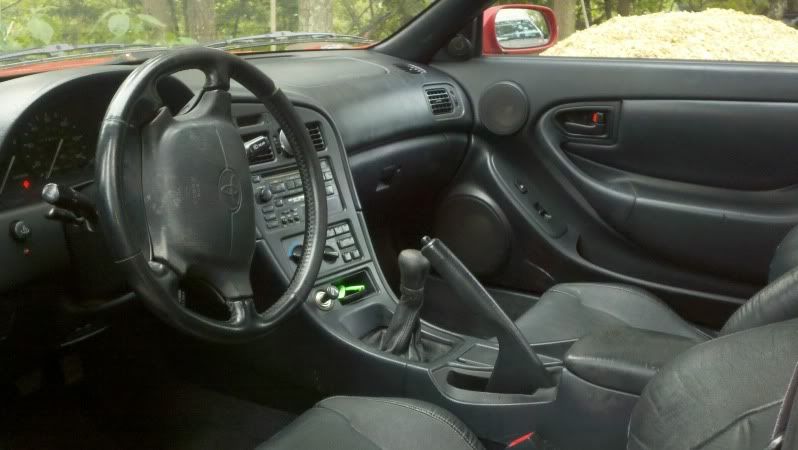 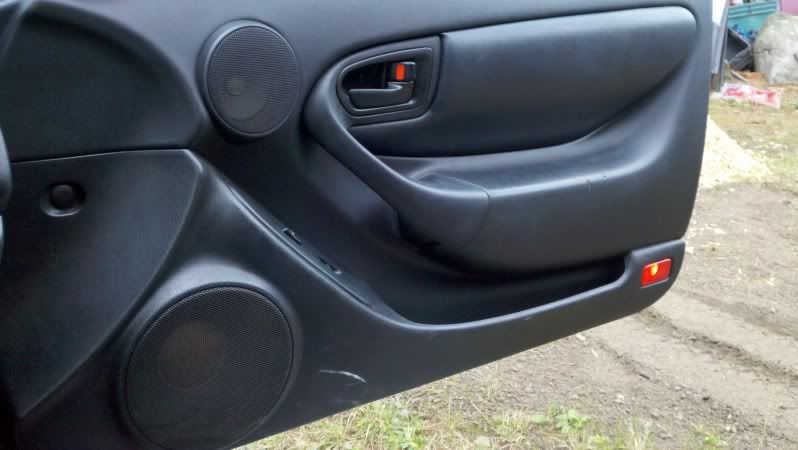 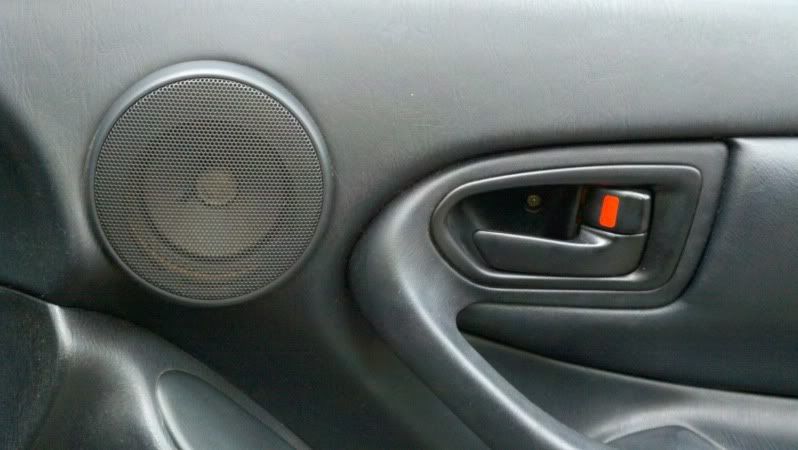 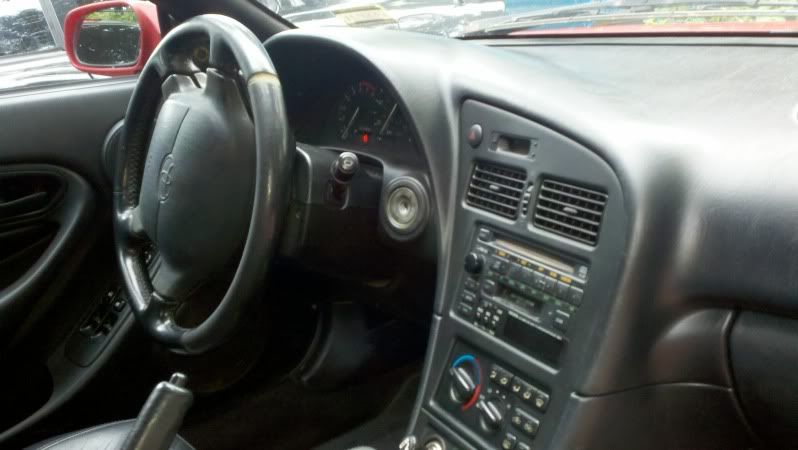 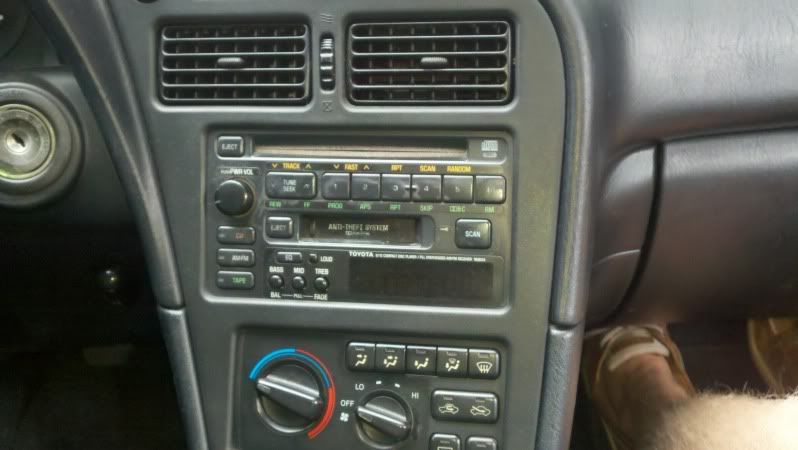 UNDER THE HOOD: 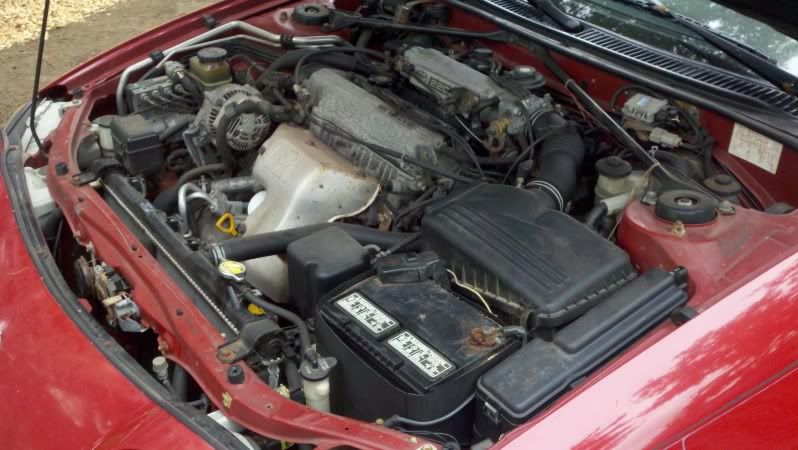 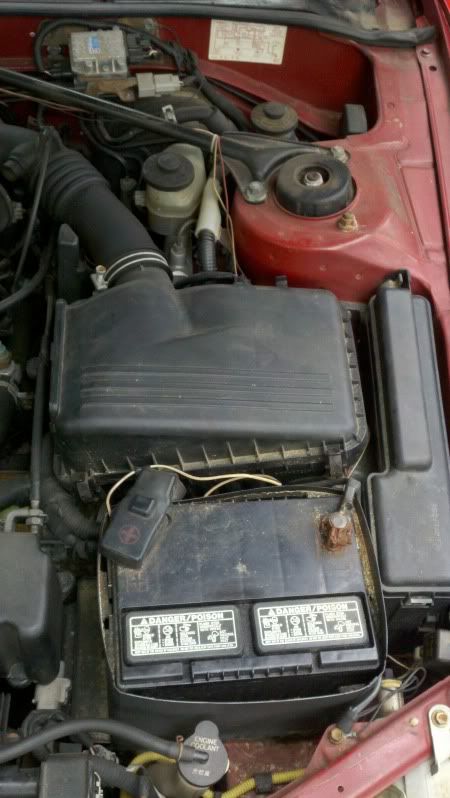  Here is the progress thread for my first build a few years back.. Learned a lot on that project: http://www.6gc.net/forums/index.php?showto...3997&st=280 (A good read if you are bored at work, lots of parts, pics, problems and even a fire) This post has been edited by jcbass7: Dec 6, 2012 - 10:29 AM |

 |
Replies
|
Oct 27, 2010 - 10:01 AM
|
|
|
Enthusiast Joined Apr 20, '06 From Florida Currently Offline Reputation: 44 (100%) |
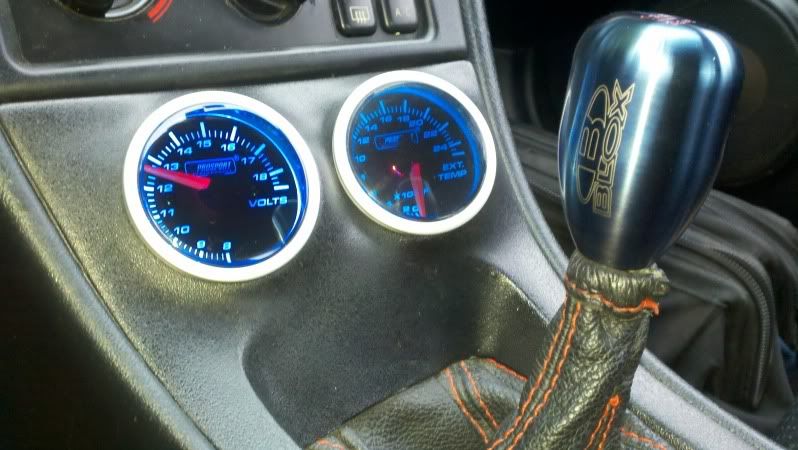
Well I contacted prosport and it looks like they made a change to their gauges about a year ago. So my old style ext temp gauge is only blue and cannot turn white at all, and the old ones have slightly less powerful LED's as well (as seen below). So for now I'll keep the blue all the time set up, but eventually I will upgrade so that I can have both gauges go white during the day.
 Also I found a picture of the switches in a stock BMW 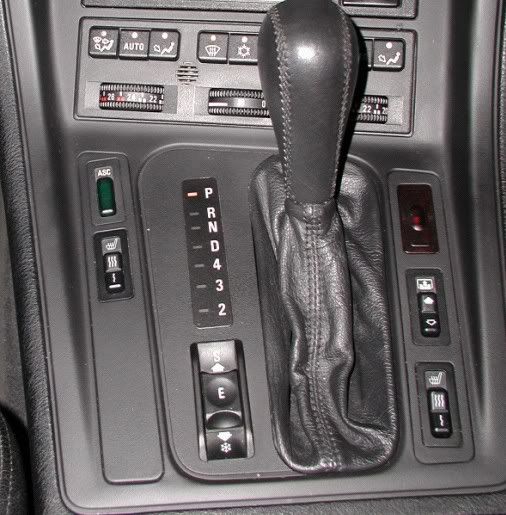 I need to figure out how they turn on and off. There is a high and low setting on the switch, but no off position like the toggle Toyota seat heater switches Dustin has. From what I gathered, the wiring on the back of the switch is as follows: Wire 1: illumination + 2: Power (Hi?) 3: Power (Low?) 4: Ground (Illumintaion -) 5: Heat Pad Back 6: Heat Pad Seat So this might be more interesting than I thought to get it to wire up correctly, but I'll make it work. This post has been edited by jcbass7: Oct 27, 2010 - 10:02 AM |
Posts in this topic
jcbass7 Car Progress Thread v2.0 Oct 4, 2010 - 10:51 AM jcbass7 CURRENT CONDITION: (compare to above!)
Mods/W... Oct 4, 2010 - 10:54 AM DEATH Nice addition!
What happened to the other two?... Oct 4, 2010 - 10:56 AM
jcbass7 CURRENT CONDITION: (compare to above!)
Mods/W... Oct 4, 2010 - 10:54 AM DEATH Nice addition!
What happened to the other two?... Oct 4, 2010 - 10:56 AM
 jcbass7 QUOTE (DEATH @ Oct 4, 2010 - 11:56 A... Oct 4, 2010 - 12:23 PM jcbass7 So this past weekend I was working mostly on the v... Oct 4, 2010 - 10:56 AM SwissFerdi Oh, I don't know...maybe the GT-FOUR parts and... Oct 4, 2010 - 1:55 PM jcbass7 QUOTE (SwissFerdi @ Oct 4, 2010 - 2... Oct 4, 2010 - 2:43 PM 3WayStunna QUOTE (jcbass7 @ Oct 4, 2010 - 2:43 ... Oct 11, 2010 - 10:36 PM jcbass7 QUOTE (3WayStunna @ Oct 11, 2010 - 11... Oct 12, 2010 - 6:38 PM DEATH OK I gotta ask - you have 2 sets of projectors hea... Oct 4, 2010 - 2:04 PM jcbass7 QUOTE (DEATH @ Oct 4, 2010 - 3:04 PM... Oct 4, 2010 - 2:39 PM mkernz22 I just gotta say good luck with everything!
O... Oct 4, 2010 - 4:37 PM jcbass7 QUOTE (mkernz22 @ Oct 4, 2010 - 5:37... Oct 4, 2010 - 5:06 PM mkernz22 I would only go with 94 or 95's for that same ... Oct 4, 2010 - 5:13 PM jcbass7 QUOTE (mkernz22 @ Oct 4, 2010 - 6:13... Oct 4, 2010 - 5:15 PM EKAn That coupe is defiantly hot! Oct 4, 2010 - 5:21 PM jcbass7 QUOTE (EKAn @ Oct 4, 2010 - 6:21 PM)... Oct 4, 2010 - 5:25 PM EKAn As a coupe owner I'm bias, but either way i kn... Oct 4, 2010 - 5:44 PM dudeofchaos Are you selling your OEM head unit? Oct 4, 2010 - 5:51 PM jcbass7 QUOTE (EKAn @ Oct 4, 2010 - 6:44 PM)... Oct 4, 2010 - 7:19 PM dudeofchaos Awhhh crap Oct 4, 2010 - 8:42 PM jcbass7 So I don't remember what this guy is.. my best... Oct 6, 2010 - 10:47 AM Batman722 yes sir, ABS. Oct 6, 2010 - 6:14 PM jcbass7 So I did a lot of work this weekend, I will post p... Oct 11, 2010 - 1:10 PM DEATH Yeah Bro - that's not your problem. The first ... Oct 11, 2010 - 1:23 PM jcbass7 QUOTE (DEATH @ Oct 11, 2010 - 2:23 P... Oct 11, 2010 - 1:29 PM DEATH QUOTE (jcbass7 @ Oct 11, 2010 - 1:29... Oct 11, 2010 - 1:32 PM jcbass7 QUOTE (DEATH @ Oct 11, 2010 - 2:32 P... Oct 11, 2010 - 1:44 PM jcbass7 Well I figured out part of the problem. There was... Oct 11, 2010 - 2:27 PM DEATH Rewire it all bro - you got the interior half gutt... Oct 11, 2010 - 2:43 PM jcbass7 QUOTE (DEATH @ Oct 11, 2010 - 3:43 P... Oct 11, 2010 - 2:50 PM DEATH QUOTE (jcbass7 @ Oct 11, 2010 - 2:50... Oct 11, 2010 - 3:29 PM jcbass7 QUOTE (DEATH @ Oct 11, 2010 - 4:29 P... Oct 11, 2010 - 4:12 PM DEATH QUOTE (jcbass7 @ Oct 11, 2010 - 4:12... Oct 11, 2010 - 4:26 PM jcbass7 QUOTE (DEATH @ Oct 11, 2010 - 5:26 P... Oct 11, 2010 - 4:33 PM 95st-celica i installed a "flip out" head unit in my... Oct 11, 2010 - 2:51 PM jcbass7 QUOTE (95st-celica @ Oct 11, 2010 ... Oct 11, 2010 - 2:57 PM jcbass7 I had a chance to get some more done on the car th... Oct 11, 2010 - 10:09 PM jcbass7 So I was told the front brakes on the coupe (when ... Oct 12, 2010 - 9:38 PM Johnnyny 404's!!! Oct 13, 2010 - 3:04 AM jcbass7 QUOTE (Johnnyny @ Oct 13, 2010 - 4:0... Oct 13, 2010 - 2:55 PM jcbass7 Well I tried to do a little tonight, but got some ... Oct 13, 2010 - 8:35 PM mkernz22 My rust hole is in the same spot! Sh!t now... Oct 13, 2010 - 9:49 PM BonzaiCelica yes water fills up in the same spot but mines on t... Oct 13, 2010 - 11:01 PM jcbass7 yea its on the to-do list to fix that spot. I... Oct 14, 2010 - 8:14 AM mkernz22 i might shave mine too so that it wont rust out ag... Oct 14, 2010 - 4:15 PM HectortheRican Good luck with the ST205 cluster! Are you want... Oct 15, 2010 - 2:31 AM jcbass7 QUOTE (HectortheRican @ Oct 15, 2010 - 3... Oct 15, 2010 - 6:06 AM jcbass7 Well I checked the fuses and they were all good...... Oct 15, 2010 - 6:39 AM Veilside01 Hi guys, following this thread with interest.
... Oct 15, 2010 - 7:45 AM jcbass7 QUOTE (Veilside01 @ Oct 15, 2010 - 8... Oct 15, 2010 - 9:53 AM jcbass7 Here is where I'm at...
STOCK USDM CLUSTER..
... Oct 15, 2010 - 10:03 AM jcbass7 So part of me feels like I should just put the rpm... Oct 15, 2010 - 12:26 PM cyprus_gt QUOTE (jcbass7 @ Oct 15, 2010 - 8:26... Oct 15, 2010 - 3:03 PM jcbass7 QUOTE (cyprus_gt @ Oct 15, 2010 - 4... Oct 15, 2010 - 3:05 PM jcbass7 Bammmm just talked to the member I purchased it fr... Oct 15, 2010 - 3:02 PM jcbass7 Well I got closer. I re-pinned it to the Japanese ... Oct 15, 2010 - 5:06 PM HectortheRican Soooo close!! Just some more work man... Oct 15, 2010 - 6:24 PM jcbass7 It looks so good at night with the orange turn ind... Oct 15, 2010 - 8:41 PM cyprus_gt ok...as i promised here the links of the fotos of ... Oct 16, 2010 - 4:54 PM jcbass7 Thanks Dimitri!
So I fought with it some more... Oct 18, 2010 - 6:39 AM jcbass7 made some progress.. and some more teaser pics.. ... Oct 18, 2010 - 10:17 AM HectortheRican QUOTE (jcbass7 @ Oct 18, 2010 - 9:17... Oct 18, 2010 - 10:24 AM jcbass7 QUOTE (HectortheRican @ Oct 18, 2010 - 1... Oct 18, 2010 - 10:27 AM jcbass7 So I have a few questions:
A. How do you remove... Oct 18, 2010 - 10:45 AM DEATH Contact member stephen_lee - he cracked the speedo... Oct 18, 2010 - 11:12 AM jcbass7 QUOTE (DEATH @ Oct 18, 2010 - 12:12 ... Oct 18, 2010 - 12:23 PM jcbass7 ok so i did a quick little test. I am confident t... Oct 18, 2010 - 12:31 PM jcbass7 Well the cluster is in and working. Everything is... Oct 19, 2010 - 6:52 PM HectortheRican It ain't that bad!! Haha Nice job man Oct 19, 2010 - 8:33 PM mkernz22 get a JDM non-airbag one like me! it looks ama... Oct 19, 2010 - 8:50 PM njccmd2002 I was going to say that trd makes the car so fast ... Oct 19, 2010 - 9:11 PM cyprus_gt Nice job mate
Dimitar
p.s.
i can find a jdm 3... Oct 20, 2010 - 1:24 AM jcbass7 QUOTE (mkernz22 @ Oct 19, 2010 - 9:5... Oct 20, 2010 - 9:26 AM KAOS QUOTE (jcbass7 @ Oct 20, 2010 - 8:26... Oct 20, 2010 - 6:36 PM jcbass7 QUOTE (KAOS @ Oct 20, 2010 - 7:36 PM... Oct 20, 2010 - 7:07 PM mkernz22 QUOTE (jcbass7 @ Oct 20, 2010 - 10:2... Oct 22, 2010 - 10:53 AM jcbass7 QUOTE (mkernz22 @ Oct 22, 2010 - 11... Oct 22, 2010 - 12:42 PM jcbass7 more fun.. so the trunk popper came with a button... Oct 20, 2010 - 8:28 PM jcbass7 Snagged these as well, since I didn't want to ... Oct 21, 2010 - 7:38 AM cyprus_gt jcbass7...did you ever eat,sleep or work?...or jus... Oct 21, 2010 - 12:12 PM jcbass7 QUOTE (cyprus_gt @ Oct 21, 2010 - 1... Oct 21, 2010 - 1:58 PM KAOS QUOTE (jcbass7 @ Oct 21, 2010 - 12:5... Oct 21, 2010 - 2:08 PM HectortheRican I'm seeing all these little electronics you... Oct 22, 2010 - 10:42 AM jcbass7 QUOTE (HectortheRican @ Oct 22, 2010 - 1... Oct 22, 2010 - 12:38 PM jcbass7 More work done this weekend, not as much as I woul... Oct 24, 2010 - 9:21 PM jcbass7 More progress, got some stuff in the mail today.
... Oct 25, 2010 - 7:11 PM HectortheRican JDM tails for the win bro! Oct 25, 2010 - 9:25 PM jcbass7 as promised...
JDM Tails and debadged (still a bi... Oct 26, 2010 - 3:18 PM jcbass7 got some more work done today..
Progress:
-DCW Sh... Oct 26, 2010 - 4:32 PM HectortheRican I just love all your custom interior work man. Oct 27, 2010 - 12:00 AM jcbass7 QUOTE (HectortheRican @ Oct 27, 2010 - 1... Oct 27, 2010 - 5:23 AM presure2 looking good jesse!
that black frame rail came... Oct 27, 2010 - 7:03 AM jcbass7 QUOTE (presure2 @ Oct 27, 2010 - 8:0... Oct 27, 2010 - 8:59 AM presure2 QUOTE (jcbass7 @ Oct 27, 2010 - 9:59... Oct 27, 2010 - 9:20 AM jcbass7 I'm getting good at spending money...
Seat He... Oct 28, 2010 - 6:13 AM mkernz22 Looking great man! I love all your custom work... Oct 28, 2010 - 7:13 AM jcbass7 I might be interested, got any pics? I also reali... Oct 28, 2010 - 7:34 AM jcbass7 Took the CC unit from the coupe apart since Eric (... Oct 29, 2010 - 10:30 AM
jcbass7 QUOTE (DEATH @ Oct 4, 2010 - 11:56 A... Oct 4, 2010 - 12:23 PM jcbass7 So this past weekend I was working mostly on the v... Oct 4, 2010 - 10:56 AM SwissFerdi Oh, I don't know...maybe the GT-FOUR parts and... Oct 4, 2010 - 1:55 PM jcbass7 QUOTE (SwissFerdi @ Oct 4, 2010 - 2... Oct 4, 2010 - 2:43 PM 3WayStunna QUOTE (jcbass7 @ Oct 4, 2010 - 2:43 ... Oct 11, 2010 - 10:36 PM jcbass7 QUOTE (3WayStunna @ Oct 11, 2010 - 11... Oct 12, 2010 - 6:38 PM DEATH OK I gotta ask - you have 2 sets of projectors hea... Oct 4, 2010 - 2:04 PM jcbass7 QUOTE (DEATH @ Oct 4, 2010 - 3:04 PM... Oct 4, 2010 - 2:39 PM mkernz22 I just gotta say good luck with everything!
O... Oct 4, 2010 - 4:37 PM jcbass7 QUOTE (mkernz22 @ Oct 4, 2010 - 5:37... Oct 4, 2010 - 5:06 PM mkernz22 I would only go with 94 or 95's for that same ... Oct 4, 2010 - 5:13 PM jcbass7 QUOTE (mkernz22 @ Oct 4, 2010 - 6:13... Oct 4, 2010 - 5:15 PM EKAn That coupe is defiantly hot! Oct 4, 2010 - 5:21 PM jcbass7 QUOTE (EKAn @ Oct 4, 2010 - 6:21 PM)... Oct 4, 2010 - 5:25 PM EKAn As a coupe owner I'm bias, but either way i kn... Oct 4, 2010 - 5:44 PM dudeofchaos Are you selling your OEM head unit? Oct 4, 2010 - 5:51 PM jcbass7 QUOTE (EKAn @ Oct 4, 2010 - 6:44 PM)... Oct 4, 2010 - 7:19 PM dudeofchaos Awhhh crap Oct 4, 2010 - 8:42 PM jcbass7 So I don't remember what this guy is.. my best... Oct 6, 2010 - 10:47 AM Batman722 yes sir, ABS. Oct 6, 2010 - 6:14 PM jcbass7 So I did a lot of work this weekend, I will post p... Oct 11, 2010 - 1:10 PM DEATH Yeah Bro - that's not your problem. The first ... Oct 11, 2010 - 1:23 PM jcbass7 QUOTE (DEATH @ Oct 11, 2010 - 2:23 P... Oct 11, 2010 - 1:29 PM DEATH QUOTE (jcbass7 @ Oct 11, 2010 - 1:29... Oct 11, 2010 - 1:32 PM jcbass7 QUOTE (DEATH @ Oct 11, 2010 - 2:32 P... Oct 11, 2010 - 1:44 PM jcbass7 Well I figured out part of the problem. There was... Oct 11, 2010 - 2:27 PM DEATH Rewire it all bro - you got the interior half gutt... Oct 11, 2010 - 2:43 PM jcbass7 QUOTE (DEATH @ Oct 11, 2010 - 3:43 P... Oct 11, 2010 - 2:50 PM DEATH QUOTE (jcbass7 @ Oct 11, 2010 - 2:50... Oct 11, 2010 - 3:29 PM jcbass7 QUOTE (DEATH @ Oct 11, 2010 - 4:29 P... Oct 11, 2010 - 4:12 PM DEATH QUOTE (jcbass7 @ Oct 11, 2010 - 4:12... Oct 11, 2010 - 4:26 PM jcbass7 QUOTE (DEATH @ Oct 11, 2010 - 5:26 P... Oct 11, 2010 - 4:33 PM 95st-celica i installed a "flip out" head unit in my... Oct 11, 2010 - 2:51 PM jcbass7 QUOTE (95st-celica @ Oct 11, 2010 ... Oct 11, 2010 - 2:57 PM jcbass7 I had a chance to get some more done on the car th... Oct 11, 2010 - 10:09 PM jcbass7 So I was told the front brakes on the coupe (when ... Oct 12, 2010 - 9:38 PM Johnnyny 404's!!! Oct 13, 2010 - 3:04 AM jcbass7 QUOTE (Johnnyny @ Oct 13, 2010 - 4:0... Oct 13, 2010 - 2:55 PM jcbass7 Well I tried to do a little tonight, but got some ... Oct 13, 2010 - 8:35 PM mkernz22 My rust hole is in the same spot! Sh!t now... Oct 13, 2010 - 9:49 PM BonzaiCelica yes water fills up in the same spot but mines on t... Oct 13, 2010 - 11:01 PM jcbass7 yea its on the to-do list to fix that spot. I... Oct 14, 2010 - 8:14 AM mkernz22 i might shave mine too so that it wont rust out ag... Oct 14, 2010 - 4:15 PM HectortheRican Good luck with the ST205 cluster! Are you want... Oct 15, 2010 - 2:31 AM jcbass7 QUOTE (HectortheRican @ Oct 15, 2010 - 3... Oct 15, 2010 - 6:06 AM jcbass7 Well I checked the fuses and they were all good...... Oct 15, 2010 - 6:39 AM Veilside01 Hi guys, following this thread with interest.
... Oct 15, 2010 - 7:45 AM jcbass7 QUOTE (Veilside01 @ Oct 15, 2010 - 8... Oct 15, 2010 - 9:53 AM jcbass7 Here is where I'm at...
STOCK USDM CLUSTER..
... Oct 15, 2010 - 10:03 AM jcbass7 So part of me feels like I should just put the rpm... Oct 15, 2010 - 12:26 PM cyprus_gt QUOTE (jcbass7 @ Oct 15, 2010 - 8:26... Oct 15, 2010 - 3:03 PM jcbass7 QUOTE (cyprus_gt @ Oct 15, 2010 - 4... Oct 15, 2010 - 3:05 PM jcbass7 Bammmm just talked to the member I purchased it fr... Oct 15, 2010 - 3:02 PM jcbass7 Well I got closer. I re-pinned it to the Japanese ... Oct 15, 2010 - 5:06 PM HectortheRican Soooo close!! Just some more work man... Oct 15, 2010 - 6:24 PM jcbass7 It looks so good at night with the orange turn ind... Oct 15, 2010 - 8:41 PM cyprus_gt ok...as i promised here the links of the fotos of ... Oct 16, 2010 - 4:54 PM jcbass7 Thanks Dimitri!
So I fought with it some more... Oct 18, 2010 - 6:39 AM jcbass7 made some progress.. and some more teaser pics.. ... Oct 18, 2010 - 10:17 AM HectortheRican QUOTE (jcbass7 @ Oct 18, 2010 - 9:17... Oct 18, 2010 - 10:24 AM jcbass7 QUOTE (HectortheRican @ Oct 18, 2010 - 1... Oct 18, 2010 - 10:27 AM jcbass7 So I have a few questions:
A. How do you remove... Oct 18, 2010 - 10:45 AM DEATH Contact member stephen_lee - he cracked the speedo... Oct 18, 2010 - 11:12 AM jcbass7 QUOTE (DEATH @ Oct 18, 2010 - 12:12 ... Oct 18, 2010 - 12:23 PM jcbass7 ok so i did a quick little test. I am confident t... Oct 18, 2010 - 12:31 PM jcbass7 Well the cluster is in and working. Everything is... Oct 19, 2010 - 6:52 PM HectortheRican It ain't that bad!! Haha Nice job man Oct 19, 2010 - 8:33 PM mkernz22 get a JDM non-airbag one like me! it looks ama... Oct 19, 2010 - 8:50 PM njccmd2002 I was going to say that trd makes the car so fast ... Oct 19, 2010 - 9:11 PM cyprus_gt Nice job mate
Dimitar
p.s.
i can find a jdm 3... Oct 20, 2010 - 1:24 AM jcbass7 QUOTE (mkernz22 @ Oct 19, 2010 - 9:5... Oct 20, 2010 - 9:26 AM KAOS QUOTE (jcbass7 @ Oct 20, 2010 - 8:26... Oct 20, 2010 - 6:36 PM jcbass7 QUOTE (KAOS @ Oct 20, 2010 - 7:36 PM... Oct 20, 2010 - 7:07 PM mkernz22 QUOTE (jcbass7 @ Oct 20, 2010 - 10:2... Oct 22, 2010 - 10:53 AM jcbass7 QUOTE (mkernz22 @ Oct 22, 2010 - 11... Oct 22, 2010 - 12:42 PM jcbass7 more fun.. so the trunk popper came with a button... Oct 20, 2010 - 8:28 PM jcbass7 Snagged these as well, since I didn't want to ... Oct 21, 2010 - 7:38 AM cyprus_gt jcbass7...did you ever eat,sleep or work?...or jus... Oct 21, 2010 - 12:12 PM jcbass7 QUOTE (cyprus_gt @ Oct 21, 2010 - 1... Oct 21, 2010 - 1:58 PM KAOS QUOTE (jcbass7 @ Oct 21, 2010 - 12:5... Oct 21, 2010 - 2:08 PM HectortheRican I'm seeing all these little electronics you... Oct 22, 2010 - 10:42 AM jcbass7 QUOTE (HectortheRican @ Oct 22, 2010 - 1... Oct 22, 2010 - 12:38 PM jcbass7 More work done this weekend, not as much as I woul... Oct 24, 2010 - 9:21 PM jcbass7 More progress, got some stuff in the mail today.
... Oct 25, 2010 - 7:11 PM HectortheRican JDM tails for the win bro! Oct 25, 2010 - 9:25 PM jcbass7 as promised...
JDM Tails and debadged (still a bi... Oct 26, 2010 - 3:18 PM jcbass7 got some more work done today..
Progress:
-DCW Sh... Oct 26, 2010 - 4:32 PM HectortheRican I just love all your custom interior work man. Oct 27, 2010 - 12:00 AM jcbass7 QUOTE (HectortheRican @ Oct 27, 2010 - 1... Oct 27, 2010 - 5:23 AM presure2 looking good jesse!
that black frame rail came... Oct 27, 2010 - 7:03 AM jcbass7 QUOTE (presure2 @ Oct 27, 2010 - 8:0... Oct 27, 2010 - 8:59 AM presure2 QUOTE (jcbass7 @ Oct 27, 2010 - 9:59... Oct 27, 2010 - 9:20 AM jcbass7 I'm getting good at spending money...
Seat He... Oct 28, 2010 - 6:13 AM mkernz22 Looking great man! I love all your custom work... Oct 28, 2010 - 7:13 AM jcbass7 I might be interested, got any pics? I also reali... Oct 28, 2010 - 7:34 AM jcbass7 Took the CC unit from the coupe apart since Eric (... Oct 29, 2010 - 10:30 AM |
1 User(s) are reading this topic (1 Guests and 0 Anonymous Users)
0 Members:
| Lo-Fi Version | Time is now: June 16th, 2026 - 5:06 AM |