
 Jan 14, 2011 - 2:17 AM Jan 14, 2011 - 2:17 AM
|
 
|
 Enthusiast  Joined Mar 28, '04 From St.Louis Currently Offline Reputation: 15 (100%) |
Well after many a nights of being too lazy to post these pictures...I mean too busy to post them *cough* I have finally decided to do this.
This build thread will follow, not quite step by step, the process of my pulling my 5S and rebuilding it. At the same time it will hopefully give some people a better insight on what it takes to do a proper nitrous setup on a 5S. Well to start with a little background info on my girl, she is a 94 GT hatchback with 260K miles on the original motor, before the motor pull mods included: - NGK Plug Wires - NGK Plugs - Full long tube header - Full 2.5" Exhaust - CAI - Webcams 294 Grind cams - Apexi Neo Tune She put down a healthy 119 WHP and 132 WTQ with these mods and a tune. So here we go with the pics of the build: (Sorry for the crappy cell phone pictures) 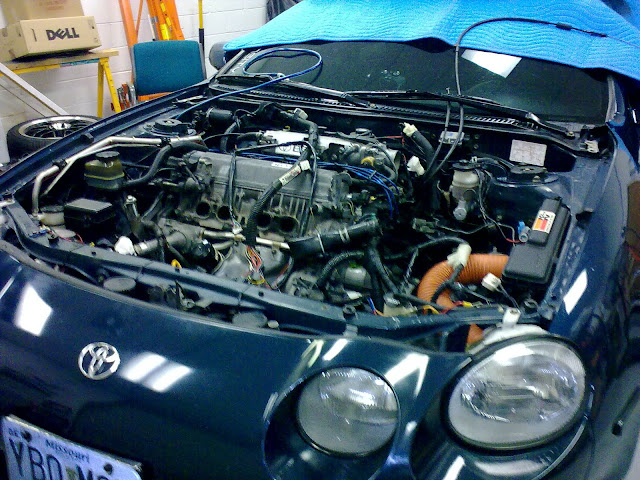 Well underway to taking the old tired engine out 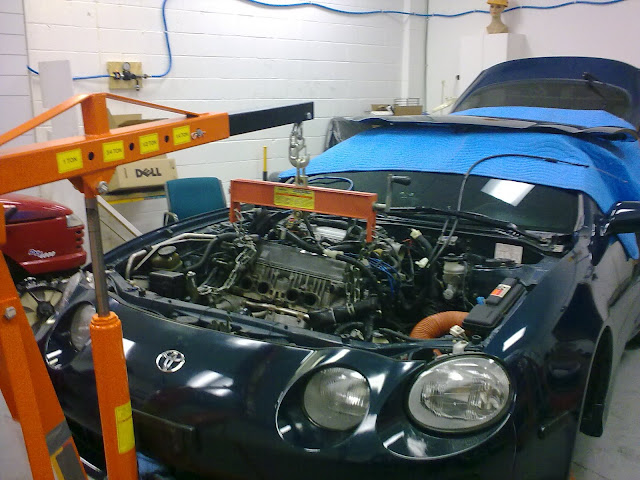 Here it comes... (thats what she said?) 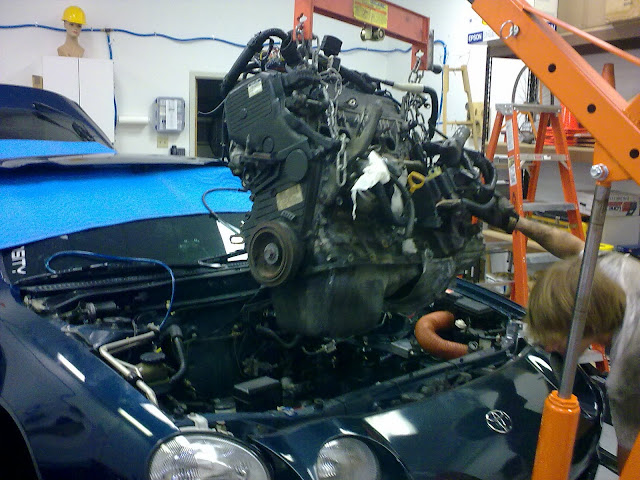 Almost out 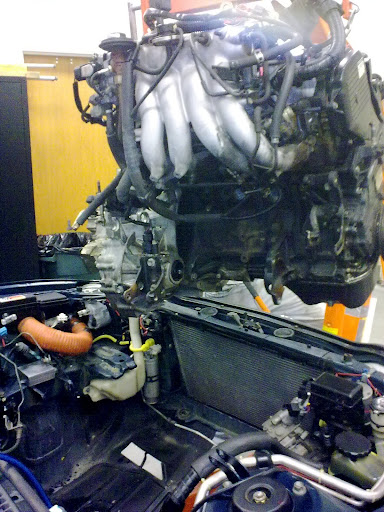 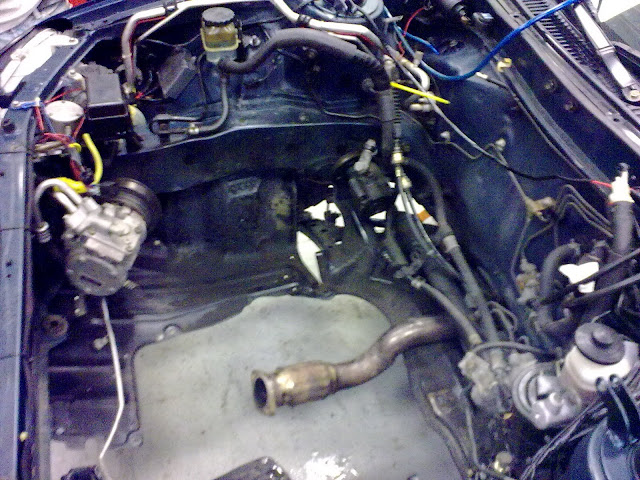 Needs a little cleaning...  And here is the culprit for wayy too many speeding tickets. 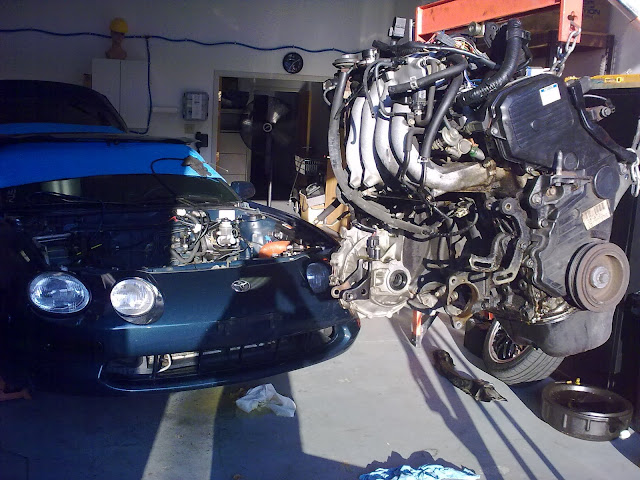 To be reunited soon 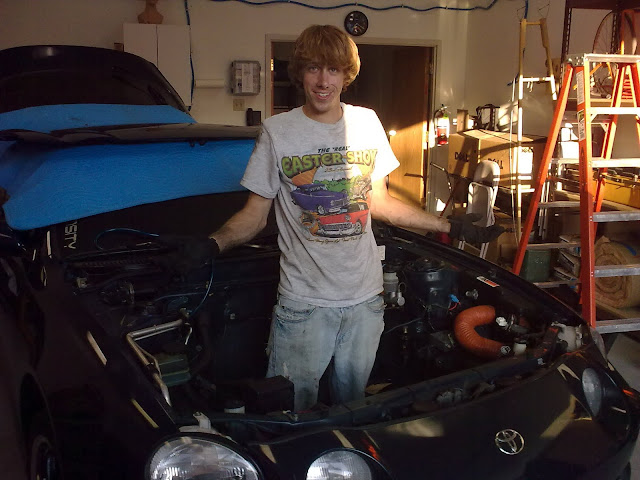 Whiteboy power? (My buddy, not me) 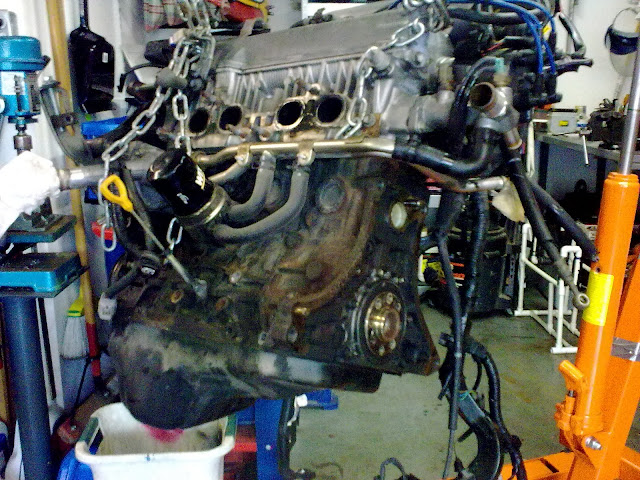 It was definitely time it came out for a good clean if anything! 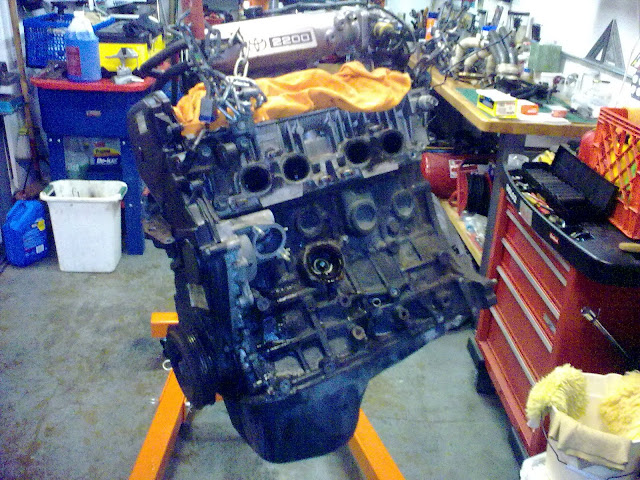 Tear down 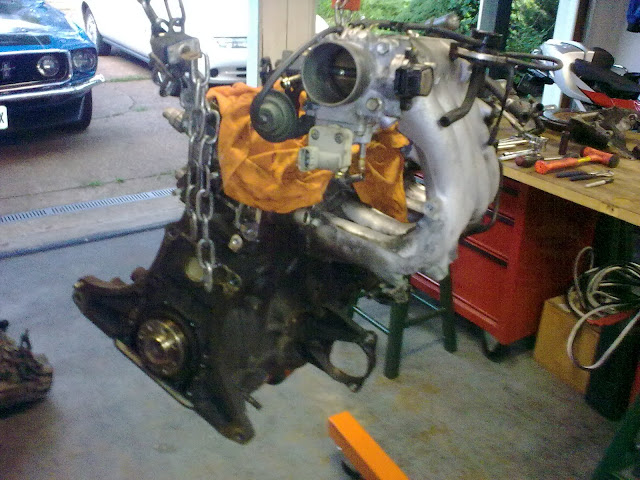 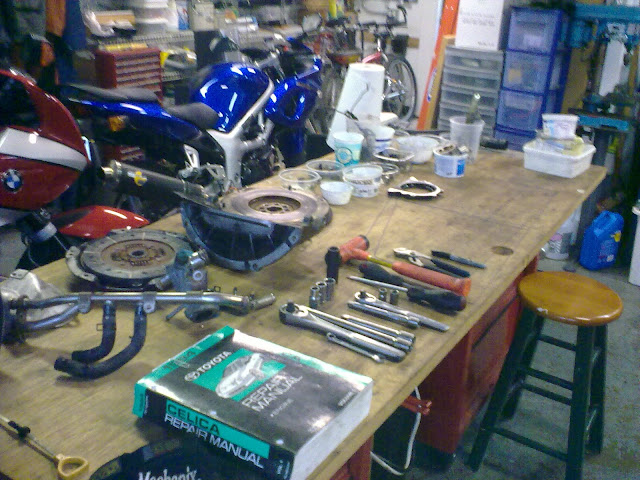 organization is key in a good motor build. 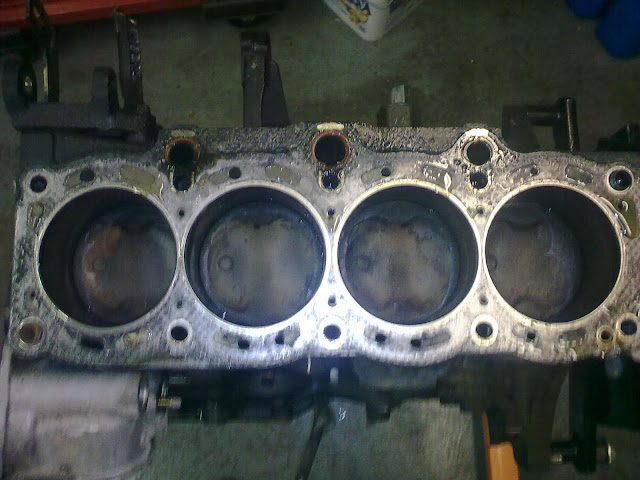 Finally popped the top 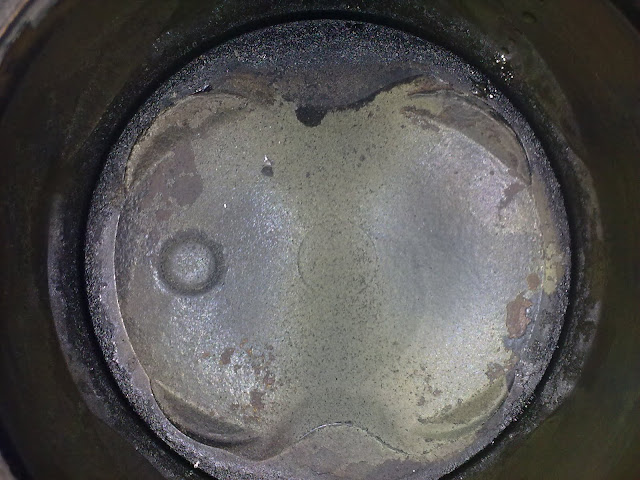 260K miles worth of carbon...not too bad i guess. 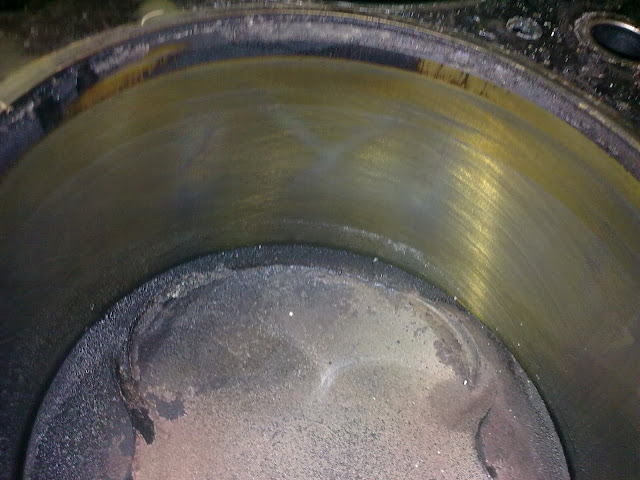 Factory honing hatch marks?! Wait a minute here... 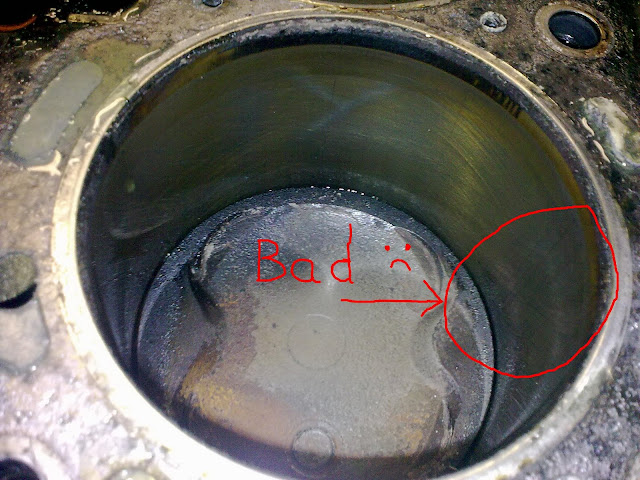 I knew it was too good to be true...bores are totally worthless and scratched up on the sides, sorry it may be hard to see in this picture but it was there in all 4!   Bare block ready to see the machine shop. At this point I brought the block, head, cams, flywheel, crank, rods, pistons, and crank pulley to my machine shop to have them check everything and dynamically balance the entire rotating assembly. But of course, as any good story the bad news comes first.... 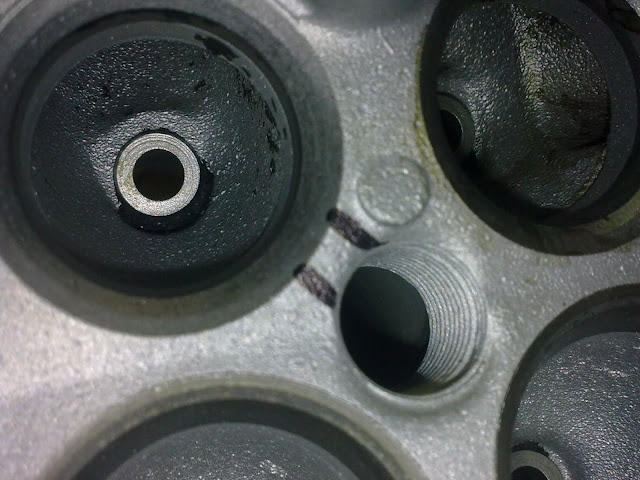 Hard to see, but the head was cracked in about 7-9 different places, I never would have know if I had not taken it apart, this thing ran like a beast! 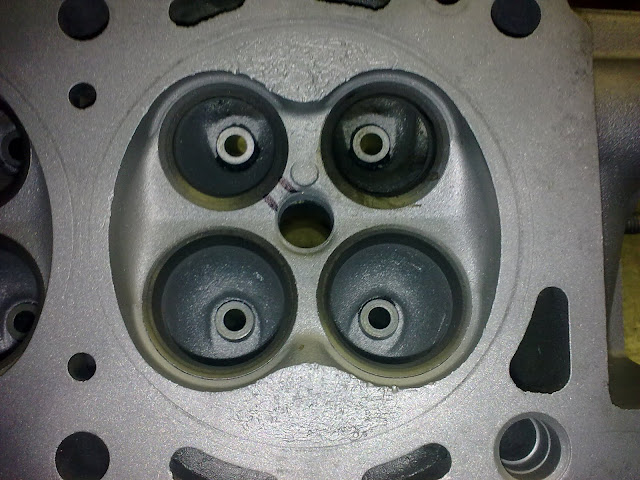 This picture shows what happens when a spark plug electrode tip breaks off and rattles around your motor for a while, car still ran perfectly with this damage, the top of the piston looked the same as the head. Machine shop also pointed out that the motor was running hot, hence the imprint of the head gasket around each combustion chamber... so the block got decked, bored .20 over and a new cylinder head and 4 oversized pistons were purchased. Cue the waiting for one piston to arrive from Japan... After about 3 weeks of waiting on one piston, finally got everything to the machine shop and got it all back. Work done includes: - Block bored .20 over - Block decked to ensure flat surface - Balanced crankshaft, rods, pistons, flywheel, and crank pulley. - Polished cam bearing surfaces - Shot-peened rods to recondition and strengthen - Cleaned block, intake manifold, and all other items at the machine shop. So once everything was back in the garage I got down to business. 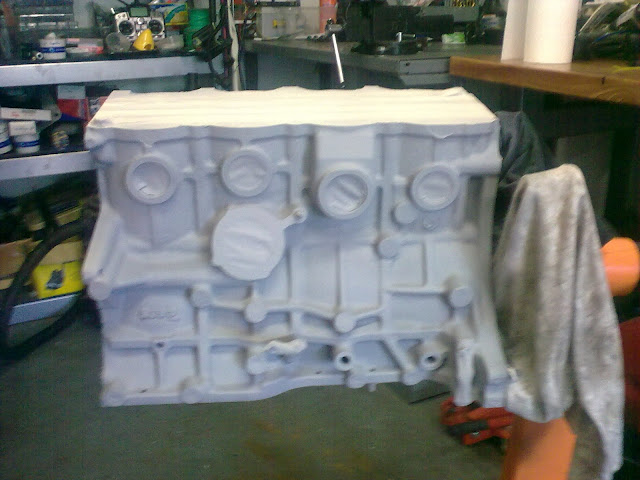 Masked off the blocked and primed it 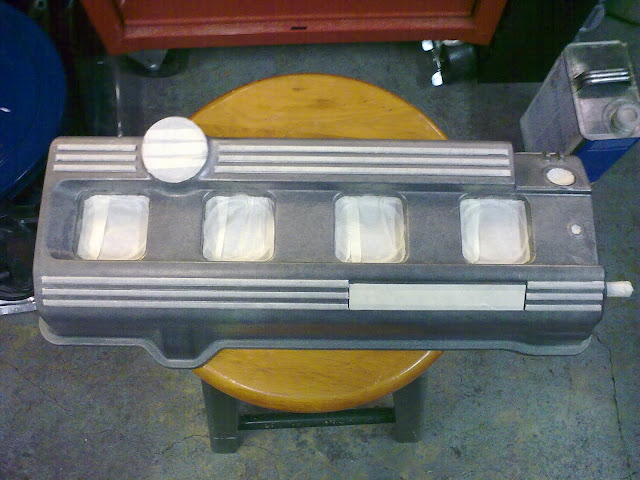 Same treatment for the valve cover 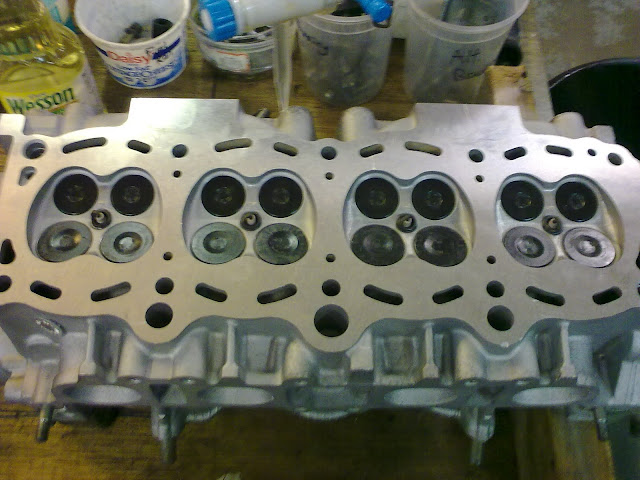 Re-man cylinder head gets a combustion chamber balancing 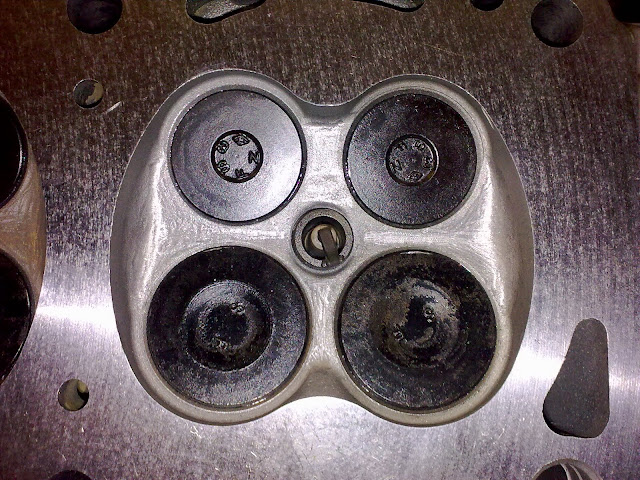 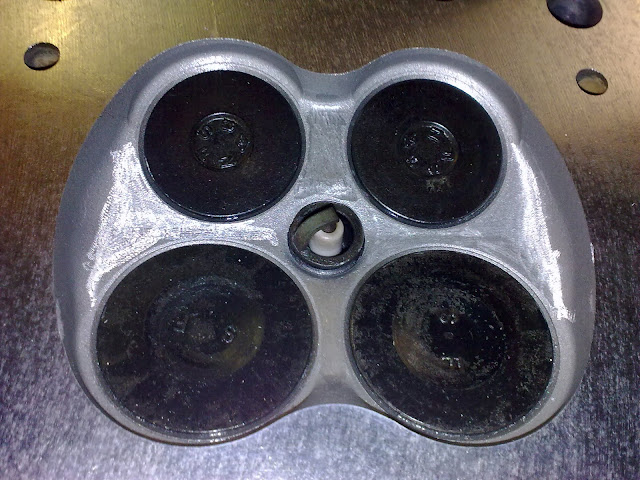 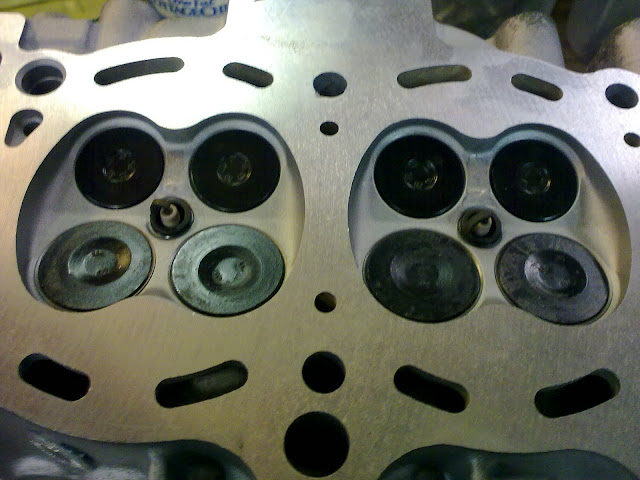 Finally got all 4 combustion chambers to have the same volume within .05 cc Painstaking process but entirely necessary especially for the upcoming power-adder. And the reassembly begins: 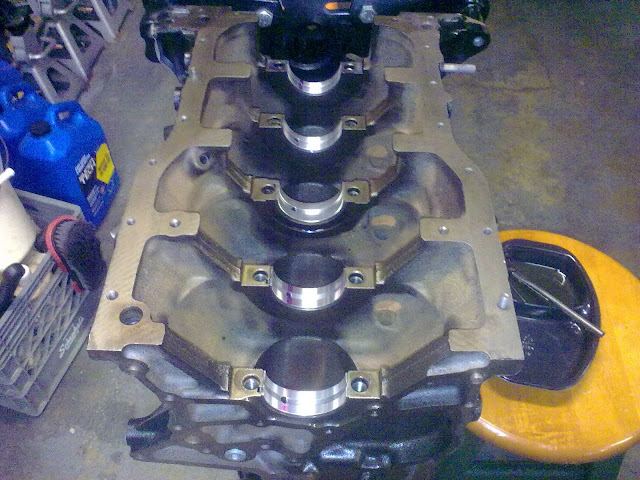  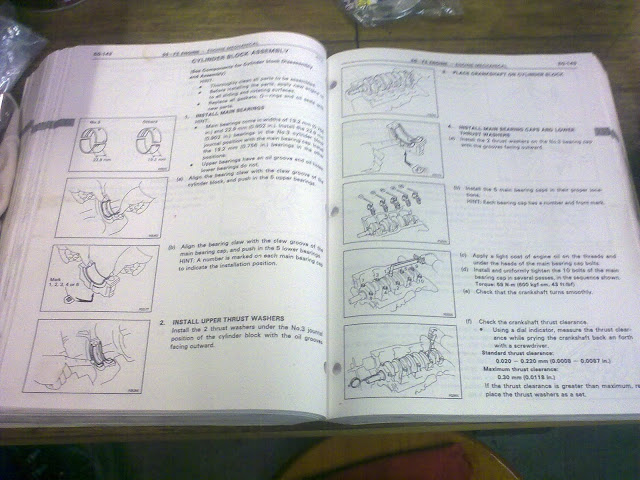 Now I would like to say that i'm good enough to do this by memory...but I have a little cheat cheat  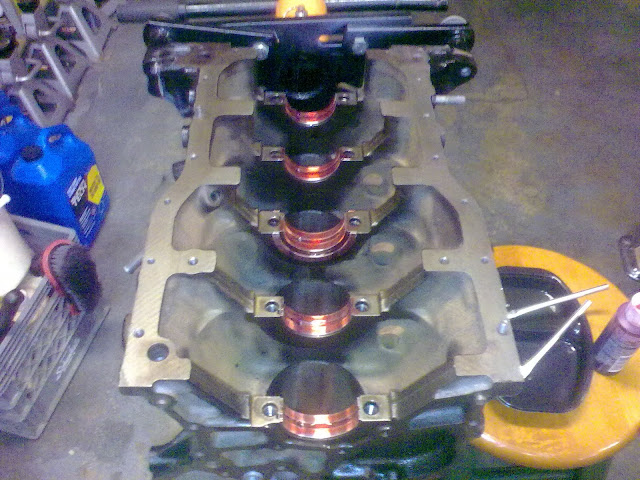 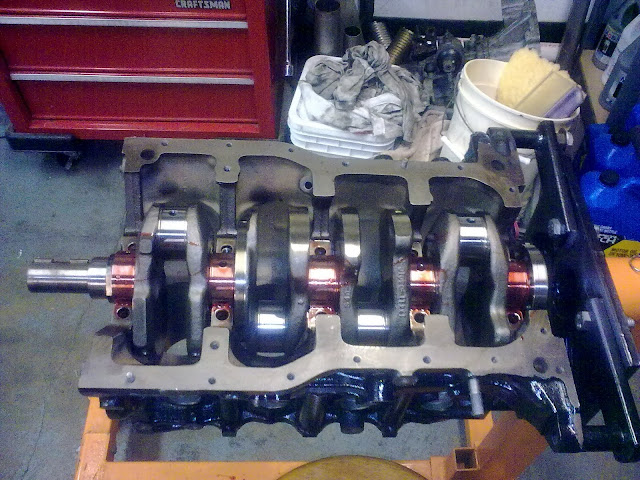 Freshly balanced crank gets dropped in...  And bolted down. 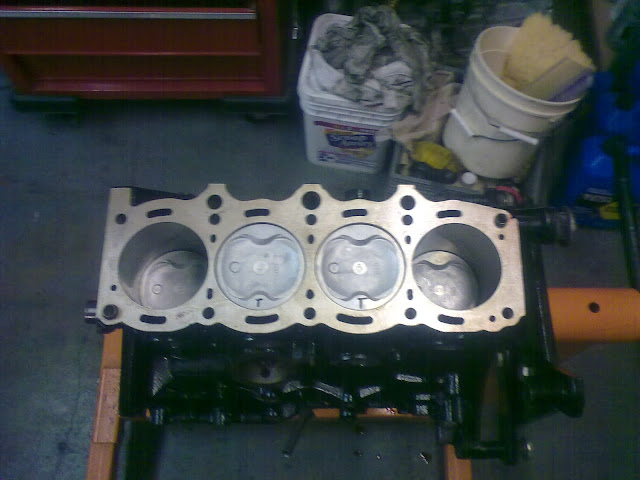 New pistons happily in their new home  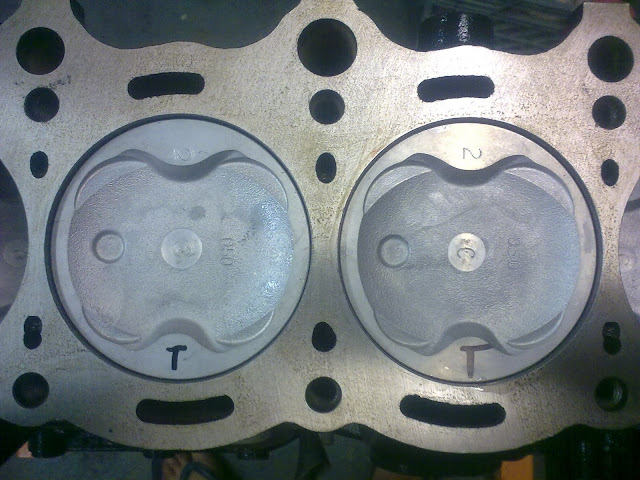 Everything looks so clean... 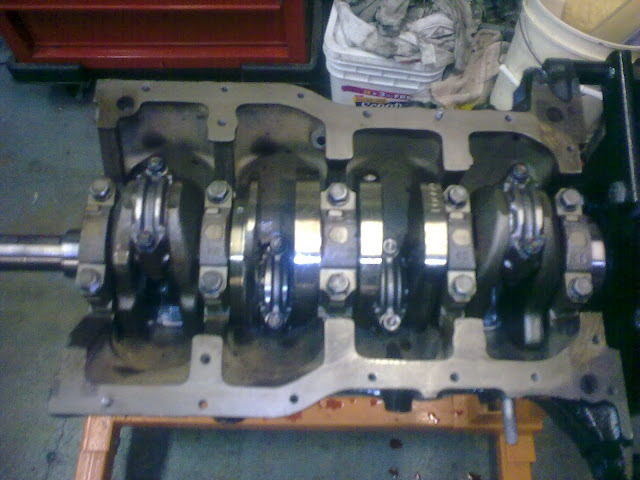 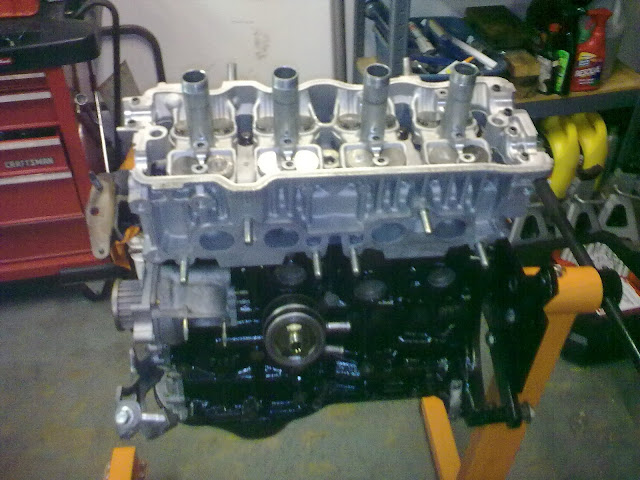 By the way, I painted the block and valve cover in a fresh Gloss Black...and the new head it on and torqued. 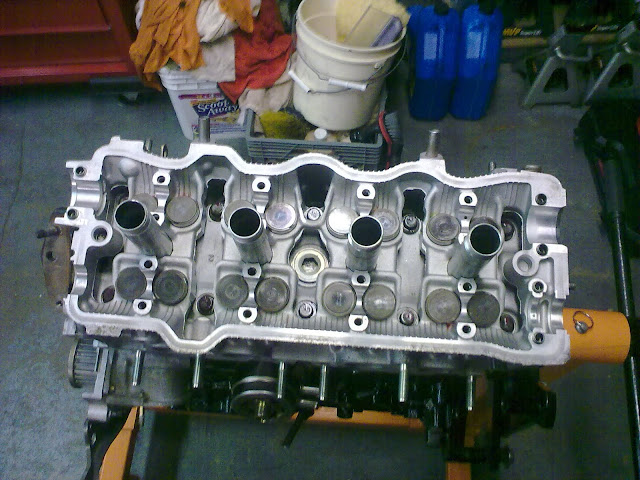 Needs 294's!!!!...soon to come 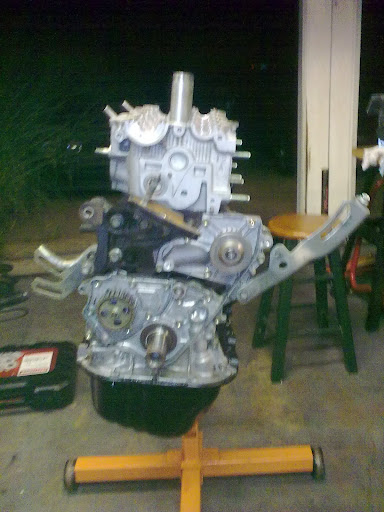 Oil pump and new water pump installed 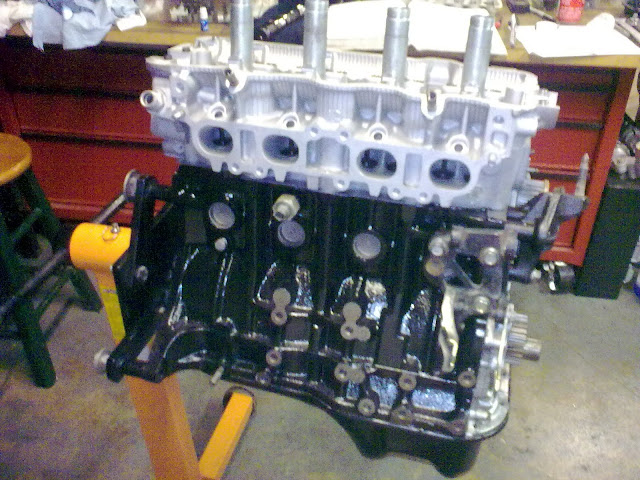 Cream on the outside clean on the inside???  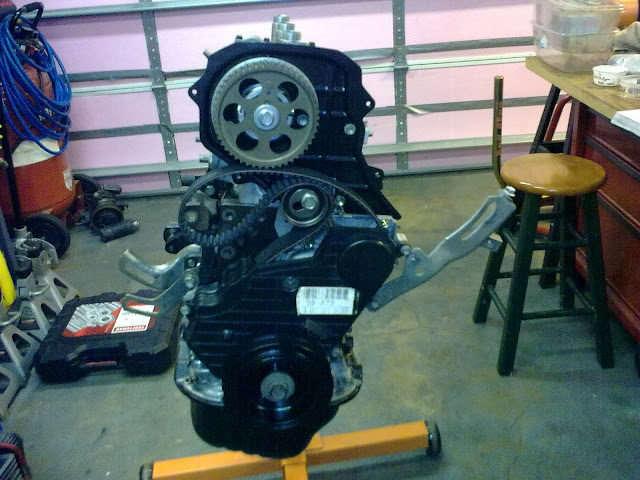 This thing is so much easier to time out of the car.... 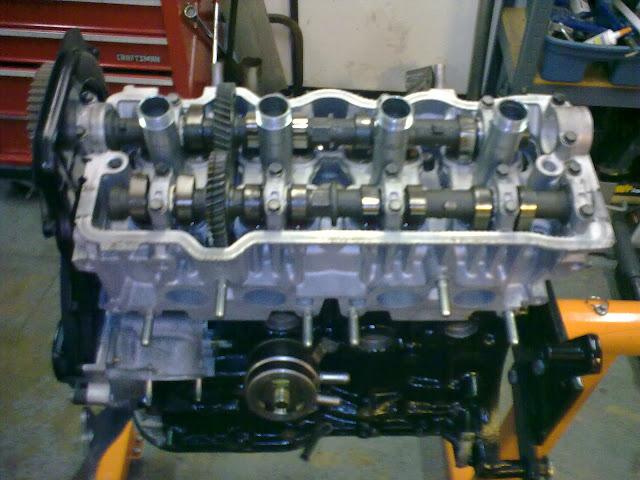 Performance cams happily in their new home as well At this point i debated for a while on what to do for a power-adder...turbo...somehow manage to piece together a supercharger system...or nitrous. Well since nobody else has really extensively played with nitrous on this motor, since it makes so much sense to do a 3S swap, I decided to go a little outside the box and dabble in the N02 area...which as far as i'm concerned is still a new area for the 5S, correct me if i'm wrong. So after some deliberation and thought, I decided to go for a Zex Direct Port Injection Wet nitrous kit, this would ensure that all cylinders will get the same amount of nitrous and fuel and reduce my chances of leaning out one or more of the cylinders. The main reason I did this instead of the easier alternative of just spraying through the throttle body is because I asked the 6gc community which one they would recommend, and I got some great answers from many members. The one that really pushed me to go the direct port route is that from Dr. tweak (Thanks). he stated that the FI intake manifold is designed to flow air and not nitrous and fuel, so there is a great chance that the first 2 or 3 cylinders would be properly fed, but the last one (#1) would get the least amount of fuel, and lean out and possibly crack a piston or maybe even worse. So after this I decided, ok if i'm gonna do this I am going to do it the right way, and that is why I chose this set up. Also because I dont think anyone else has done a setup like this on a 5S which means I get to enjoy the trials and tribulations of trying it out...oh boy what am I getting myself into!?!?! So with no nitrous experience before I set off into a new world..for me: 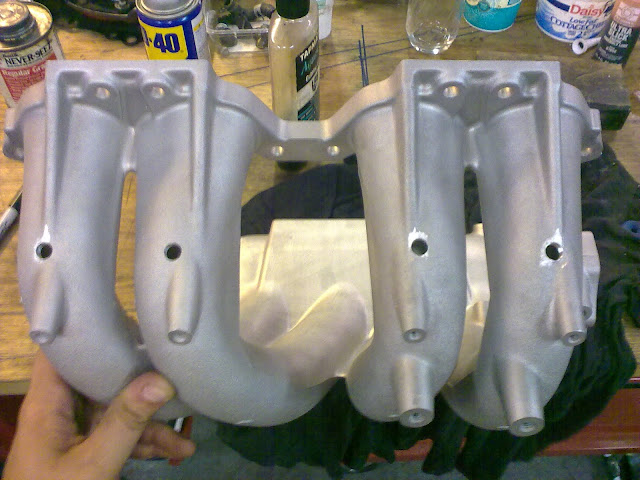 Drilled 4 holes in the bottom of the intake manifold to fit some pretty purple pieces 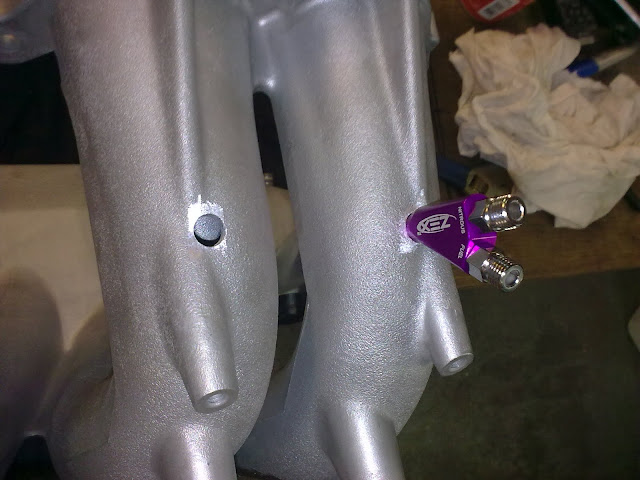 Like these!  Shiny!!! 8O  Inside shot of the intake runner 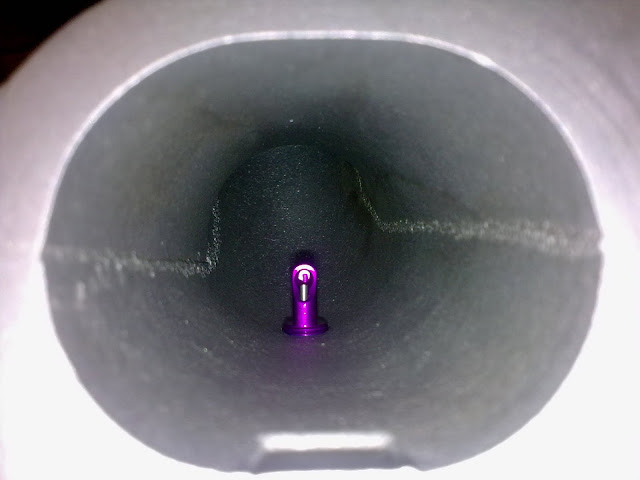 Another shot of the same  Starting to take shape 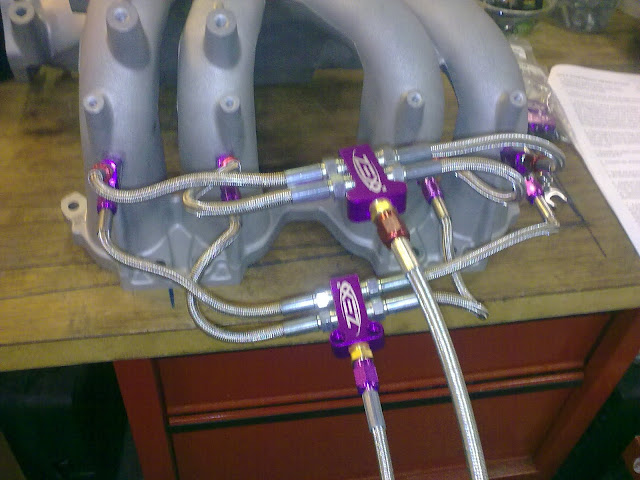 Holy crap!!! Is this really happening?!?? 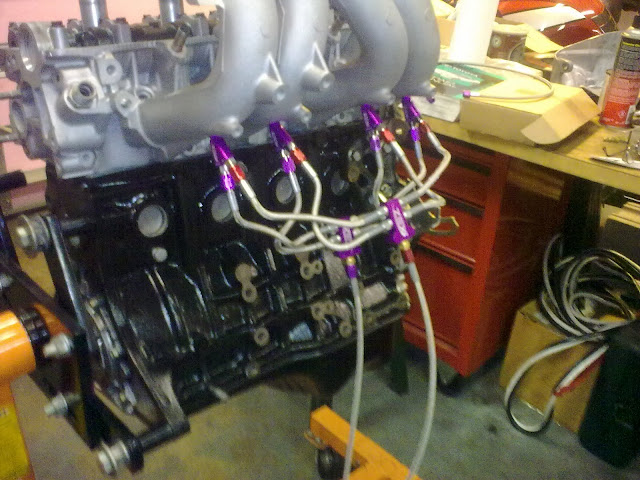 Test fitting to see if it all drops on.... 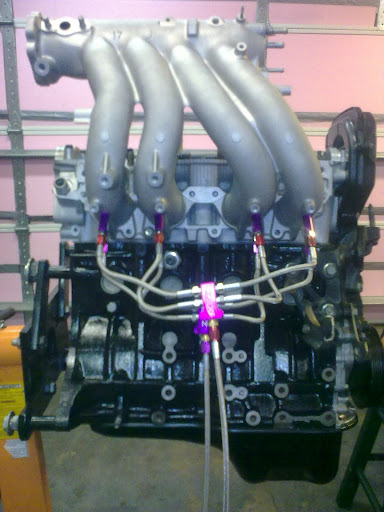 Hot damn! I barely cleared a part of the air pipe on the back of the manifold for cylinder #2...but it works! 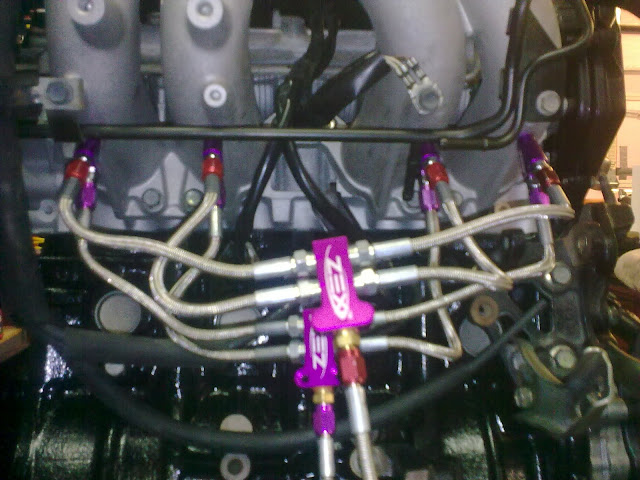 Here you can see where the nitrous nozzle is snugly against the air pipe on the right... 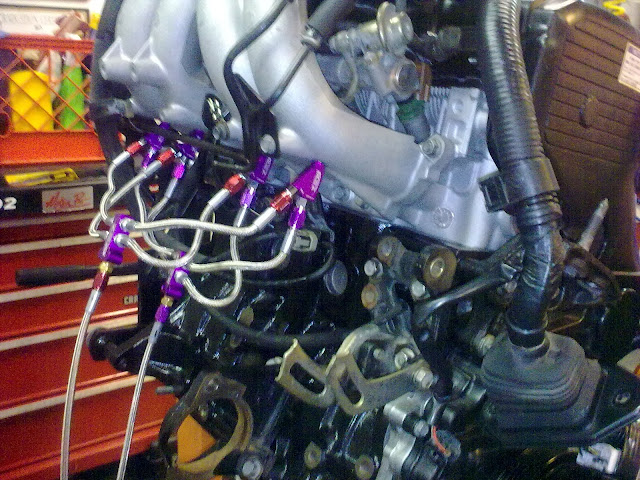 I must admit, it looks bad-ass! 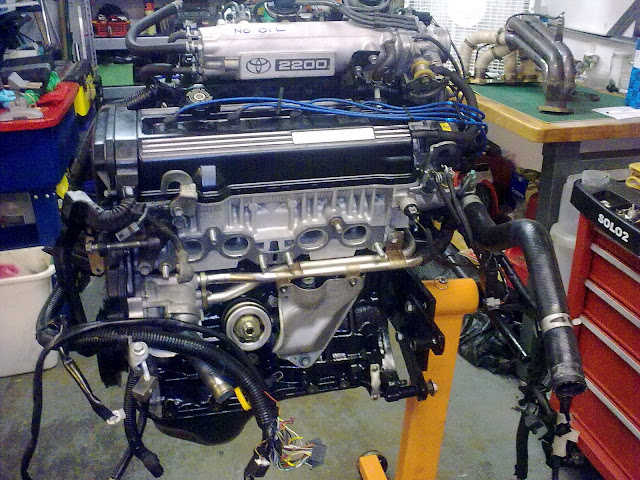 Finally she is all back together...just putting the finishing touches on. 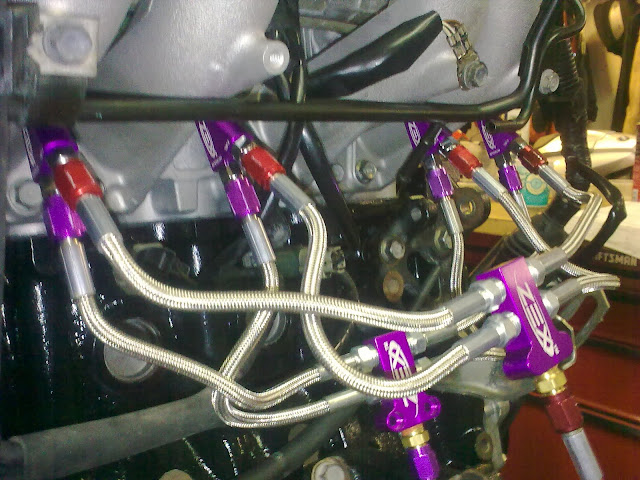 Another close up for SnGs 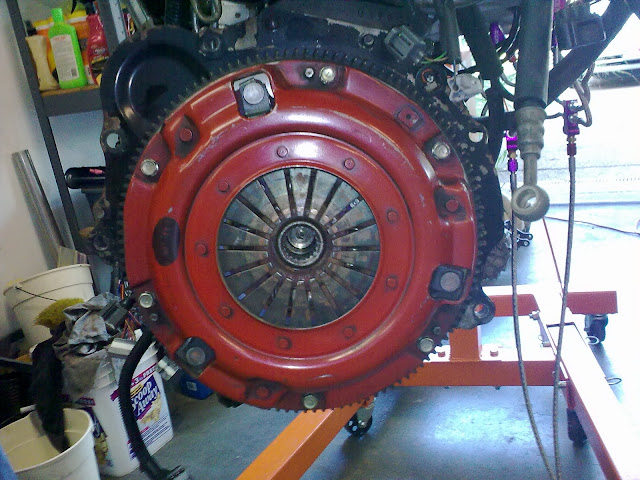 Of course, Southbend Racing Stage 2 clutch...this thing is amazing! (highly recommended) 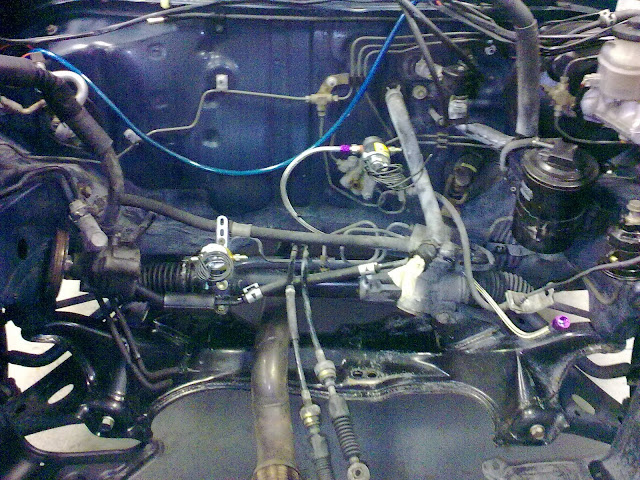 Find the nitrous solenoids... ok its not that hard. 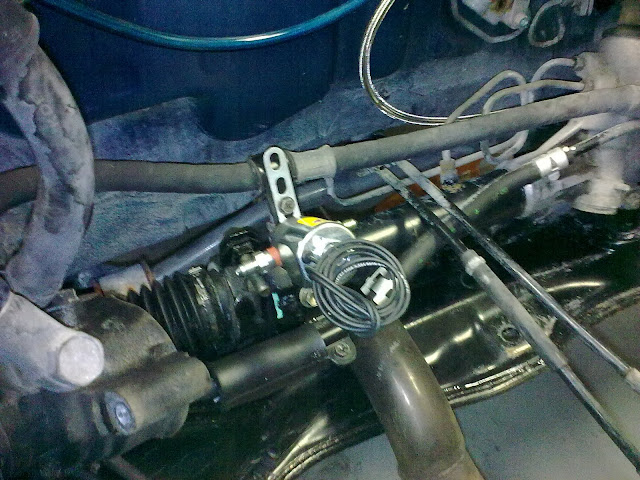 Nitrous solenoid...not drilling required to mount it. 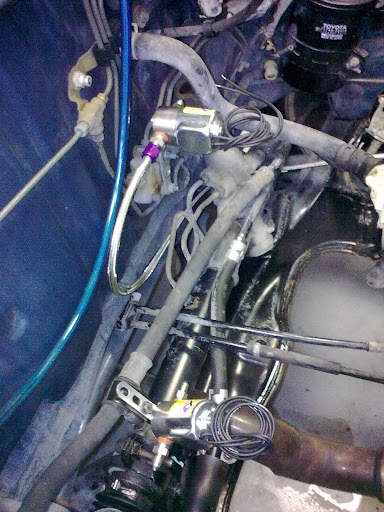 Same goes for the fuel solenoid.  And a shot of both  Ran the supply line for the bottle trough the shifter cables boot, water tight, and secured to the shifter cables so its not going anywhere. 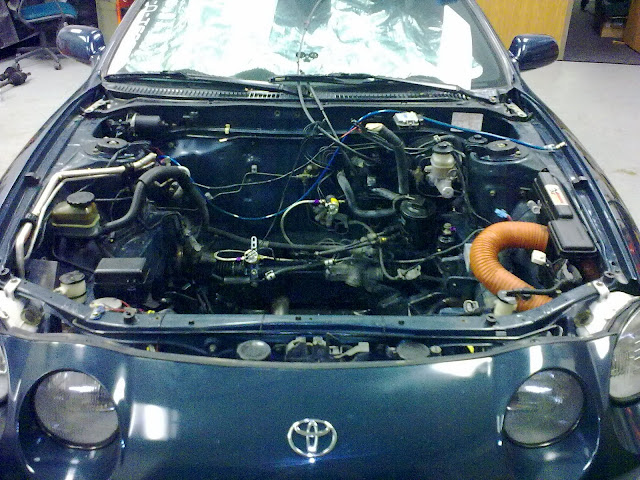 Just a shot to help locate the solenoids 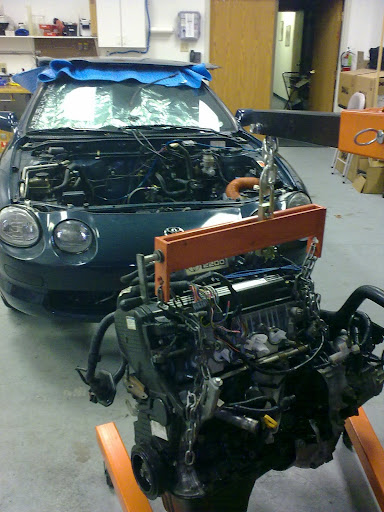 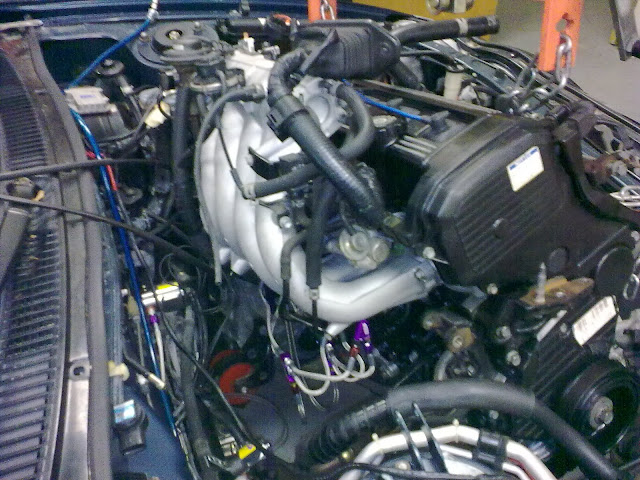 As far as clearance issues are concerned, this thing fit like it was meant to be! I couldnt believe it when I saw it!!!! 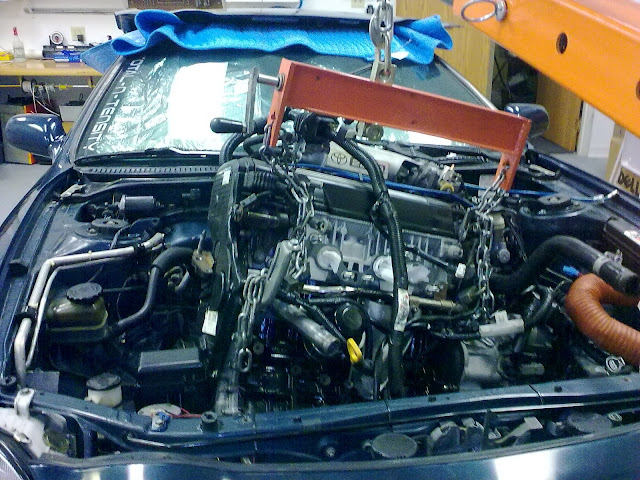 Almost in 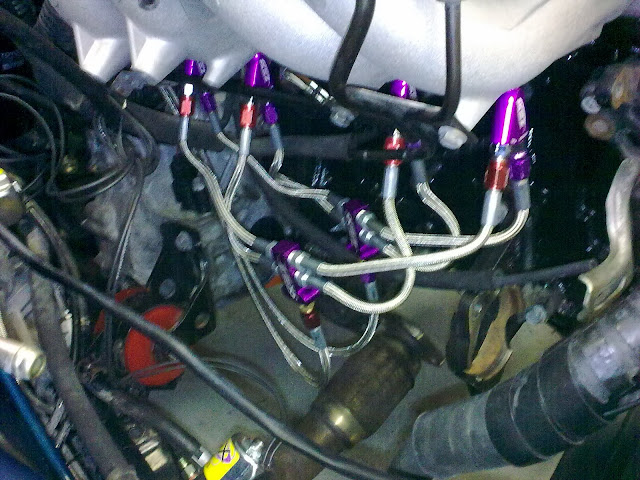 Another shot of the lines, hard to tell but it all cleared the exhaust, the steering rack, and the K-member without needing to be repositioned...all luck! I mean skill *cough* 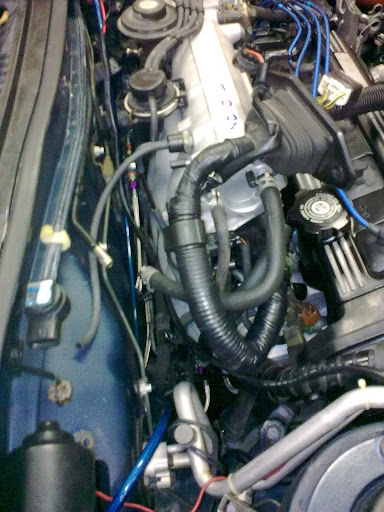 Holy crap! Where did it all go?!? 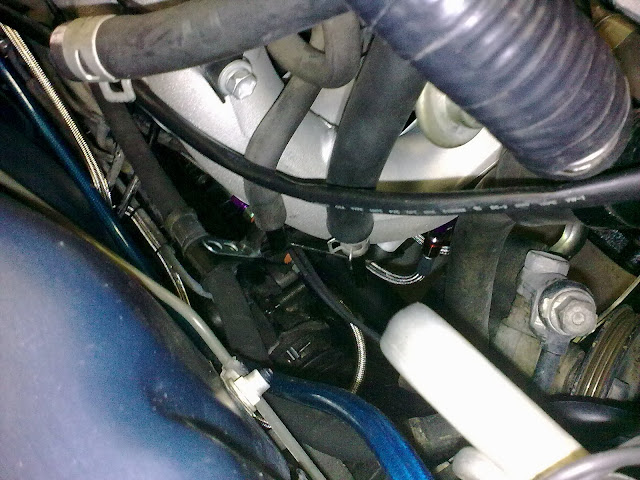 If you know what to look for you can find it, with the hood off... 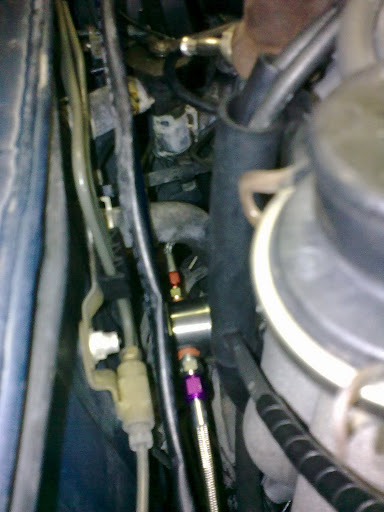 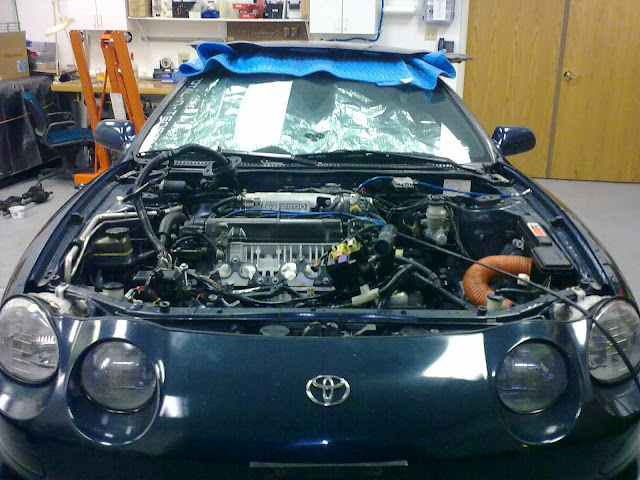 And she is all back at home, just need to button it all up and try a first start 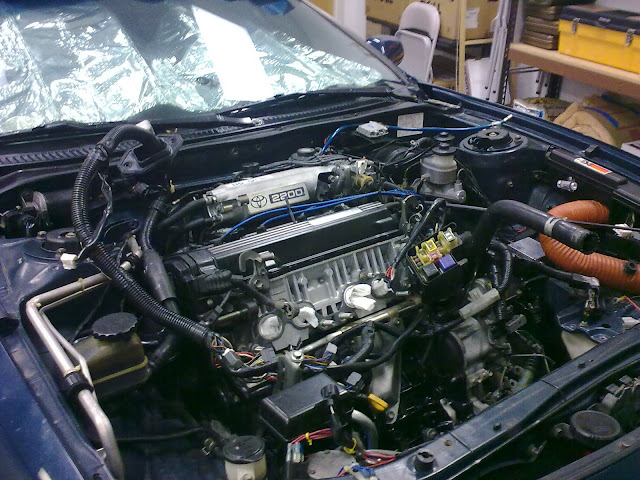  At this point I finished up plugging everything back in, primed the motor and turned it over, it actually suprised the hell out of me and started right up on the first turn of the key, I must have done something right at least! The only thing left to do for the nitrous kit is to wire up the solenoids and the activation switch, the WOT switch is already on the motor, just need to do the arming switch and mount the bottle. So I started driving the car and putting miles on the engine, everything worked flawlessly, good power, smooth rotation throughout the RPM range, all that good stuff! Eventually the summer came to an end and I had to go back to school, so I kept driving the car as it is my DD. came home for labor day weekend and some blind old bat decided to do a number on me as I was leaving Wal-Mart 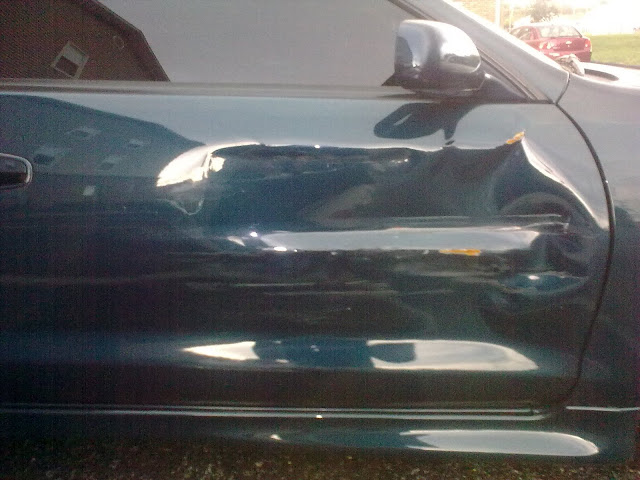 Took out my entire passenger door, luckily the damage was limited to the door only, not the fender, not the rear quarter...just the door...a bit of luck I guess. So regardless I kept driving the car, took care of all the insurance mumbo jumbo and go a settlement check. Then I was on the way home from school one weekend and halfway home... Managed to coax her into an AZ parking lot, changed plugs, distributor cap, rotor and it still continued to fire on only two cylinders...FML So I called AAA to the rescue  And had her towed 112 miles the rest of the way home, first time I have EVER used AAA for my own car...and it payed off, only cost me $36 in the end! Love AAA!!!!! 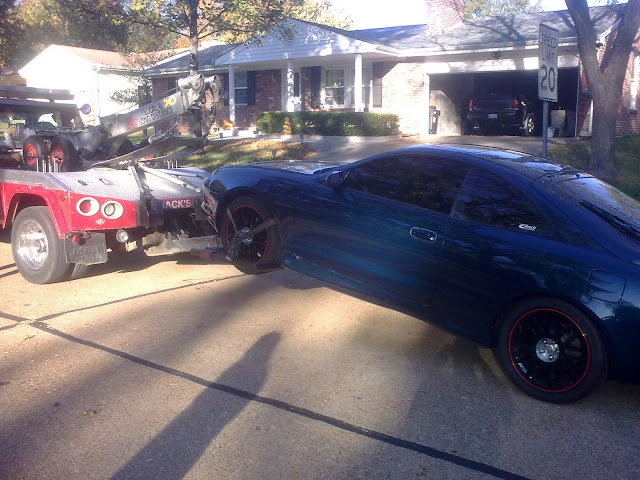 So I started to diagnose her and did a compression test, cylinders #1 & 2 came up completely dead...which reaffirmed my fear that I had just popped a head gasket... GD!!!!!!!!!!!!  So off comes the head 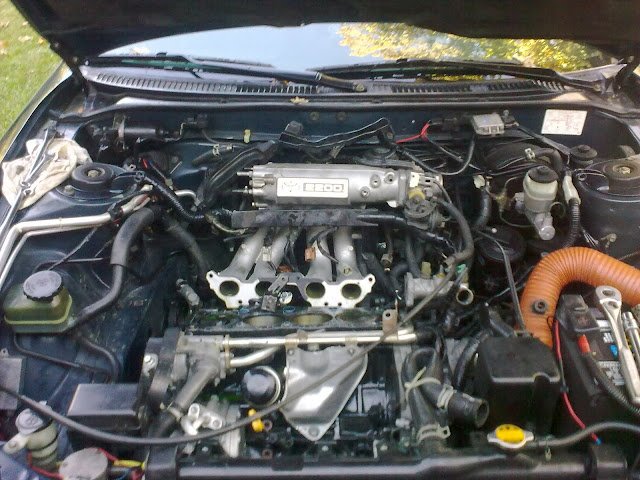 And sure enough... 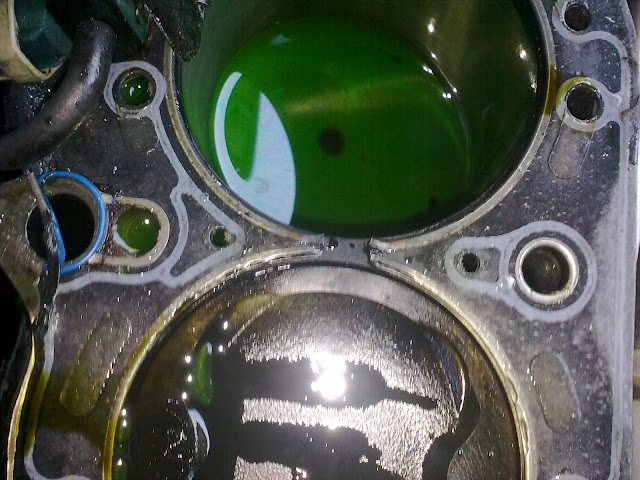 About 1/4" of HG is missing between 1 & 2, dont worry the coolant is just from pulling the head in the car. So I proceeded to fix the blown HG, and managed to make her live again!!!! The lesson here is that you must bring your reman cylinder head to a machine shop, have them deck it regardless of what it looks like if the head has enough material left, and get them to clean it out as well. As I found out the hard way, there was still some glass beads left over in the oil ports in the head and it almost ruined my 294 cams, luckily my machine shop was able to save it all, and had I not blown the HG I would never have figured that one out either...so in the end it was a good thing it let go then because I was heading home that weekend to finish the nitrous install, and was gonna go spray it for the first time on the dyno...crisis averted!!!! So now that winter took over she is warm in the body shop getting a new door and maybe a few other goodies For all those of you that have read this far down, thank you for your time. This project is obviously still underway, so I will keep updating things as they happen and hopefully I will have on of the first 5S sprayed motors with some dyno charts to show what I got. I know this build may seem like a complete waste of money to some people, but I wanted to be different and instead of doing the all common 3S swap I took a different route. I hope you all enjoyed this thread, and I hope that you will give me feedback on this build, I am open to hearing people's thoughts and ideas it, good or bad. Subscribe to it in order to get the latest updates on everything! Thanks again for your time, Matt This post has been edited by 94celicadude: Dec 22, 2011 - 3:40 PM --------------------  1994 GT Hatchback 1994 ST Coupe 1988 Corolla Wagon All-Trac 1999 Corvette 2008 Cobalt SS Turbo |

 |
Replies
|
Aug 16, 2011 - 8:58 PM
|
|
|
Enthusiast Joined Mar 28, '04 From St.Louis Currently Offline Reputation: 15 (100%) |
I did tap into the fuel line before it bolts into the fuel.
I tapped a fitting into the line from the fuel filter to the rail, so this is pre regulator fuel pressure. I would not have enough if I had tapped in from post-regulator, because as stephen said it would basically be no pressure. And i dont agree with the statement that a 10.9 A/F while spraying is perfect...that is so rich its not even funny. Once again tuning is still a work in progress. I will update you guys when I do some more work! -------------------- 1994 GT Hatchback 1994 ST Coupe 1988 Corolla Wagon All-Trac 1999 Corvette 2008 Cobalt SS Turbo |
Posts in this topic
 94celicadude WARNING!!! DANGER TO MANIFOLD!!! !@#$ Jan 14, 2011 - 2:17 AM
 NGHTKD Awesome thread!!! Going to subscribe... Jan 14, 2011 - 3:04 AM eboz74 best of luck im in favor of the idea way to stand ... Jan 14, 2011 - 3:38 AM Smaay awesome thread, im very proud of your pictures and... Jan 14, 2011 - 9:51 AM presure2 X2 on the 98+ gasket (all 98+5s motors came with t... Jan 14, 2011 - 10:05 AM Smaay ^^^ thats good to point out. when i did my rebuild... Jan 14, 2011 - 10:08 AM 94celicadude QUOTE (Smaay @ Jan 14, 2011 - 3:51 P... Jan 14, 2011 - 2:52 PM HectortheRican Great thread man! Jan 14, 2011 - 3:08 PM easternpiro1 i must say... this thread is full of win. from the... Jan 14, 2011 - 4:07 PM captb loving the detail in the thread. I was supposed to... Jan 14, 2011 - 4:43 PM 95st-celica YOU.
DO.
GREAT.
WORK.
Plain and simple man. Ev... Jan 14, 2011 - 5:01 PM SwissFerdi Thank you for the articulate, concise, and informa... Jan 14, 2011 - 5:02 PM SwissFerdi FAWK IT MAKES ME WANT NITROUS Jan 14, 2011 - 5:07 PM EKAn So sick, cant wait untill your spray it Jan 14, 2011 - 6:35 PM captb Please Vid and share when you do... Jan 14, 2011 - 6:51 PM DEATH Awesome build bro!
Yes - to answer your questi... Jan 14, 2011 - 9:49 PM mak5603 Sweet build bro, can't wait to see some number... Jan 17, 2011 - 2:43 PM Johnnyny me likey! Jan 17, 2011 - 11:45 PM Hanyo good job and keep up the great work! Jan 20, 2011 - 4:17 AM 94celicadude Thanks for all the positive feedback guys, I reall... Jan 23, 2011 - 4:58 PM Ted95 was that a 69 Boss Mustang in one of those pics???... Feb 1, 2011 - 4:25 PM 94celicadude I was wondering how long it would take for someone... Feb 3, 2011 - 6:41 PM stephen_lee any updates? Aug 8, 2011 - 12:56 PM 94celicadude Hey all,
Sorry ive been so off the forums for so ... Aug 9, 2011 - 6:30 PM hatchy_gt-s Nice thread! I'm glad your floor board did... Aug 9, 2011 - 9:13 PM
NGHTKD Awesome thread!!! Going to subscribe... Jan 14, 2011 - 3:04 AM eboz74 best of luck im in favor of the idea way to stand ... Jan 14, 2011 - 3:38 AM Smaay awesome thread, im very proud of your pictures and... Jan 14, 2011 - 9:51 AM presure2 X2 on the 98+ gasket (all 98+5s motors came with t... Jan 14, 2011 - 10:05 AM Smaay ^^^ thats good to point out. when i did my rebuild... Jan 14, 2011 - 10:08 AM 94celicadude QUOTE (Smaay @ Jan 14, 2011 - 3:51 P... Jan 14, 2011 - 2:52 PM HectortheRican Great thread man! Jan 14, 2011 - 3:08 PM easternpiro1 i must say... this thread is full of win. from the... Jan 14, 2011 - 4:07 PM captb loving the detail in the thread. I was supposed to... Jan 14, 2011 - 4:43 PM 95st-celica YOU.
DO.
GREAT.
WORK.
Plain and simple man. Ev... Jan 14, 2011 - 5:01 PM SwissFerdi Thank you for the articulate, concise, and informa... Jan 14, 2011 - 5:02 PM SwissFerdi FAWK IT MAKES ME WANT NITROUS Jan 14, 2011 - 5:07 PM EKAn So sick, cant wait untill your spray it Jan 14, 2011 - 6:35 PM captb Please Vid and share when you do... Jan 14, 2011 - 6:51 PM DEATH Awesome build bro!
Yes - to answer your questi... Jan 14, 2011 - 9:49 PM mak5603 Sweet build bro, can't wait to see some number... Jan 17, 2011 - 2:43 PM Johnnyny me likey! Jan 17, 2011 - 11:45 PM Hanyo good job and keep up the great work! Jan 20, 2011 - 4:17 AM 94celicadude Thanks for all the positive feedback guys, I reall... Jan 23, 2011 - 4:58 PM Ted95 was that a 69 Boss Mustang in one of those pics???... Feb 1, 2011 - 4:25 PM 94celicadude I was wondering how long it would take for someone... Feb 3, 2011 - 6:41 PM stephen_lee any updates? Aug 8, 2011 - 12:56 PM 94celicadude Hey all,
Sorry ive been so off the forums for so ... Aug 9, 2011 - 6:30 PM hatchy_gt-s Nice thread! I'm glad your floor board did... Aug 9, 2011 - 9:13 PM
 SwissFerdi QUOTE (hatchy_gt-s @ Aug 9, 2011 - ... Aug 10, 2011 - 8:01 PM 94celicadude She already has a set of 294 Webcams regrind in he... Aug 10, 2011 - 7:32 PM Smaay your AF is perfect while spraying, and your fuel p... Aug 11, 2011 - 9:09 AM stephen_lee if im imagining this properly, pulling fuel from a... Aug 12, 2011 - 12:02 PM delusionz would pay to upgrade the fuel pump though, to make... Aug 16, 2011 - 10:18 PM 94celicadude QUOTE (delusionz @ Aug 17, 2011 - 3... Aug 17, 2011 - 7:07 PM stephen_lee yeah 10.9 is richhh
id want it close to 12-12.5 ... Aug 18, 2011 - 11:14 AM 94celicadude Hey guys and girls!
Sorry this thread has bee... Dec 22, 2011 - 3:45 PM cheela almost there. that's awesome! Dec 22, 2011 - 4:42 PM Fastbird I must compliment you. VERY VERY good work. Impr... Dec 22, 2011 - 5:46 PM Neon90424 great build man I just purchased the ZEX 4 cyl kit... Dec 22, 2011 - 6:04 PM 94celicadude Thanks Fastbird!!! I always had the de... Dec 22, 2011 - 8:32 PM Neon90424 Yeah thanks man I got direct port and my mechanic... Dec 22, 2011 - 11:15 PM Smaay you are going to blow that engine, your peak torqu... Dec 23, 2011 - 8:16 AM Neon90424 What would fail first? melted pistons? Dec 23, 2011 - 1:20 PM 94celicadude QUOTE (Smaay @ Dec 23, 2011 - 7:16 A... Dec 24, 2011 - 1:01 PM evo_lucian Sorry I didn't read the entire thread, what si... Dec 24, 2011 - 6:05 PM 94celicadude I'm actually running a factory fuel pump for n... Dec 28, 2011 - 9:29 PM evo_lucian QUOTE (94celicadude @ Dec 28, 2011 - 9... Jan 9, 2012 - 5:20 AM KAOS aaaaaaaaaaaaaaaaaaaaaaaaaaaaaand subscribed!
... Dec 29, 2011 - 11:02 AM evo_lucian What jets were used to make the 196 whp ? Nov 16, 2012 - 7:39 AM 94celicadude .54 in all the nitrous side of the nozzles, .19 in... Nov 16, 2012 - 9:05 AM
SwissFerdi QUOTE (hatchy_gt-s @ Aug 9, 2011 - ... Aug 10, 2011 - 8:01 PM 94celicadude She already has a set of 294 Webcams regrind in he... Aug 10, 2011 - 7:32 PM Smaay your AF is perfect while spraying, and your fuel p... Aug 11, 2011 - 9:09 AM stephen_lee if im imagining this properly, pulling fuel from a... Aug 12, 2011 - 12:02 PM delusionz would pay to upgrade the fuel pump though, to make... Aug 16, 2011 - 10:18 PM 94celicadude QUOTE (delusionz @ Aug 17, 2011 - 3... Aug 17, 2011 - 7:07 PM stephen_lee yeah 10.9 is richhh
id want it close to 12-12.5 ... Aug 18, 2011 - 11:14 AM 94celicadude Hey guys and girls!
Sorry this thread has bee... Dec 22, 2011 - 3:45 PM cheela almost there. that's awesome! Dec 22, 2011 - 4:42 PM Fastbird I must compliment you. VERY VERY good work. Impr... Dec 22, 2011 - 5:46 PM Neon90424 great build man I just purchased the ZEX 4 cyl kit... Dec 22, 2011 - 6:04 PM 94celicadude Thanks Fastbird!!! I always had the de... Dec 22, 2011 - 8:32 PM Neon90424 Yeah thanks man I got direct port and my mechanic... Dec 22, 2011 - 11:15 PM Smaay you are going to blow that engine, your peak torqu... Dec 23, 2011 - 8:16 AM Neon90424 What would fail first? melted pistons? Dec 23, 2011 - 1:20 PM 94celicadude QUOTE (Smaay @ Dec 23, 2011 - 7:16 A... Dec 24, 2011 - 1:01 PM evo_lucian Sorry I didn't read the entire thread, what si... Dec 24, 2011 - 6:05 PM 94celicadude I'm actually running a factory fuel pump for n... Dec 28, 2011 - 9:29 PM evo_lucian QUOTE (94celicadude @ Dec 28, 2011 - 9... Jan 9, 2012 - 5:20 AM KAOS aaaaaaaaaaaaaaaaaaaaaaaaaaaaaand subscribed!
... Dec 29, 2011 - 11:02 AM evo_lucian What jets were used to make the 196 whp ? Nov 16, 2012 - 7:39 AM 94celicadude .54 in all the nitrous side of the nozzles, .19 in... Nov 16, 2012 - 9:05 AM |
1 User(s) are reading this topic (1 Guests and 0 Anonymous Users)
0 Members:
| Lo-Fi Version | Time is now: June 10th, 2026 - 6:44 AM |