
 Apr 16, 2009 - 12:09 AM Apr 16, 2009 - 12:09 AM
|
 
|
|
Enthusiast  Joined Jun 16, '07 From Vancouver, Canada Currently Offline Reputation: 14 (100%) |
A DIY FOR REPLACING YOUR REAR HUB & BEARING on a GT
(I am not a mechanic so used this guide at your own risk! The reason why I am changing my hub and bearing because the hub exceeded the bearing backlash maximum. The way I checked it was by lifting up the car, and pushing on wheel left and right. It moved around a lot, plus it was making a winding noise when driving some what like having winter tires on in the summer. I did this on a 1995 GT Convertible, so I'm not sure if this applies to a ST with drums. Good luck, and I hope this helps one person at least!) TOOLS & PARTS LIST 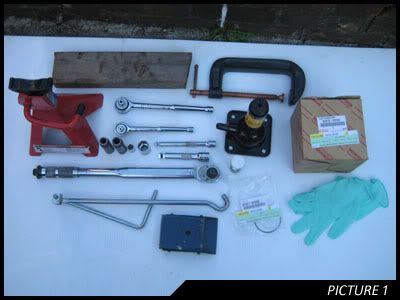 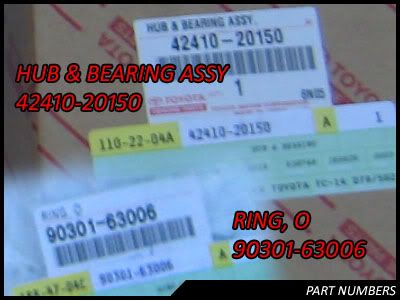 (look at picture one) - jack + jack tools - wheel block - jack stand - 1/2 ratchet + extension - 3/8 ratchet + extension - torque wrench - 14mm socket (deep and short) - 12mm socket - 21mm socket - gloves - clamp - mp grease - hub & bearing (42410-20150) - bearing oil ring (90301-63006) (not in picture) - Toyota manual - hammer - towel SETUP & PREPARATION 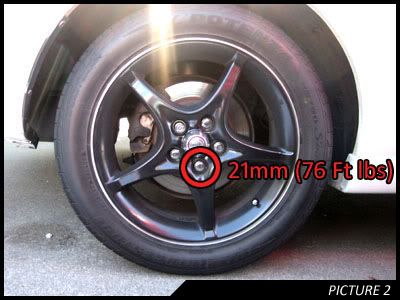 1. loosen lug nuts with a 21mm socket 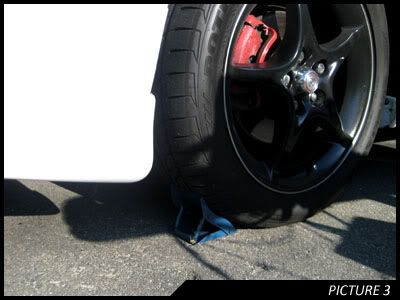 2. place wheel blocker 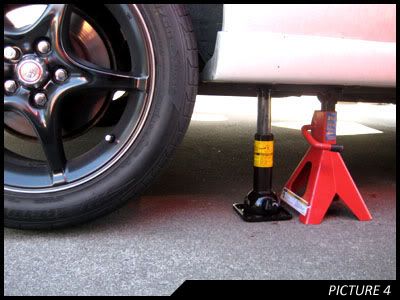 3. raise car with jack, and place a jack stand under the car for safety reasons *if you have a convertible you should unlatch your top to avoid any extra pressure that happens from jacking up your car* 4. remove lug nuts and than the wheel REMOVAL 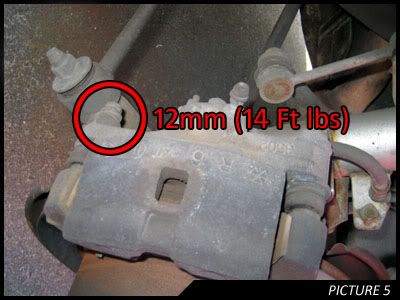 5. remove caliper bolt with a 12mm socket 6. push the caliper towards the inside of the car and lift the caliper up to remove the brake pads 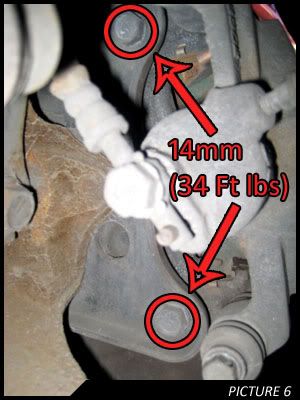 7. remove the 2 caliper housing bolts with 14mm socket *I had one hell of time removing the top one, i used a deep 14 for this*  8. remove brake disc * I had alot of trouble removing the brake disc, what i did was i used the caliper bolt to push the disc out, the Toyota manual says you can return the shoe adjuster until the wheel turns freely, if your brake disc does not come off easily* 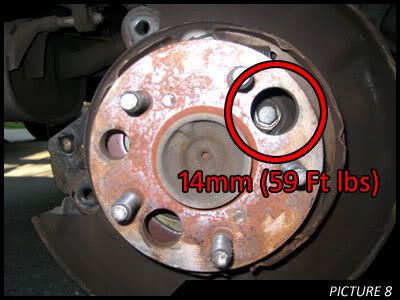 9. spin the hub until you can see the bolt behind the hub assembly shown in picture 8 * spin it around to see the other ones, there are four of them* 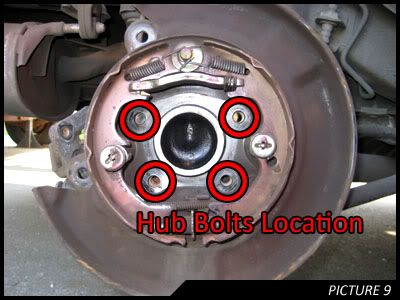 *i had to tug on the brake shoe to get to the bolts on the left side* 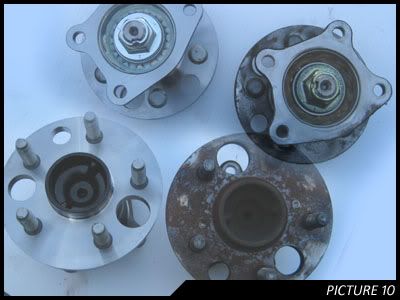 *here is a comparison of the my new and old hub & bearing* 10. remove the oil ring, its almost invisible but it should be there! INSTALLATION 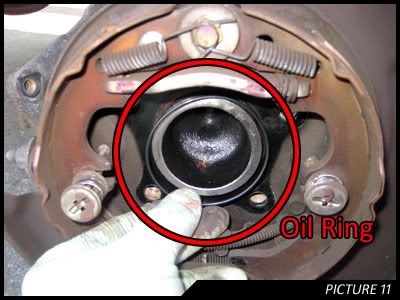 11. install new oil ring, remeber to put some MP grease on it first 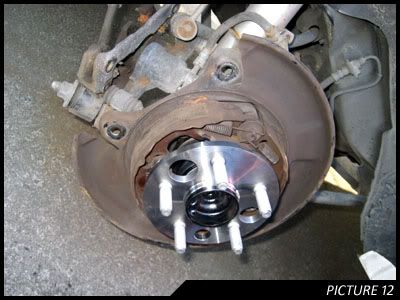 12. bolt down the hub back by doing the reverse order of removal *remember the torque specification is 59 Ft lbs, I installed the bolts across from each other the same way you tighten a lug nuts on a wheel* 13. install everything back in the reverse order of removal CONGRATULATIONS! YOU JUST DID A HUB AND BEARING REPLACEMENT This post has been edited by vile_v: Apr 17, 2009 - 12:33 AM --------------------  |

 |
Replies
(1 - 6)
|
Apr 16, 2009 - 4:42 AM
|
|
|
Enthusiast Joined Feb 6, '08 From Oregon Currently Offline Reputation: 8 (100%) |
great write up!
This post has been edited by Legit94GT: Apr 16, 2009 - 4:43 AM -------------------- 1 JL 1,000/1v2
2 JL 12" W6v2 2 Focal 6.5 component 165a1 Kenwood DDX512 head unit Running 142.6db with the back seat up:) |
|
Apr 16, 2009 - 5:58 AM
|
|
|
Enthusiast Joined Feb 24, '07 From Oahu, Hawaii Currently Offline Reputation: 23 (100%) |
nice job man. its about time for me to do mines also

-------------------- I don't normally drive fast, but when I do its on a curvy section of this island
 |
|
Apr 16, 2009 - 6:00 AM
|
|
|
Moderator Joined Oct 1, '02 From fall river, ma Currently Offline Reputation: 13 (100%) |
nice write up.
moved to suspension forum, and stickied. only thing i noticed is pic #5 has one of the rear arm bolts circled instead of the caliper bolts. -------------------- Former Team 5SFTE pro member ;)
 13.6@108MPH, 5SFTE Powered |
|
Apr 16, 2009 - 6:08 AM
|
|
|
Enthusiast Joined May 22, '03 From NOVA Currently Offline Reputation: 16 (100%) |
Nice write up, but in your first "removal" picture you circled the rear trailing arm nut?
and the ST is the same process
|
|
Apr 16, 2009 - 8:06 AM
|
|
 Enthusiast Joined Apr 18, '05 From Calgary Currently Offline Reputation: 20 (100%) |
good stuff.. can you add a close up of the part numbers in the first pic?
-------------------- -------------------------------------------------------------------------------- -------------------------------------------------------------------------------- |
|
Apr 16, 2009 - 7:17 PM
|
|
|
Enthusiast Joined Jun 16, '07 From Vancouver, Canada Currently Offline Reputation: 14 (100%) |
I fixed picture 5, I'll add the picture of the parts number when i get home from school.
Okay, I just added the part numbers picture! This post has been edited by vile_v: Apr 17, 2009 - 12:34 AM -------------------- |
 |
1 User(s) are reading this topic (1 Guests and 0 Anonymous Users)
0 Members:
| Lo-Fi Version | Time is now: May 9th, 2024 - 11:11 PM |