  |

 Mar 11, 2007 - 8:19 PM Mar 11, 2007 - 8:19 PM
|
 
|
|
Enthusiast  Joined Dec 11, '06 From New Jersey Currently Offline Reputation: 0 (0%) |
Ok, i got my 6gc.net stickers this weekend (yay:) ) but now i'm waiting on a couple others i order form a differant site.. my question is..
How to i apply the stickers to the car? I'm putting them on the side rear windows.. Do i put it on the outside or inside? (Probably i really dumb question i'm thinking the outside?) Will i have a problem going though the car wash with them on? Thanks for any help. -------------------- "Drive Well...
...Drift Better" |

|
Mar 11, 2007 - 9:00 PM
|
|
|
Enthusiast Joined Oct 7, '06 From wyomissing pennsylvania Currently Offline Reputation: 2 (100%) |
outside if you have tint, or inside if you really want, shouldnt have any problems with them coming off unless you are trying to take them off... have you ever tried to take off a sticker from a window??? haha some people spray the glass so they can better line up the stickers, most just stick em on
-------------------- you know why they put sheep at the edge of a cliff.... that way they push back!
(2:27:32 AM) edit: please f*cking work, f*ck, sh*t, piss (2:28:08 AM) edit: that did the trick |
|
Mar 11, 2007 - 9:15 PM
|
|
|
Enthusiast Joined Jan 28, '05 From Redondo Beach, CA Currently Offline Reputation: 86 (100%) |
--------------------  |
|
Mar 12, 2007 - 1:13 AM
|
|
 Enthusiast Joined Jan 10, '06 From Mozambique, Africa Currently Offline Reputation: 8 (100%) |
QUOTE(LewFX @ Mar 12, 2007 - 4:15 AM) [snapback]535388[/snapback] What's contained in the application spray? My link doesn't work. This post has been edited by Slick: Mar 12, 2007 - 1:13 AM -------------------- 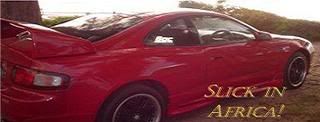 "Remember, amateurs built the ark and professionals built the Titanic. But revolutionaries built the Celica!"- Me |
|
Mar 21, 2007 - 8:45 PM
|
|
|
Enthusiast Joined Jul 11, '06 From Sefner, FL Currently Offline Reputation: 24 (100%) |
stupid question but i'll ask anyway. got some 6g stickers, i want to put them on now but tinting windows soon, if i put them on inside will they still show after you tint.
or should i just wait till the windows are tinted and put them on the outside --------------------  |
|
Mar 21, 2007 - 8:48 PM
|
|
 Enthusiast Joined Feb 5, '05 From pineapple under the sea Currently Offline Reputation: 9 (100%) |
QUOTE stupid question but i'll ask anyway. got some 6g stickers, i want to put them on now but tinting windows soon, if i put them on inside will they still show after you tint. or should i just wait till the windows are tinted and put them on the outside Tint goes on the inside of the window, so if you apply the sticker OUTSIDE (which is what you should do) it will still show like the day you put it on. -------------------- 1991 MR2 - T-tops - Crimson Red - Gen3 3SGTE - Lots of money
 I'm not really an asshole, but I play one on the internet. **** Photobucket |
|
Mar 21, 2007 - 9:33 PM
|
|
|
Enthusiast Joined Jul 11, '06 From Sefner, FL Currently Offline Reputation: 24 (100%) |
thx!
-------------------- |
|
Mar 23, 2007 - 10:01 AM
|
|
|
Enthusiast Joined May 3, '06 From New Hampshire Currently Offline Reputation: 2 (100%) |
Also I believe someone stated in another topic to use a piece of tape as a base line on the window where you are applying the sticker so you line it up and apply it straight, not crooked.
--------------------  Darin H. |
|
Mar 23, 2007 - 10:24 AM
|
|
 Enthusiast Joined Jan 10, '07 From Devon, UK Currently Offline Reputation: 0 (0%) |
Use the tape as a baseline to line it up by all means but if you use some masking tape along the top when positioning it you can flip the sticker up, whip off the backing and smooth back down with no fear of it moving. Unless the stickers are very big you don't need to apply them wet - in fact it will just make your life harder in the long run.
I applied all these dry back when my car had graphics. 
|
|
Mar 23, 2007 - 12:58 PM
|
|
|
Enthusiast Joined Nov 22, '04 From FL Currently Offline Reputation: 1 (100%) |
HAving done this myself on many cars.. inlcuding my old car.. wink wink check out my profile.. and having applied HUGE stickers ie a huge dragon on sides of my car, spiders... tigers.. ladies.. just about anything on request in my college. Anyways let me give you a couple of pointers.
IF its a small sticker such as under photo-sized just prep area and voila. if you are going for something as big as I had on my car.. -park your car in garage.. wash it before hand. -make sure there is no wind blowing cause dust and little particles just love sticking on glue surfaces and not coming out.. thus creating permanent bumps. -they say that your can get the bubbles out starting at center.. trust me that does not always work. I had bajillion little stickers representing dragon skin and scales and best way to apply sticker of that size is to tape it on top.. then using a razor blade slice it into manageble sections and then while slowly peeling backing starting from the top.. use (in my case it was included) a creditcard/anything that is soft enough but durable enough to apply pressure. as you go all the way down there are no bubbles. My dragon took about 3 hours per side 1st try when i repainted my car it took me only 1 hour per side. ohh btw. make sure to use caution when washing your car.. cause stickers may start to peel off on edges. -------------------- Captain Pessimist
|
|
Mar 23, 2007 - 1:08 PM
|
|
|
Enthusiast Joined Feb 5, '05 From pineapple under the sea Currently Offline Reputation: 9 (100%) |
Also, with window decals, be careful when you are scraping ice off your windows, because ice scrapers will thrash stickers.
after saying that, does anyone have any spare Ground Control decals? -------------------- 1991 MR2 - T-tops - Crimson Red - Gen3 3SGTE - Lots of money
I'm not really an asshole, but I play one on the internet. **** Photobucket |
|
Mar 23, 2007 - 2:26 PM
|
|
|
Enthusiast Joined Jan 28, '05 From Redondo Beach, CA Currently Offline Reputation: 86 (100%) |
i bet i can make em!
-------------------- |
|
Mar 23, 2007 - 2:56 PM
|
|
|
Enthusiast Joined Feb 5, '05 From pineapple under the sea Currently Offline Reputation: 9 (100%) |
well with the 6GC ones on their way, I'm think about just peeling off the ground control ones and placing the 6GC in their spot.
-------------------- 1991 MR2 - T-tops - Crimson Red - Gen3 3SGTE - Lots of money
I'm not really an asshole, but I play one on the internet. **** Photobucket |
|
Mar 23, 2007 - 4:44 PM
|
|
|
Enthusiast Joined Jan 10, '07 From Devon, UK Currently Offline Reputation: 0 (0%) |
QUOTE(yarik83 @ Mar 23, 2007 - 5:58 PM) [snapback]539109[/snapback] HAving done this myself on many cars.. inlcuding my old car.. wink wink check out my profile.. and having applied HUGE stickers ie a huge dragon on sides of my car, spiders... tigers.. ladies.. just about anything on request in my college. Anyways let me give you a couple of pointers. IF its a small sticker such as under photo-sized just prep area and voila. if you are going for something as big as I had on my car.. -park your car in garage.. wash it before hand. -make sure there is no wind blowing cause dust and little particles just love sticking on glue surfaces and not coming out.. thus creating permanent bumps. -they say that your can get the bubbles out starting at center.. trust me that does not always work. I had bajillion little stickers representing dragon skin and scales and best way to apply sticker of that size is to tape it on top.. then using a razor blade slice it into manageble sections and then while slowly peeling backing starting from the top.. use (in my case it was included) a creditcard/anything that is soft enough but durable enough to apply pressure. as you go all the way down there are no bubbles. My dragon took about 3 hours per side 1st try when i repainted my car it took me only 1 hour per side. ohh btw. make sure to use caution when washing your car.. cause stickers may start to peel off on edges. I would certainly agree with the additional points you raise - mine were ok through numerous washes but got peeled off by driving albeit slowly through a flood. Well, a couple of the front bumper did anyway 
|
|
Mar 23, 2007 - 8:09 PM
|
|
|
Enthusiast Joined May 12, '06 From Wilmington, NC Currently Offline Reputation: 45 (100%) |
with the 6gc.net decals, they are small enough you don't really need to do anything fancy. basically, just peel off the backing, carefully line it up, put it on starting at one side. then after its on just smooth it out using a credit card or something, then slowly pull the top piece off, and there you go! stickers!
Before my 6gc stickers I had some celicatech.com decals in my rear quarter windows and I had no problems with them peeling or anything. I took my car through a car wash once and they were still fine afterwards. This post has been edited by 6strngs: Mar 23, 2007 - 8:09 PM --------------------  94 GT - Sold -------- 69 Pontiac Lemans - Sold 88 Alltrac - Sold ---- 04 WRX - Sold 00 GT-S - Sold ------ 91 Miata - project/drift car 95 GT - Sold -------- 96 GT - New Daily Drive |
|
Mar 23, 2007 - 10:00 PM
|
|
|
Enthusiast Joined Jan 28, '05 From Redondo Beach, CA Currently Offline Reputation: 86 (100%) |
using masking tape to "hinge" the sticker is the easier way and then use a credit card or something to smooth it on, peel application tape off
-------------------- |
|
Mar 28, 2007 - 9:17 AM
|
|
|
Enthusiast Joined Feb 5, '05 From pineapple under the sea Currently Offline Reputation: 9 (100%) |
Okay, here is my How-to for decal install (specifically 6GC decal)
Tools: Decal(s) Cotton Ball  Rubbing Alcohol or equivalent  Masking tape  Okay, first what I had to do is remove my old vinyl, because one side was kind of killed from my ice scraper, so I removed it. My window looked like this  Then I took my equivalent to rubbing alcohol (I used whatever had the most alcohol in it) and put it on my cotton ball and rubbed the area clean of the sticky residue and whatever else was there.  Afterwards your window should look like this  Next, with ALL material still on the decal, tape it down where you want it with the masking tape.  Now here is the Hinge we are talking about. Cut one end of the tape and pull the decal back like a hinge. Once you have it pulled back, go ahead and remove the backing to the decal.  Once laid down take something laying around and press the decal down starting from the middle-ish and go up and down. I used the rubber handle to my wire strippers.  Once that is pressed on real good go ahead and start peeling back the cover. Don't go at a 90 degree angle on this. A nice 30 degree angle works well.  And thats it! Now its on the window.  Take off all residual tape and make sure it looks pretty.  Don't worry about bubbles that are ~2cm in size. Vinyl is porous and will let them go as time passes. If you get any big bubbles take a needle and poke it lightly. Now press the air out of the bubble. This post has been edited by 95CelicaST: Mar 28, 2007 - 9:18 AM -------------------- 1991 MR2 - T-tops - Crimson Red - Gen3 3SGTE - Lots of money
I'm not really an asshole, but I play one on the internet. **** Photobucket |
|
Mar 28, 2007 - 9:28 AM
|
|
|
Enthusiast Joined Jan 28, '05 From Redondo Beach, CA Currently Offline Reputation: 86 (100%) |
you should use something flat and hard like a scrapper or credit card to smooth it out, you can hindge the other way too and sometimes a middle hinge works best too but not for a short piece.
-------------------- |
|
Mar 28, 2007 - 9:33 AM
|
|
|
Enthusiast Joined Feb 5, '05 From pineapple under the sea Currently Offline Reputation: 9 (100%) |
Yeah these pictures were right after initial application. I took my American Eagle card to it afterwards. Makes it look real nice

-------------------- 1991 MR2 - T-tops - Crimson Red - Gen3 3SGTE - Lots of money
I'm not really an asshole, but I play one on the internet. **** Photobucket |
|
Mar 28, 2007 - 9:40 AM
|
|
|
Enthusiast Joined Jan 28, '05 From Redondo Beach, CA Currently Offline Reputation: 86 (100%) |
when smoothing, use the backing paper, smooth side on vinyl and press against the paper and smooth vinyl toget any bubble outs, but a needle works with a little heat (hair dryer) to soften it.
This post has been edited by LewFX: Mar 28, 2007 - 9:41 AM -------------------- |
|
1 User(s) are reading this topic (1 Guests and 0 Anonymous Users)
0 Members:
| Lo-Fi Version | Time is now: May 17th, 2026 - 3:10 PM |