
 Jan 18, 2009 - 6:55 PM Jan 18, 2009 - 6:55 PM
|
 
|
|
Enthusiast  Joined Mar 31, '04 From Summerville, SC Currently Offline Reputation: 5 (100%) |
Version for the 2nd/3rd gen is on the way, calm yourself down
  Note about pricing: Since I know this is going to come up, I'm going to get it out of the way ahead of time. Pricing was set using this method: Cost of all parts including shipping, $334.86, plus $50 for me to make the stainless line, clock the housing, and put everything together, then marked down to the nearest ".99", so $379 and free shipping. These instructions are for the Phoenix Tuning Fuel Pressure Regulator Kit for the 4th gen 3SGTE engine. This kit includes an AEM adjustable fuel pressure regulator, stainless-steel braided high pressure line, fuel rail adapter fitting, aluminum anodized AN fittings, a fuel pressure gauge, vacuum line and fitting, return line and fitting, and installation hardware. (23 pieces in total!!!) The kit is fully assembled (as shown in the pictures below) and is easy to install. This kit took many hours of testing and perfecting to get it just right, we hope that you enjoy it! The kit is $379 including free shipping. Everything you see in the pictures is included. Use on other vehicles: This kit is designed to fit the 4th gen 3SGTE engine swapped into a 6th gen Celica. We can make kits for other makes and models as well, contact us with requests. 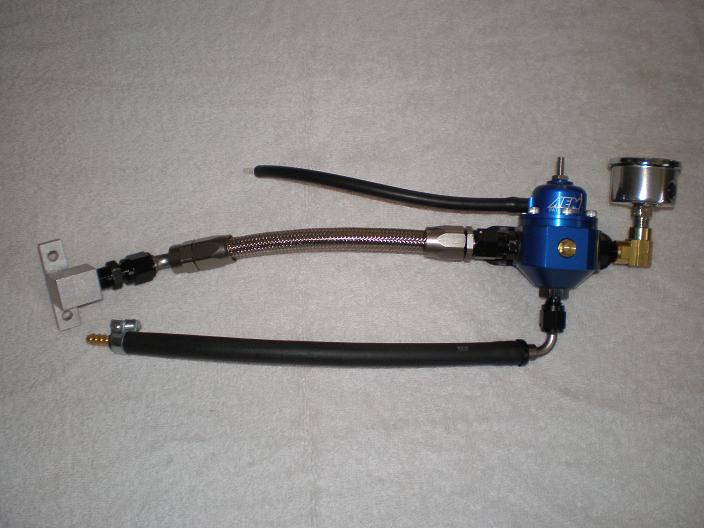 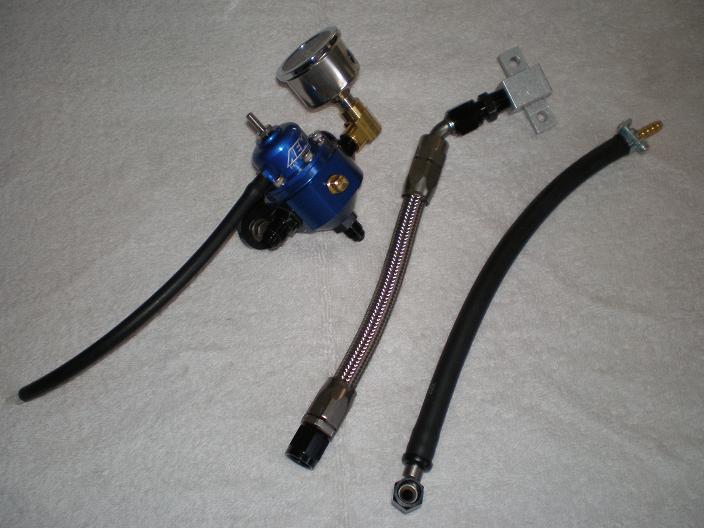 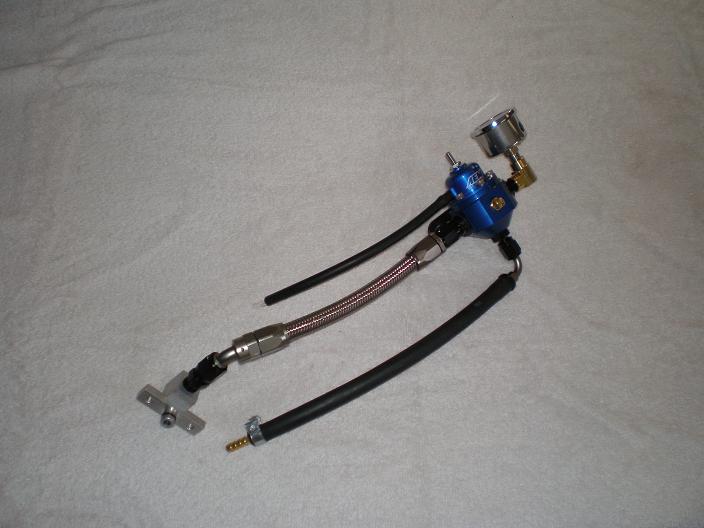 Installation Instructions FIRST: Remember that you are working with fuel here so be prepared by having some rags ready, and obviously do not smoke or allow any open flames or sparks to be in the vicinity of the work area. We strongly recommend that this be installed by a qualified technician. To release the pressure in the fuel rail, locate the Circuit Opening Relay (normally bolted to the ECU) and unplug it. Then, start the engine and allow it to idle until it dies on it's own. This should release the pressure from the fuel rail. (Remember to plug the relay back in.) Step 1: Locate the stock fuel pressure regulator located at the end of the fuel rail on the passenger side of the engine bay. Move the clamp holding the return line and disconnect it. (Warning, fuel will come out of the line). Move the clamp holding the vacuum line and disconnect that as well. Then remove the stock regulator by unbolting the two 10mm bolts. The bolts will be reused. After unbolting, the regulator can be pulled out of the fuel rail. 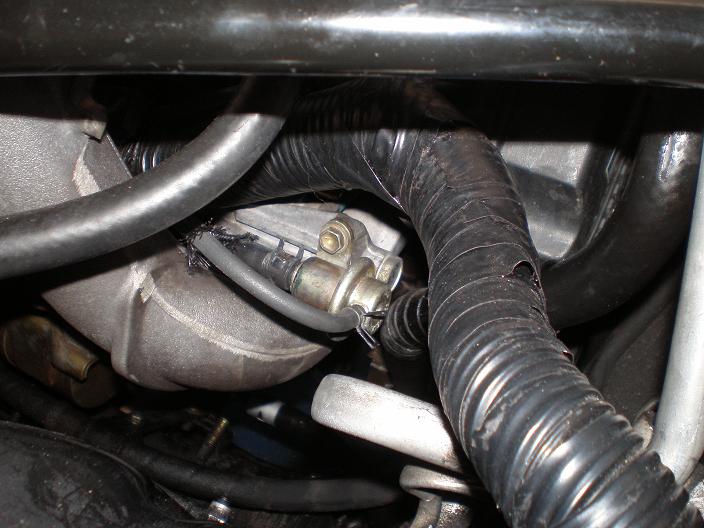 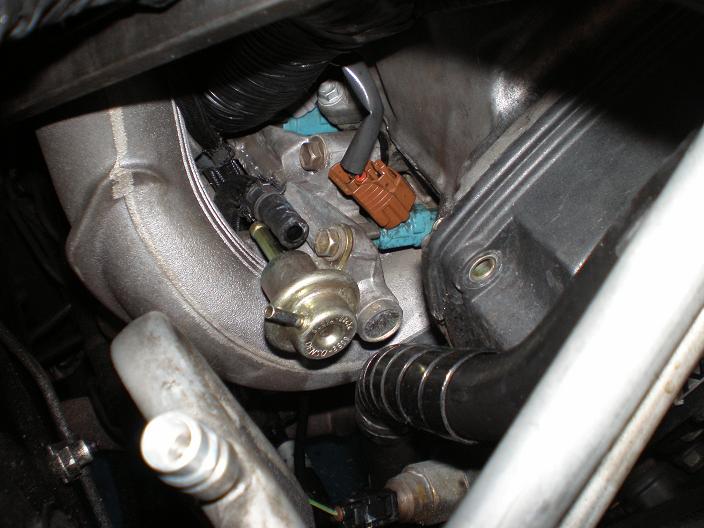 Step 2: Install the fuel rail adapter into the fuel rail. It bolts into the same place as the old regulator, and make sure the AN fitting is facing away from the engine. 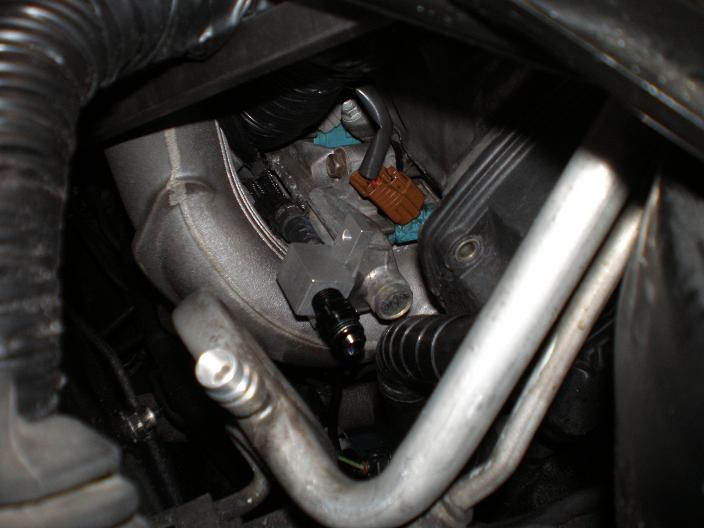 Step 3: Unbolt the bracket shown below, Then bolt the regulator into that location with the included bolt. The bracket can be reinstalled between the regulator and the body if needed. Do not tighten the bolt down all of the way yet. Also, when routing the low pressure return line (which is normally shipped already installed to the regulator), make sure it goes under the a/c lines. 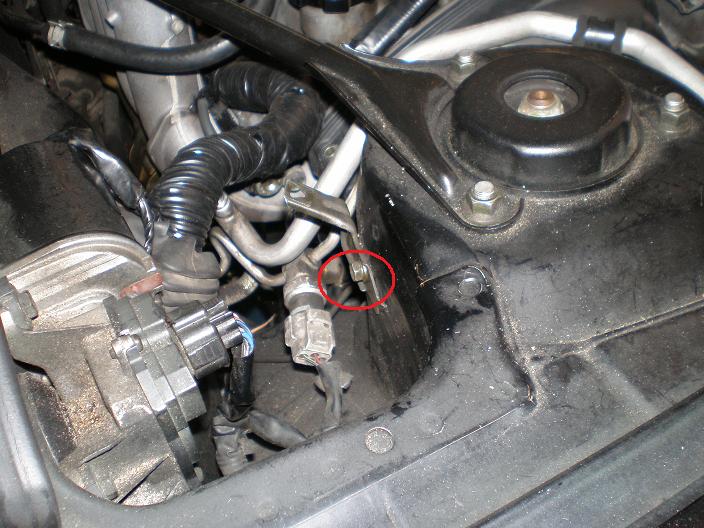 Step 4: Connect the stainless high-pressure line to the fuel rail adapter (45* fitting) and to the new regulator, being sure to route the stainless line so that it is not touching anything else. Tighten the 10mm bolt holding the regulator to the body and then tighten the two fuel line fittings all of the way (the correct wrench size is 11/16"). Connect the low-pressure fuel return line to the return line that went to the old regulator using the provided barb fitting, and move the clamp back into place. Connect the vacuum line to the vacuum line that went to the old regulator, using the provided barb fitting. Double-check that all of the fittings are tight and secure. 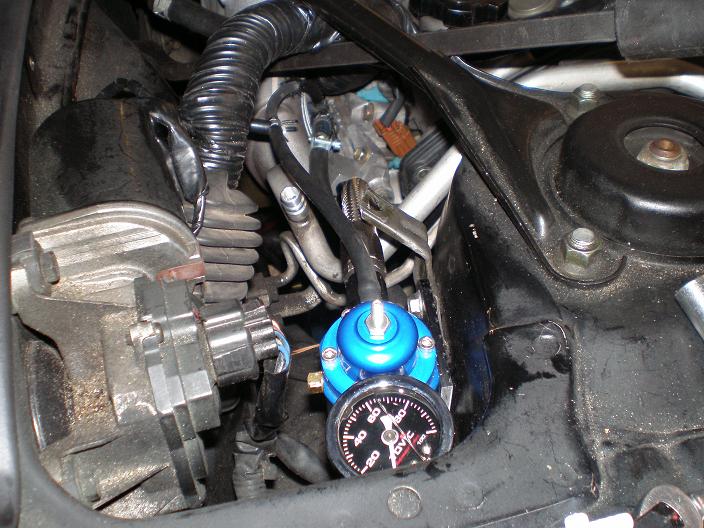 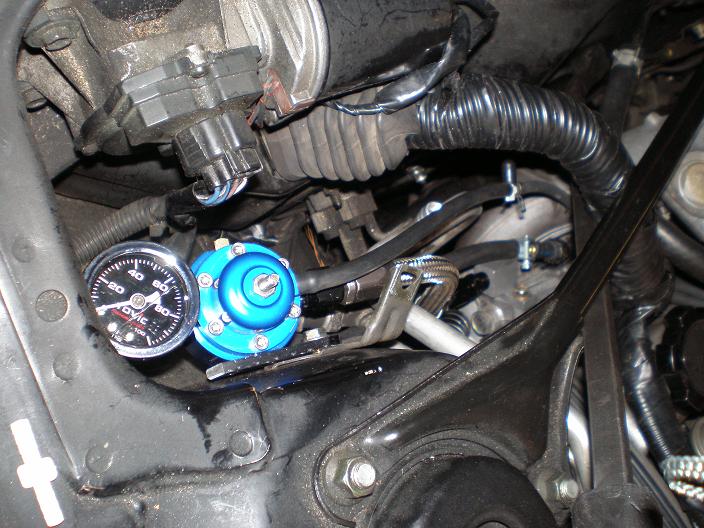 Fuel leak check: Locate the Circuit Opening Relay which is normally bolted to the side of the ECU. Using a wire, jump the black/yellow or black/red wire to the blue/black wire. Then turn the key to the ON position (do not start the car). The fuel pump should be running, now check for any leakage at all of the fittings. If any leak is found, it must be resolved before continuing. Once you have confirmed that there are no leaks, you can set the base pressure. Follow the provided instructions (supplied by AEM) for adjustments of the fuel pressure and orifice adjustments. Questions? Contact us at contact@phoenixtuning.com or 404-474-4573 -Dr Tweak, Phoenix Tuning LLC -------------------- -Dr Tweak, 6GC's resident engine swap wiring expert extraordinaire Click here to see my swaps drtweak@phoenixtuning.com |

Posts in this topic

  |
1 User(s) are reading this topic (1 Guests and 0 Anonymous Users)
0 Members:
| Lo-Fi Version | Time is now: July 11th, 2026 - 11:47 AM |