
 Jan 18, 2009 - 7:28 PM Jan 18, 2009 - 7:28 PM
|
 
|
|
Enthusiast  Joined Mar 31, '04 From Summerville, SC Currently Offline Reputation: 5 (100%) |
This is for the Phoenix Tuning Stainless Braided Fuel Line Kit. The kit included the high-pressure stainless braided line, anodized aluminum AN fittings, and banjo bolt adapter fittings. This kit is for the 4th gen, and again, I'm planning on putting one together for the 2nd/3rd gen 3SGTE shortly.
 The fuel line kit is $119 with free shipping. (Cost of parts is $85.82, plus $40 for me to make the line and put the kit together, rounded down to the nearest ".99") 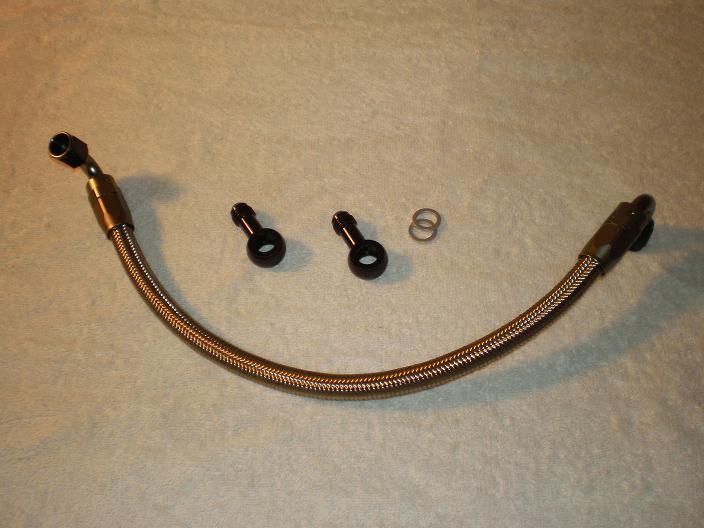 FIRST: Remember that you are working with fuel here so be prepared by having some rags ready, and obviously do not smoke or allow any open flames or sparks to be in the vicinity of the work area. We strongly recommend that this be installed by a qualified technician. To release the pressure in the fuel rail, locate the Circuit Opening Relay (normally bolted to the ECU) and unplug it. Then, start the engine and allow it to idle until it dies on it's own. This should release the pressure from the fuel rail. (Remember to plug the relay back in.) Step 1: Unbolt the 17mm banjo bolt holding the fuel line to the fuel filter. (Warning, fuel will come out of the line.) 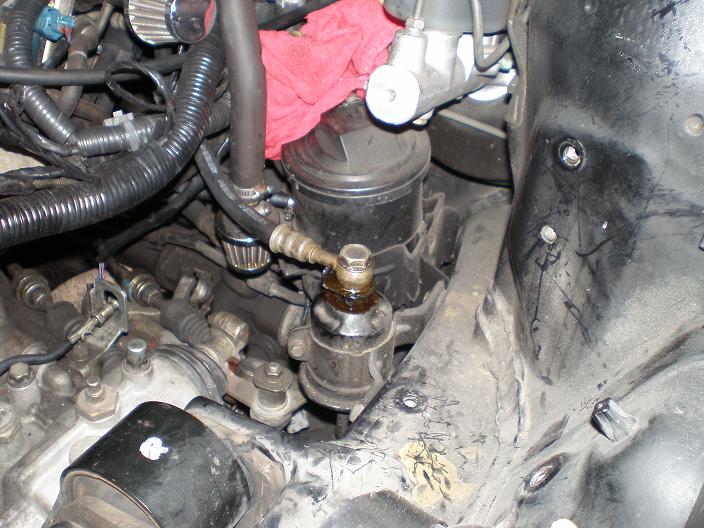 Step 2: Bolt one of the banjo fitting to AN fitting adapters to the top of the fuel filter. Use the new provided crush washers. Note that the AN fitting will not go into the slot for the old fuel line, so position it as shown in the below picture. 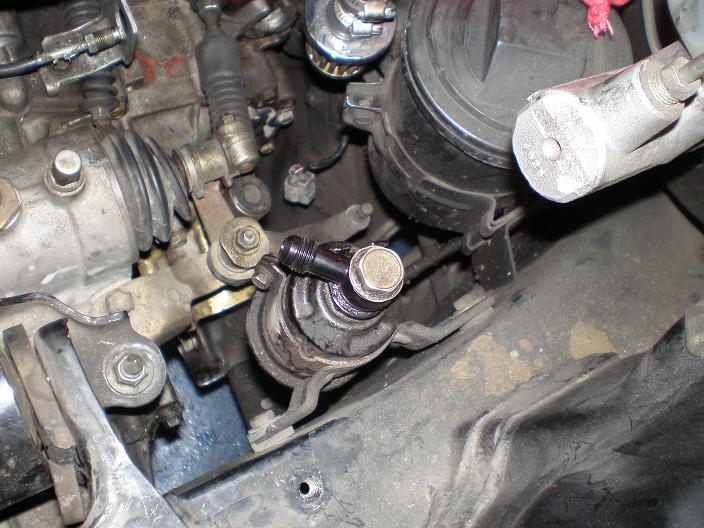 Step 3: Locate the pressure conditioner/banjo bolt as shown in the below pic. Behind the round body visible in the picture is a 22mm nut that is part of the housing, note that it may be easier to access this from underneath the car. If you do so, please use jackstands and observe safe vehicle lifting procedures. Remove the conditioner/banjo bolt, being careful to KEEP the two castle-style washers, these WILL be reused.  Step 4: Install the two castle-style washers and banjo-to-AN adapter onto the conditioner/banjo bolt fitting as shown below, then install it. Be careful to point the AN fitting up towards the firewall as shown. Do NOT tighten the fitting down all of the way just yet. 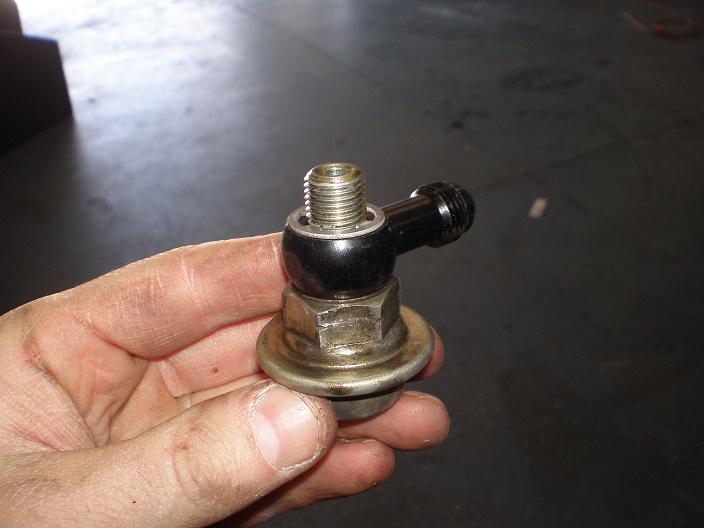 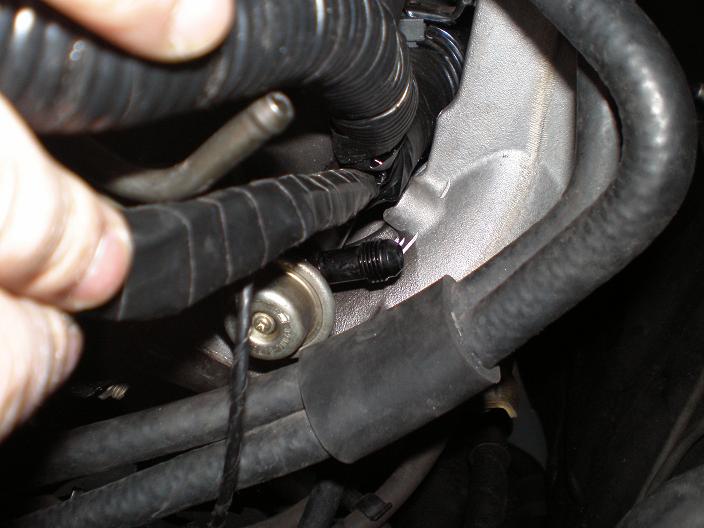 Step 5: Install the stainless fuel line, noting that the 120-degree fitting goes to the fuel rail and the 90-degree fitting goes to the fuel filter. Tighten both fittings (11/16" wrench), making sure that the stainless line does not touch any other lines or hoses. Then, tighten the 22mm conditioner/banjo bolt that hold the fuel line to the fuel rail. 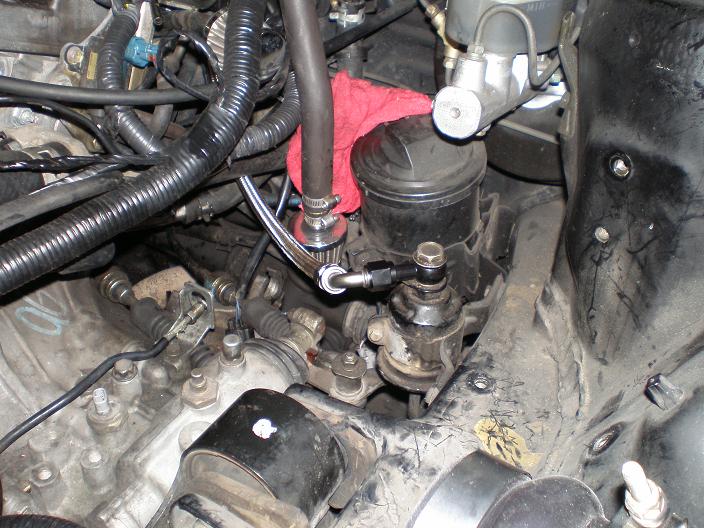 Fuel leak check: Locate the Circuit Opening Relay which is normally bolted to the side of the ECU. Using a wire, jump the black/yellow or black/red wire to the blue/black wire. Then turn the key to the ON position (do not start the car). The fuel pump should be running, now check for any leakage at all of the fittings. If any leak is found, it must be resolved before continuing. Questions? Contact us at contact@phoenixtuning.com or 404-474-4573 -Dr Tweak, Phoenix Tuning LLC -------------------- -Dr Tweak, 6GC's resident engine swap wiring expert extraordinaire Click here to see my swaps drtweak@phoenixtuning.com |

Posts in this topic

  |
1 User(s) are reading this topic (1 Guests and 0 Anonymous Users)
0 Members:
| Lo-Fi Version | Time is now: July 10th, 2026 - 8:59 AM |