  |

 May 20, 2012 - 3:34 AM May 20, 2012 - 3:34 AM
|
 
|
|
Enthusiast  Joined Aug 2, '05 From Guam Currently Offline Reputation: 15 (100%) |
>>LET'S GO OVER REAL QUICK OUR REPLACEMENT OPTIONS OUT THERE:
TOYOTA OEM FRONT ENDLINKS Item #4: $61.50  TOYOTA OEM REAR ENDLINKS Item #4: $45.75         SWAY BAR LINK INSPECTION: Condition.............Code........Procedure Attaching hardware incorrect .............. A .......... Require replacement of incorrect part, if available; otherwise, replace link. Attaching hardware loose .................. A ... Require repair or replacement of loose part, if available; otherwise, replace link. Attaching hardware missing ................ C .. Require replacement of missing part, if available; otherwise, replace link. Attaching hardware threads damaged ........ A ... Require repair or replacement of part with damaged threads, if available; otherwise, replace link. Attaching hardware threads stripped (threads missing) ...... A ..... Require replacement of part with stripped threads, if available; otherwise, replace link. Ball and socket has looseness (perceptible vertical movement) ..... 1 ........ (1) Suggest replacement. Ball and socket has looseness that is excessive .............. B ..... (1)(2) Require replacement. Bent .................... B ............ Require replacement. Broken .................. A ............ Require replacement. Corroded, affecting structural integrity ... A ............ Require replacement. Grease boot cracked ..... 2 ........ (3) Suggest replacement. Grease boot missing ..... 2 ........ (4) Suggest replacement. Grease boot torn ........ 2 ........ (5) Suggest replacement. Missing ................. C ............ Require replacement. Nut on stud loose ....... A ............. (6) Require repair. Stud bent ............... B ........ (7) Require replacement. Stud broken ............. A ........ (7) Require replacement. Threads damaged ......... A .. Require repair or replacement. Threads stripped (threads missing) ............... A ........ (7) Require replacement. (1) - If manufacturer’s procedures for inspection exist, use those procedures; otherwise, use an approved inspection method such as the dry park check. CAUTION: DO NOT use pliers or pry bar to check ball and socket movement. Use only moderate hand pressure. (2) - Excessive looseness is defined as being significant enough to affect vehicle handling or structural integrity. (3) - Cracked grease boot will allow contaminants to enter the joint and will accelerate wear. (4) - Lack of grease boot will allow contaminants to enter the joint and will accelerate wear. (5) - Torn grease boot will allow contaminants to enter the joint and will accelerate wear. (6) - Check for bent stud or damaged taper hole. (7) - Check for damaged taper hole. TOOLS NEEDED TO REMOVE AND REPLACE ENDLINKS:  Real Quick On Removing and Installing Endlinks: 1. Jack up the car in the correct jacking points, place jack stands in correct jack stand areas. Refer to manual or on this forum. I guess to be safe you can block the wheels depending if you are doing front or back. 2. Take off wheel. 3. Identify the endlink to be replaced. 4. Use 14mm wrench to remove nut, must be used with allen wrench at the same time so that nut does not move with the stud. Repeat for the other nut. (If yours is stuck use vise grips on the other side of the sway bar so you can lock it in place. Refer here: http://www.6gc.net/forums/index.php?showtopic=41243. You can also use a disc grinder but be careful. 5. Once both nuts are removed you can take off the endlink. Sometimes you have to use like scissor jacks to play with the knuckle and lift it up and down if the endlink is stuck - same thing goes for removal and installation. NOTES: However some aftermarket endlinks do not have the part where the allen wrench goes in to hold the stud from moving. I suggest depends on the endlink you can slip a wrench on the other end's inner nut or you can install the outer nut onto the endlink first meaning not on the car. Note: Some aftermarket endlinks use bigger nuts than OEM like 15mm or so. Some aftermarket links like MEVOTECH or MOOG, if you put on the nut almost halfway but then it gets tight after that and it makes the stud spin, so before installing onto the car, use two wrenches and install the nuts onto the links first (not on the car) and then remove, then install onto the car - this will make the threads ready for the nut to go on easier. If your endlinks still have the center part where an allen wrench can fit into then no worries, removal and install is simple. In simple terms you gotta get out the endlink and put on the endlink, depending how they come off and on. GREASABLE ENDLINKS (Sometimes Only offered for certain cars, by certain brands, or if there is a common problem with a specific car model): In my case I also used a grease gun on the fittings cus mine came with them. For the MOOGs it was not necessary to add more grease, they looked pretty full but the MEVOTECH's looked less so i used the grease gun on these links. Technically you can tell when to stop pumping grease when it begins to slightly ooze out of the boot. It might ooze out more once you lower the car. In most cases, if your car is on the ground, and if you can fit under there, this is the right time to put grease cus its already settled into its final suspension load. Its pretty straight forward, but I don't want to get too detailed unless you guys want me to elaborate. 6. Pretty simple - installation is reverse. Pls see below torque spec.  Introduction and Options: What are Endlinks? In general, end links are also known as sway bar links. These are the parts that connect your sway bar to the lower control arm, which induces twist into the sway bar as it moves up and down, thereby reducing body roll. End links are bolted to a round opening at either end of the sway bar, and then into round openings in the lower control arm, knuckle, and/or Strut. The sway bar is also connected to the car’s frame by way of sway bar mounting or frame bushing. Worn out end link bushing can allow your car’s body to roll while cornering. Now, I just wanted to give you guys somewhat of an informed update on me upgrading to the MEVOTECH front sway bar endlinks and MOOG rear sway bar endlinks. My links are bad so I am just trying to get something better than OEM. I'm not trying to loose much of the OEM drivability. I'm sure higher end products change the feel of the car especially if you combine them with sway bar bushings and sway bars and make it more for sporty driving or track. My Other Options:#1. I could have gotten the GT4 Racing PolyUrethane endlinks that come with Polybushings (non-adjustable) that i'm sure would be good for track and stiff feel but was not sure how this would affect ride quality so opted for upgraded OEM replacement links that are beefier but still use the ball joint design. There is also lots of talk about how the possibility over time the poly bushings material in general tend to squeak and I did not want to deal with that idea, I could be wrong or whatsoever, and I don't know anyone that has GT4 Racing ones that could vouch for it specifically for our cars. The product is semi-brand new if not brand new since no one has it yet. http://www.gt4-racing.eu/index.php #2. There are other options that azian_advanced found for the rears only which are adjustable hex poly bushing endlinks which may be an option for you. There are also the TwosRUs adjustable endlinks for front and rear and comes in red/stainless finishes and full stainless finish which costs alot more. You can read on both here on http://www.6gc.net/forums/index.php?showto...&hl=twosrus Actual Install and Results: Good thing about both MEVOTECH and MOOG besides they are obviously beefier are that they are both greasable and come with Zerk Fittings (this I hope makes the links last much longer). But with the beefiness and zirk fittings, makes it to me more of an upgrade from regular endlinks that have neither especially the going rate for OEM "toothpick" endlinks that cost about 50-70 bucks eachx4. For the MOOG brand, needs no introduction, they are respected in the suspension/chassis arena. In fact, I went ahead and bought me MOOG inner and outer tie rods to go along with it. Thinking of the lower ball joints to be MOOG too. To get started...Here are pics of the front stock endlinks still installed. Needs no explanation, looks weak, thin, and breaks fast.  Here are pics of the comparison side by side for the front. As you can see the MEVOTECH front links are much beefier. As Spider once mentioned they are 13mm compared to the stock 8mm on the rod size. Comes with a nice blue boot cover but thats just for show. I read that the black boot covers are the newer designed ones (supposed to be better) which i've seen as well but dunno the difference of how some say its better. FYI, MEVOTECH for some reason offers their beefier models for both front and rear for our model. For other cars, MEVOTECH sometimes provide the stock skinny ones for example for the 7gc. I guess we are lucky. The reason why i decided on getting MEVOTECH for the fronts and not MOOG all around is because MOOG front links seem to be like stockish looking and its size - I did not know for sure but i've seen the fronts for other cars and they size up the same as stocks.  Here are pics of the MEVOTECH Front endlinks installed. Nice!  Here are the pics of the rear stock endlinks still installed. Again, scrawny.  Here are the side by side pic comparison for the rear. As you can see the MOOGs are definitely beefier. Comes with a nice MOOG black boot cover with their logo. Also has the greasable zerk fittings. I did not opt to match MEVOTECHs in the rear only because I know MOOG is top-notch replacements. Again MOOG rear endlinks are much better in design than their front version, thus the mix and match with MEVOTECH's fronts. MOOG fronts just look like stock (which I'm sure is just equal or a bit better than OEM). MOOG I believe may offer this same design for the fronts and rears but not for every car, in our Celica's case, just the rears are the nicer ones.  Here are pics of the rear MOOG endlinks installed. Sorry crappy phone night pics. But Definitely looks beefier and nicer.  Review and feedback of the ride upgrade. Car feels much stiffer, very noticeable, there were turns I used to take with my worn out ones and I would just feel the car tilt, now its more stable with these ones. Turn-in is great, im hugging turns a lot better now. Definitely a good feeling. I thought maybe there wouldn't be a difference but there is. I will probably loose that feeling over time when i get used to it, but as of now its a night and day difference. In conclusion, there are many decent OE replacements out there, Autoextra, MEVOTECH, DEEZA, Beck and Arnley, AC Delco, Raybestos (Service and Professional Grades), NAPA, whitelines (AUS), MOOG, etc. - some better than others. MOOG and RAYBESTOS (Pro Grade) are good choices for ball joint types. I'm not trying to promote the products I installed, just wanted to tell you my experience on this setup. Again there are many brands out there, mix and match parts, etc. for you to choose from. Another good tip is that there are some cars that share the same endlinks either front/rear interchangeable so that means if other cars have a performance version thats an option for you too. A good example was azian_advanced's Miata rear endlink find. Also with adjustable endlinks since they are hex types, you can flip the bolt/stud to face in same or opposite directions and adjust height length as well giving you more options < as so i think i understand it that way. For the most part what endlinks are its generally the same its really just a matter of length and the direction of the studs for it to fit. So good luck on your endlink jobs and be safe when doing it. Again constructive feedback is welcome so that we can make it better if anything... ENDLINK WRITE-UP BY: 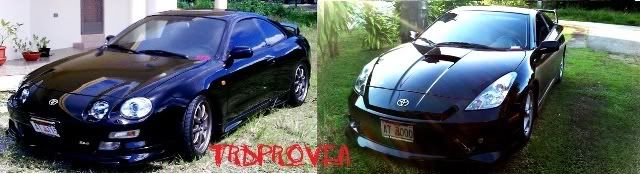
This post has been edited by trdproven: May 29, 2012 - 11:06 PM -------------------- 94 Celica GT
|Toyota OEM Japan|Toyota Racing Development|Tom's|Competition Clutch|5Zigen|Apexi| |Laille/Beatrush|Magnecor|Denso|Royal Purple|Optima|PIAA|PW JDM|Megan Racing|Nitto| |Work|Greddy|Samco|Project Mu|H&R|Gates|Moog|Rota|Yokohama|Epman|1320|Upgr8 04 Celica GT |Toyota OEM Japan|Toyota Racing Development|Tein|BC Racing|Greddy| |

|
May 20, 2012 - 7:09 AM
|
|
|
Enthusiast Joined Jun 18, '09 From Orlando Currently Offline Reputation: 8 (100%) |
Great guide.

-------------------- '97 ST \ Eibach \ KYB \ Kenwood \ Alpine \ Cusco \ OEM+ [sold 10/18]
'90 MX-5 Mariner Blue '93 MX-5 LE '07 Kawasaki Eliminator 125 silver '15 Optima Grey '04 206 GTi silve |
|
May 20, 2012 - 9:17 AM
|
|
 Enthusiast Joined Apr 18, '05 From Calgary Currently Offline Reputation: 20 (100%) |
just to add, if worst comes to worst and you still can't easily remove the endlink using the allen key or vice grip methods, just use a disc grinder and cut them off at the studs. it's so much faster especially if the links are shot and going to the trash anyway.. sticky! -------------------- -------------------------------------------------------------------------------- -------------------------------------------------------------------------------- |
|
May 20, 2012 - 11:36 AM
|
|
|
Enthusiast Joined Jul 23, '09 From Fresno, Ca Currently Offline Reputation: 6 (100%) |
how much did they run you?>
nice guide tho! |
|
May 20, 2012 - 1:29 PM
|
|
|
Enthusiast Joined Jan 20, '09 From Winnipeg Currently Offline Reputation: 5 (100%) |
Sticky for sure.
There's been a ton of talk on end links around here and. It a whole lot of solid conclusions either than azian_advanced's thread but this definitely covers it all -------------------- -Protection mode, For when your amp tries to blow its load. 1995 Toyota Celica GTS - Daily Driver 1999 Chevy Cavalier - Winter Beater 1994 Honda Civic CX Hatchback - Dead My Celica! |
|
May 20, 2012 - 2:19 PM
|
|
|
Enthusiast Joined Jan 17, '08 From JB MDL, NJ Currently Offline Reputation: 30 (100%) |
Well, Im glad your enjoying your new endlinks. Ive been running mine for a bit now and I can still notice the difference....turns are now fun again (on an empty road of course), although my wife would beg to differ. Another great write up!
|
|
May 20, 2012 - 3:33 PM
|
|
|
Enthusiast Joined Aug 2, '05 From Guam Currently Offline Reputation: 15 (100%) |
QUOTE (azian_advanced @ May 21, 2012 - 12:17 AM)  just to add, if worst comes to worst and you still can't easily remove the endlink using the allen key or vice grip methods, just use a disc grinder and cut them off at the studs. it's so much faster especially if the links are shot and going to the trash anyway.. sticky! I've done the disc grinder method as well, not for the careless weekend mechanic but definitely works as well. -------------------- 94 Celica GT
|Toyota OEM Japan|Toyota Racing Development|Tom's|Competition Clutch|5Zigen|Apexi| |Laille/Beatrush|Magnecor|Denso|Royal Purple|Optima|PIAA|PW JDM|Megan Racing|Nitto| |Work|Greddy|Samco|Project Mu|H&R|Gates|Moog|Rota|Yokohama|Epman|1320|Upgr8 04 Celica GT |Toyota OEM Japan|Toyota Racing Development|Tein|BC Racing|Greddy| |
|
May 20, 2012 - 8:15 PM
|
|
|
Enthusiast Joined Aug 2, '05 From Guam Currently Offline Reputation: 15 (100%) |
QUOTE (SwissFerdi @ May 20, 2012 - 10:09 PM) Great guide. thanks. QUOTE (azian_advanced @ May 21, 2012 - 12:17 AM) just to add, if worst comes to worst and you still can't easily remove the endlink using the allen key or vice grip methods, just use a disc grinder and cut them off at the studs. it's so much faster especially if the links are shot and going to the trash anyway.. sticky! updated! thanks for your input as always. QUOTE (benzo @ May 21, 2012 - 2:36 AM) how much did they run you?> nice guide tho! Updated with all products/prices from ROCKAUTO! QUOTE (jordisonjr @ May 21, 2012 - 4:29 AM) Sticky for sure. There's been a ton of talk on end links around here and. It a whole lot of solid conclusions either than azian_advanced's thread but this definitely covers it all Thanks, couldn't have done it without reading what everyone else had to say about theirs. QUOTE (Spider77 @ May 21, 2012 - 5:19 AM) Well, Im glad your enjoying your new endlinks. Ive been running mine for a bit now and I can still notice the difference....turns are now fun again (on an empty road of course), although my wife would beg to differ. Another great write up! Thanks. your pics gave me a good idea on how the MEVOTECH's looked like, they are pretty beefy, and thanks for your input. -------------------- 94 Celica GT
|Toyota OEM Japan|Toyota Racing Development|Tom's|Competition Clutch|5Zigen|Apexi| |Laille/Beatrush|Magnecor|Denso|Royal Purple|Optima|PIAA|PW JDM|Megan Racing|Nitto| |Work|Greddy|Samco|Project Mu|H&R|Gates|Moog|Rota|Yokohama|Epman|1320|Upgr8 04 Celica GT |Toyota OEM Japan|Toyota Racing Development|Tein|BC Racing|Greddy| |
|
May 21, 2012 - 12:33 AM
|
|
|
Enthusiast Joined Apr 24, '08 From Orange County, CA Currently Offline Reputation: 33 (100%) |
great thanks!! liking what I'm seeing.
noticed that both on the MOOG and MEVOTECH you can install grease into the boot by removing that little pin. Why is that? stock doesn't have that option, whats the advantage??? This post has been edited by BonzaiCelica: Sep 2, 2015 - 4:12 PM -------------------- Group buy to replicate Narrow E series transaxle parts
http://www.6gc.net/forums/index.php?showto...p;#entry1107514 Items for Sale: http://www.6gc.net/forums/index.php?showto...p;#entry1107572 |
|
May 21, 2012 - 2:14 AM
|
|
|
Enthusiast Joined Aug 2, '05 From Guam Currently Offline Reputation: 15 (100%) |
Sorry I'm lost removing what little pin? are you talking about the grease fitting? you have to leave the fitting on, you use it with a grease gun and it hooks onto the fitting. OEM does not have these fittings. These fitting allow not only for the joint to be kept always greased, but it can also push out old grease and keep it fresh, making the links last longer. The OEM ones wear out quicker because it dries up, or the insides get contaminated.
This post has been edited by trdproven: May 21, 2012 - 3:24 AM -------------------- 94 Celica GT
|Toyota OEM Japan|Toyota Racing Development|Tom's|Competition Clutch|5Zigen|Apexi| |Laille/Beatrush|Magnecor|Denso|Royal Purple|Optima|PIAA|PW JDM|Megan Racing|Nitto| |Work|Greddy|Samco|Project Mu|H&R|Gates|Moog|Rota|Yokohama|Epman|1320|Upgr8 04 Celica GT |Toyota OEM Japan|Toyota Racing Development|Tein|BC Racing|Greddy| |
|
May 21, 2012 - 5:23 AM
|
|
|
Enthusiast Joined Aug 17, '10 Currently Offline Reputation: 0 (0%) |
What is your opinion about the gt4 racing has anyone used them?
I see there is polyurethane bush that holds it together so is it possible to sqeek? Do they need to grease them very frequently? Because it looks that it wont keep the grease as the rest of them that are sealed with rubber. Great thread, a very nice write up! Congratulations! |
|
May 21, 2012 - 3:39 PM
|
|
|
Enthusiast Joined Aug 2, '05 From Guam Currently Offline Reputation: 15 (100%) |
im not sure...but poly material has been known to squeak thats why they use grease on them. Poly material is pretty slippery rubbery which i can see why they COULD POSSIBLY squeak. For sway bar bushings I've seen people use teflon tape aroundd the sway bar to keep it from squeaking. No one i think on this forum has the gt4 endlinks yet. They are similar in design to the the Whiteline brand. The rear design is shaped like that so that it allows the middle to pivot for movement.
This post has been edited by trdproven: May 26, 2012 - 8:45 AM -------------------- 94 Celica GT
|Toyota OEM Japan|Toyota Racing Development|Tom's|Competition Clutch|5Zigen|Apexi| |Laille/Beatrush|Magnecor|Denso|Royal Purple|Optima|PIAA|PW JDM|Megan Racing|Nitto| |Work|Greddy|Samco|Project Mu|H&R|Gates|Moog|Rota|Yokohama|Epman|1320|Upgr8 04 Celica GT |Toyota OEM Japan|Toyota Racing Development|Tein|BC Racing|Greddy| |
|
May 21, 2012 - 8:14 PM
|
|
|
Enthusiast Joined Apr 24, '08 From Orange County, CA Currently Offline Reputation: 33 (100%) |
QUOTE (trdproven @ May 21, 2012 - 2:14 AM) Sorry I'm lost removing what little pin? are you talking about the grease fitting? you have to leave the fitting on, you use it with a grease gun and it hooks onto the fitting. OEM does not have these fittings. These fitting allow not only for the joint to be kept always greased, but it can also push out old grease and keep it fresh, making the links last longer. The OEM ones wear out quicker because it dries up, or the insides get contaminated. really the grease can get old on the insides of the end links how so?? haha might want to edit the photo size please. They are way too large This post has been edited by BonzaiCelica: May 21, 2012 - 8:23 PM -------------------- Group buy to replicate Narrow E series transaxle parts
http://www.6gc.net/forums/index.php?showto...p;#entry1107514 Items for Sale: http://www.6gc.net/forums/index.php?showto...p;#entry1107572 |
|
May 21, 2012 - 8:19 PM
|
|
|
Enthusiast Joined Aug 2, '05 From Guam Currently Offline Reputation: 15 (100%) |
Well, old in terms of not newer than the new grease being put in. Another thing is that the boots allow the old grease to ooze out so there is some type of opening. Moog oozes out from the ends of the boot while MEVOTECH oozes out from these small slits on the boot. so its not exactly a fully enclosed boot, the MOOG dont have a ring locking it, the MEVOTECH is locked with a ring but has small slits on the boot for the grease to come out. also grease tends to not say disappear but get less or old meaning thats why OEM or generic replacements get to that point where it just messes up, these zirk grease fittings promote longer lasting links with always replenished grease every 6 months to a year you can refill.
May I add the bigger ball joint design allows for more grease to be put in. thus i guess the rod thats in between is proportional to match the bigger ball joints. On my 7th gen, I used front BC Racing Endlinks that came with the coilovers, not greasable but beefier than OEM. The rears on it were just beefier aftermarket versions, IDK the brand. This post has been edited by trdproven: May 21, 2012 - 8:36 PM -------------------- 94 Celica GT
|Toyota OEM Japan|Toyota Racing Development|Tom's|Competition Clutch|5Zigen|Apexi| |Laille/Beatrush|Magnecor|Denso|Royal Purple|Optima|PIAA|PW JDM|Megan Racing|Nitto| |Work|Greddy|Samco|Project Mu|H&R|Gates|Moog|Rota|Yokohama|Epman|1320|Upgr8 04 Celica GT |Toyota OEM Japan|Toyota Racing Development|Tein|BC Racing|Greddy| |
|
May 21, 2012 - 8:54 PM
|
|
 Enthusiast Joined Apr 23, '08 From Muskego,Wi Currently Offline Reputation: 8 (100%) |
great guide, i guess i'm spoiled though by being able to just torch the endlinks off

-------------------- 2nd Gen 3s-gte.... It lives!
97celiman "92-gt-quit making up random acronyms that dont mean anything. the only real acronym is JDM" |
|
Jun 27, 2012 - 2:14 AM
|
|
|
Enthusiast Joined Apr 24, '08 From Orange County, CA Currently Offline Reputation: 33 (100%) |
hey the guys with st sway bars. I always have a hard time installing the end links. I see in your picture trdproven that the sway bar is almost at a 90 degree angle, basically vertical to the end link. How did you get it to install like so??! usually I jack up the shock from the bottom of the ball joint but I can never get it that close.
This post has been edited by BonzaiCelica: Jun 27, 2012 - 2:15 AM -------------------- Group buy to replicate Narrow E series transaxle parts
http://www.6gc.net/forums/index.php?showto...p;#entry1107514 Items for Sale: http://www.6gc.net/forums/index.php?showto...p;#entry1107572 |
|
Jun 27, 2012 - 2:29 AM
|
|
|
Enthusiast Joined Aug 2, '05 From Guam Currently Offline Reputation: 15 (100%) |
i just jack it up from the bottom. The trick with sway bars for any car, is to find out which side should go on first. for example put on the endlink on the bottom side first, start jacking it up and see if the top part of the endlink begins to align. and vise versa try putting it into the top first and see when jacking it up it aligns with the bottom hole. Always worked for me. I remember my 7th gen front links go on the top first, my 6th gen goes on bottom first.
This post has been edited by trdproven: Jun 27, 2012 - 2:30 AM -------------------- 94 Celica GT
|Toyota OEM Japan|Toyota Racing Development|Tom's|Competition Clutch|5Zigen|Apexi| |Laille/Beatrush|Magnecor|Denso|Royal Purple|Optima|PIAA|PW JDM|Megan Racing|Nitto| |Work|Greddy|Samco|Project Mu|H&R|Gates|Moog|Rota|Yokohama|Epman|1320|Upgr8 04 Celica GT |Toyota OEM Japan|Toyota Racing Development|Tein|BC Racing|Greddy| |
|
Jun 27, 2012 - 2:05 PM
|
|
 Enthusiast Joined Jan 4, '12 From US Currently Offline Reputation: 6 (100%) |
Great write-up and it's nice to see a first-hand input on the MOOG/Mevotech links. Would like to hear about them in the long term.
-------------------- 1993 Celica GT Coupe - sold
1994 Celica GT Liftback |
|
Jun 27, 2012 - 10:17 PM
|
|
|
Enthusiast Joined Apr 24, '08 From Orange County, CA Currently Offline Reputation: 33 (100%) |
makes sense trdproven. I'll have to remove both sides first. and jack up both control arms with jacks. that way I can swing the sway bar to make it near vertical with the end links like you have done :

This post has been edited by BonzaiCelica: Feb 18, 2013 - 9:36 PM -------------------- Group buy to replicate Narrow E series transaxle parts
http://www.6gc.net/forums/index.php?showto...p;#entry1107514 Items for Sale: http://www.6gc.net/forums/index.php?showto...p;#entry1107572 |
|
Jul 4, 2012 - 2:06 PM
|
|
|
Enthusiast Joined Apr 24, '08 From Orange County, CA Currently Offline Reputation: 33 (100%) |
well I ordered mine from rock auto for $45 shipped to California. You can definitely tell how much thicker and durable they feel compared to oem links. Have yet to install them. I didn't get the grease fitting like you :
 
This post has been edited by BonzaiCelica: Feb 18, 2013 - 9:38 PM -------------------- Group buy to replicate Narrow E series transaxle parts
http://www.6gc.net/forums/index.php?showto...p;#entry1107514 Items for Sale: http://www.6gc.net/forums/index.php?showto...p;#entry1107572 |
|
1 User(s) are reading this topic (1 Guests and 0 Anonymous Users)
0 Members:
| Lo-Fi Version | Time is now: July 10th, 2026 - 8:55 AM |