
 May 27, 2014 - 4:23 PM May 27, 2014 - 4:23 PM
|
 
|
|
Enthusiast  Joined Dec 3, '13 From Missourah Currently Offline Reputation: 0 (0%) |
Here is a How-To for charging the Air Conditioning System and I will illustrate proper methods for doing it and making the AC nice and Cold using equipment made for regular refrigeration/AC systems instead of automotive, as you may be able to acquire this sort of equipment from a pawn shop for not a whole lot of money. Which may be worth it for a few of you who have need to charge the AC yourself although for most people the cost of this equipment will be quite a bit more than if you'd just take it to some shop and have them charge the AC for <$100.
but some of you seem to have plenty of money for spending on the car, and this would cost less than what you blew on tires and struts.  I will stick to the basics of How the AC system works and charging the refrigerant to make it nice and cold, and not get into "fixing" mechanical issues like the compressor ect. So we will assume you just need to charge the refrigerant, and everything else is in working order. I will stick to the basics of How the AC system works and charging the refrigerant to make it nice and cold, and not get into "fixing" mechanical issues like the compressor ect. So we will assume you just need to charge the refrigerant, and everything else is in working order. First an overview of the refrigeration system and how it works. there are four basic pieces of any refrigeration/Air Conditioning system. The Compressor , Condenser, Evaporator, and metering device. The Evaporator is a small radiator tucked away in the air box mounted on the inside of the firewall deep underneath the dashboard, (also where the heater core is). The compressor Pumps the refrigerant through the system toward the metering device which is just before the evaporator. The metering device can be as simple as just a smaller hole for the refrigerant to pass through as it enters the evaporator, this causes a drop in the pressure of the refrigerant which lowers the boiling point of the refrigerant. For comfort air systems this pressure is designed so that the refrigerant in the evaporator will boil at 40 degrees Fahrenheit(with a car system this temp changes as the outdoor air changes). The cars blower moves the cabin air across the evaporator coil where the heat from the air is transferred into the refrigerant as the refrigerant boils into a vapor(evaporates), and the compressor pumps the Vapor refrigerant out to the Condenser, which is another 'radiator' mounted out on the front of the car and is stacked on top of the cars cooling radiator. At the condenser the Vapor refrigerant condenses back into liquid as the heat within the refrigerant is released back into the outdoor air. So note that heat flows from what is warmer to what is cooler, the system does not 'make cold' but rather removes heat from one area(inside the car) and moves it to another area(outside the car). Heat will always flow from what is warmer toward what is cooler, so The Evaporator Coil must be Colder than what you want the inside of the car to be and the Condenser coil must be Hotter than it is outside in order to give off heat to the outdoor air. Also be aware that the refrigerant is changing from a liquid to a vapor as it rejects heat and absorbs heat, and the refrigerant must be in the vapor state as it enters the compressor as you cannot compress liquid refrigerant, liquid refrigerant in the compressor will destroy the compressor.  this diagram is of a medium temperature refrigeration system like you would have for a cooler or food refrigeration so the temperature of the evaporator colder to achieve a 25 degree coil, and a 40 degree space temp. otherwise it works the same way. Ok so first off, if you want your AC to be Cold, Really Cold, Like it was when it was new, the most important thing is that the Sealed Refrigeration System In the pipes must contain ONLY Refrigerant, and Oil. if there is any Air or Moisture in the system it will not transfer heat as well and will not be as cold as you want. In most cases if you've leaked refrigerant out, then you're system is most likely contaminated with air and moisture as well which will eventually destroy you're compressor. but lets say you think you're system may be just a little low and you want to check it to be sure 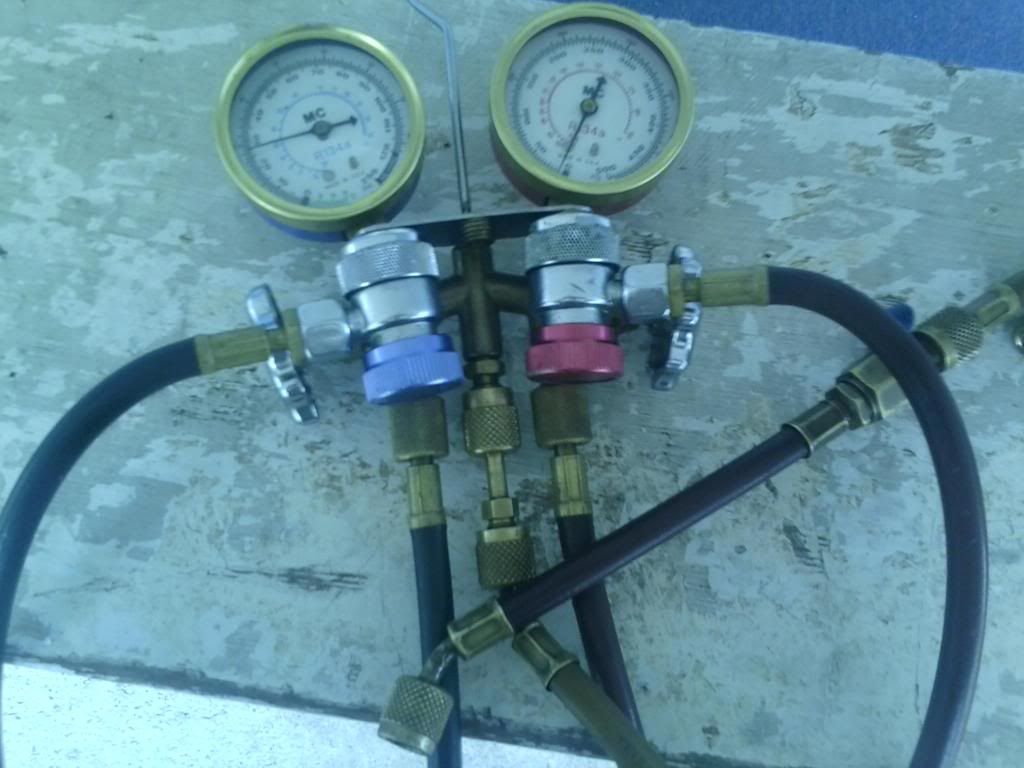 it is best to have a set of gauges like this for automotive, when doing a full recovery and recharge it is a Must, but if you've just got the little can of Freon and the one-gauge hose to top it off you can at least check it this way. there are two access ports on the car, High side and Low side, just as there are two gauges. and the connectors on the hose are made different sizes so that you cannot connect the low side to the high side. especially if you are using a little can of R134a you would not want to attach that to the high side by mistake !! the low side access port is on the larger of the two refrigerant pipes just before they enter the fire wall. 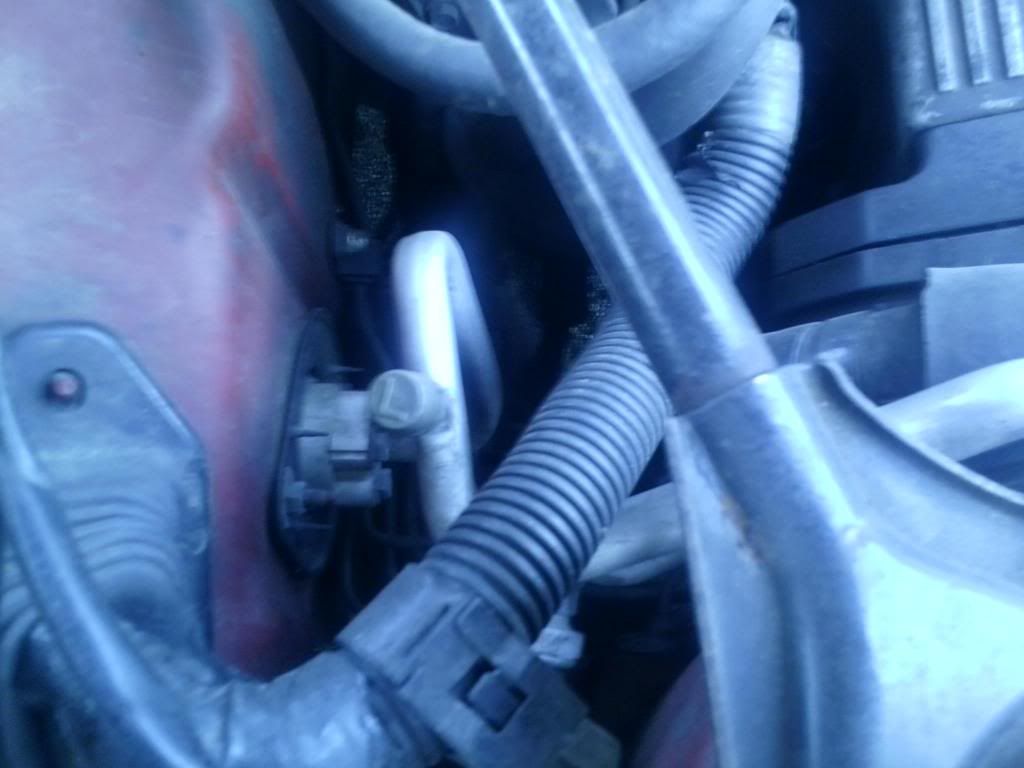 The Blue Hose goes Here, or if you have the one gauge can it attaches here. 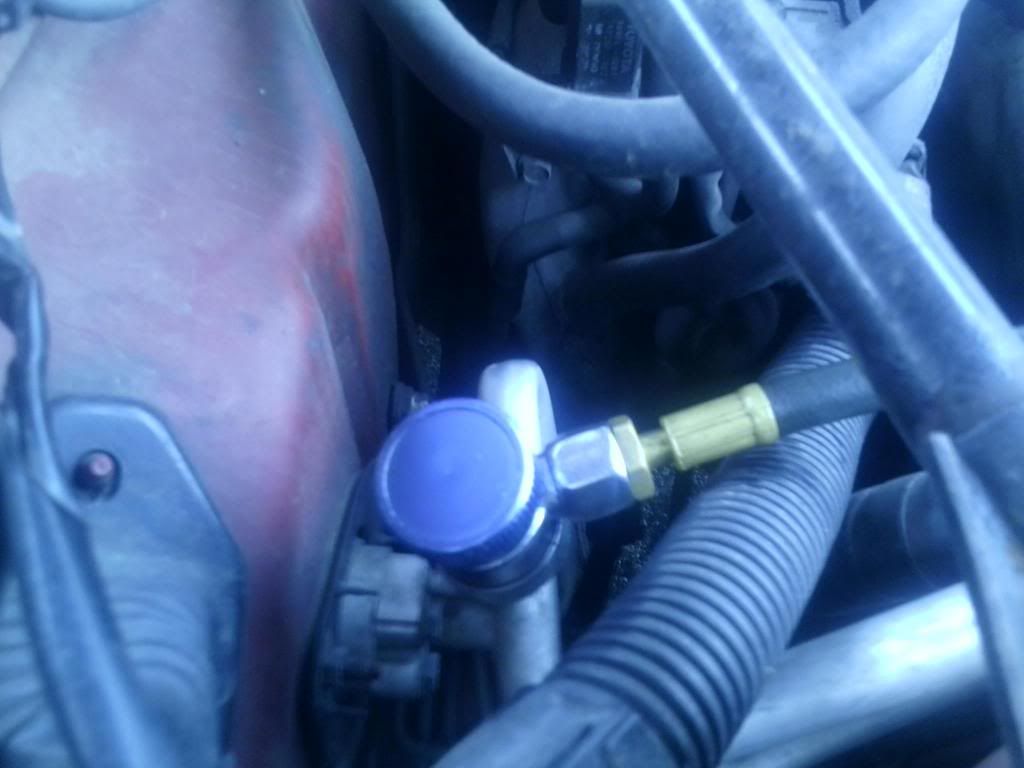 The high side access port is on the nose of the car where the condenser is 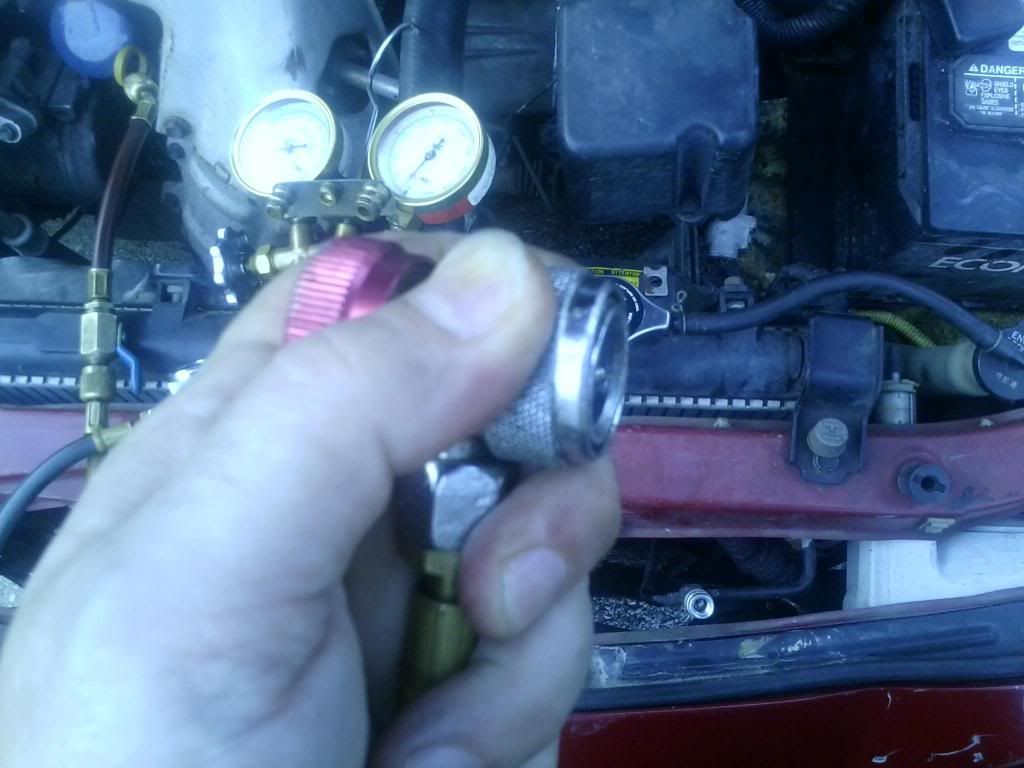 In Order for the system to work right it must have the Proper amount of refrigerant in it, not too little OR too Much. It's not like filling the "gas" you don't want to just "fill it up". With Too Much refrigerant in the system there will not be enough room for the refrigerant to evaporate and condense properly and you will end up with liquid refrigerant in your compressor which will destroy the most expensive component in the system. So the Best way is to Remove the Refrigerant, pull a Vacuum and Weigh in the Exact amount, more on this later. For now lets check if you need to worry about the refrigerant at all. the next gadget you will need is some kind of a thermometer that you can use to measure the temperature of a pipe.  I use something like this for pro work because it has a special sensor for wrapping around a pipe to get an accurate temperature, but anything that gets you an accurate pipe temp is good. Attach the thermometer to the same pipe you hooked the Low side port to. this is the Suction line. Start up the Car and turn on the AC full blast with the vent set to recirculate. You should see the Compressor kick on and in a short time the Suction pipe should get cold enough to sweat. The pressure of the Gauge is how we measure the temperature of the refrigerant inside the evaporator coil. There is a PSI/KPS on the outer dial for pressure and the inner blue dial shows what temperature R134a is at that pressure. the thermometer is measuring the physical temperature of the pipe. What we want to do now is to compare the two. The temperature of the Evaporator coil should be around 40 degrees F (it will be slightly warmer if its really hot outside), and the Temperature of the pipe should be about 15 degrees warmer than the temperature on refrigerant Gauge (55 degrees). To break it down simply let me just say that So long as the Temperature of the Pipe is Warmer than the Temperature of the evaporator coil this proves that All of the refrigerant leaving the Evaporator has fully Vaporized and therefore there is no liquid entering the compressor. If you see the temp of the pipe about 15 or so degrees warmer than the coil temp You are good. If you measure the air coming out of the vents inside the car it may be as cold as 45 degrees but this will vary as the inside of the car gets colder and if you're driving down the road or not. anything inside less than 55 degrees is just dandy. If you are using a manifold set then you're high pressure gauge will read about 30 degrees hotter than it is outside. so if it is 85 degrees outside the temperature on the gauge will read 115 degrees. Now if your pipe temp is The Same temp as the Coil Temp this means you have TOO MUCH refrigerant in the system and some will need to be removed. or If you're pipe temperature is much warmer than the Coil temperature, like for example say the coil temp on the gauge reads 30 degrees and the pipe temperature is 75 degrees, This is when you need to Add Refrigerant. and you want to do so slowly opening the lowside (blue) valve on the manifold, keeping an eye on that pipe temperature which will drop as you add more refrigerant. maybe if you've got a very small leak you can get away with just adding a little more, Be Careful not to Add too much or you will most surely destroy the compressor. If you are Very low on refrigerant the compressor may run for a moment and then kick off, and then kick back on. This would be caused by a low pressure cut-out switch located close to the lowside port where you hooked the gauge to.  if you hear the compressor cycling off and on then you can be pretty sure you are just low on refrigerant. This method will get you nice and cool unless you need a full recharge. The system works best when charged with the Exact amount of refrigerant and in order to remove all of the air and moisture from the system you will need to pull a vacuum on the empty piping to make it work right. Next I'm going to illustrate how to do a full recovery, vacuum and charge of the system. but I need to run some errands so I'll stop here and come back to complete this later tonight ( I may even look up the conversions from F to C for our friends in the rest of the world) This post has been edited by VavAlephVav: May 27, 2014 - 10:19 PM -------------------- Bust a Deal; Face the Wheel.
|

Posts in this topic
 VavAlephVav How To Charge your Air Conditioning System May 27, 2014 - 4:23 PM
 njccmd2002 hmm this is cool.. hurry up and do it... how do ... May 27, 2014 - 9:15 PM VavAlephVav ya my Dad asked me to help him figure out how to g... May 27, 2014 - 10:22 PM VavAlephVav Ok So now we will look at how to Recover the syste... May 27, 2014 - 11:54 PM VavAlephVav Most Automotive systems will have leak detector dy... May 28, 2014 - 1:39 AM
 VavAlephVav and I forgot to add, the Filter/Dryer that njccmd2... Aug 9, 2014 - 9:08 PM
  |
1 User(s) are reading this topic (1 Guests and 0 Anonymous Users)
0 Members:
| Lo-Fi Version | Time is now: July 9th, 2026 - 1:34 PM |