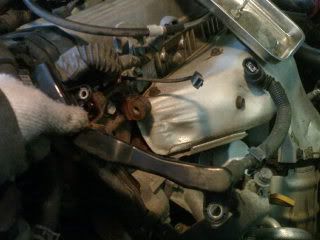
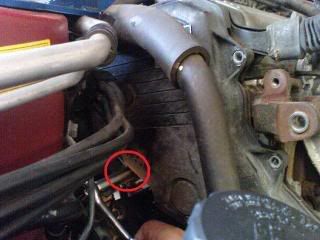
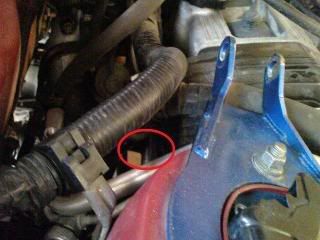
6. Remove the two 10mm bolts holding the harness protector to the motor.
7. Place a secondary jack beneath the engine and jack it up til it reaches the oil pan. You'll be using this jack to lift the engine up and down to be able to gain access to bolt located in tight spaces.
NOTE: Be careful when lifting or releasing the jack, you do it slowly and keep watch of the height as you don't want to put too much stress on your motor mounts.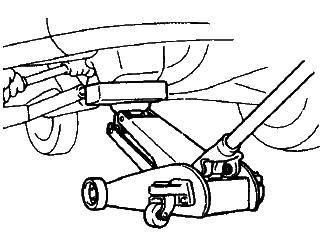
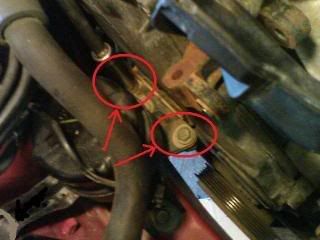
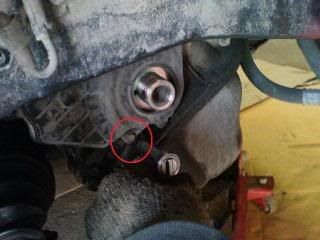
8. Pump the jack to raise the engine a little. Just enough to remove the weight being forced on the front motor mount. Use a 17mm or 11/16" socket to remove the front motor mount bolt.
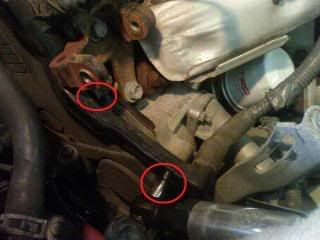
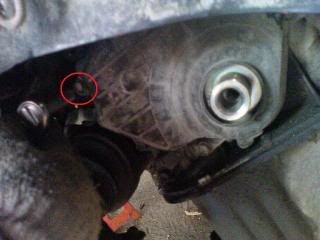
9. Remove the 14mm nut and 12mm bolt on the passenger-side motor mount.
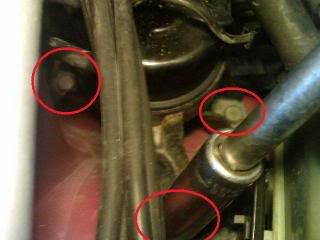
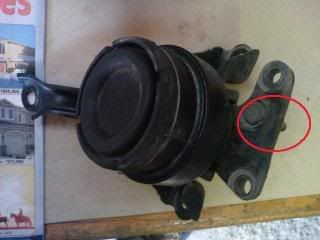
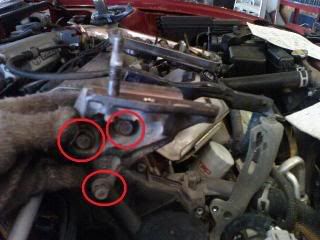
10. Remove the 2 14mm bolts and 1 14mm nut holding the passenger-side motor mount to the body of the car. Remove the 14mm nut from directly under the motor mount. You'll need a fairly long extension to do this. Remove the power steering reservoir bracket from one of the studs where the 14mm nut used to be. Remove the engine mount. (If it won't come off, try raising and lowering the engine until it does)
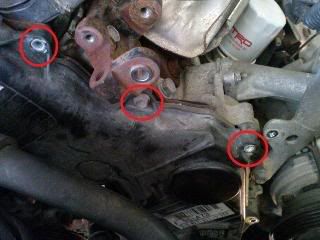
11. Remove the 3 14mm bolts holding the lower bracket to the engine.
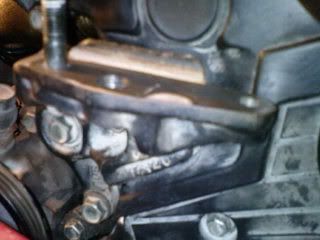
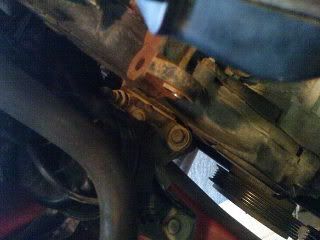
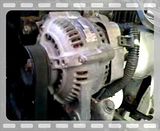
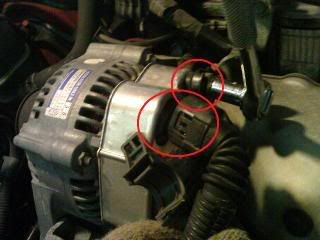
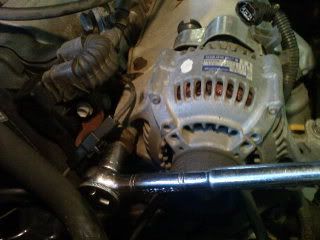
12. Loosen the 2 14mm bolts holding the power steering to the motor. Like the alternator, one of the bolts is for pivoting while the other one is used to adjust the angle and hold its position. After loosening, pull the power steering pulley towards the front of the car to loosen the belt. Remove the belt.
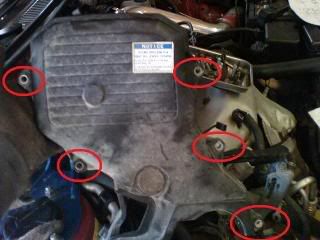
13. Remove the 3 10mm bolts holding the upper timing belt cover at the front side of the engine. Remove the remaining 2 10mm bolts in the rear. Remove the upper timing belt cover ensuring that the rubber gasket is still on it.
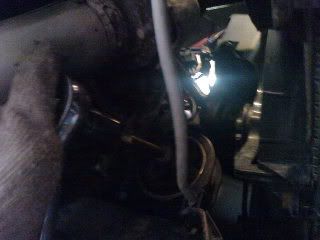
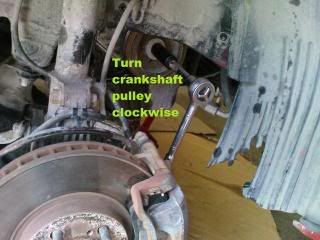
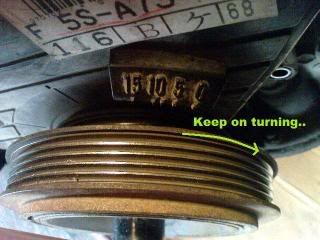
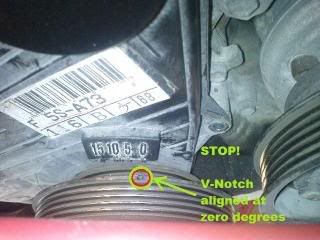
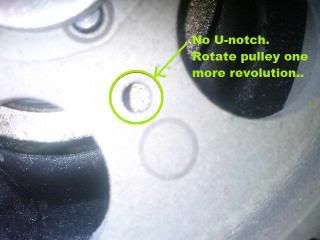
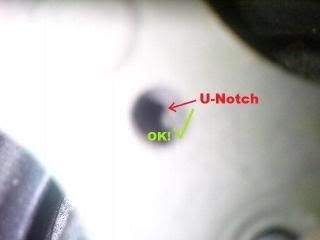
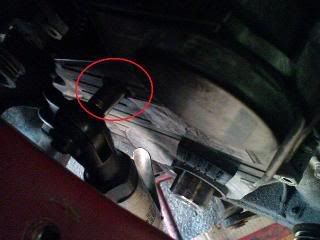
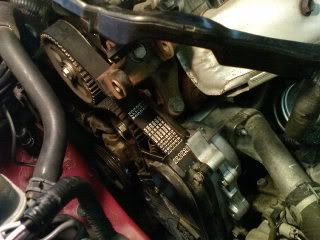
14. Use a 3/4" socket and turn the crankshaft pulley clockwise until the v-notch on the pulley is aligned at 0 degrees. Check the hole on the camshaft pulley. (You might not have enough room to see this. I used my camera phone and slid it between the camshaft timing pulley and strut tower, took a picture, then viewed it later. Lifting the engine and using a small mirror can be used otherwise) There should be a u-notch on the head that you should see directly through the hole on the camshaft pulley. If there is, then go to the next step. If there isn't, then turn the crankshaft pulley another 360 degrees until the v-notch on the crankshaft pulley is aligned at 0 degrees. Check the hole through the camshaft timing pulley, you should now see the u-notch on the head.
Note: Make sure that the alignment of the v-notch is ±0.5 degrees from the 0 degree mark. This step ensures that the #1 cylinder is at top dead center (TDC, ie. piston at maximum height) when the piston is in compression and the exhaust valve is just closing. 2 crankshaft revolutions equals 1 system cycle.
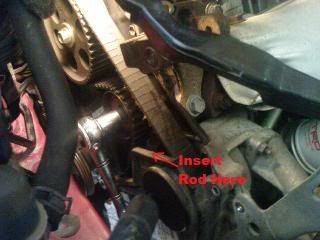
Click here for more info.Alternative method: This is another way to check if the #1 cylinder is at TDC at the end of the exhaust stage. This step may require 2 people to do. Remove the #1 spark plug, put your thumb over the spark plug hole to seal it and turn the crankshaft until you feel the air push out. This means you're in compression. You need one more revolution to be at the beginning of the cycle (ie. at the beginning of the intake stage and end of the exhaust stage). Use a long object like a straight coat hanger and put it through the spark plug hole lighly resting on the piston inside. As you turn the pulley on its final revolution, the coat hanger should rise to the highest position. Adjust going back and forth on the crankshaft pulley per unit degree until you reach maximum height.
Click
here for more info.
*Thanks to my cousin for telling me this method.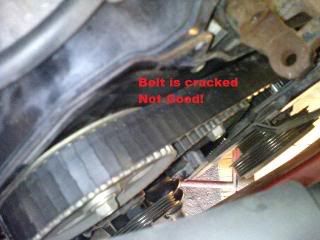
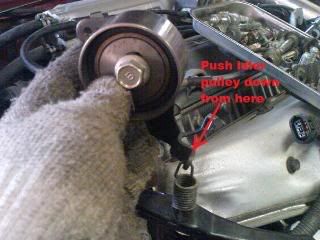
15. Loosen the tensioner pulley bolt. Use a hard rod (like a socket extension for example) to push down on the part where the spring is hooked on to. Keep it down and retighten the pulley bolt. This loosens the tension in the belt. Remove the belt from the camshaft timing pulley. If you're reusing the timing belt only to replace the oil pump or water pump, then put a mark on the belt and timing pulleys to know where the belt should line up when you put it back on later. Click
here to see an example.
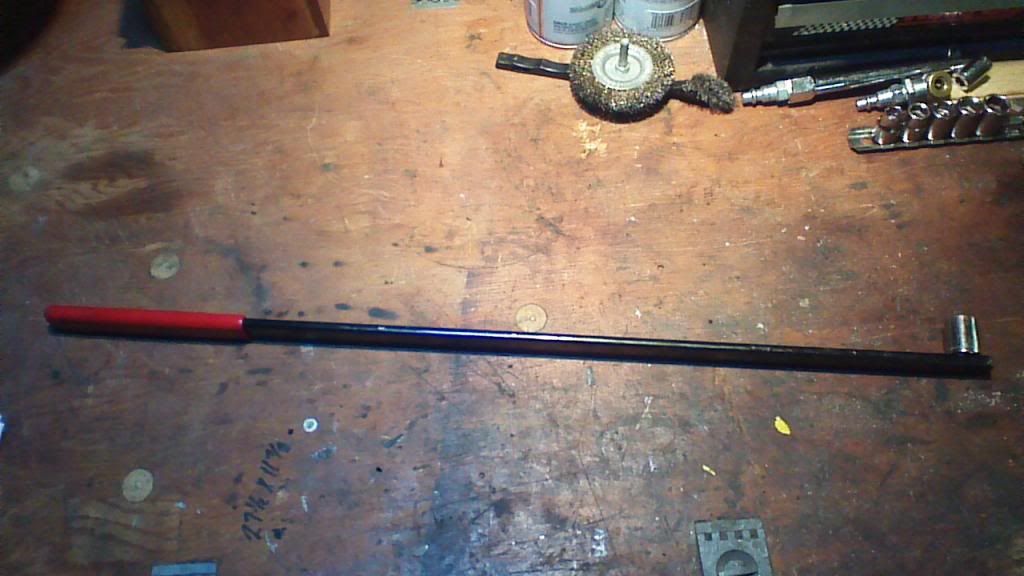
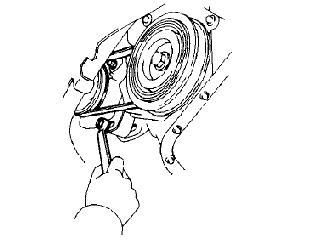
16. This step requires you to remove the crankshaft bolt. You'll need to find a bolt that screws into one of the holes on the pulley. (It's good that I have a huge collection of random nuts & bolts in my garage, but I wasn't able to determine what type of threading it is.) None of the bolts that were removed up until now fit in that hole. The bolt I used looked to me like some sort of rear caliper bolt..
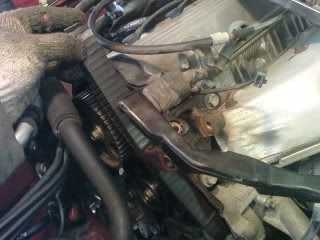
Anyway, once you find a bolt and screw it into one of the holes, use a long pipe or crowbar to keep the pulley from turning as you undo the center bolt. If you have an impact gun, you probably won't really need to lock the pulley down. Just hold the pulley steady while you unbolt it with the other hand.

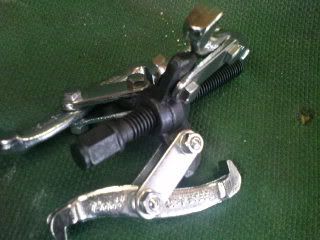
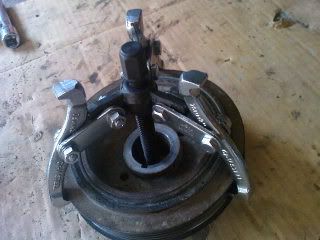
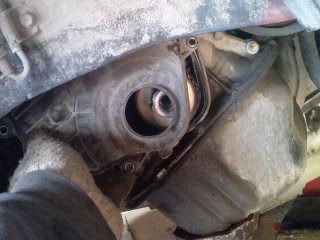
17. Using a pulley puller, pull out the crankshaft pulley. (You'll need to block the center of the pulley with something. I used a bolt that fit the end of the threads on the pulley puller.) Make sure that when you pull the pulley off, that it was set at 0 degrees. If this turns on you, you will have a mess later on with adjusting the timing and your car won't run (like what happened to me. You'll notice the crankshaft has a square notch so the pulley can only go in one way. I'd suggest you make a mark on the block where that notch should be. In the next few steps, there's a good possibility that the shaft will rotate.
18. Remove the lower timing belt cover by undoing the 4 10mm bolts. Make sure the rubber gasket is attached to the cover.
19. Remove the timing belt guide.
20. Remove the timing belt from the crank shaft but remember to make markers if you plan on reusing your timing belt. Also make a marker on the block directly inline with the square notch on the crank shaft. This way in case the crank shaft turns a few degrees in the next few steps, you can put it back to how it was at 0 degrees. Click
here to see an example.
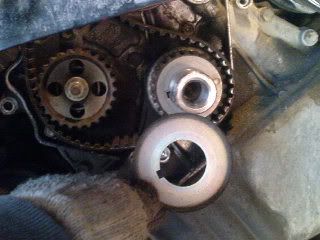
Remove the crankshaft timing pulley which should easily slide off by hand.
(Make sure the crank shaft doesn't get pushed in. This happened to my dad when he was doing the timing belt on my sisters 6th gen. He had to get my uncle (Toyota mechanic) to help him and required a lot more work.) 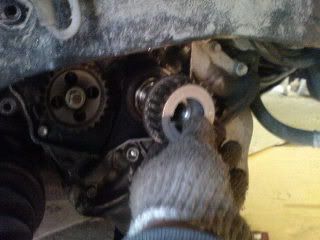
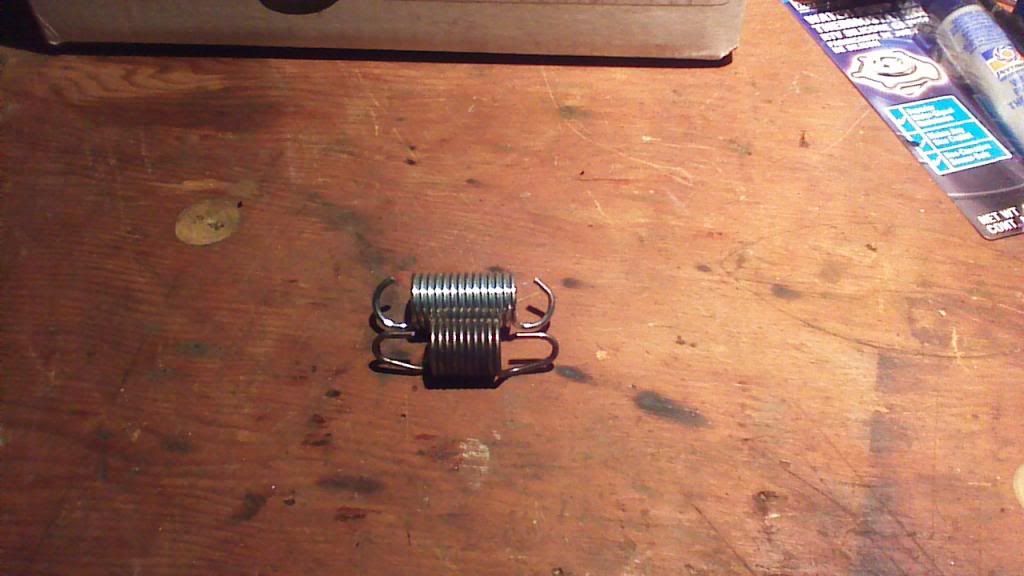
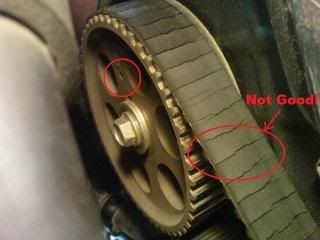
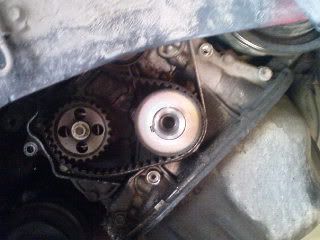
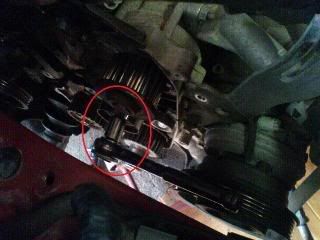
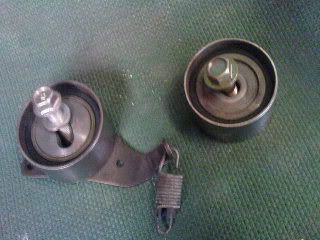
21. Now that the belt is off, remove both tensioner and idler pulleys using a 14mm socket. Once off, inspect both pulleys to ensure they can freely rotate and don't wobble or have any cracks or anything. Also inspect the spring ensuring it meets factory specifications. I was only able to inspect the dimensions of the spring but not the tension force of the spring. I guess I can use Hooke's Law (F=kx) if only 'k' was given! LOL
 Nerds only: oh wait a sec, actually you can! if the range is 32 to 37 [N] while at 50.5 [mm] or 0.0505 [m] and since F=kx, then k=F/x.
therefore, k(min) = 32 [N] /0.0505 [m] = 633.66 [N/m] and k(max) = 37 [N] / 0.0505 [m] = 732.67 [N/m]. (this is the theoretical ideal range for k).
but you'll also need a known mass hanging on the spring and a ruler to measure its elongation (x) due to gravity.
also calculate the force (F) by multiplying its mass by the gravitational acceleration.
then solve for the actual value for k using k=F/x and compare if it falls in the theoretical ideal range for k.
but i'm too lazy to actually do it, plus i'm on my summer break. no engineering til september!
i'm gonna take my chances and skip the spring force test. meh, if the spring fails on me, then so be it.

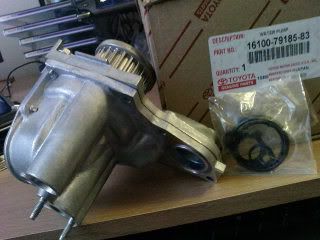
22. For this next step, we'll be replacing the water pump. If this doesn't concern you, then jump on ahead to step 23. If you've gotten this far, then congratulations you're 1/3rd of the way! LOL

seriously though.
Since you made it this far, then replacing your water pump is a piece of cake. I'll quickly summarize everything you need to do this in one step.
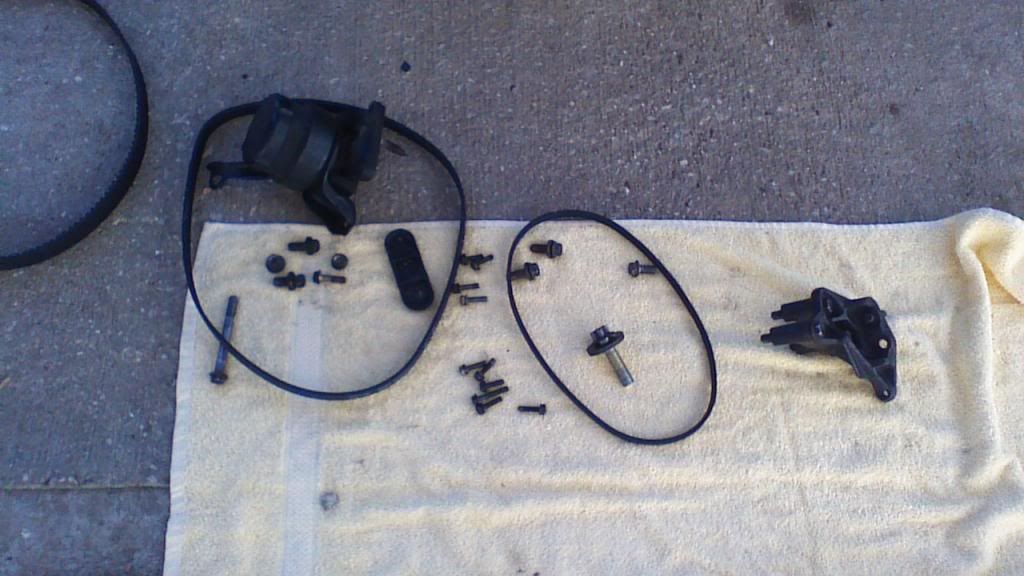
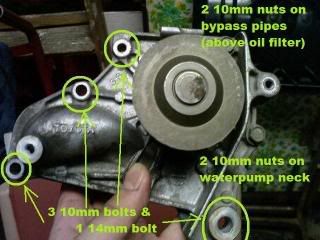
Drain coolant. Remove the 3 10mm and 1 14mm bolts holding the water pump to the block. Remove the 2 10mm nuts holding the water pump neck to the water pump. Remove the 2 10mm nuts joining the coolant bypass pipes to the water pump (just above the oil filter). Remove the water neck. Remove the water pump. Replace the old thermostat gasket and bypass pipe gasket with new ones (new gaskets should have come with the new water pump). Install new water pump and put all nuts and bolts back on. The studs and housing on the water pump are aluminum and aluminum is generally known to be softer than steel so don't overtorque the nuts and bolts. But they should be fairly snug.

23. In this step you're putting parts back on the car. So backtrack going from step 21 to step 14. This step consists of 1/4 of the whole procedure. (It sucks, i know). Make sure there is no oil or other contaminants anywhere in the timing belt area like on the pulleys, the belt itself, etc. If there is make sure you wipe everything clean before moving on.
Basically the idler and tensioner pulleys, the new timing belt (or used one if you're reusing it. but be sure to match the marks made earlier on the belt teeth to the proper gear tooth on the timing pulley), timing belt guide (make sure the crankshaft is aligned to the marks made earlier in step 20), lower timing belt cover, crankshaft timing pulley, crankshaft pulley, and center crank bolt are all back on. Make sure the tensioner pulley is set to 'loose' (ie. where the spring is in tension). Run the timing belt back on all pulleys except for the camshaft timing pulley.
24. Warning: The next two following steps will be the most difficult and longest steps. Get a box of kleenex ready just in case

.
In this step, you will try to test start the car and see if the timing is right. Since there is no coolant (if you replaced your water pump) and the alternator is not attached, you can't run your engine for long. If the car starts and idles fine, you're golden! Otherwise, you'll need to make adjustments by moving the timing belt back and forth on the camshaft timing pulley til you get it right.
To start off, put the timing belt on the camshaft timing pulley and make sure it's fairly tight. Then loosen the tensioner pulley bolt until it springs back tight putting tension back on the timing belt. Retighten the tensioner pulley bolt. If you had used the alternative method from step 14, then put the spark plug and wire back on. Put the negative terminal back on the battery. Pray... now get in the car and start it with the hopes of it running normally. If it does, congrats as you just saved the extra trouble in having to adjust the timing and proceed to step 26.
25. Otherwise, you car will either not idle properly or more likely will not run at all. In this case, you'll need to rotate the crankshaft pulley 2 revolutions clockwise and back to the 0 degree mark. Make sure again it's at ± 0.5 degree tolerance. Recheck the hole on the camshaft timing pulley and see if it's aligned with the u-notch on the head. More likely it isn't which is why it isn't running normally. If it isn't, then we'll have to readjust it so that it is. So remove the negative terminal on the battery, put the tensioner pulley back in 'loose' and remove the timing belt from the camshaft timing pulley and make the necessary 1 or 2 tooth adjustments to bring the hole back in alignment with the u-notch. Put the tensioner pulley back in 'normal operation' mode, reconnect the negative terminal on the battery, and start it again.
Repeat this step again and again until the timing belt is correctly positioned and until the car idles normal. If you're lucky you could get it right the 1st time but for me, this took about 3 times before i got it down right to the right timing since my crankshaft turned while the timing belt was off so I had to narrow it back down to the right position.
Here's a video of how my engine ran after I got the timing set.
26. Congratulations, you're now at 2/3 of the way to completion! Take another break if you want but..

you're almost there! Just hang on.
27. From here on out, you're putting everything back the way it was before you started. So in other words, you're backtracking once again from step 13 all the way back to step 1 (with the exception of the splash guard since if you're going to add coolant). Make sure you don't mix up the bolts, which is why you're supposed keep them all organized in the process..
Feelin tired yet? Try writing a how to! lol
28. Once everthing is put back correctly and the car is down, you're finished! But if you still need to add coolant, see the next step.
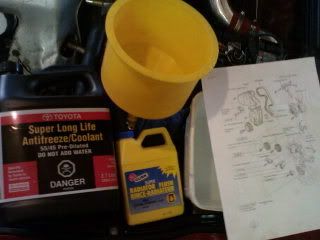
29. Since the coolant system is completely empty, now would be a good time to do a full system flush. I followed Bitter's idea (i think it was him) in flushing out the heater core lines but removing one of the heater coolant lines and flush it with water using a garden hose. I wanted to make sure the lines are clean and clear of all rust or deposits to provide maximum heat in the winter when I need it most. In addition, I bought a bottle of Gunk radiator flush liquid just to be safe and followed the instructions on the back which was fairly simple. Then added Toyota brand pink coolant already premixed using a special coolant bleeder funnel to ensure no air locks in the system. And just to be sure, after filling the system with coolant i did a combination of jacking up the rear and front and revving it high to increase fluid flow to ensure air is pushed through and out towards the radiator. Then let it sit for about an hour for the engine to cool back with the environment and the coolant reduces in volume while the funnel feeds it coolant to ensure no air enters. Radiator cap goes back on and Finished!
 Total Time:
Doing this the first time while following the Toyota BGB and taking notes, organizing nuts and bolts, and taking pics, all took about 18 hours.. but for a skilled mechanic, it should probably take about 5 hours more or less.Finished!
-----------
 This concludes the replacement and installation of the timing belt and water pump
--------------------------------------------------------------------------


 j/k
j/k
 uh oh..lol