Converting Rear Drums to Disk Brakes
| Author: | Celica_At_GT |
| Approximate Time: | 3 hours |
| Required Tools: | 14mm socket to take off brake calipers 17mm socket to take off the spindle/hub 10/12mm line wrenches (not exactly size of brake lines) 8mm wrench for bleeding brakes |
 This how-to covers the details on how to convert your rear drum brakes to rear disc brakes. I used parts from a '96 Celica GT to make things less complicated regarding the parking brake and whatnot.
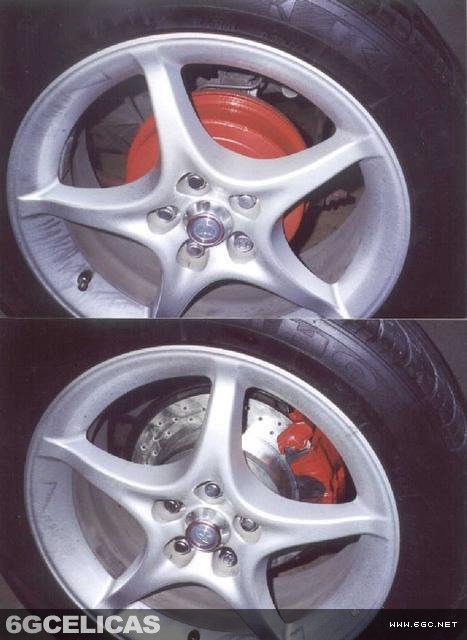
The parking brake on a 6th gen. GT with discs in back doesn't use the caliper to stop, it uses an internal drum brake. Fifth generation Celicas use a similar setup, but beware that they use a smaller center bore, so fifth gen. GT rotors cannot fit on a sixth gen. hub.
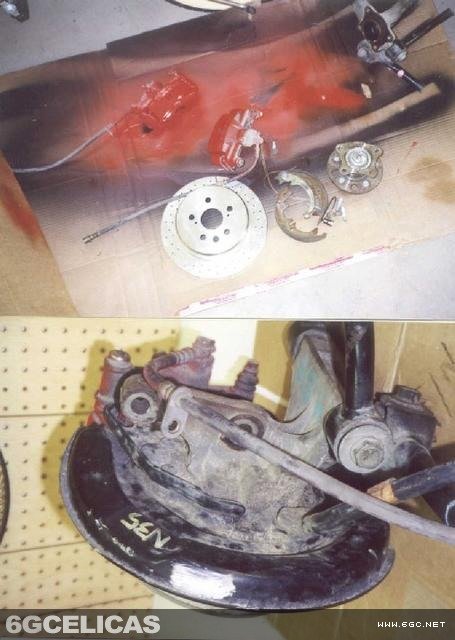
Parts Needed: (per side)
- Rear caliper from any 6th gen. Celica without ABS (ABS calipers may work, but I don't know for sure)
- Rotor
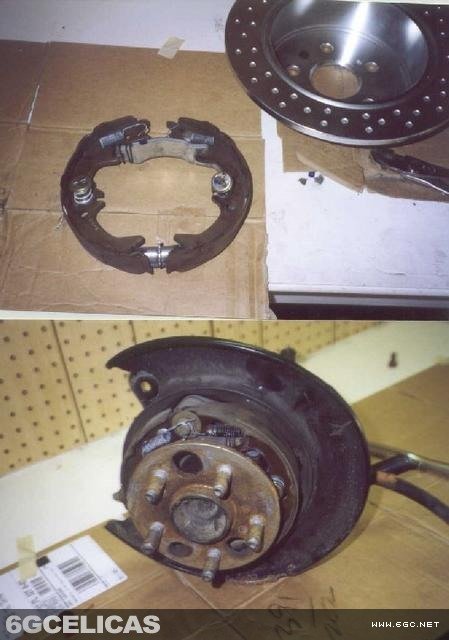
- Backplate with internal brake components for parking brake (drum brake inside walls of rotor)
- Parking brake cable from a 6th gen. GT (this component can come from one with ABS, but the rest cannot.)
1. Loosen your wheels, jack up your car, support it with jackstands, and remove your wheels completely. Make sure that your car is well supported.
2. The Drum brake casing just slides, but I just used a end of a hammer to pry it off. Don't worry, there aren't any bolts holding it on, so just use a pry bar/hammer/whatever to pull it off. It's easier if you pull it a little on each part of the drum so that it comes off straight. You may also find bolts that fit in the two threaded holes in the drum and tighten them bit by bit to force the drum off.
3. Now we need to take off the spindle and plate that holds the drum brake on. Untighten (but don't remove) the bolts holding the spindle on (which is four 14 mm bolts.)
4. Next, remove the brake line where it is attached to the steel line towards the front of the car (in the wheelwell.) Make sure you don't break or strip off this, because it will cost a lot to fix. This plug is a 10mm connection. Next, remove the 12mm bolt that holds the rubber brake line right above the drum brake.
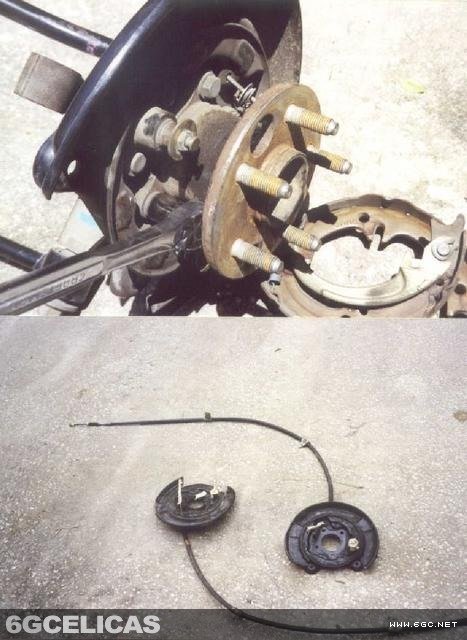 5. Now remove the spindle and plate. Save the small rubber seal, or, better yet, get a new one from the dealership; They are cheap. Now it's time to put on all of the new parts!
6. Put the GT's backplate into place and then make sure that the small gasket is in place, and slide the spindle on. Tighten the four 14mm bolts that hold the spindle on by hand, and then tighten in the same star order that you use to tighten the lugnuts on your wheels. If the parking brake cable isn't connected to the backplate, then attach the GT parking brake cable to the backplate. It has two 10mm bolts holding it into the backplate.
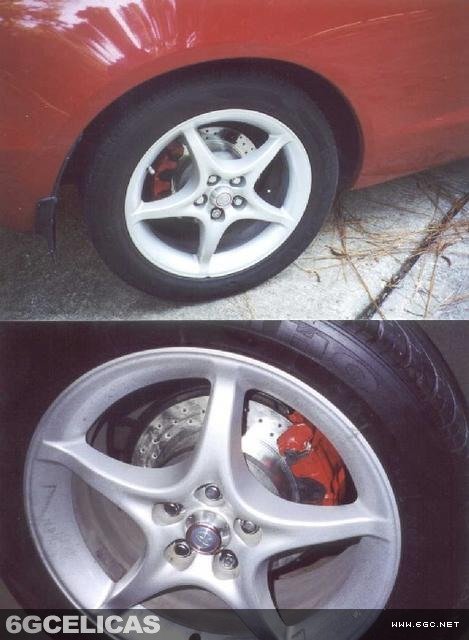
7. Slide the rotor into place. It will eventually be held in place simply by the wheels and lugnuts.
8. Install the caliper with the two 14mm bolts, which attach to the backplate. Attach the brake lines the same way as the drums were before.
9. For the parking brake, just guide the new parking brake cables the same way the old ones are. You will have to take off part of the exhuast to attach it to the cable that goes to the parking brake handle, but it will all work without additional parts.
10. Double check that everything is connected and tightened, and then bleed the brakes, starting with the furthest from the master cylinder (right rear) and working your way towards the closest (front left.) Once the brakes are bled, put your wheels on, drop the car back down to the ground, and drive very slowly at first to test that your brakes are working. Once you can confirm that they're working, drive cautiously and make sure that they work as they should. Once you're sure everything is working, simply enjoy your new rear disc brakes!
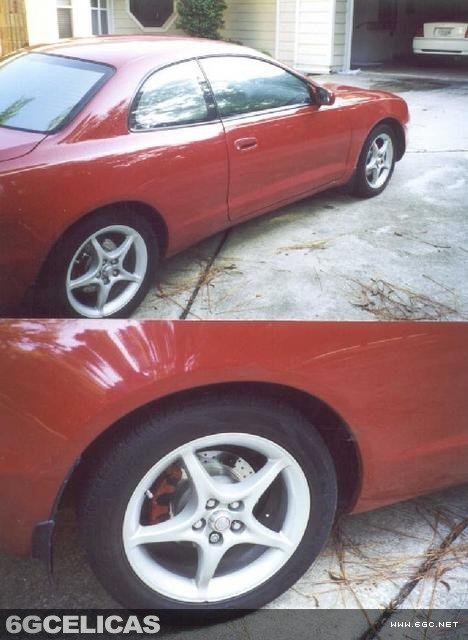
More Photos