Installing Angel Eyes
| Author: | doGGy |
| Approximate Time: | About One Day |
| Required Tools: | Clear acrylic rod Dremel tool Heat gun Screwdrivers (flat and philips head) Hot glue gun or silicone LED bulb 220 ohms resistor |
Angel eyes are simply rings that reflect light, creating an awesome effect once installed inside headlights. This how-to provides details on how to install angel eye rings in your Celica headlights. The actual process of making the ring for your angel eyes installation is written about in this link.
Once you've made some angel eyes for your Celica, you need to take out your high beam headlights by taking off your front bumper.
 The first thing is that you need to do is open your high beam lamp (or low beam, it depends on where you want your angel eyes to be installed.) I used a really big pot, put the water in it, and boiled the water (I used a pot because I didn't find a big enough oven to fit my head lamp in it). Then once the water is boiling, I put the high beam that I removed in it (make sure that the whole glass of your headlight assembly is under water).
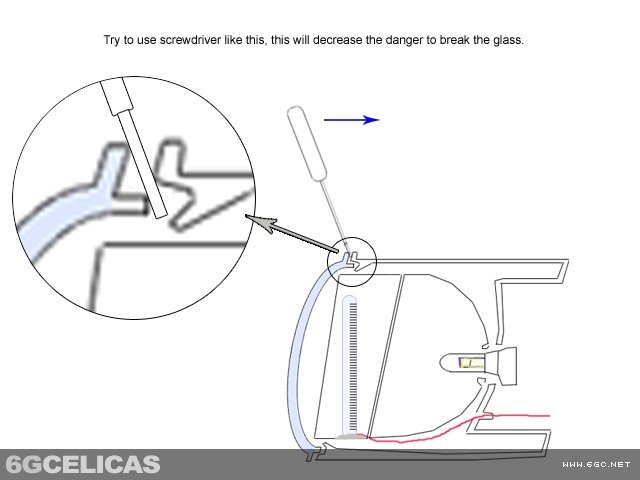
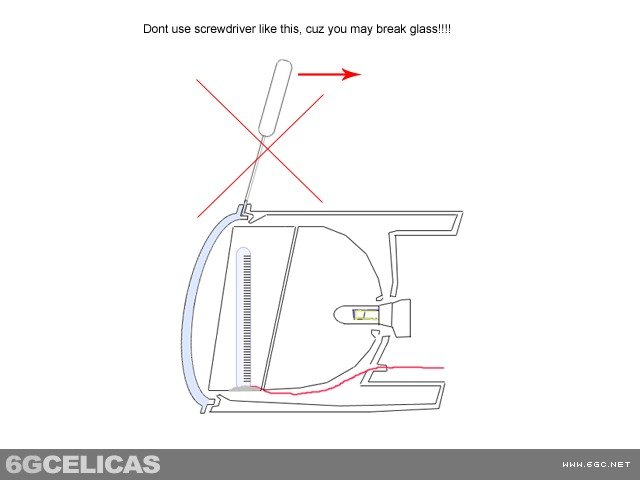
After 20 minutes of boiling, take out your lamp, and use a flat screwdriver to open the glass. Do it carefully, because you may break the glass if you don't. If the glass won't come off easily, boil the lamp for another 20 minutes.
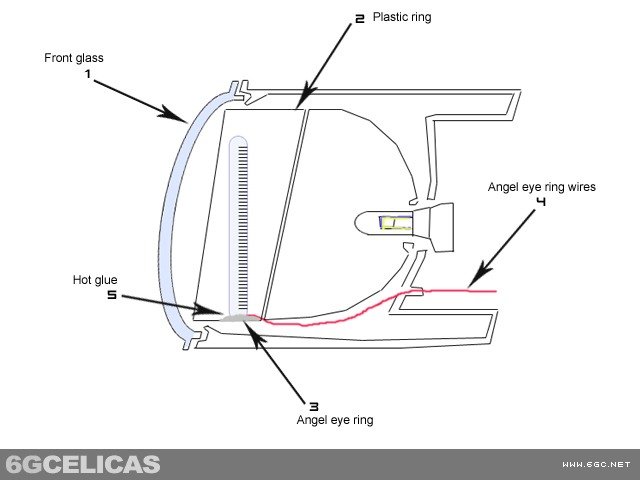
 Once the high beam is open, use a philips head screwdriver to unbolt the plastic ring that is located inside of your high beam (there will be 3 bolts.) Once the ring is off, mark the place on it where your angel eye ring will be placed. Then glue the angel eye ring to the plastic ring with a hot glue gun or with some clear silicon adhesive.
After that, run the angel eye ring wires through the water drainage opening. Then put the plastic ring (with the angel eye ring) back into the headlight assembly.
 For re-attaching the front glass of the high beam I used the same glue that was holding the glass before. Just heat it up with the heat gun, and then it gets soft, and then you can attach those parts together. Put some pressure on them to get an air-tight hold. Once the high beam is back together, put it back in your car, connect wires to your parking lights or a switch, and that's it.
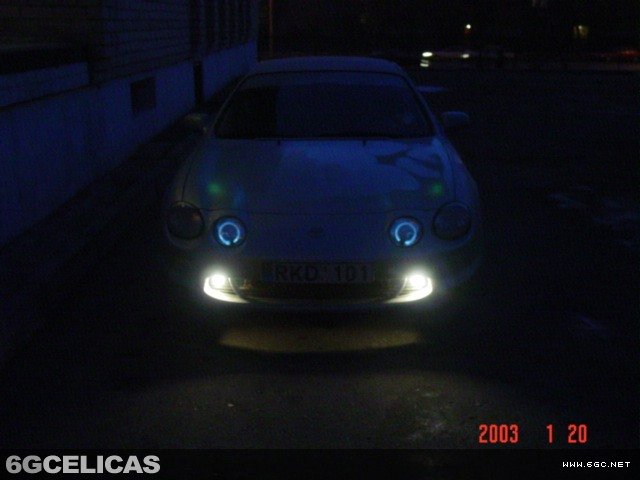
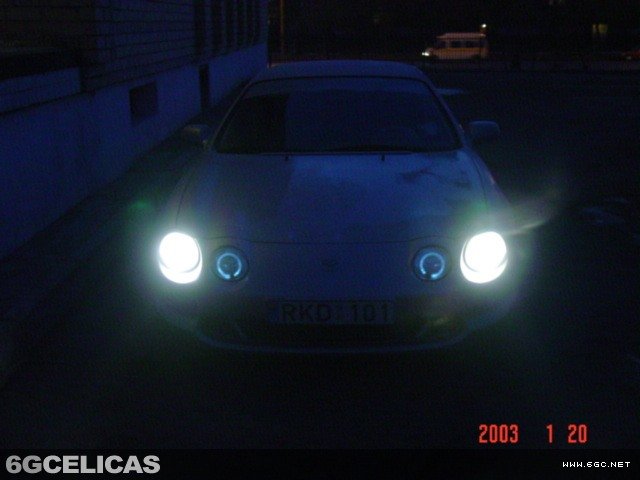
You've now got custom angel eyes! Sit back and admire your work and your new customized headlights!
More Photos