Installing Coilovers/Springs
| Author: | Mynzeyes |
| Approximate Time: | 2+ Hours |
| Required Tools: | Various sockets - 12+ mm Allen key Spring compressor Open end wrenches Grease (if installing coilovers) |
Disclaimer: I am not responsible for any injury you may obtain from undertaking any do-it-yourself projects on your car. I am also not responsible for anything that is broken/lost/etc from anything that happens while undertaking this project. With that said, enjoy.
1. Ok, first things first, you need to get the car up on some sturdy jack-stands and remove the wheels. You can start with either the front two, the back two, or one side. I recommend starting on the front, as it is slightly easier and the instructions for it are below.
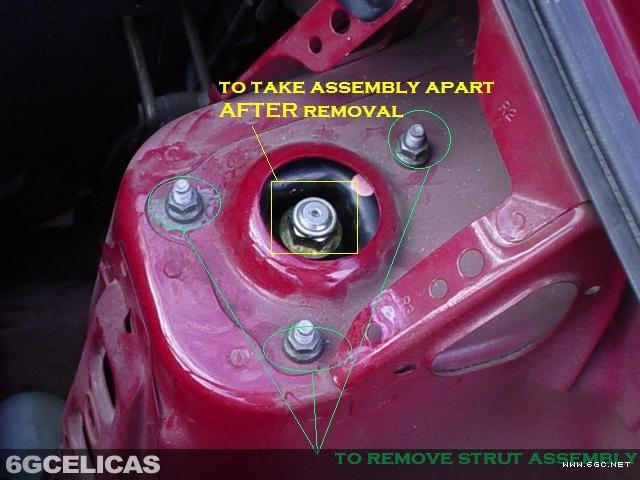
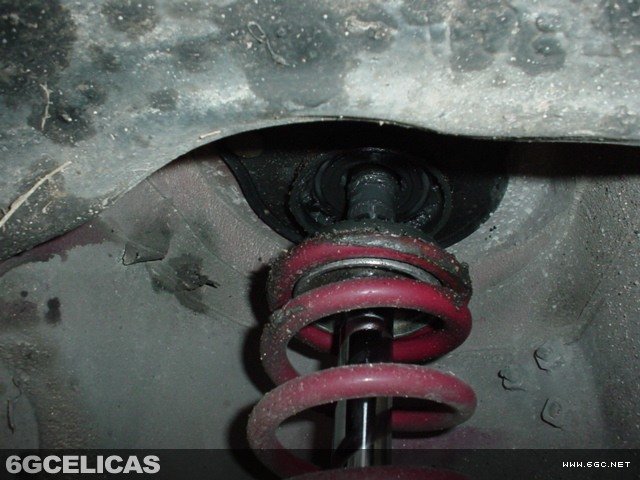
 2. After the car is secured, you can get in the hood, and remove the 3 bolts holding the strut assembly in on the top (CIRCLED in picture 1), and also the 2 bolts on the bottom-side holding the strut assembly to the control arm/hub/etc. Also, be sure to undo the smaller bolt holding the brake line to the strut assembly (2 lower bolts CIRCLED, and brake line bolt BOXED in picture 2).
3.After the 6 bolts are removed, the entire strut assembly will come out of the car intact. In order to get the spring out, you must take off the bolt on the top (seen in the BOX in picture 1). USE CAUTION when doing this, I personally did not use a spring compressor, because when the bolt pops off, it will shoot maybe a foot, the stock suspension should not be under too much pressure. If you feel at all concerned, it's better to be safe than sorry!
 4. At this point, the steps for springs v. coilovers change, if you are installing springs, continue to step 7.
5. COILOVER EXCLUSIVE: Ok, after you get the strut assembly apart, the only parts you need to keep are the strut tower cap, the bearings, and the strut assembly. All of the washers, and spring cushions can be removed.
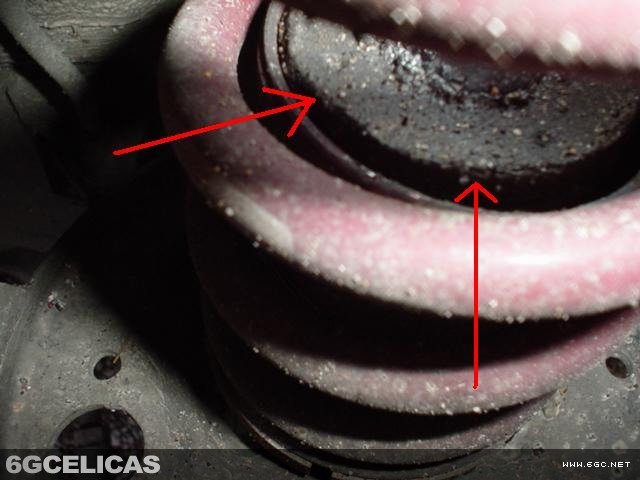 6. COILOVER EXCLUSIVE: After that is removed, the grinding process begins. You will see where the strut/shock is threaded into the housing. That silver/metal ring needs to be ground down to allow the coilover sleeve to slide into place. (You will see the after-math of grinding in picture 3). Keep grinding and trying, you'll get it eventually, and once it's done, place the rubber rings supplied w/ the coilover kit around the strut housing, and slide and secure the coilover sleeve into place, and also set the spring perch to where you want it to be.
7. Put in the coil, and reassemble based on the application you have. Be it with springs, put all of the rubber cushions and what not. If you are installing coilovers, put the spring on the perch, the top cap on top of that, then the bearings. BE SURE TO GREASE THE TOP CAP! If you are putting on coilovers, this will cut down on some of the noise.
8. After putting the assembly back together, reinsert it into the car, secure the top 3 bolts FIRST, and that will make it easier to put the bottom into place, so that you may secure the bottom 2 bolts, and the brake line bolt.
9. Tighten everything down and look everything over to make sure nothing was left out, and put the wheel back on.
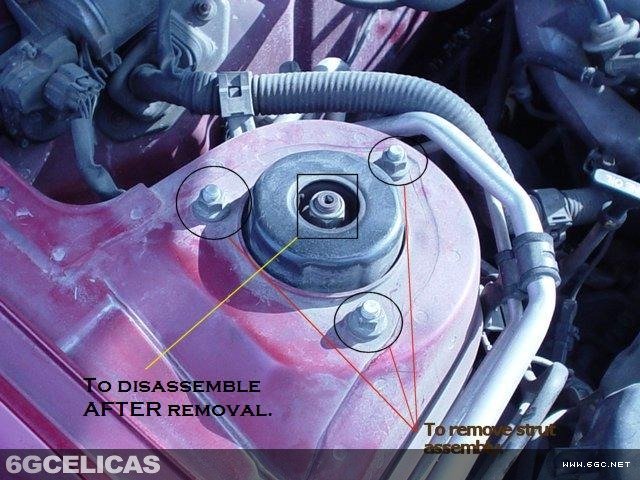
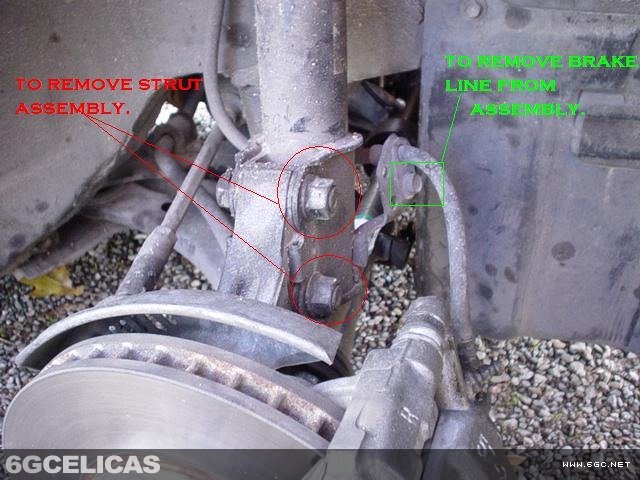
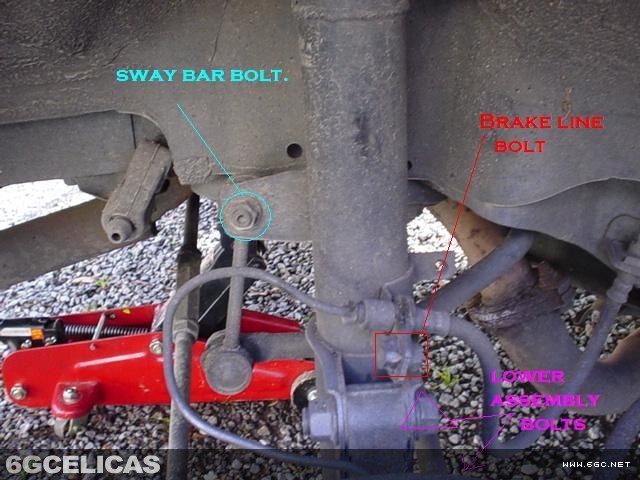 The rear is basically the same, the only difference is that you must undo the sway bar via a bolt which requires an allen key being inserted into the head, and turning the bolt w/ an open end wrench (seen CIRCLED in picture 4, the brake line bolt will be BOXED, and um…let's TRIANGLE in the lower bolt. Hehe, just to SPICE THINGS UP!). Also, when taking the assembly apart, there is no need for caution or a spring compressor or anything, as the rear springs will be under NO pressure as you remove the top bolt, so don't worry. There is also a picture of the strut tower shown to the right, which is the same as the front, the only diff is that to get to it, you must take out the rear panels (if you have a hatchback). In the coupe, the strut towers are accessible by removing the rear deck. To do this, you must first pull off the third braake light cover. It pulls off towards you, and then you'll see two bolts. Loosen those and unclip the wiring harness for the light, and then the third brake light assembly should come out. Now fold down the seats, and carefully pry up the rear deck until the snap clips pop off. One they're off, the rear deck slides towards the front of the car a bit and then comes out. Once you do that, you'll be able to acess the strut tower bolts, though you'll probably need a socket extension. Also, the top cap in the rear does not need to be greased if you are putting in coilovers.
I also included a pic of my coil and topcap (ground control is the system I'm using). And you can see how nasty and greased it is. Put everything back together, go for a drive, and enjoy your coilovers or springs!
More Photos