Installing a Front Sway Bar
| Author: | Coomer |
| Approximate Time: | 1 Hour |
| Required Tools: | Ratchet 14mm socket 12mm socket or wrench 14mm wrench 5mm allen wrench |
 Have a new front sway bar and want to install it, but don't know how? Have no fear; This how-to is here to help you through the install.
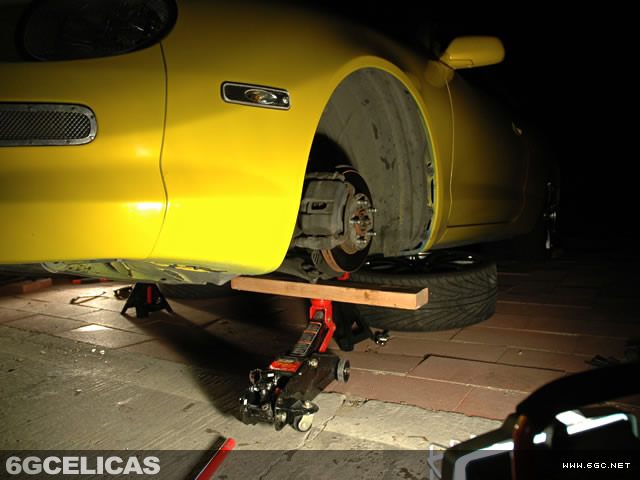
First things first, loosen your front wheels, jack up the front end of your car and support it with jackstands. You'll be working underneath the car, so make sure it's secure and stable on the jackstands. Once the car is up, pull the wheels off of the car.
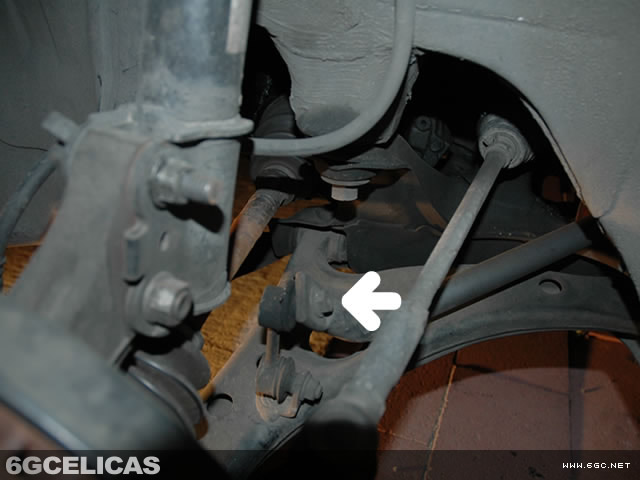
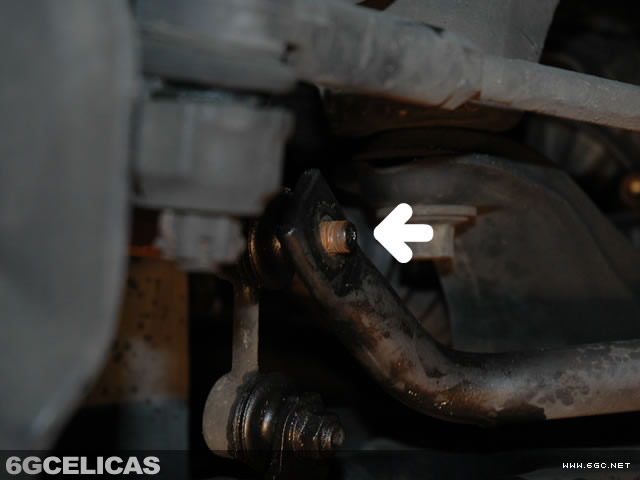
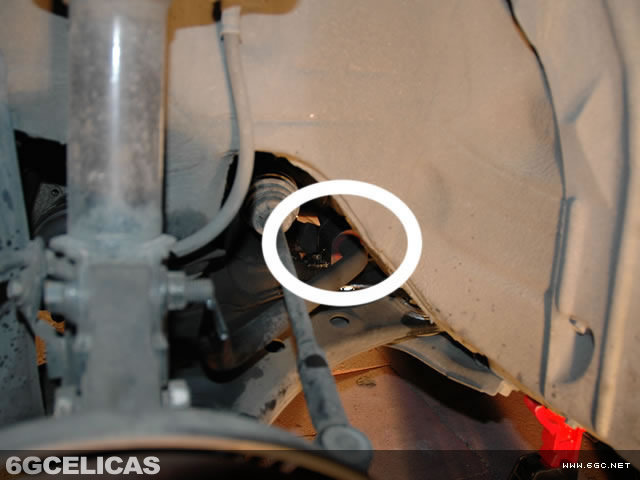
Once the wheels are off, you can easily access the sway bar end link bolts. The end link is the piece that connects the end of the sway bar to the lower control arm via two bolts. The bolt you want to remove is the upper one.
 To remove the bolt, you first want to get the lower control arm as close to parallel with the ground as possible by jacking it up (Be very careful.) This will put less strain on the end link. You will most likely want to spray the end link nut and bolt with your choice of penetrating lubricant; I opted for PB Blaster, but WD-40 or something similar would work as well. Let the PB Blaster sit for a few minutes and penetrate into the nut and bolt.
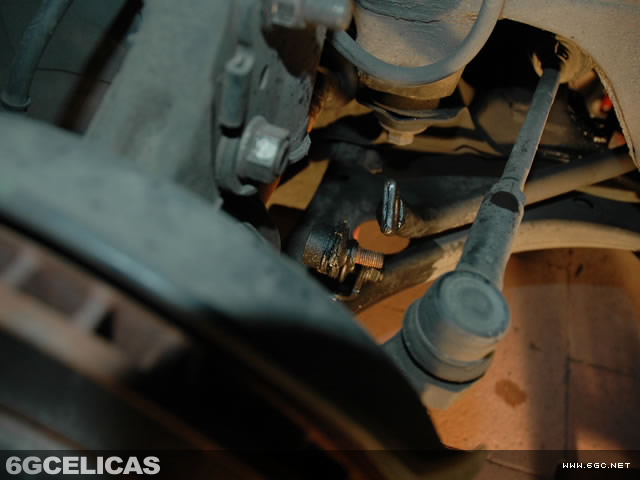
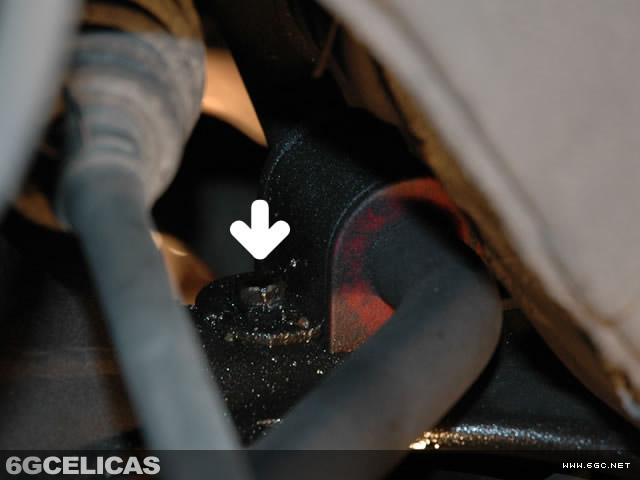
Then, using a 14mm socket and a ratchet, loosen the upper end link nut. It will most likely be very tight, so be careful and use your 14mm socket and ratchet first. Once it's a little bit loose, the nut and bolt will both spin most likely. Once this happens, the 14mm socket and ratchet will just spin the whole bolt and it will not come out.
What needs to be done is the bolt needs to be held in place with a 5mm allen wrench, which goes into the inside of the nut. Then, using a wrench, you can turn the 14mm nut while holding the bolt in place with your allen wrench. The nut should come right off and the end link's bolt will disconnect from the sway bar. You can now lower the control arm and do the other side of the car using the same procedure. On the other side, however, you won't need to jack up the lower control arm.
Once the sway bar is disconnected from both sides, it will be held in only by the two bushings, which are held in place by two brackets, which are held in place by two 12mm bolts per bracket.
 Getting to these bolts can be difficult. I found them easiest to access from underneath the middle of the front of the car, because the brackets sit on top of the crossmember that goes from side to side. The four bolts come right out, and then the brackets and bushings can be removed.
The sway bar will then come out. It does take some maneuvering, but it does come out (both stock and the aftermarket Suspension Techniques bar) without removing anything else.
Once everything is out, the new sway bar can be installed using essentially the same procedure. Be sure to use the brackets and bushings that came with your sway bar, and liberally lube up the bushings with some sort of grease or lubricant. Get the four 12mm bolts that hold the sway bar brackets to the crossmember started, but don't tighten them. Then attach the end links to the sway bar and get those two 14mm nuts started, but don't tighten them.
 Tighten the four 12mm bolts that hold the brackets to the crossmember to 13 ft.-lbs or 18 N.m. Then tighten the two 14mm nuts on the end link bolts to 26 ft.-lbs. or 35 N.m. To tighten these nuts, you may need to use your allen wrench and 14mm wrench to get them tight to the point where you can then use a torque wrench and a socket to torque down the nuts, but you may not. I didn't need to, and simply used my 14mm socket and torque wrench to tighten the nuts.
Put the wheels back on, lower the car back down to the ground, tighten your lug nuts, and go for a drive, slowly at first to ensure everything is tight and nothing went wrong. Then enjoy your new sway bar!
More Photos