Installing a New Head Unit
| Author: | runriot95 |
| Approximate Time: | 1 Hour |
| Required Tools: | 1987+ Toyota stereo harness Flat head screwdriver Phillips head screwdriver Razor blade Wire strippers Electrical tape Soldering iron (optional) Solder (optional) Heat shrink tubing (optional) Heat gun (optional) Crimp connectors (optional) Crimping tool (optional) |
 I'm writing this how-to to help all those people that will struggle, like I did, when trying to put in a new head unit. Hopefully this will help out a lot and if you have a question that isn't answered here, feel free to email me.
First, you're going to have to do some prep work before the actual installation.
The very first thing you should do is to go buy a wiring harness. This will connect the wires from the back of your new stereo to the wiring that exists in your car. You can buy this at most electronics stores that carry car audio products and also on the internet. You'll want to get the harness for Toyotas 1987 and up. It will have 2 plugs, one large and one small.
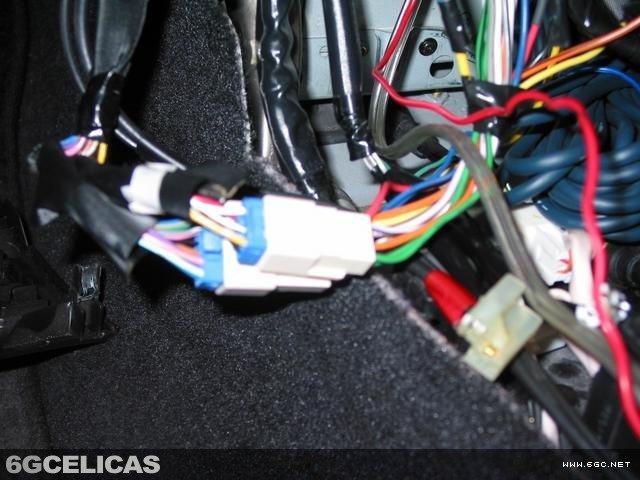
Now that you've got the harness, you'll have to connect the wires from the back of your new stereo to the wires on the harness.
There are several ways that you can connect the wires. A temporary solution is to strip about a half an inch of the insulation off the end of the wires and twist the 2 wires together and then wrap a piece of electrical tape around the connection. This is a good method to use the first time you install the stereo just to make sure everything is working okay and that you connected all the wires properly. You SHOULD NOT use this method as a permanent install as the wires are likely to come loose over time. Another method is to crimp the wires with a crimp connector and a crimping tool, though sometimes these connections will come loose over time as well. The method that I recommend is soldering the connections using a soldering iron and then heating shrink tubing over the connection. Don't forget to slide the heat shrink tubing over one of the wires BEFORE soldering.
Now that you've got all the wires connected, you will have a big mess of wires with a plug at one end that goes into your new stereo and 2 plugs at the other end that plug into your factory wiring.
Before doing any electrical work in your car, disconnect the negative terminal of the battery to prevent damage from occuring as easily should something not go correctly.
First, pry up the trim around the gear shifter with flathead screwdriver. Be sure to wrap tape around the end of the screwdriver to prevent the screwdriver from marking up your dash.
Next, disconnect the wiring harnesses at the back of the panel.
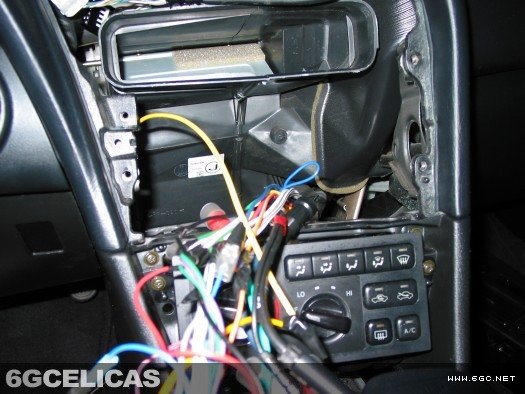
 At this point, you will see whether or not you have a factory amp, as shown in the picture. If you do, you will see a rectangular silver metal box below the heater controls. Obviously, if you don't see the silver box, then you don't have a factory amp. If you don't have an amp, then congratulations, your installation just got a lot easier.
If you do have the factory amp, then your challenge is to locate the factory wiring underneath the amp. My wiring was held in place by a plastic plug making it even more difficult to access. To access the wiring will require removal of a lot more trim pieces, such as the heater controls and "knee panel" that surrounds them and is by your knees while sitting in the seat.
For those without the factory amp, continue as follows:
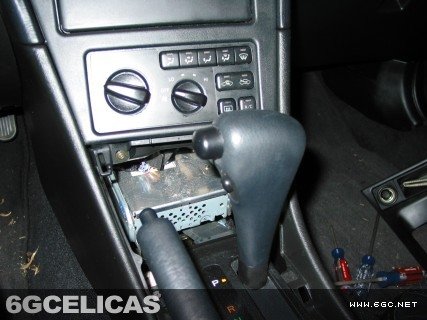
Unscrew the two screws now visible below the heater/AC controls. Pry up the rest of the trim that goes around the heater controls, stereo, and vents. The trim should come up rather easily except in the upper left corner by the hazards button where you have to use a little more force to pry it out. Once the panel is out, disconnect all wiring attached to the back of the trim panel. This might take some effort as you have to push in the little tab while pulling the plug out. Unscrew the 4 screws holding in the stereo. Lift out the unit and unplug the wiring and antenna cable(s) in the back of the stereo. I say "cables" because my stereo has 2 antenna cables connected in the back. I'm not sure why there are 2 but either one worked when I plugged it into my new stereo.
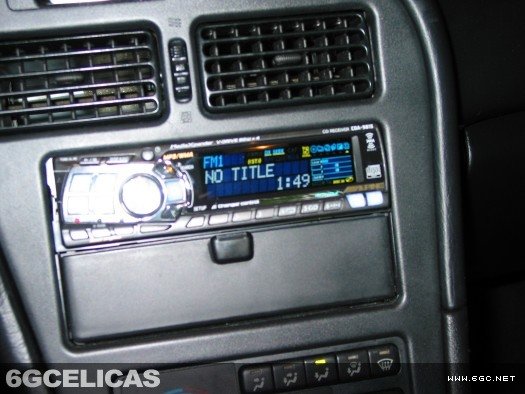
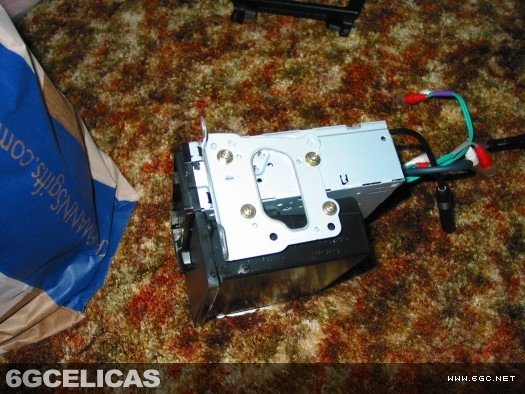 Once the stereo unit is pulled out, remove the screws attaching the brackets to the stereo and slide out the old stereo. Slide in your new stereo and line up the screw holes on the stereo with the holes on the brackets. If you have a pocket underneath, there may be little tabs on the top corners that prevent your new stereo from lining up the screw holes. The Toyota factory stereo had slots that these tabs slid into but your new stereo won't have these slots thus making the front of the stereo sit up a little higher and consequently misaligning the screw holes. To solve this I just took a razor blade and sliced off enough of the tabs until the holes lined up.
Now that you've got your new stereo mounted in the bracket, it's just a matter of connecting the wiring harness plugs into the car's wiring and the other end into the back of the new stereo. Don't forget to plug in the antenna cable.
Re-install everything and don't forget to re-connect the battery. If your new stereo has a detachable face then, when installed correctly, the face will protrude from the dash. With the face removed the stereo will be flush with the rest of the dash. I don't particularly like this but the only way to have the face flush with the dash is to build some custom brackets allowing you to mount the stereo back about a half an inch. Enjoy!
More Photos