Making Clear Currenesque Coupe Tail-Lights
| Author: | FallenHero |
| Approximate Time: | 6 Hours |
| Required Tools: | Rotory tool Flathead screwdriver Lens material Sandpaper (150 and 1500 grit) Chrome spray paint Clear coat spray paint Two part epoxy (4-5 tubes) |
Before you start, you will need to be sure to have all of the necessary safety gear on hand. I would have a squirt bottle of water, protective eyeware, and a mask.
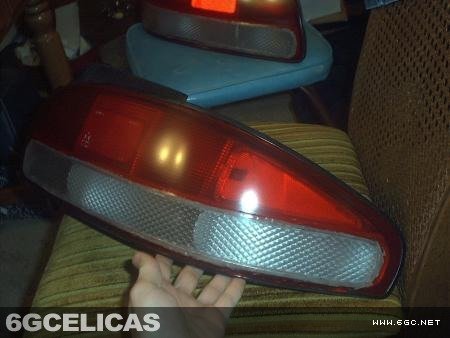
 To start, look at the tail light and find the seam where the clear lens and the red come together. This is where you will be cutting. It's impossible to pull or pry the lens out. It's far too brittle and will chip. Use your Rotary tool with a large disc attachment to cut the seam. Try to cut it as straight as possible. You will be able to see the clear and red shavings flying out. Make sure you stay on the seam, or the final product will look really bad. You want to cut down about a third of an inch. After you start, you will see how far down you should cut. There is an opening under the clear lense that you will feel when you break through.
Cutting corners is very difficult. I made one large cut on the end, and a shalow cut on each edge. This didn't work so well, as you should be able to tell from the pictures. You might try and find a smaller disc to cut with, or use a little ingenuity. After you have cut all of the border off of the lense, use the flat head screwdriver to pop it loose. Be careful not to chip it. It should break loose so you can remove it.
After you remove the top clear lense, put it in a SAFE place. You will use it later. Notice that it is tinted red.
Use your rotary tool to cut the middle out of the amber part of the lense. Be very careful not to harm the housing. After you have cut the middle out, you will be able to use your flat head screw driver to pop the amber part out. Start at the far edge of the light, and just rip it out. The clear reverse part also just pops out with the use of your screw driver.
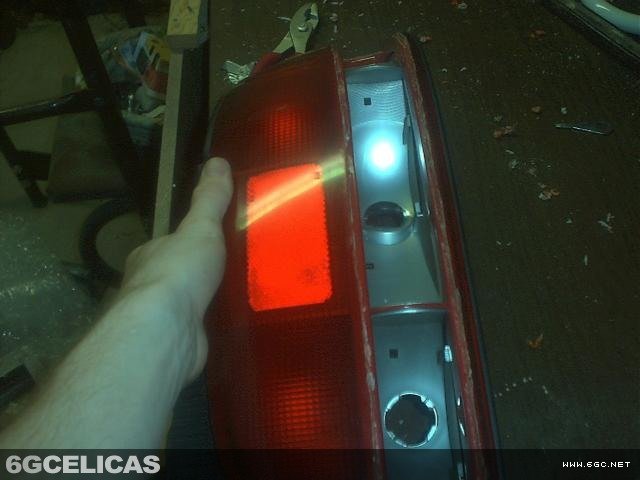 After it has all been removed, tape off your lense and paint the interior of the housing chrome. When this is done, the fun begins.
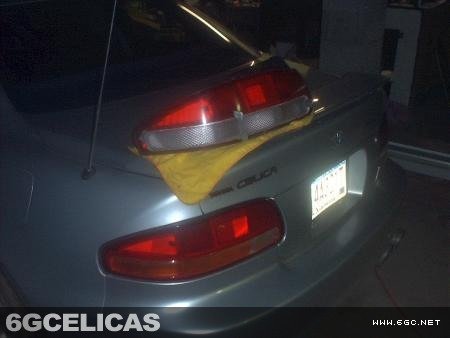
You will have to make a lense that fits PERFECTLY in the slot where the old lense was located. If it is off by a millimeter, the light will look horrible. The lense will need to be one piece, and span from the far edge of the light to the reverse part. It will need to fit in the cleft where the old lenses were removed. Once you get the light apart, you will see what I mean. You can also see it when you look through the clear at your lights on your car. It's not easy to do this, and takes loads of patience. Once you have got it perfect, secure it in place sparingly with your two part epoxy.
 After you have it in place, it's time to get the light back together. Clean the original clear outer lense up with your rotary tool's sanding attachment. Once again, be careful. Once it's ready, put it in place, and secure it with duct tape. Fill the gap left with two part epoxy. When it dries, remove the tape, and fill the holes with the epoxy. Let the light dry overnight, and then apply another layer of epoxy, because it will most likely sink in overnight.
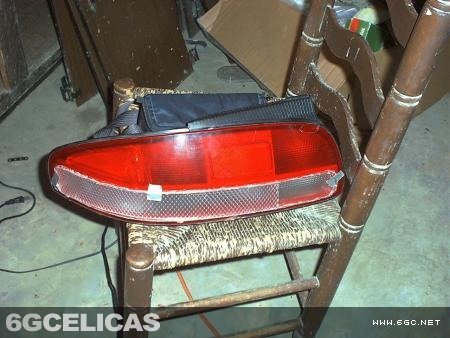
Once you have built up a ridge of epoxy, and it has hardened, you can begin to sand. Don't use the rotary tool much or you will do harm to the lense. I suggest sand paper and muscle. Sand it down until it's flat. When you are satisfied that it's flat, get out your fine sand paper. Sand the entire lense with the fine grit sandpaper. Sand it well, and be sure not to leave any part clear. After this is done,wash the lense VERY WELL and be careful not to leave anything on it. Don't even let your finger prints get on it. You are then going to clear coat the lenses. If I were you, I'd practice my clear coating before I tried on the lenses. When you are up to the challenge, put a couple of layers of clear on the lenses, and let them dry. Then, you will have Clear Curren-esque tail lights!
More Photos