Making Headlight Eyebrows
| Author: | doGGy |
| Approximate Time: | 4 Hours |
| Required Tools: | Sharp knife or electric jigsaw Piece of plain plastic Piece of cardboard Sandpaper Heat gun or blow dryer |
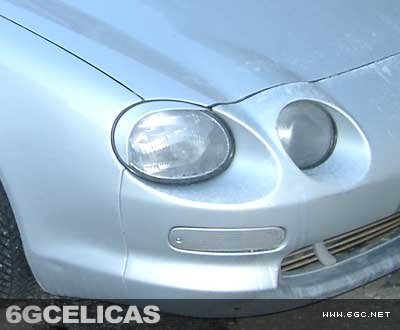
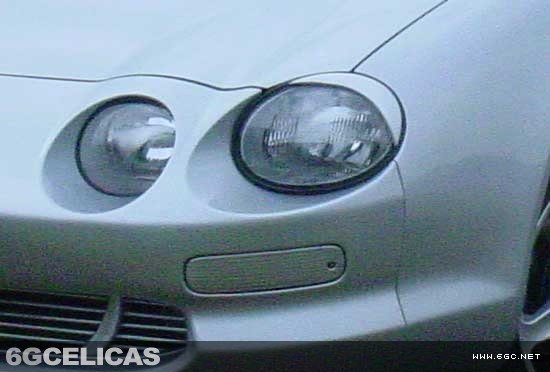 Want some custom headlight eyebrows? Follow this how-to and you'll have this project done in no time!
First, you need to cut a piece of cardboard to the shape that you want your headlight eyebrows to be. Once you have the piece cut out, put it one of the headlights to be sure that it will fit fine. Once you're satisfied with the shape of your cardboard cutout, trace the cutout onto your piece of plastic twice, and then carefully cut the plastic so that you have two plastic pieces in the shape of your cardboard cutout. After cutting the plastic, you may want to sand down the edges first to remove any sharp or unsightly edges.
Once you're satisfied with your plastic pieces, heat them up with your blow dryer or heat gun until they are soft and pliable, and then set the pieces on your headlights and mold them so that they conform to the shape of the headlights. Let the plastic pieces cool, and test fit them again. If they don't fit very well, you can use sandpaper to sand them down. If the contour of the plastic pieces still isn't right, you can head them up and bend them again. Once you're satisfied, proceed to the next step.
The next step is to paint your eyebrows. You can do this yourself or let a bodyshop do it for you. After that, you have a nice pair of headlight eyebrows for your Celica. Stick them to the lights with some strong double-sided adhesive tape, or with some good glue. I would recommend strong double-sided tape so that you can remove them in the future if desired.
If there are any questions, contact me and I'll help you out.
 Also, an alternative way to make custom eyebrows is by just using vinyl.
Simply buy the color that you want and cut it out to the shape that you want using scissors or a blade. Once you've got your eyebrows cut out, simply stick them to your headlights.
The method you use is up to you. Regardless of the method you choose, once you're done, sit back and admire your new eyebrows!
More Photos