
 Dec 16, 2012 - 1:28 PM Dec 16, 2012 - 1:28 PM
|
 
|
 Enthusiast  Joined Aug 25, '08 From England Currently Offline Reputation: 1 (100%) |
I was certain I started a build thread on here, but for the life of me I can not find it so forgive me if I start again and its old news.
About a year and a half ago my current GT4 failed its yearly inspection (MOT) with rusty sills, they were fixed and it subsequently passed but it set alarm bells ringing in my head that the poor things days were numbered. I decided that I would buy a shell and swap everything onto it. so I hunted for a reasonable shell to start work on. While I was looking, I had to extend my garage. I only had a single car garage so not enough space to work or store stuff. So I decided to extend my garage backwards a bit Work started. 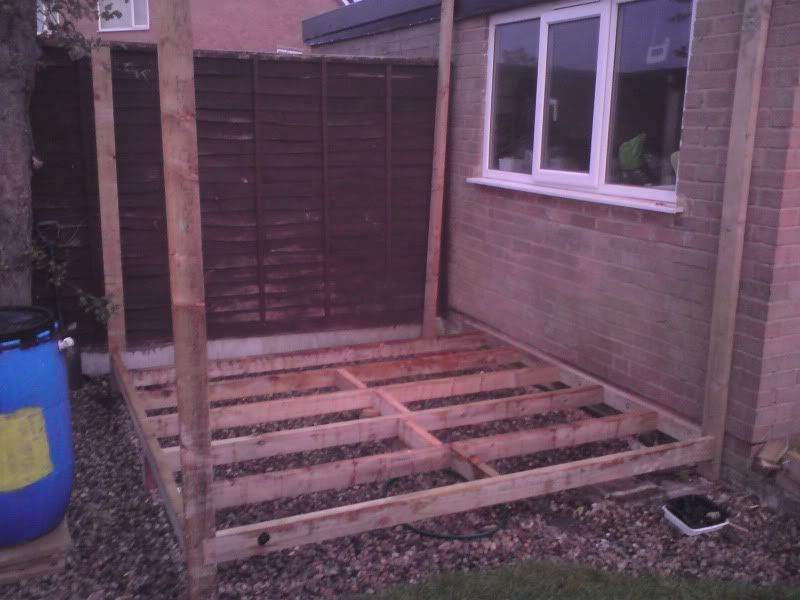 and after a few weeks, finished ;0 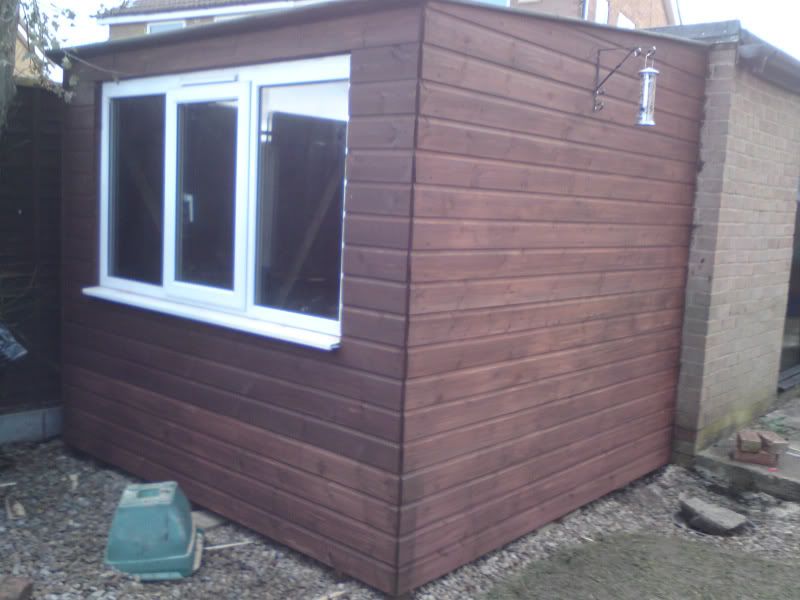 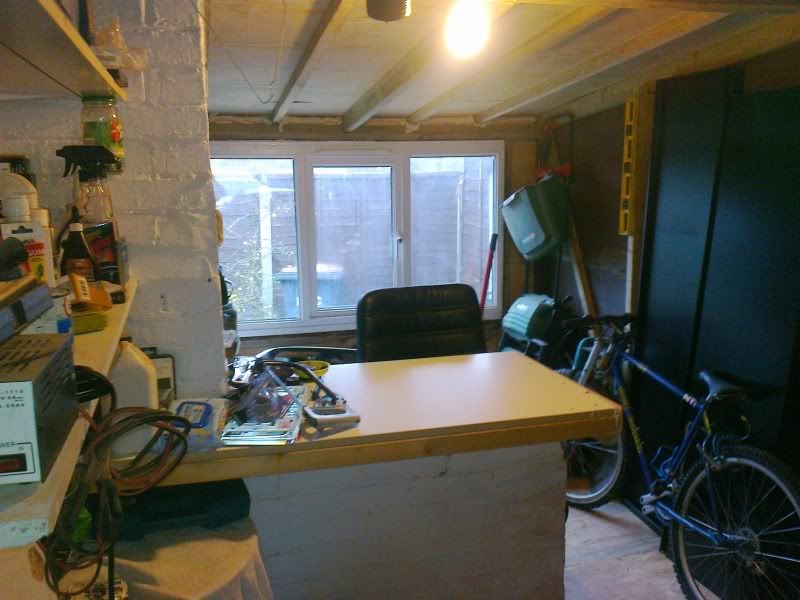 About the same time a shell turned up, well it was sold as a shell, but it was more or less a complete car minus the engine and gearbox. 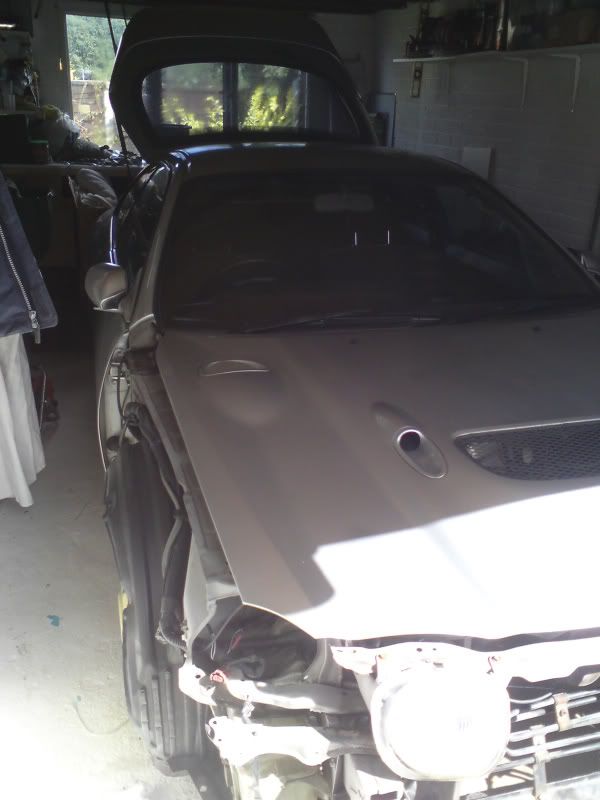 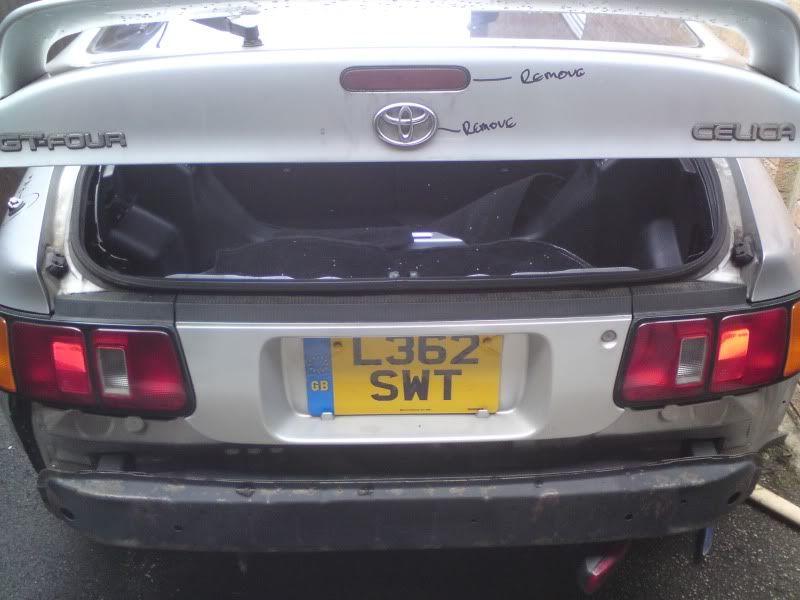 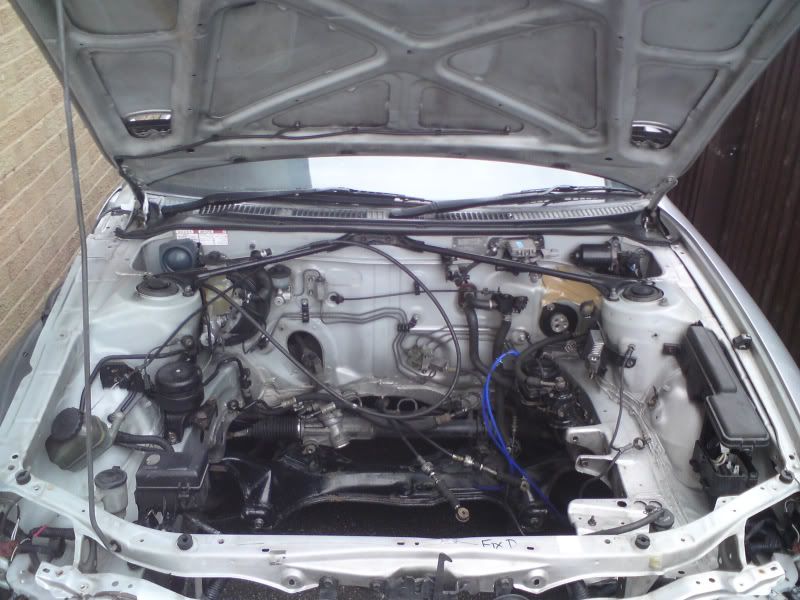 It was in good condition with no rust, even the interior was in pretty much spot on condition, not that I need much of it  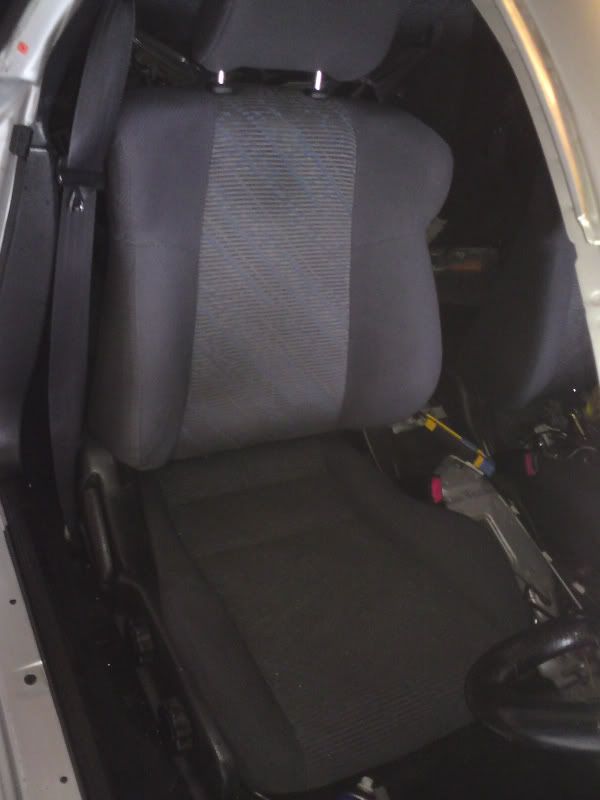 I set to wrok more or less straight away 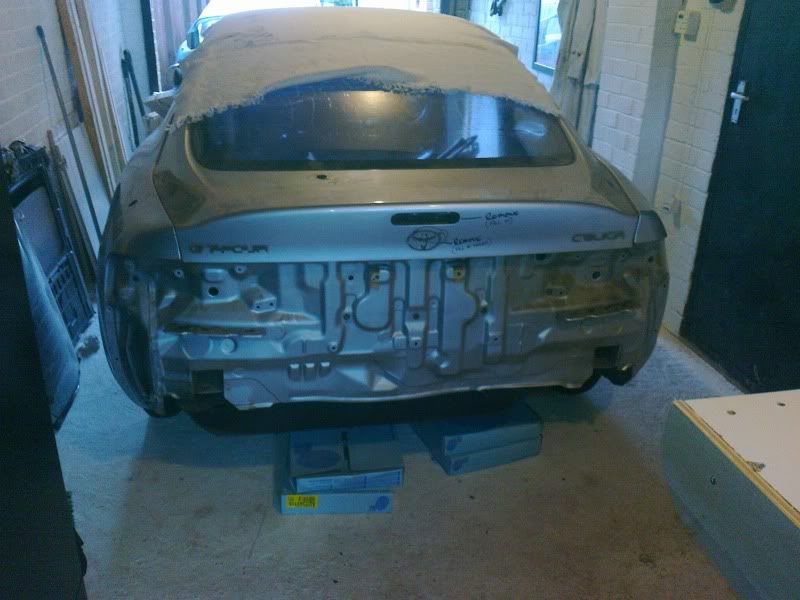 First job was to strip everything off the car 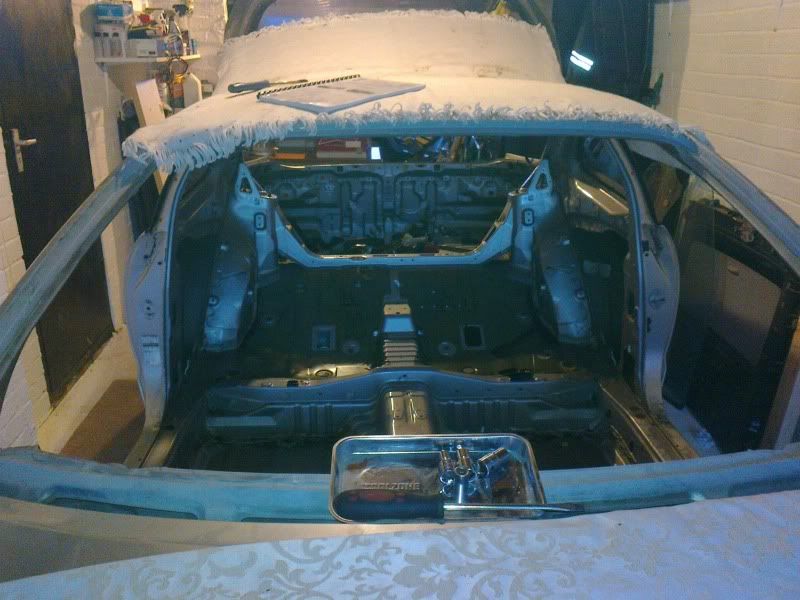 everything went, all the looms, glass, suspension the works 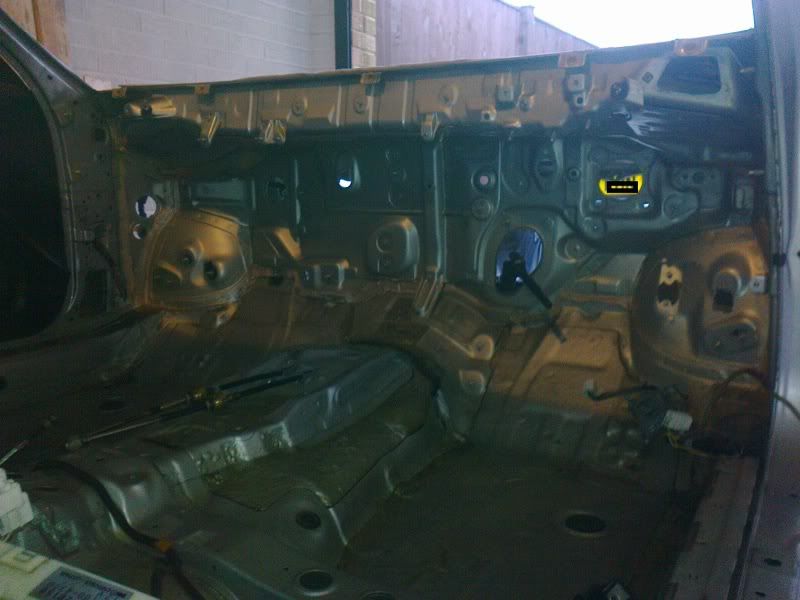 Next job was to remove the sound deadening material 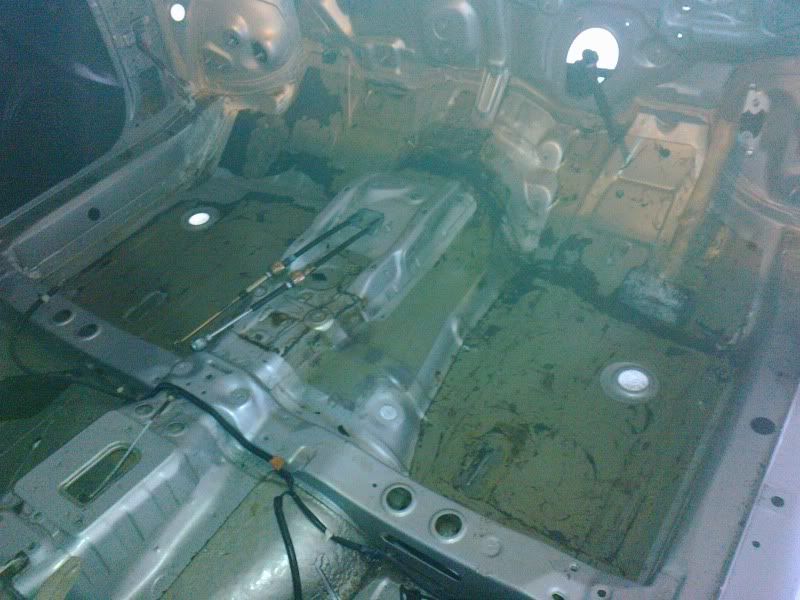 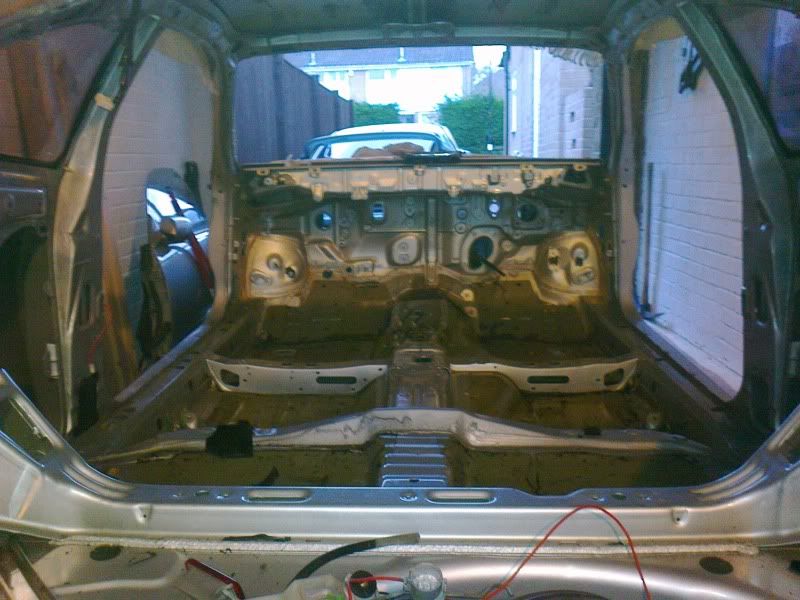 it then went outside for a thorough jet wash go get rid of all the years of crap 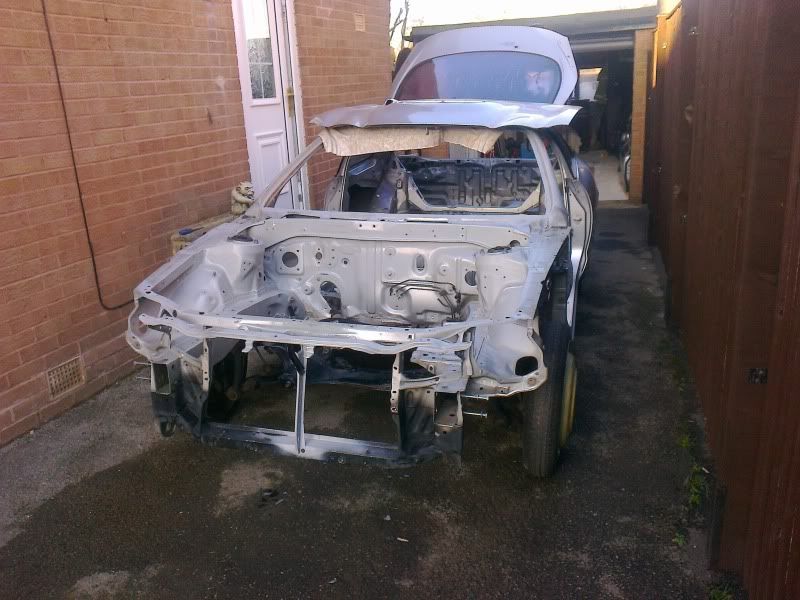 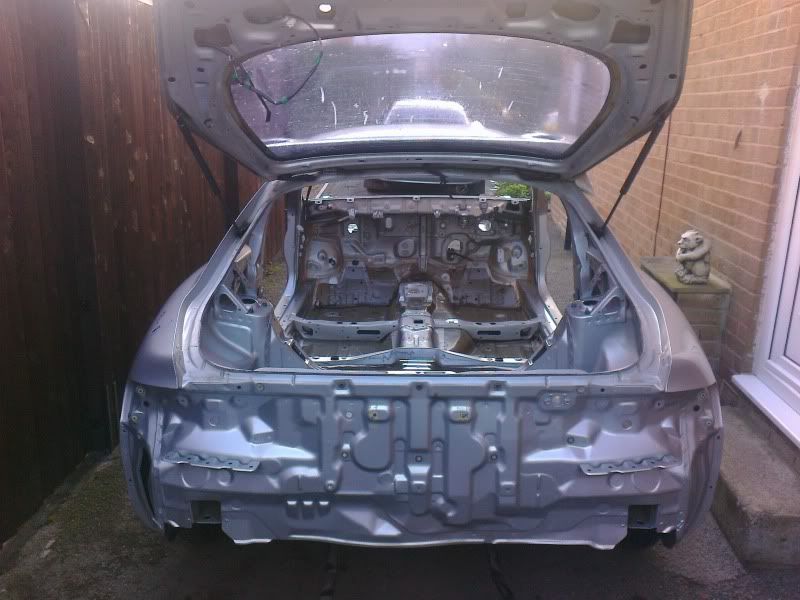 As I was moving the battery to the inside I could remove the battery tray 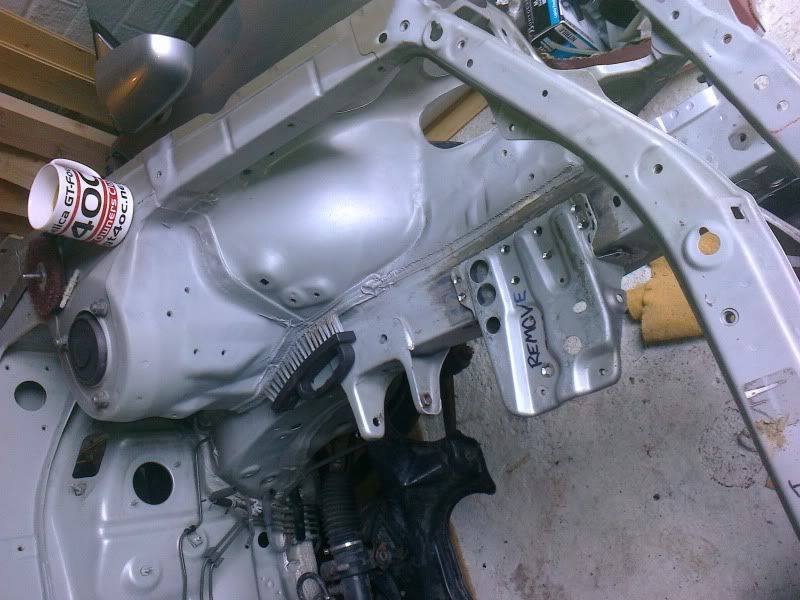 which I did 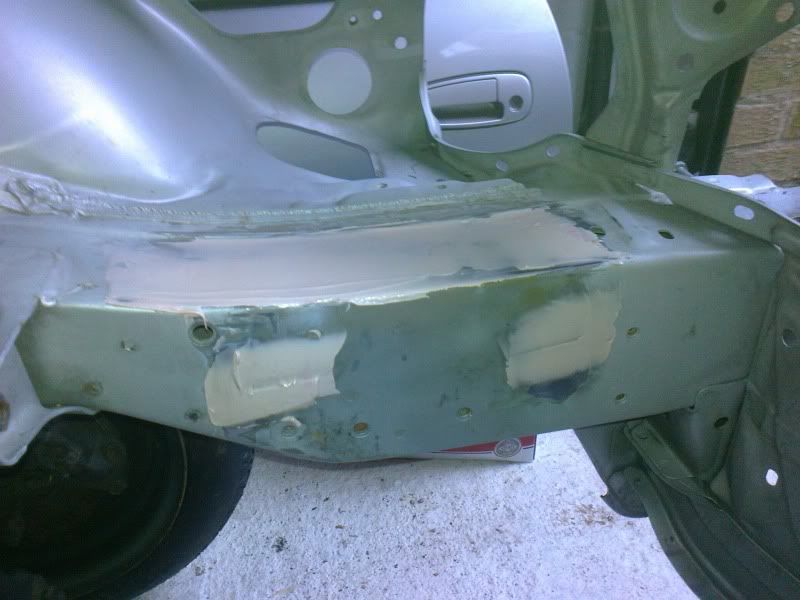 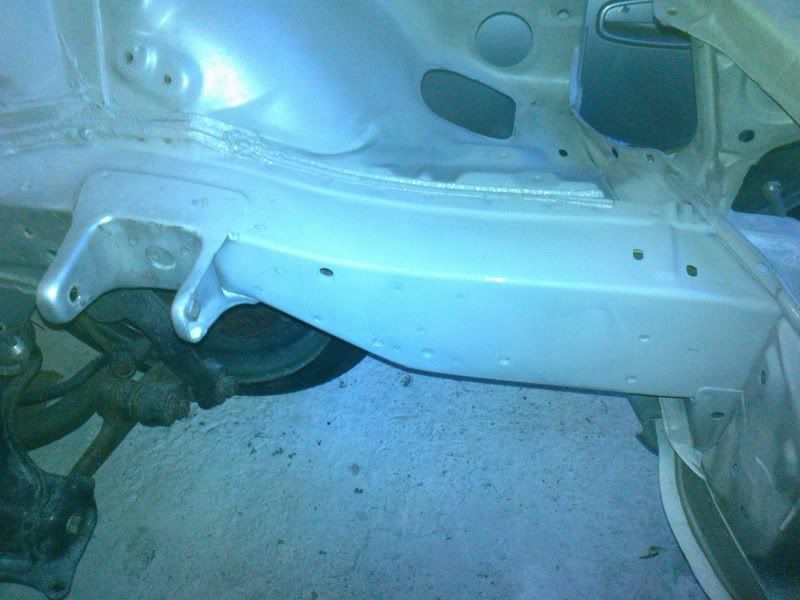 Next up I needed to get to the bottom of the car....this was going to require some ingenuity. -------------------- |

Posts in this topic
Nial ST205 Total Rebuild Dec 16, 2012 - 1:28 PM Nial I was going to have to make my own rotisserie.
So... Dec 16, 2012 - 1:38 PM Nial Tackling the stone guard on the bottom of the car.... Dec 16, 2012 - 1:45 PM Nial First job was to add some strengthening to the top... Dec 16, 2012 - 1:54 PM Nial I was going to have to make myself a mini blast fu... Dec 16, 2012 - 1:59 PM Nial Taking a long look at my roll cage, I was not happ... Dec 16, 2012 - 2:06 PM
Nial I was going to have to make my own rotisserie.
So... Dec 16, 2012 - 1:38 PM Nial Tackling the stone guard on the bottom of the car.... Dec 16, 2012 - 1:45 PM Nial First job was to add some strengthening to the top... Dec 16, 2012 - 1:54 PM Nial I was going to have to make myself a mini blast fu... Dec 16, 2012 - 1:59 PM Nial Taking a long look at my roll cage, I was not happ... Dec 16, 2012 - 2:06 PM
 SwissFerdi QUOTE (Nial @ Dec 16, 2012 - 2:06 PM... Dec 17, 2012 - 12:47 AM Batman722 Great job.
That's a ton of work, impressive. Dec 16, 2012 - 2:19 PM Ted95 Not your everyday build, excellent job so far man. Dec 16, 2012 - 10:18 PM Tigawoods super diy!! Dec 16, 2012 - 10:43 PM malpaso You are unbelievable Nial . You are true faffer Dec 17, 2012 - 5:06 AM Nial Thanks all, glad you like it
QUOTE (malpaso ... Dec 17, 2012 - 5:32 AM Edser Looks great! It'll be like new!
Just o... Dec 17, 2012 - 6:28 AM Nial QUOTE (Edser @ Dec 17, 2012 - 6:28 A... Dec 17, 2012 - 6:41 AM richee3 Great work so far! I can't wait to see whe... Dec 17, 2012 - 10:36 AM S8S8 Nice work! Can't wait to see the finished... Dec 18, 2012 - 4:45 AM Nial I dont know if you guys like small regular updates... Dec 18, 2012 - 2:23 PM enderswift QUOTE just because you cant see it doesn't mea... Dec 18, 2012 - 6:00 PM Nial I have been busy recently, but have found some tim... Feb 25, 2013 - 3:47 PM paulgtt absolutely epic Nial, top work.
fancy doing my car... Feb 25, 2013 - 4:10 PM Nial QUOTE (paulgtt @ Feb 25, 2013 - 4:10... Feb 25, 2013 - 4:28 PM delusionz f**k yeah! I want to reshell into yours!... Feb 25, 2013 - 5:53 PM Legen-dary Wow, just wow. I truly admire your attention to d... Feb 25, 2013 - 10:28 PM Nial QUOTE (Legen-dary @ Feb 25, 2013 - ... Feb 26, 2013 - 3:28 AM delusionz Ahhh is that what that was, I was thinking of jus... Feb 26, 2013 - 4:25 AM Nial QUOTE (delusionz @ Feb 26, 2013 - 4... Feb 26, 2013 - 4:31 AM delusionz do you know what the pre-rad thing is on the TTE c... Feb 26, 2013 - 4:50 AM Nial QUOTE (delusionz @ Feb 26, 2013 - 4... Feb 26, 2013 - 4:53 AM Nial Well, it's been a while, haven't done much... Jun 4, 2013 - 2:57 PM Dennisthe10 Love this thread, your car is going to be epic... Jun 6, 2013 - 4:26 AM Nial Its been a while, but a bit of progress this weeke... Sep 8, 2013 - 2:38 PM richee3 Love that bumper. Sep 8, 2013 - 2:49 PM JoshuaM Oh, so not content with a perfectly rebuilt st205.... Sep 8, 2013 - 4:11 PM Nial QUOTE (JoshuaM @ Sep 8, 2013 - 5:11 ... Sep 9, 2013 - 2:12 PM SwissFerdi Very funny, I actually had that idea myself (SS-FO... Sep 8, 2013 - 5:34 PM Nial Thanks just need to start sanding it all smooth n... Sep 9, 2013 - 12:27 AM kurt95gt Good to see an update on such a sweet build Sep 9, 2013 - 1:38 AM Nial Hmmmm shiny bits Sep 17, 2013 - 10:19 AM cjh4l22 Wow, most impressive sir. Keep up the good work... Sep 17, 2013 - 12:18 PM Nial Thanks
i will just be using standard motor mount... Sep 17, 2013 - 12:34 PM onnaj Really really impressive! Nice work! Sep 18, 2013 - 4:35 AM rentaspace Just read through this whole build... I am so jeal... Sep 22, 2013 - 11:46 PM KAOS Excellent! Sep 25, 2013 - 12:16 PM Nial Thanks.....have been busy paint stripping and unde... Sep 25, 2013 - 3:58 PM Nial Still removing paint and underseal......sigh. Just... Sep 30, 2013 - 3:12 PM Nial I could do the chassis welding route, but for two ... Oct 10, 2013 - 2:43 PM malpaso QUOTE (Nial @ Oct 10, 2013 - 9:43 PM... Oct 11, 2013 - 2:54 AM Nial Well, not much being done today, spent a large por... Oct 12, 2013 - 12:25 PM Nial Finally getting round to finishing the SS4 front b... Oct 13, 2013 - 10:07 AM Nial Well finally got to apply some paint instead of st... Oct 27, 2013 - 10:42 AM enderswift So much epicness Oct 27, 2013 - 10:54 AM bsamps4 That is ridiculously epic! Oct 27, 2013 - 11:33 AM mi645 I am really impressed with the amount of work just... Oct 27, 2013 - 2:20 PM Nial QUOTE (mi645 @ Oct 27, 2013 - 2:20 P... Oct 27, 2013 - 2:44 PM dudeofchaos Will you post how to mod the BC coils?
I plan... Nov 8, 2013 - 12:50 PM qatar11 QUOTE (dudeofchaos @ Nov 8, 2013 - 12... Nov 9, 2013 - 7:10 AM qatar11 . Nov 9, 2013 - 7:32 AM Nial There is no modding of BC coilovers required, simp... Nov 8, 2013 - 5:13 PM dudeofchaos QUOTE (Nial @ Nov 8, 2013 - 7:13 PM)... Nov 10, 2013 - 3:33 PM qatar11 QUOTE (dudeofchaos @ Nov 10, 2013 - 3... Nov 10, 2013 - 7:11 PM dudeofchaos QUOTE (qatar11 @ Nov 10, 2013 - 9:11... Nov 10, 2013 - 7:51 PM Nial Well a bit more progress, some high build primer i... Nov 16, 2013 - 1:36 PM Nial adding some seam sealer now. need more masking tap... Nov 22, 2013 - 4:57 PM RoyO Awesome rebuild, very impressive! Nov 22, 2013 - 5:31 PM Nial Only about a million hors of sanding left to go Nov 27, 2013 - 2:58 PM SwissFerdi Yes!
I almost feel bad for Martin that his de... Nov 27, 2013 - 3:41 PM malpaso QUOTE (SwissFerdi @ Nov 27, 2013 - 9... Nov 29, 2013 - 4:20 AM delusionz I looked back and noticed martin didn't transf... Nov 28, 2013 - 7:12 AM Nial Not that I have been following all others that hav... Nov 28, 2013 - 2:35 PM 6G96GT Everything you are doing is effing incredible. Nov 29, 2013 - 4:11 PM Nial Thanks.
More sanding today, managed to get a nice... Nov 29, 2013 - 6:14 PM Trodai QUOTE (Nial @ Nov 29, 2013 - 6:14 PM... Nov 29, 2013 - 7:11 PM Nial Any 6gc club meets in Florida in April next year? ... Nov 29, 2013 - 6:26 PM Box DISNEY WORLD!!!! Nov 29, 2013 - 6:26 PM Nial Yep
On my honeymoon.....but if you can't at... Nov 29, 2013 - 6:28 PM Box What do I win for getting it right? Nov 29, 2013 - 6:39 PM Nial Taking a break from this project while I decide wh... Dec 16, 2013 - 3:47 PM enderswift QUOTE (Nial @ Dec 16, 2013 - 4:47 PM... Dec 16, 2013 - 4:22 PM Tigawoods yup! time to call it a day! Fly it over to... Dec 16, 2013 - 3:50 PM Nial It is a POR paint yes. Sick of it. It runs no matt... Dec 16, 2013 - 4:37 PM enderswift QUOTE (Nial @ Dec 16, 2013 - 5:37 PM... Dec 16, 2013 - 8:33 PM Nial QUOTE (enderswift @ Dec 16, 2013 - 8... Dec 17, 2013 - 1:17 AM Nial Well, a bit of work today, decided to refurbish a ... Dec 28, 2013 - 11:25 AM Smaay keep up the good work!!! This is what ... Dec 28, 2013 - 11:45 AM Nial Well after getting over a rather mild winter, i ha... Mar 23, 2014 - 12:44 PM JoshuaM I would personally go black because it will look t... Mar 23, 2014 - 1:13 PM Nial So, i went with black, looks ok. Will contrast wel... Mar 30, 2014 - 1:26 PM Langing Nial, reading about your Celica build is like read... May 14, 2014 - 10:34 AM Nial Well got a bunch of tstuff back from the zinc plat... May 18, 2014 - 9:55 AM Smaay such an awesome build...
How much do you think yo... May 18, 2014 - 9:14 PM Nial I dread to think how much I have spent.....probabl... May 19, 2014 - 12:25 AM Smaay stick with it man, its going to be worth it when i... May 20, 2014 - 8:25 AM Nial I hope so, the number of things to do seems endles... May 20, 2014 - 11:52 AM Nial It's about time I had a new rotisserie, so I h... May 23, 2014 - 12:55 PM Nial Sent the shell away for Media blasting at last, an... Jun 20, 2014 - 10:44 AM Langing QUOTE (Nial @ Jun 20, 2014 - 11:44 A... Jun 20, 2014 - 3:04 PM Nial QUOTE (Langing @ Jun 20, 2014 - 4:04... Jun 20, 2014 - 3:36 PM Nial This s one of the wooden supports kinda three quar... Jun 20, 2014 - 3:42 PM Langing To set my reference: The last two photos show ... Jun 20, 2014 - 5:28 PM Nial QUOTE (Langing @ Jun 20, 2014 - 6:28... Jun 21, 2014 - 12:55 AM
SwissFerdi QUOTE (Nial @ Dec 16, 2012 - 2:06 PM... Dec 17, 2012 - 12:47 AM Batman722 Great job.
That's a ton of work, impressive. Dec 16, 2012 - 2:19 PM Ted95 Not your everyday build, excellent job so far man. Dec 16, 2012 - 10:18 PM Tigawoods super diy!! Dec 16, 2012 - 10:43 PM malpaso You are unbelievable Nial . You are true faffer Dec 17, 2012 - 5:06 AM Nial Thanks all, glad you like it
QUOTE (malpaso ... Dec 17, 2012 - 5:32 AM Edser Looks great! It'll be like new!
Just o... Dec 17, 2012 - 6:28 AM Nial QUOTE (Edser @ Dec 17, 2012 - 6:28 A... Dec 17, 2012 - 6:41 AM richee3 Great work so far! I can't wait to see whe... Dec 17, 2012 - 10:36 AM S8S8 Nice work! Can't wait to see the finished... Dec 18, 2012 - 4:45 AM Nial I dont know if you guys like small regular updates... Dec 18, 2012 - 2:23 PM enderswift QUOTE just because you cant see it doesn't mea... Dec 18, 2012 - 6:00 PM Nial I have been busy recently, but have found some tim... Feb 25, 2013 - 3:47 PM paulgtt absolutely epic Nial, top work.
fancy doing my car... Feb 25, 2013 - 4:10 PM Nial QUOTE (paulgtt @ Feb 25, 2013 - 4:10... Feb 25, 2013 - 4:28 PM delusionz f**k yeah! I want to reshell into yours!... Feb 25, 2013 - 5:53 PM Legen-dary Wow, just wow. I truly admire your attention to d... Feb 25, 2013 - 10:28 PM Nial QUOTE (Legen-dary @ Feb 25, 2013 - ... Feb 26, 2013 - 3:28 AM delusionz Ahhh is that what that was, I was thinking of jus... Feb 26, 2013 - 4:25 AM Nial QUOTE (delusionz @ Feb 26, 2013 - 4... Feb 26, 2013 - 4:31 AM delusionz do you know what the pre-rad thing is on the TTE c... Feb 26, 2013 - 4:50 AM Nial QUOTE (delusionz @ Feb 26, 2013 - 4... Feb 26, 2013 - 4:53 AM Nial Well, it's been a while, haven't done much... Jun 4, 2013 - 2:57 PM Dennisthe10 Love this thread, your car is going to be epic... Jun 6, 2013 - 4:26 AM Nial Its been a while, but a bit of progress this weeke... Sep 8, 2013 - 2:38 PM richee3 Love that bumper. Sep 8, 2013 - 2:49 PM JoshuaM Oh, so not content with a perfectly rebuilt st205.... Sep 8, 2013 - 4:11 PM Nial QUOTE (JoshuaM @ Sep 8, 2013 - 5:11 ... Sep 9, 2013 - 2:12 PM SwissFerdi Very funny, I actually had that idea myself (SS-FO... Sep 8, 2013 - 5:34 PM Nial Thanks just need to start sanding it all smooth n... Sep 9, 2013 - 12:27 AM kurt95gt Good to see an update on such a sweet build Sep 9, 2013 - 1:38 AM Nial Hmmmm shiny bits Sep 17, 2013 - 10:19 AM cjh4l22 Wow, most impressive sir. Keep up the good work... Sep 17, 2013 - 12:18 PM Nial Thanks
i will just be using standard motor mount... Sep 17, 2013 - 12:34 PM onnaj Really really impressive! Nice work! Sep 18, 2013 - 4:35 AM rentaspace Just read through this whole build... I am so jeal... Sep 22, 2013 - 11:46 PM KAOS Excellent! Sep 25, 2013 - 12:16 PM Nial Thanks.....have been busy paint stripping and unde... Sep 25, 2013 - 3:58 PM Nial Still removing paint and underseal......sigh. Just... Sep 30, 2013 - 3:12 PM Nial I could do the chassis welding route, but for two ... Oct 10, 2013 - 2:43 PM malpaso QUOTE (Nial @ Oct 10, 2013 - 9:43 PM... Oct 11, 2013 - 2:54 AM Nial Well, not much being done today, spent a large por... Oct 12, 2013 - 12:25 PM Nial Finally getting round to finishing the SS4 front b... Oct 13, 2013 - 10:07 AM Nial Well finally got to apply some paint instead of st... Oct 27, 2013 - 10:42 AM enderswift So much epicness Oct 27, 2013 - 10:54 AM bsamps4 That is ridiculously epic! Oct 27, 2013 - 11:33 AM mi645 I am really impressed with the amount of work just... Oct 27, 2013 - 2:20 PM Nial QUOTE (mi645 @ Oct 27, 2013 - 2:20 P... Oct 27, 2013 - 2:44 PM dudeofchaos Will you post how to mod the BC coils?
I plan... Nov 8, 2013 - 12:50 PM qatar11 QUOTE (dudeofchaos @ Nov 8, 2013 - 12... Nov 9, 2013 - 7:10 AM qatar11 . Nov 9, 2013 - 7:32 AM Nial There is no modding of BC coilovers required, simp... Nov 8, 2013 - 5:13 PM dudeofchaos QUOTE (Nial @ Nov 8, 2013 - 7:13 PM)... Nov 10, 2013 - 3:33 PM qatar11 QUOTE (dudeofchaos @ Nov 10, 2013 - 3... Nov 10, 2013 - 7:11 PM dudeofchaos QUOTE (qatar11 @ Nov 10, 2013 - 9:11... Nov 10, 2013 - 7:51 PM Nial Well a bit more progress, some high build primer i... Nov 16, 2013 - 1:36 PM Nial adding some seam sealer now. need more masking tap... Nov 22, 2013 - 4:57 PM RoyO Awesome rebuild, very impressive! Nov 22, 2013 - 5:31 PM Nial Only about a million hors of sanding left to go Nov 27, 2013 - 2:58 PM SwissFerdi Yes!
I almost feel bad for Martin that his de... Nov 27, 2013 - 3:41 PM malpaso QUOTE (SwissFerdi @ Nov 27, 2013 - 9... Nov 29, 2013 - 4:20 AM delusionz I looked back and noticed martin didn't transf... Nov 28, 2013 - 7:12 AM Nial Not that I have been following all others that hav... Nov 28, 2013 - 2:35 PM 6G96GT Everything you are doing is effing incredible. Nov 29, 2013 - 4:11 PM Nial Thanks.
More sanding today, managed to get a nice... Nov 29, 2013 - 6:14 PM Trodai QUOTE (Nial @ Nov 29, 2013 - 6:14 PM... Nov 29, 2013 - 7:11 PM Nial Any 6gc club meets in Florida in April next year? ... Nov 29, 2013 - 6:26 PM Box DISNEY WORLD!!!! Nov 29, 2013 - 6:26 PM Nial Yep
On my honeymoon.....but if you can't at... Nov 29, 2013 - 6:28 PM Box What do I win for getting it right? Nov 29, 2013 - 6:39 PM Nial Taking a break from this project while I decide wh... Dec 16, 2013 - 3:47 PM enderswift QUOTE (Nial @ Dec 16, 2013 - 4:47 PM... Dec 16, 2013 - 4:22 PM Tigawoods yup! time to call it a day! Fly it over to... Dec 16, 2013 - 3:50 PM Nial It is a POR paint yes. Sick of it. It runs no matt... Dec 16, 2013 - 4:37 PM enderswift QUOTE (Nial @ Dec 16, 2013 - 5:37 PM... Dec 16, 2013 - 8:33 PM Nial QUOTE (enderswift @ Dec 16, 2013 - 8... Dec 17, 2013 - 1:17 AM Nial Well, a bit of work today, decided to refurbish a ... Dec 28, 2013 - 11:25 AM Smaay keep up the good work!!! This is what ... Dec 28, 2013 - 11:45 AM Nial Well after getting over a rather mild winter, i ha... Mar 23, 2014 - 12:44 PM JoshuaM I would personally go black because it will look t... Mar 23, 2014 - 1:13 PM Nial So, i went with black, looks ok. Will contrast wel... Mar 30, 2014 - 1:26 PM Langing Nial, reading about your Celica build is like read... May 14, 2014 - 10:34 AM Nial Well got a bunch of tstuff back from the zinc plat... May 18, 2014 - 9:55 AM Smaay such an awesome build...
How much do you think yo... May 18, 2014 - 9:14 PM Nial I dread to think how much I have spent.....probabl... May 19, 2014 - 12:25 AM Smaay stick with it man, its going to be worth it when i... May 20, 2014 - 8:25 AM Nial I hope so, the number of things to do seems endles... May 20, 2014 - 11:52 AM Nial It's about time I had a new rotisserie, so I h... May 23, 2014 - 12:55 PM Nial Sent the shell away for Media blasting at last, an... Jun 20, 2014 - 10:44 AM Langing QUOTE (Nial @ Jun 20, 2014 - 11:44 A... Jun 20, 2014 - 3:04 PM Nial QUOTE (Langing @ Jun 20, 2014 - 4:04... Jun 20, 2014 - 3:36 PM Nial This s one of the wooden supports kinda three quar... Jun 20, 2014 - 3:42 PM Langing To set my reference: The last two photos show ... Jun 20, 2014 - 5:28 PM Nial QUOTE (Langing @ Jun 20, 2014 - 6:28... Jun 21, 2014 - 12:55 AM  |
1 User(s) are reading this topic (1 Guests and 0 Anonymous Users)
0 Members:
| Lo-Fi Version | Time is now: May 15th, 2026 - 3:45 PM |