
 Apr 5, 2010 - 10:22 PM Apr 5, 2010 - 10:22 PM
|
 
|
|
Moderator  Joined Jun 29, '08 From Denver Currently Offline Reputation: 59 (100%) |
You might be asking yourself, "Self, how does a person who just sold their Celica make a progress thread for a Celica?" The answer is easy: you go buy another Celica. So I picked up a '96 GT hatchback with a blown engine.
The story: My brother's friend got the car brand new in '97. It's a '96 model though... gotta wait until the end of the year so you can get a good deal on a car! So back in 1997, a slate gray Celica pulls into my driveway. I've never seen one before. My brother is always telling me about how fast the car is. Flash forward a few years and I find myself with a '96 ST sitting in my garage and I find out that my brother lied to me and that these cars aren't fast at all. So here I am, 3 Celicas and a Lexus IS 300 later, and I miss my Celica. I had my hopes up for a swap and a GT4 front end conversion. So what did I do? I called Marc tonight and asked him about his old Celica. I knew he never changed the oil and never even checked it. I knew he blew the engine up. Tranny is still good, body is still good. New brakes and tires. Even has good blades on the windshield wipers. So tonight I call him and ask if he still has the car and he said he'd let it go for $250. I was there in 30 minutes with a check in hand. The car I grew up watching, the Celica that made me love Celicas, is now mine. Forgive the bad pictures, since it was night before I got there to buy the car. Better pictures coming later. 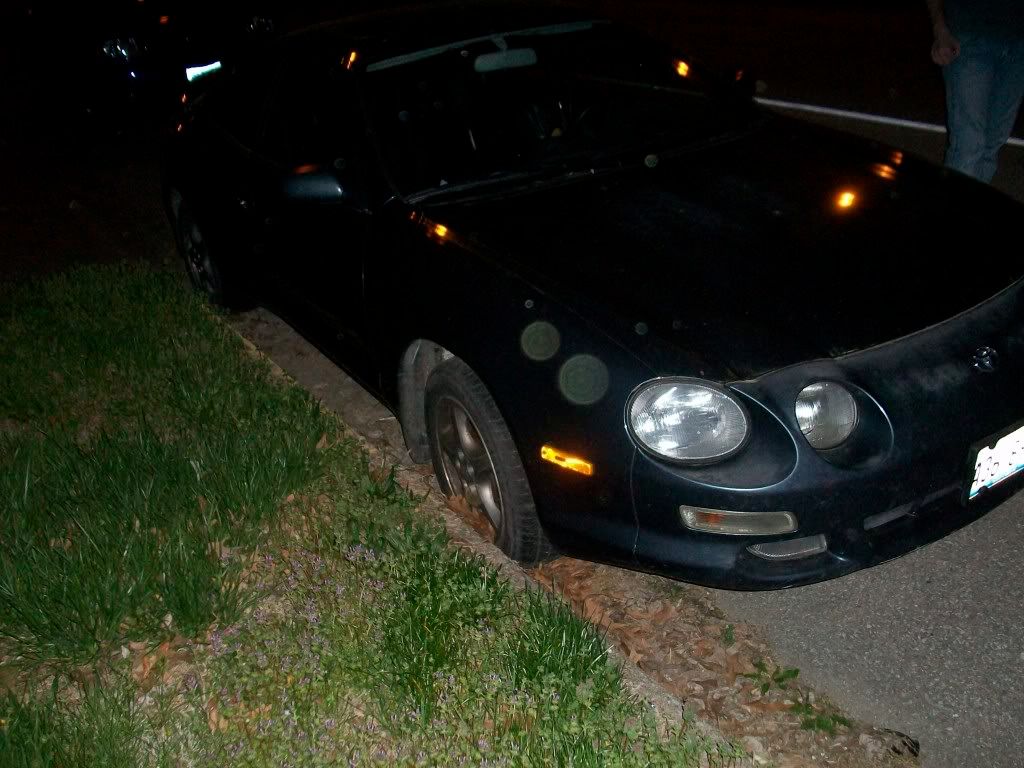 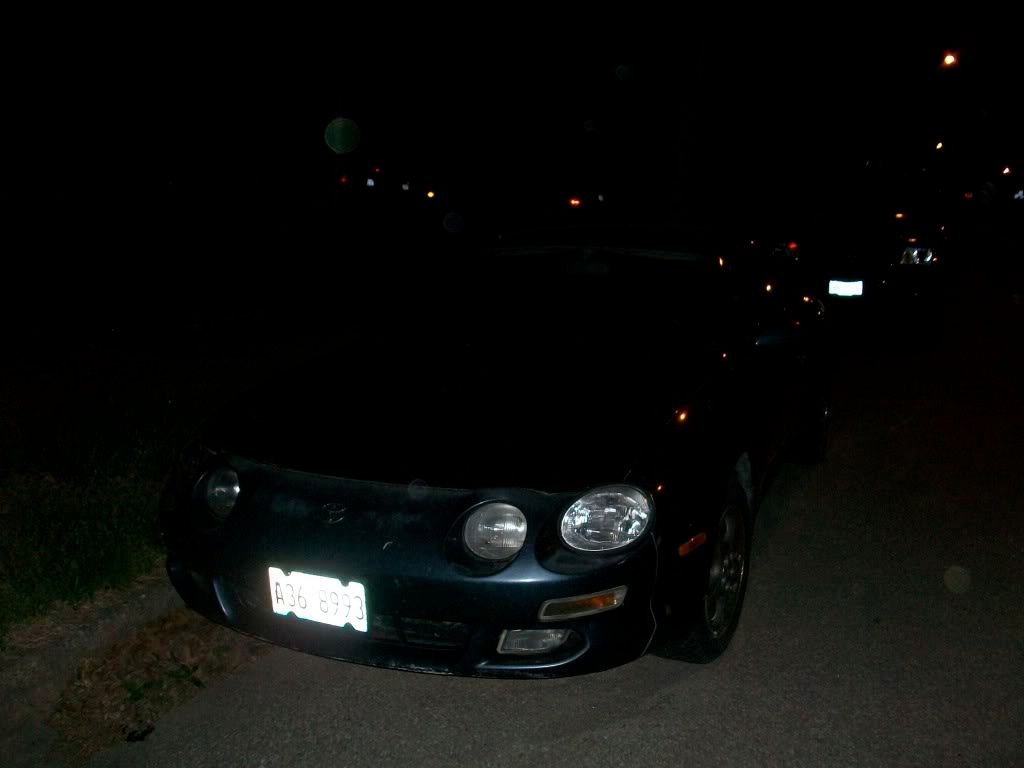 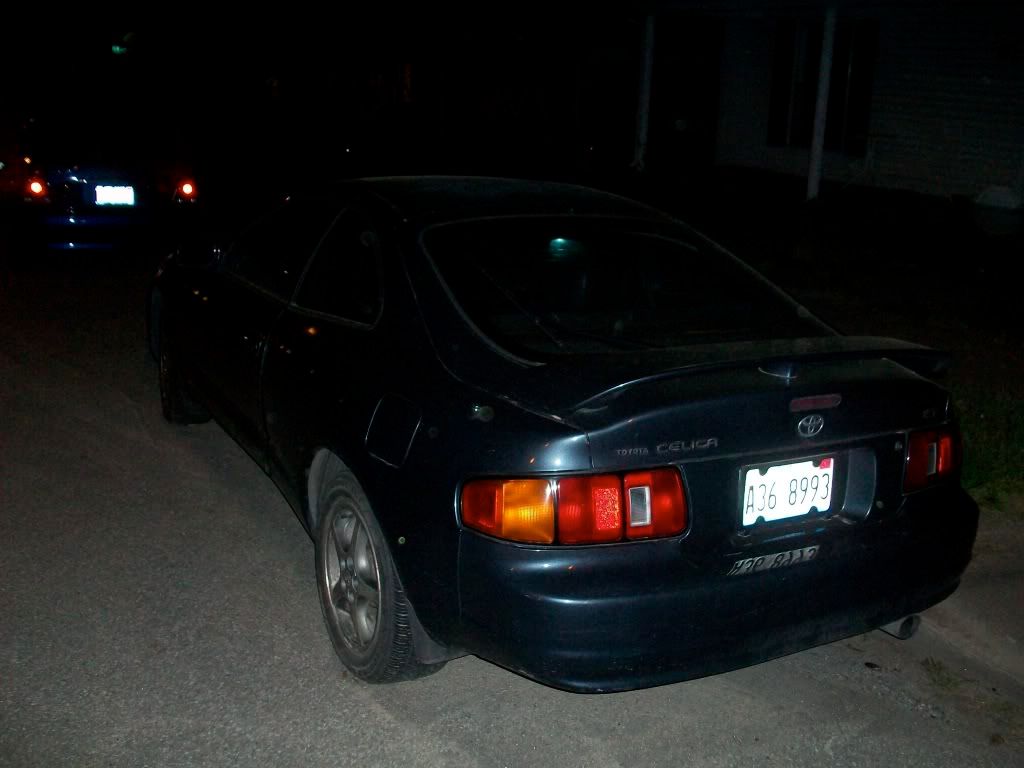 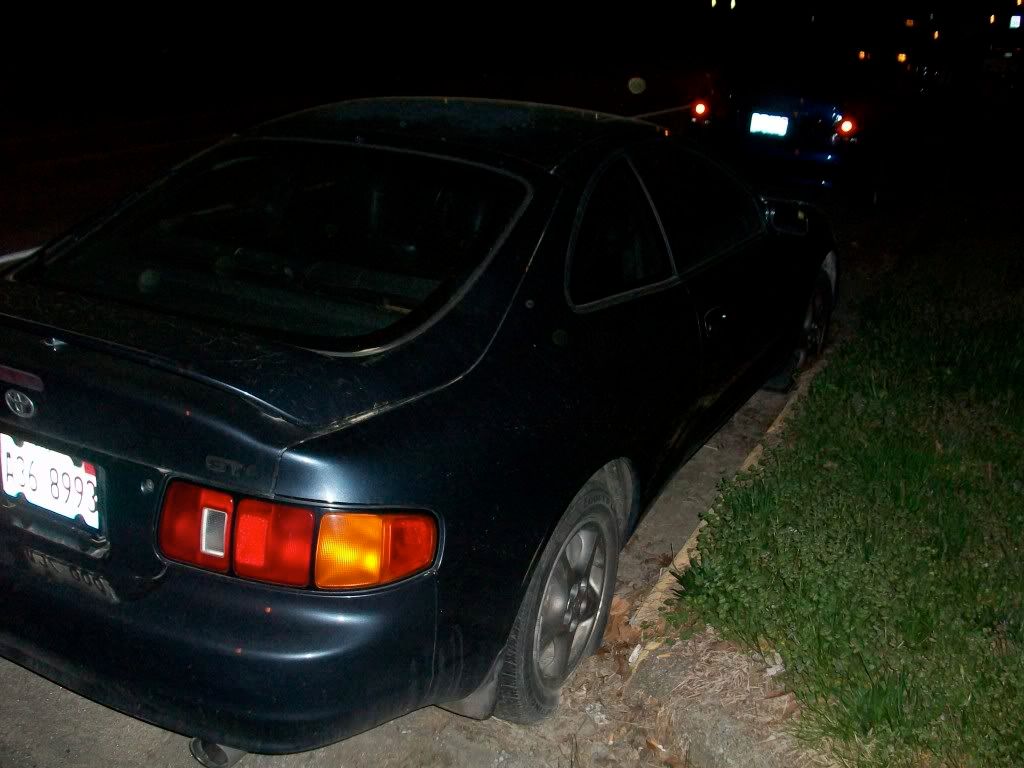 Like I said, the motor is blown. Not a big deal since I am doing a swap anyway. It was lady driven at first, and ladies suck at driving (no offense, ladies.) So she cracked the skirts and had a body shop remove them. No big deal since I am putting TRD skirts on. The car needs paint. No big deal since I was painting it anyway. Needs a new head unit... You get the idea. That's literally the extent of things that are wrong with the car. Everything else is in good shape. Plans for the car... I'm still undecided. It's definitely getting a 3S, whether it's a BEAMS or a 3rd gen -GTE. So... here I am, 6gc. It was a long month without a Celica, but I'm back and I'm here to stay. ____________________________________________________________ ____________________________________________________________ _ __________ Update: 5S-FE to BEAMS 3S-GE wiring explained with pictures: • EA1 Plug: Pins 17 and 4 need to be bridged. Pin 17 needs power when pin 4 has it. Pin 17 is in the lower left corner, black w/red trace. Pin 4 is the big black wire at the top, center of the plug. Doing this gives the BEAMS spark. Pin 17 coming off of the EA1 plug can be snipped and covered up, left alone. (See picture 1.) • EA1 Plug: Pins 2 and 12 need to be bridged. They are both ground wires, white w/black trace. (See picture 1.) • Clutch start wire: Black w/yellow trace. This one is a bit tricky to explain. There are 3 vertical plugs next to the ECU. On the body side of the plugs, you have a white (19 pin) plug, light gray (13 pin) plug, and dark gray (17 pin) plug. The clutch start wire is pin 18 on the white plug. Move it to pin 17 on the dark gray plug. (Refer to picture 2.) • If using your OEM tach and a tach adapter, you'll need to intercept the tach signal going from the ECU to the gauges. This comes from plug C, wire 27 on the ECU plugs. It's a gray wire. (Refer to picture 3.) • Cruise control wiring: I have a 1998 USDM Celica. In my case, no wiring changes were necessary and my cruise control works perfectly. I believe that this is standard across the board of USDM Celicas, although some pre-98 models may still require changes. Further research from others is necessary. • Airbag light: To get your airbag light to function properly, you run a wire from the EA1 plug to the light gray interior plug (either pin 4 or pin 5, I have read separate posts saying both and I chose not to do this step so I cannot confirm which pin it is.) Picture 1. EA1 plug: At the top, pins 2 and 12 are bridged together. These are grounds. In the middle with the yellow butt connector, you can see pins 17 and 4 bridged together, red w/black trace and plain black wire. At the bottom of the picture, you can see the unused and covered wire that used to be pin 17. 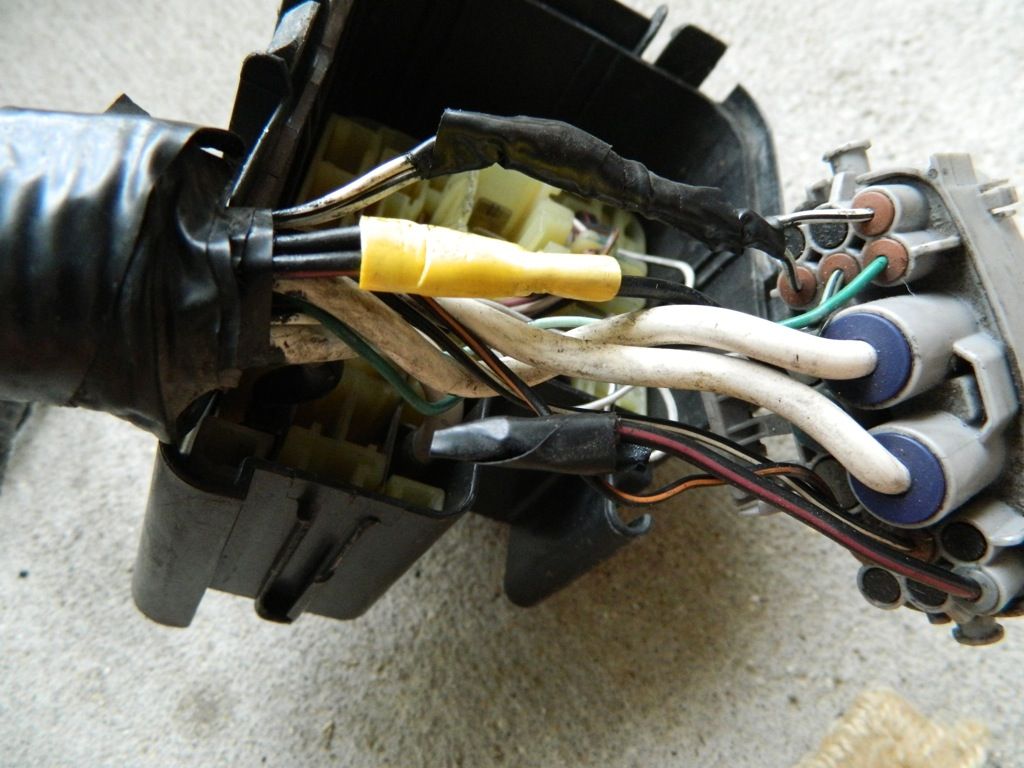 Picture 2. Body plugs next to the ECU. Here you can see the clutch start wire in the bottom left corner, black w/yellow trace. 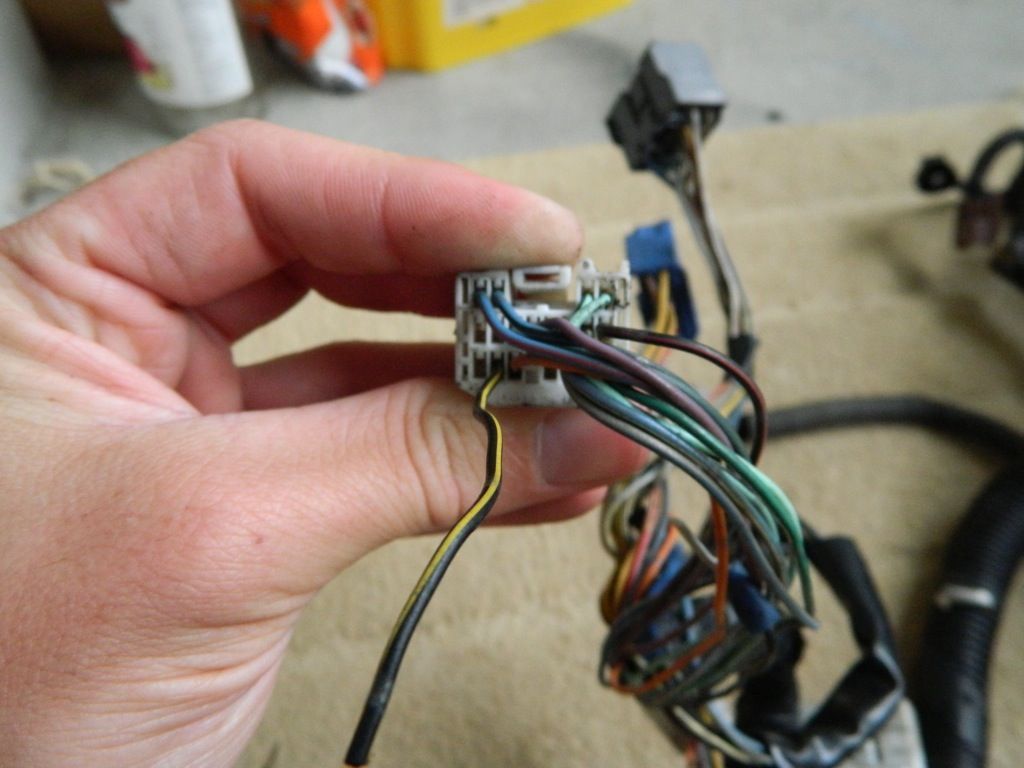 Picture 3. Plug C, wire 27. This is the tach signal wire that needs to be intercepted for a tach signal adapter. 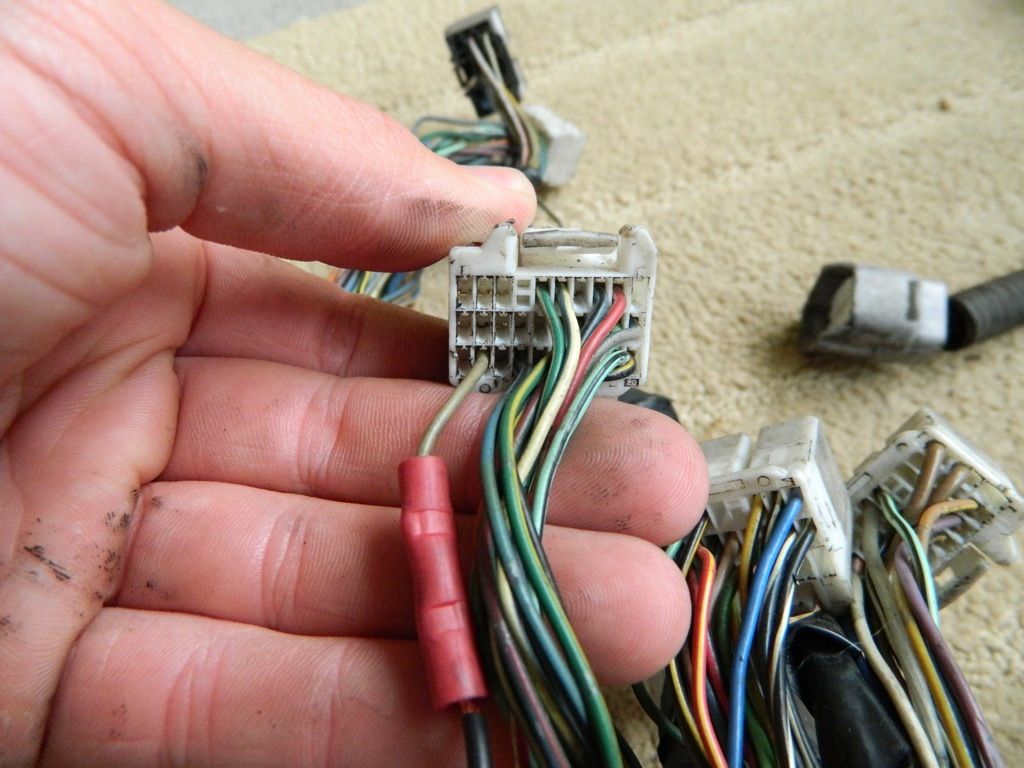
This post has been edited by richee3: Aug 26, 2014 - 10:01 PM -------------------- "Employ your time in improving yourself by other men's writings, so that you shall gain easily what others labored hard for." -Socrates. Even Socrates told us to use the search button!
 2006 Aston Martin V8 Vantage. 1998 Celica GT- BEAMS Swapped. 2022 4Runner TRD Off Road Prenium. 2021 GMC Sierra AT4. |

 |
Replies
|
Jul 18, 2010 - 8:45 PM
|
|
|
Moderator Joined Jun 29, '08 From Denver Currently Offline Reputation: 59 (100%) |
Got the front seats reupholstered. It wasn't very time consuming at all, but I already had the old covers off. I also found a useful tip. Some people say you can use zip ties to hold the new covers down, but I personally don't trust that method. Every auto upholstery shop in the world that does a good job will use pig rings, so I used pig rings. However, trying to hold the seat cover where it needs to be, nice and stretched, and trying to get the pig ring in place can be very tedious. So I used zip ties to hold the seat covers in place, set the pig rings, then cut the zip ties out. Pretty easy stuff. I will be putting seat heaters in later, so I'll work on correcting a couple of small issues then. But for right now, I'm content with them. Thanks again to upscaleauto for hooking me up.
More pictures of the seats. BEFORE: 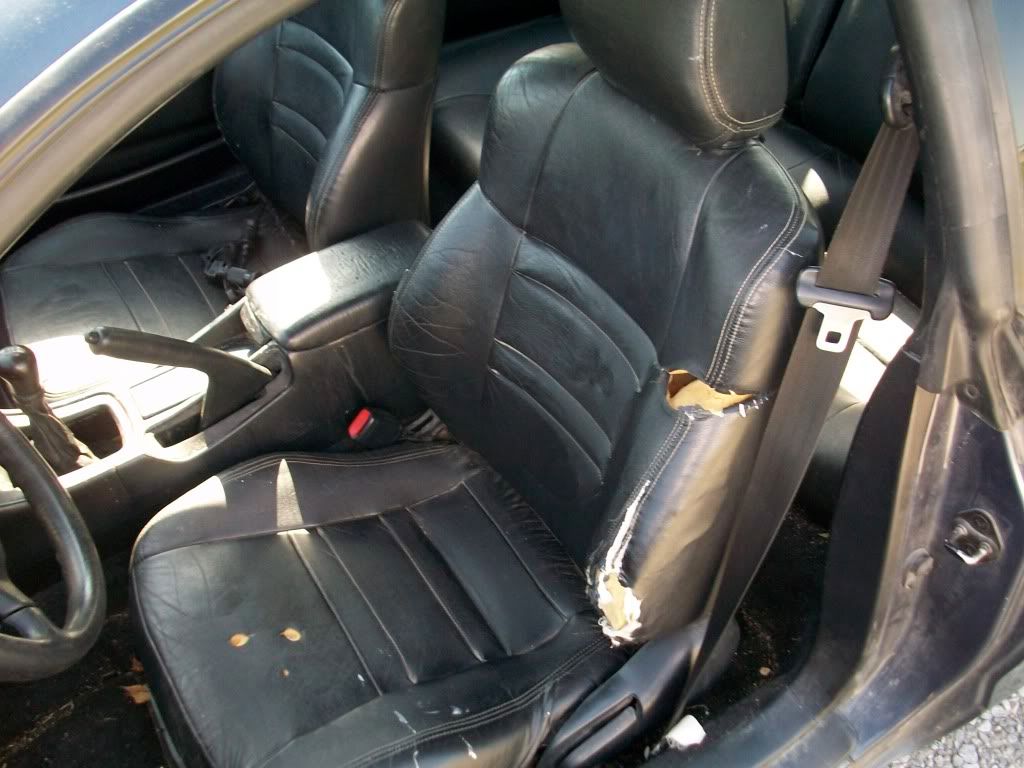 AFTER: 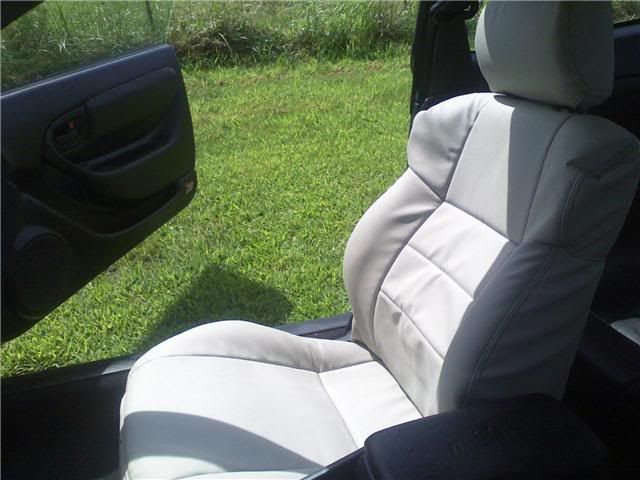 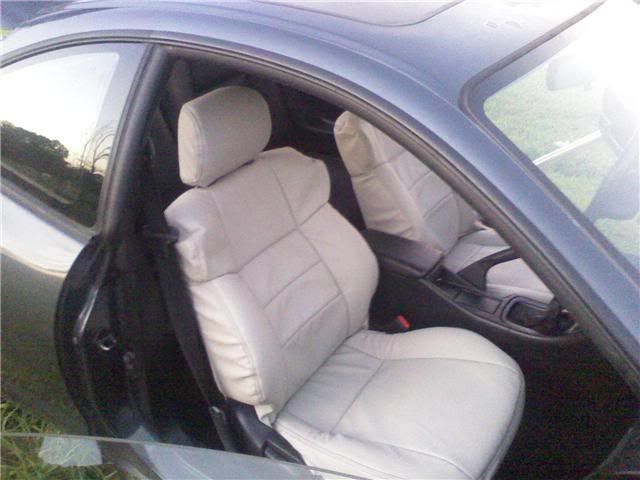 And a couple of better pictures of the battery box. 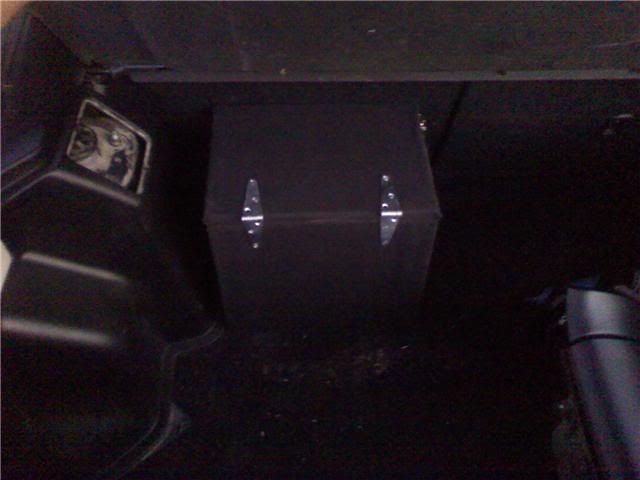 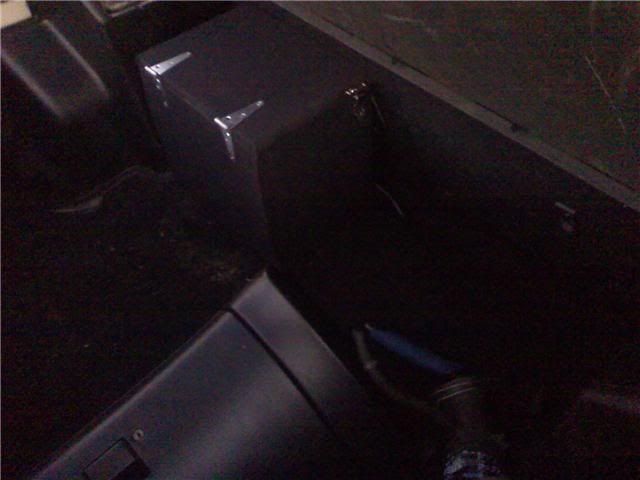 My camera is pretty much dead in the water, so sorry for the cell phone pics. I'm contemplating buying a new camera and designating it as a "swap expense." Gotta take pictures of everything I do. QUOTE (rave2n @ Jul 18, 2010 - 9:43 PM)  Ah those seat covers, just did mine this weekend. Fun weren't they!? - Looks good though, my upper seat turned out about the same as yours, still 10x better than the OEM ones. Only thing I dun like is when i jump in the car, i don't slide into place anymore, i got wiggle into it =P Looking good overall  Haha thanks. I already had the OEM seat covers off, so it wasn't too bad to put these on. Like I said, I learned after a few minutes to use the zip ties to hold the covers in place before putting the pig rings in. Made things go a LOT smoother. I still have to buy the rear seat covers and do those, but I'm not in any hurry. For what it's worth, I almost like having them different colors. It draws your attention away from the back seat, almost makes it like a shadow back there. So maybe my friends will get the hint and NOT want to ride in the back seat then complain about not having any room. I definitely agree that these seat covers have a lot more grip than the factory leather. I was pleasantly surprised. I think the top corners of the seats would fit better if I had '94-'95 seats. Seems like I've noticed those having larger upper corners. Or maybe it's the 'vert seats I'm thinking of. Either way, I got them in with fairly little issue, minus the headrests. This post has been edited by richee3: Jul 20, 2010 - 5:13 PM -------------------- "Employ your time in improving yourself by other men's writings, so that you shall gain easily what others labored hard for." -Socrates. Even Socrates told us to use the search button!
2006 Aston Martin V8 Vantage. 1998 Celica GT- BEAMS Swapped. 2022 4Runner TRD Off Road Prenium. 2021 GMC Sierra AT4. |
Posts in this topic
 richee3 Richee3's Progress thread. Apr 5, 2010 - 10:22 PM
 johnnehh YES!!!!!!!!!... Apr 5, 2010 - 10:27 PM SwissFerdi TEEEEEEEEEEEEEEEEEEEEEEEEEEEEEEHEEEEEEEEEEEEEEEEEE... Apr 5, 2010 - 10:31 PM 2celicas2love i like that color, are you going to change it? 250... Apr 5, 2010 - 10:55 PM richee3 Thanks guys.
I am not sure about the color. It... Apr 5, 2010 - 11:27 PM
johnnehh YES!!!!!!!!!... Apr 5, 2010 - 10:27 PM SwissFerdi TEEEEEEEEEEEEEEEEEEEEEEEEEEEEEEHEEEEEEEEEEEEEEEEEE... Apr 5, 2010 - 10:31 PM 2celicas2love i like that color, are you going to change it? 250... Apr 5, 2010 - 10:55 PM richee3 Thanks guys.
I am not sure about the color. It... Apr 5, 2010 - 11:27 PM
 hurley97 QUOTE (richee3 @ Apr 6, 2010 - 12:27... Apr 6, 2010 - 6:19 PM cheela welcome back, it's like you never left at all.... Apr 6, 2010 - 12:06 AM Johnnyny nice Apr 6, 2010 - 2:33 AM Keiri I'm not saying welcome back Daniel because you... Apr 6, 2010 - 9:25 AM richee3 Lol I thought you guys might have forgotten who I ... Apr 6, 2010 - 12:04 PM njccmd2002 SWEET, i have been looking for a deal like this, ... Apr 6, 2010 - 12:14 PM Heindrik QUOTE (richee3 @ Apr 6, 2010 - 1:04 ... Apr 6, 2010 - 2:23 PM njccmd2002 ^^^ BEams baby, no turbo, fun to drive..
but yea... Apr 6, 2010 - 3:08 PM Spider77 Congrats...an IS and a new-ish project celica! Apr 6, 2010 - 5:51 PM richee3 I may do that, NJCCMD. I have started looking into... Apr 6, 2010 - 10:37 PM SwissFerdi Wow, that color is beautiful...from the picture, I... Apr 7, 2010 - 1:16 AM bloodMoney I KNEW IT!!!!!
I'm glad... Apr 7, 2010 - 3:25 AM richee3 Turk- I couldn't get a good picture of the car... Apr 7, 2010 - 5:45 PM GriffGirl I just saw a 6th gen in that color by my house the... Apr 7, 2010 - 5:52 PM richee3 QUOTE (GriffGirl @ Apr 7, 2010 - 6:5... Apr 11, 2010 - 4:17 PM Zake that looks like the same color as my car. my wind... Apr 11, 2010 - 5:27 PM richee3 QUOTE (Zake @ Apr 11, 2010 - 6:27 PM... Apr 11, 2010 - 5:31 PM Ted95 3ssssssss!!!!!! lol Apr 11, 2010 - 6:22 PM richee3 I took the valve cover off to powdercoat it and pr... Apr 11, 2010 - 6:42 PM richee3 After talking to bmj67, I have decided to try and ... May 1, 2010 - 3:59 PM Keiri Dan, I say take your time and rebuild the engine -... May 1, 2010 - 4:27 PM bloodMoney ^^^^ Werd. Learn all you can about rebuilds from ... May 1, 2010 - 5:22 PM johnnehh If you part it out I will drive all the way out th... May 2, 2010 - 1:24 AM richee3 QUOTE (johnnehh @ May 2, 2010 - 1:24... May 2, 2010 - 9:58 AM Keiri QUOTE (richee3 @ May 2, 2010 - 10:58... May 2, 2010 - 12:43 PM SwissFerdi PART PART PART!
I mean, keep it.
If you do p... May 2, 2010 - 12:45 PM richee3 Alrighty, so after contemplating selling the car, ... Jun 17, 2010 - 7:55 PM pagii nice richee! haha im gonna start one up too ju... Jun 17, 2010 - 8:22 PM SwissFerdi Good stuff R2. Jun 17, 2010 - 9:02 PM Keiri Now this is what I like to hear!
Good choice ... Jun 18, 2010 - 9:33 AM njccmd2002 yeah man, its easy to pull out and put in an engin... Jun 18, 2010 - 11:24 AM richee3 QUOTE (njccmd2002 @ Jun 18, 2010 - 12... Jun 19, 2010 - 12:02 AM richee3 Small progress, but progress nonetheless. Today I ... Jun 19, 2010 - 2:38 PM pagii "Took the valve cover off, started to take th... Jun 19, 2010 - 4:25 PM njccmd2002 wow look at all that nastyness. Jun 19, 2010 - 6:15 PM Keiri Dan,
That looks filthy...and the description is w... Jun 19, 2010 - 9:33 PM richee3 Told you guys that maintenance wasn't at the t... Jun 20, 2010 - 1:01 AM njccmd2002 any news? Jun 23, 2010 - 10:18 PM richee3 Took another look at the fuse box.. It was incredi... Jun 23, 2010 - 10:49 PM stephen_lee go dan!
we got swaps going around the same ti... Jun 24, 2010 - 2:16 PM Bigblock richee3---
I see you've been bitten & you... Jun 24, 2010 - 3:15 PM richee3 Why have I taken the covers off of my seats? And w... Jul 8, 2010 - 8:31 PM Johnnyny finally sheesh.. Jul 9, 2010 - 3:11 AM Spider77 You took off the cover so you can take out some cr... Jul 9, 2010 - 4:57 PM njccmd2002 you bought leather and relocating the battery Jul 10, 2010 - 8:05 AM richee3 ^^ Close. Not leather. They're some of Vincent... Jul 11, 2010 - 3:32 PM stephen_lee win Jul 11, 2010 - 11:27 PM benzo cool! Jul 12, 2010 - 12:57 AM richee3 Here's a picture of my custom battery box. It... Jul 17, 2010 - 2:05 PM johnnehh Looking good! Jul 17, 2010 - 2:08 PM stephen_lee very nice Jul 17, 2010 - 3:15 PM D-Man I'm likein it!! keep it commin!... Jul 17, 2010 - 7:15 PM richee3 Front seats are reupholstered- interior is nearly ... Jul 18, 2010 - 6:19 PM stephen_lee SEXY!! do it yourself? Jul 18, 2010 - 8:36 PM rave2n Ah those seat covers, just did mine this weekend. ... Jul 18, 2010 - 8:43 PM 97celiman Is it just me or do they seem really loose on the ... Jul 18, 2010 - 8:57 PM richee3 Couple of quick pictures. I'm torn between del... Jul 25, 2010 - 9:01 PM dustin15brown Just buy my 3s and call it a day Jul 25, 2010 - 9:28 PM Johnnyny wingless is gross imo Jul 25, 2010 - 9:42 PM richee3 QUOTE (dustin15brown @ Jul 25, 2010 - 9... Jul 25, 2010 - 10:32 PM Batman722 good progress so far
go wingless for a while, it... Jul 25, 2010 - 11:23 PM dustin15brown i have no wing.... and it looks gooooooood Jul 26, 2010 - 12:36 AM stephen_lee IMO wingless doesn't look right. ive seen 94/9... Jul 26, 2010 - 11:46 AM epocsirhc I like this build alot. I might be getting a gt fo... Jul 26, 2010 - 7:22 PM richee3 I'm torn on the wingless. I hated it on my bla... Jul 26, 2010 - 10:59 PM richee3 Bump for a totally useless update!
Today, I w... Aug 2, 2010 - 8:13 PM stephen_lee RE: Richee3's Progress thread. Aug 2, 2010 - 8:15 PM HectortheRican QUOTE (stephen_lee @ Aug 2, 2010 - 8... Aug 3, 2010 - 1:16 AM samir0189 RE: Richee3's Progress thread. Aug 3, 2010 - 1:22 PM richee3 QUOTE (samir0189 @ Aug 3, 2010 - 2:2... Aug 3, 2010 - 1:30 PM richee3 Just a teaser for you guys.
Yes, I used a Honda... Aug 9, 2010 - 11:33 PM enderswift get this thing ready for the next meet man! Aug 10, 2010 - 12:02 AM njccmd2002 oh those greasy days!!!! Aug 10, 2010 - 2:03 PM richee3 QUOTE (enderswift @ Aug 10, 2010 - 12... Aug 10, 2010 - 10:03 PM Keiri Quite the show sir.
You're making some really... Aug 10, 2010 - 11:05 PM richee3 QUOTE (Keiri @ Aug 11, 2010 - 12:05 ... Aug 10, 2010 - 11:20 PM JuMPiiN What kind of head unit, i have a friend selling a ... Aug 11, 2010 - 12:09 AM 97celiman dude. 60 shipped and mine is yours.
it's not ... Aug 11, 2010 - 1:33 AM Keiri Guys! Stop showing him those good deals...I wa... Aug 11, 2010 - 9:13 AM stephen_lee are we swap racing? hahah Aug 11, 2010 - 1:46 PM PolliS_5S-FE its kinda good though not getting the engine in th... Aug 11, 2010 - 8:00 PM njccmd2002 you like being covered in grease? thats scary. W... Aug 11, 2010 - 8:13 PM richee3 Lol I have no extra money, guys. Not buying anythi... Aug 17, 2010 - 3:10 PM rave2n Go go progress!
I personally hate axel grease... Aug 17, 2010 - 3:13 PM enderswift those dcw's sure look awesome, way better than... Aug 17, 2010 - 11:54 PM richee3 My apologies for the delay, but I'm finally ab... Feb 3, 2011 - 9:04 PM chacha would you kindly post a pic of the places you dril... Feb 3, 2011 - 11:01 PM bloodMoney I think that I've decided to go a different ro... Feb 4, 2011 - 9:35 AM Success21 QUOTE (bloodMoney @ Feb 4, 2011 - 9... Apr 27, 2011 - 7:35 PM bloodMoney QUOTE (Success21 @ Apr 27, 2011 - 7... Apr 27, 2011 - 10:28 PM richee3 RE: Richee3's Progress thread. Apr 27, 2011 - 7:05 PM SwissFerdi Good luck as always pal. Apr 27, 2011 - 7:46 PM Stambo YESSSS Apr 27, 2011 - 10:04 PM richee3 I ordered the clutch last Tuesday and I finally go... Apr 29, 2011 - 7:21 PM
hurley97 QUOTE (richee3 @ Apr 6, 2010 - 12:27... Apr 6, 2010 - 6:19 PM cheela welcome back, it's like you never left at all.... Apr 6, 2010 - 12:06 AM Johnnyny nice Apr 6, 2010 - 2:33 AM Keiri I'm not saying welcome back Daniel because you... Apr 6, 2010 - 9:25 AM richee3 Lol I thought you guys might have forgotten who I ... Apr 6, 2010 - 12:04 PM njccmd2002 SWEET, i have been looking for a deal like this, ... Apr 6, 2010 - 12:14 PM Heindrik QUOTE (richee3 @ Apr 6, 2010 - 1:04 ... Apr 6, 2010 - 2:23 PM njccmd2002 ^^^ BEams baby, no turbo, fun to drive..
but yea... Apr 6, 2010 - 3:08 PM Spider77 Congrats...an IS and a new-ish project celica! Apr 6, 2010 - 5:51 PM richee3 I may do that, NJCCMD. I have started looking into... Apr 6, 2010 - 10:37 PM SwissFerdi Wow, that color is beautiful...from the picture, I... Apr 7, 2010 - 1:16 AM bloodMoney I KNEW IT!!!!!
I'm glad... Apr 7, 2010 - 3:25 AM richee3 Turk- I couldn't get a good picture of the car... Apr 7, 2010 - 5:45 PM GriffGirl I just saw a 6th gen in that color by my house the... Apr 7, 2010 - 5:52 PM richee3 QUOTE (GriffGirl @ Apr 7, 2010 - 6:5... Apr 11, 2010 - 4:17 PM Zake that looks like the same color as my car. my wind... Apr 11, 2010 - 5:27 PM richee3 QUOTE (Zake @ Apr 11, 2010 - 6:27 PM... Apr 11, 2010 - 5:31 PM Ted95 3ssssssss!!!!!! lol Apr 11, 2010 - 6:22 PM richee3 I took the valve cover off to powdercoat it and pr... Apr 11, 2010 - 6:42 PM richee3 After talking to bmj67, I have decided to try and ... May 1, 2010 - 3:59 PM Keiri Dan, I say take your time and rebuild the engine -... May 1, 2010 - 4:27 PM bloodMoney ^^^^ Werd. Learn all you can about rebuilds from ... May 1, 2010 - 5:22 PM johnnehh If you part it out I will drive all the way out th... May 2, 2010 - 1:24 AM richee3 QUOTE (johnnehh @ May 2, 2010 - 1:24... May 2, 2010 - 9:58 AM Keiri QUOTE (richee3 @ May 2, 2010 - 10:58... May 2, 2010 - 12:43 PM SwissFerdi PART PART PART!
I mean, keep it.
If you do p... May 2, 2010 - 12:45 PM richee3 Alrighty, so after contemplating selling the car, ... Jun 17, 2010 - 7:55 PM pagii nice richee! haha im gonna start one up too ju... Jun 17, 2010 - 8:22 PM SwissFerdi Good stuff R2. Jun 17, 2010 - 9:02 PM Keiri Now this is what I like to hear!
Good choice ... Jun 18, 2010 - 9:33 AM njccmd2002 yeah man, its easy to pull out and put in an engin... Jun 18, 2010 - 11:24 AM richee3 QUOTE (njccmd2002 @ Jun 18, 2010 - 12... Jun 19, 2010 - 12:02 AM richee3 Small progress, but progress nonetheless. Today I ... Jun 19, 2010 - 2:38 PM pagii "Took the valve cover off, started to take th... Jun 19, 2010 - 4:25 PM njccmd2002 wow look at all that nastyness. Jun 19, 2010 - 6:15 PM Keiri Dan,
That looks filthy...and the description is w... Jun 19, 2010 - 9:33 PM richee3 Told you guys that maintenance wasn't at the t... Jun 20, 2010 - 1:01 AM njccmd2002 any news? Jun 23, 2010 - 10:18 PM richee3 Took another look at the fuse box.. It was incredi... Jun 23, 2010 - 10:49 PM stephen_lee go dan!
we got swaps going around the same ti... Jun 24, 2010 - 2:16 PM Bigblock richee3---
I see you've been bitten & you... Jun 24, 2010 - 3:15 PM richee3 Why have I taken the covers off of my seats? And w... Jul 8, 2010 - 8:31 PM Johnnyny finally sheesh.. Jul 9, 2010 - 3:11 AM Spider77 You took off the cover so you can take out some cr... Jul 9, 2010 - 4:57 PM njccmd2002 you bought leather and relocating the battery Jul 10, 2010 - 8:05 AM richee3 ^^ Close. Not leather. They're some of Vincent... Jul 11, 2010 - 3:32 PM stephen_lee win Jul 11, 2010 - 11:27 PM benzo cool! Jul 12, 2010 - 12:57 AM richee3 Here's a picture of my custom battery box. It... Jul 17, 2010 - 2:05 PM johnnehh Looking good! Jul 17, 2010 - 2:08 PM stephen_lee very nice Jul 17, 2010 - 3:15 PM D-Man I'm likein it!! keep it commin!... Jul 17, 2010 - 7:15 PM richee3 Front seats are reupholstered- interior is nearly ... Jul 18, 2010 - 6:19 PM stephen_lee SEXY!! do it yourself? Jul 18, 2010 - 8:36 PM rave2n Ah those seat covers, just did mine this weekend. ... Jul 18, 2010 - 8:43 PM 97celiman Is it just me or do they seem really loose on the ... Jul 18, 2010 - 8:57 PM richee3 Couple of quick pictures. I'm torn between del... Jul 25, 2010 - 9:01 PM dustin15brown Just buy my 3s and call it a day Jul 25, 2010 - 9:28 PM Johnnyny wingless is gross imo Jul 25, 2010 - 9:42 PM richee3 QUOTE (dustin15brown @ Jul 25, 2010 - 9... Jul 25, 2010 - 10:32 PM Batman722 good progress so far
go wingless for a while, it... Jul 25, 2010 - 11:23 PM dustin15brown i have no wing.... and it looks gooooooood Jul 26, 2010 - 12:36 AM stephen_lee IMO wingless doesn't look right. ive seen 94/9... Jul 26, 2010 - 11:46 AM epocsirhc I like this build alot. I might be getting a gt fo... Jul 26, 2010 - 7:22 PM richee3 I'm torn on the wingless. I hated it on my bla... Jul 26, 2010 - 10:59 PM richee3 Bump for a totally useless update!
Today, I w... Aug 2, 2010 - 8:13 PM stephen_lee RE: Richee3's Progress thread. Aug 2, 2010 - 8:15 PM HectortheRican QUOTE (stephen_lee @ Aug 2, 2010 - 8... Aug 3, 2010 - 1:16 AM samir0189 RE: Richee3's Progress thread. Aug 3, 2010 - 1:22 PM richee3 QUOTE (samir0189 @ Aug 3, 2010 - 2:2... Aug 3, 2010 - 1:30 PM richee3 Just a teaser for you guys.
Yes, I used a Honda... Aug 9, 2010 - 11:33 PM enderswift get this thing ready for the next meet man! Aug 10, 2010 - 12:02 AM njccmd2002 oh those greasy days!!!! Aug 10, 2010 - 2:03 PM richee3 QUOTE (enderswift @ Aug 10, 2010 - 12... Aug 10, 2010 - 10:03 PM Keiri Quite the show sir.
You're making some really... Aug 10, 2010 - 11:05 PM richee3 QUOTE (Keiri @ Aug 11, 2010 - 12:05 ... Aug 10, 2010 - 11:20 PM JuMPiiN What kind of head unit, i have a friend selling a ... Aug 11, 2010 - 12:09 AM 97celiman dude. 60 shipped and mine is yours.
it's not ... Aug 11, 2010 - 1:33 AM Keiri Guys! Stop showing him those good deals...I wa... Aug 11, 2010 - 9:13 AM stephen_lee are we swap racing? hahah Aug 11, 2010 - 1:46 PM PolliS_5S-FE its kinda good though not getting the engine in th... Aug 11, 2010 - 8:00 PM njccmd2002 you like being covered in grease? thats scary. W... Aug 11, 2010 - 8:13 PM richee3 Lol I have no extra money, guys. Not buying anythi... Aug 17, 2010 - 3:10 PM rave2n Go go progress!
I personally hate axel grease... Aug 17, 2010 - 3:13 PM enderswift those dcw's sure look awesome, way better than... Aug 17, 2010 - 11:54 PM richee3 My apologies for the delay, but I'm finally ab... Feb 3, 2011 - 9:04 PM chacha would you kindly post a pic of the places you dril... Feb 3, 2011 - 11:01 PM bloodMoney I think that I've decided to go a different ro... Feb 4, 2011 - 9:35 AM Success21 QUOTE (bloodMoney @ Feb 4, 2011 - 9... Apr 27, 2011 - 7:35 PM bloodMoney QUOTE (Success21 @ Apr 27, 2011 - 7... Apr 27, 2011 - 10:28 PM richee3 RE: Richee3's Progress thread. Apr 27, 2011 - 7:05 PM SwissFerdi Good luck as always pal. Apr 27, 2011 - 7:46 PM Stambo YESSSS Apr 27, 2011 - 10:04 PM richee3 I ordered the clutch last Tuesday and I finally go... Apr 29, 2011 - 7:21 PM |
1 User(s) are reading this topic (1 Guests and 0 Anonymous Users)
0 Members:
| Lo-Fi Version | Time is now: June 7th, 2024 - 4:04 PM |