 Nov 9, 2007 - 5:44 PM Nov 9, 2007 - 5:44 PM
|
|
|
Enthusiast      Joined Mar 3, '04 From Portsmouth, RI Currently Offline Reputation: 33 (100%) |
as an extension of this post about converting from 3-post to 2-post....
QUOTE(97lestyousay @ Jul 5, 2007 - 7:27 PM) [snapback]575380[/snapback] FIND A 94-95 HATCH IF YOU CAN!!!! You will have holes to fill after completing this!!! WARNING: If you are not comfortable doing this yourself get help. I would highly advise using a 94-95 hatch if there is anyway to do so. I take no responsibility for your misinterpretation of my lingo, nor am I responsible in anyway for you choosing to do this to your hatch. I am also not the greatest speller in the world, so you have been warned. STEP 1: I bought 2 metric set screws, (head less)(they use an allen wrench inside the screw itself) the same size as stock hatch bolts. (available at ace hardware) STEP 2: Screw the setscrew into front 2 spoiler holes so they barely stick out beyond flush.(be careful adjusting spoiler on car as the will scratch the hell out of your paint) If you are doing it alone cover the hole area to be drilled with a rag on both sides. STEP 3: Line up holes in hatch with 2 post holes (the .390" ones in back that actually line up not the slots.) STEP 4: Start screws in back holes till a little less than finger tight and try to center the bolt hole in hatch with the tapped hole in spoiler as best you can. STEP 5: Remove rags from under set screws in front part of spoiler. STEP 6:Lightly snug rear bolts(a little more than finger tight) and re center as close as possible. STEP7: Tap down on front part of spoiler lightly (with hand, NOT hammer) this will create a witness mark(scratch in paint) from the set screws into the hatch itself. STEP8: Carefully remove spoiler. STEP9: Remove setscrews from spoiler. ( look at hatch to make sure it is clearly marked, if not, skip 9 go back to step 3 and start over, tapping a little harder) Step 10: MOVE WIRING HARNESS IN HATCH OUT OF WAY!!!! Use small drill to start with. ( I used 1/8 in and worked up from there) I drilled the holes and double checked everything as I went. Drill through both walls of hatch(must be part open or you will drill into car) STEP 11: From inside of hatch, drill with hole saw up to 3/4" (INSIDE WALL ONLY) Using smaller hole as pilot. QUOTE(hurley97 @ Jul 6, 2007 - 6:21 PM) [snapback]575701[/snapback] as you requested Randy from this post http://www.6gc.net/forums/index.php?showto...p;p=489063& How I removed my spoiler and covered the holes and where you have to drill to convert to a 2 post. I just used a clear vinyl sticker to cover the holes but they've held up very well for a good 9+ months now and I can take them off if I need/want to. QUOTE(hurley97 @ Oct 8, 2006 - 1:36 PM) [snapback]489063[/snapback] There are two screws for each outer post and one for the middle post. The third hole on the outers is where the plastic piece snaps into. One of the holes that are already there should match up with the 2-post. The area circled is where you have to drill the other hole, you'll notice how it flattens/flares out a little. 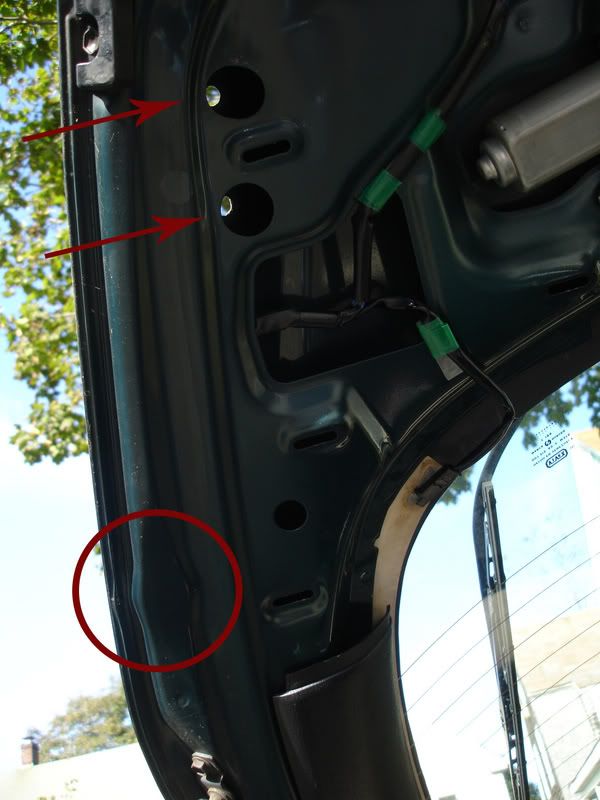 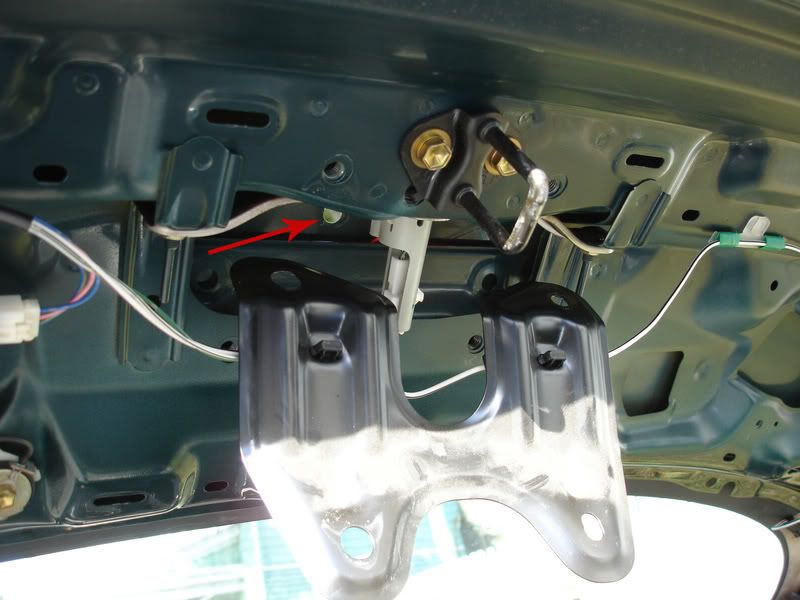 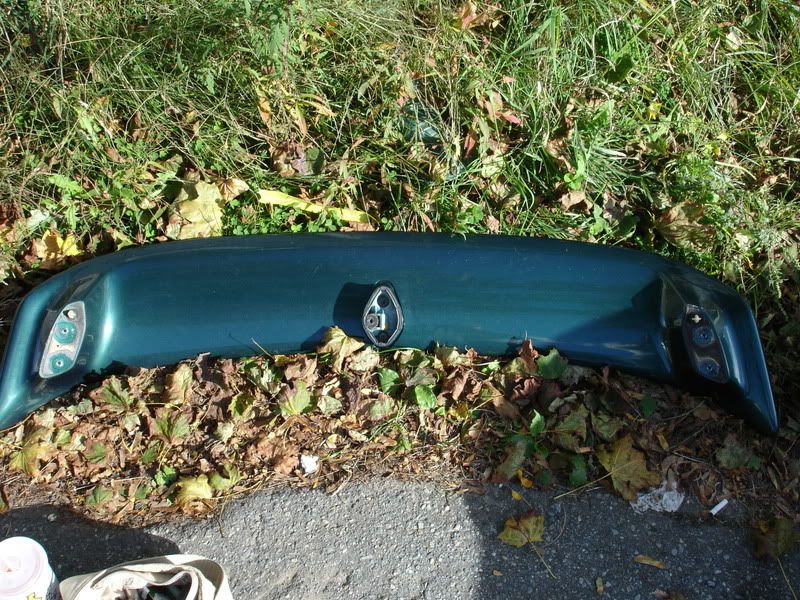 there was adhesive on mine that took some time to get off (using Goo Gone) 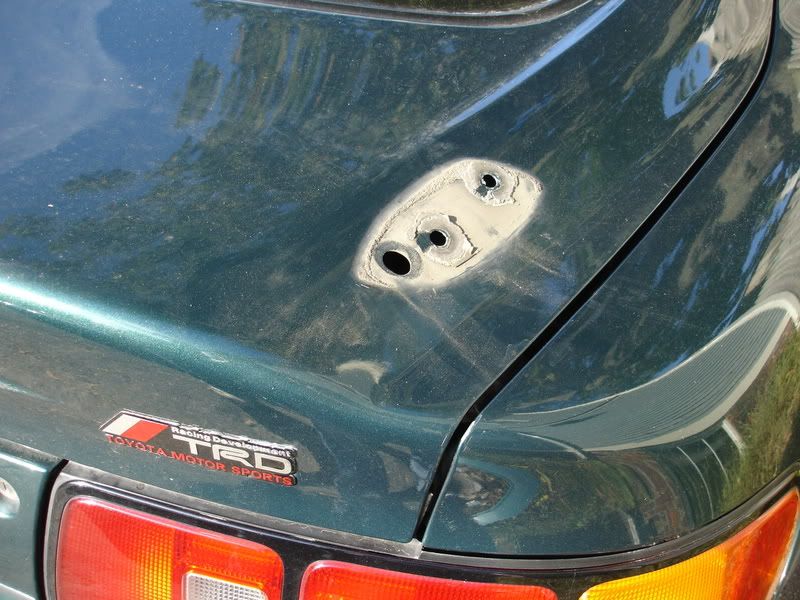 I didn't think I would but I kind of like the spoiler-less look so until I have the time/money to put the 2 post on it will stay that way. I bought an etched vinyl/sticker (of a chevy logo 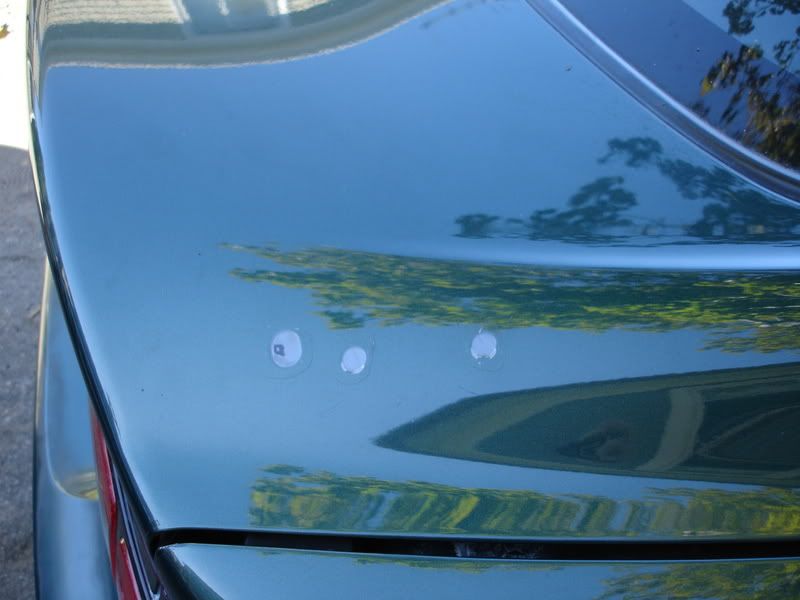 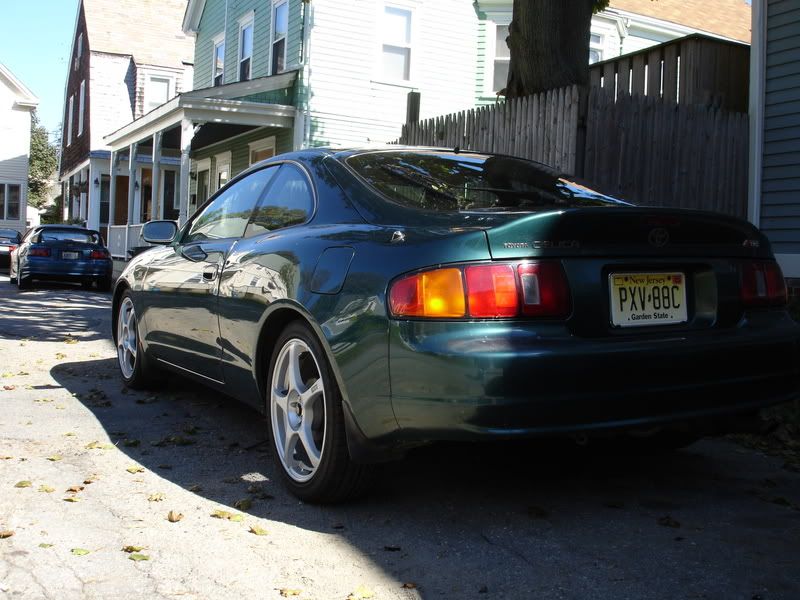 when I put the two post in I'll have more to add ... here's how to convert from spoiler to no spoiler... -------------------- |
Posts in this topic
 hurley97 Permanent Conversion to Spoilerless Nov 9, 2007 - 5:44 PM
 hurley97 thanks to Manny (presure2) I am permanently spoile... Nov 9, 2007 - 6:08 PM
 Valo666 nice write up stef. I like the little trick with t... Nov 9, 2007 - 6:29 PM

 presure2 QUOTE(Valo666 @ Nov 9, 2007 - 7:29 P... Nov 9, 2007 - 7:38 PM
 goferris now when is that dcw ducktail going to be installe... Nov 9, 2007 - 7:38 PM
 doGGy Filling the holes after welding is best with Kitty... Nov 10, 2007 - 5:34 AM

 presure2 QUOTE(doGGy @ Nov 10, 2007 - 6:34 AM... Nov 10, 2007 - 6:41 AM
 Jaws4God I think i'm gonna stay spoilerless Nov 10, 2007 - 9:08 PM
 jdg371 Jaws, the Celica looks sick without the spoiler... Nov 13, 2007 - 12:18 AM
 97lestyousay I love the spoilerless look as well. Nice work, ... Nov 13, 2007 - 1:31 PM
 m0dd3d1 So hot! Nice job. Nov 13, 2007 - 1:48 PM
 lx130 what paint and proocess did u use to cover the san... Nov 15, 2007 - 10:42 PM
 jcbass7 this is the same process when you want to shave yo... Nov 16, 2007 - 10:50 AM
 Sebby Really nice job done !! Looks like u never... Apr 14, 2010 - 7:35 AM
  |
1 User(s) are reading this topic (1 Guests and 0 Anonymous Users)
0 Members:
| Lo-Fi Version | Time is now: July 14th, 2025 - 5:21 PM |


